
June 28, 2010
Apple Cinema Tools Overview
Underneath the Surface with Frame Rates
By Dan Brockett
Film Workflow Steps
Pulling it Down
Doing the DI
Two Important Cinema Tools Features For Editing
Generating All Kinds of Lists
Integrating Cinema Tools with Your Final Cut Pro Workflow
How To Use Cinema Tools to Conform a Canon 5D MKII Clip
The Basics of Syncing Your Audio
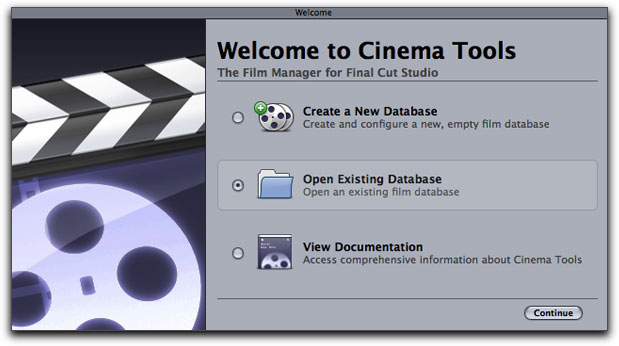
Cinema Tools is an interesting and often misunderstood utility that has been shipping with Apple Final Cut Studio since 2004. Many editors are not even sure of what Cinema Tools function is. The application is a database application that tracks the relationship between film frames and their corresponding video frames. Included with Final Cut Studio, Cinema Tools assists in editing a film or 24p digital intermediate project just as you would edit any video or multimedia originated project. Few Final Cut Pro editors are aware of or understand exactly how Cinema Tools works and what it is intended for.
In order to completely understand exactly how to use Cinema Tools, you should consult the manual. Unlike the other Final Cut Studio applications, the Cinema Tools 4.5 manual seems to only exist on-line at or is included when you install the application, there is no printed manual. While this article covers some of the procedural material listed in the Cinema Tools manual, the intent of this article is to give you an in-depth overview of Cinema Tools, and to simplify some of the concepts of editing film on computers. In order to really learn how to use Cinema Tools, there is no substitute for hands-on experience with the application.
While every user in every postproduction situation may not need Cinema Tools, it is an application that can prove to be useful in a variety of situations, once you understand how it functions. The main aim of this article is to illustrate how Cinema Tools can be effective in digital video workflows, but in order to do that, you must understand Apple's intent for designing Cinema Tools. Cinema Tools was designed for the film world.
Filming Your Film On Film?
 It is 2010 and we exist, as filmmakers, in a world of blurred lines, confusing, ever-evolving digital video standards and terminology. People are shooting their "films" on everything from cell phones all of the way to high-end digital cinema cameras to, yes, even on good old motion picture film stock. Even the terms "film", "filming" and "filmmaking" have evolved with many people "filming their films" on digital video. It comes down to an issue of how pedantic you want to be about the terminology of creating images that people watch for entertainment. These distinctions become even more important when trying to understand exactly how Cinema Tools fits into your workflow.
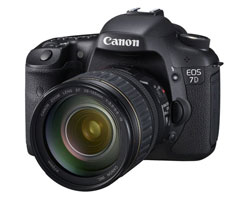
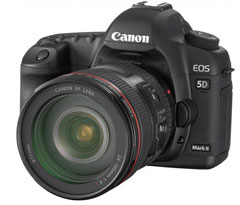
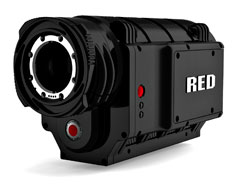
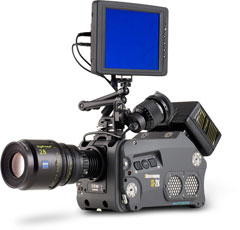
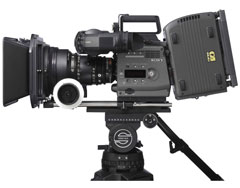
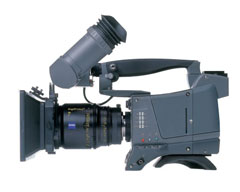
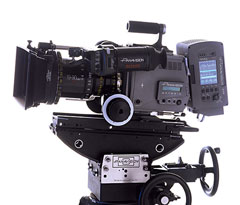
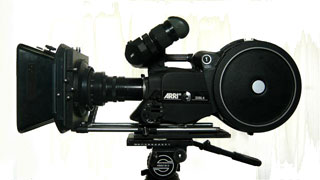
Just six short years ago when Cinema Tools was introduced, using film to shoot and distribute theatrical entertainment was still incredibly popular. Motion picture film in 2004 was THE standard. In some ways, it still is, but in other ways, film is rapidly decreasing in popularity as hot new digital tools like the Canon 7D and 5D MKII, the RED One, the Arri Alexa, the Silicon Imaging Si-2k, Sony F35, Thomson Viper and the Panavision Genesis have been rapidly replacing film for many users. Film is not yet dead, but digital origination is becoming more popular.
|
|
|

|
|
Canon 7D
|
5D MKII
|
RED One
|
Arri Alexa
|
|
|
|
|
|
Silicon Imaging Si-2k
|
Sony F35
|
Thomson Viper
|
Panavision Genesis
|
Film First
What exactly does Cinema Tools do? In order to comprehend how Cinema Tools functions, you should understand that it has always been geared toward managing film-based workflows. A film-based workflow typically begins with shooting film, then transferring the film to video, editing the film with a digital non-linear editing program, then outputting a cut list so that a negative cutter can assemble the final film negative. Film prints are then struck from the finished negative for distribution.
Cinema Tools tracks all of the individual elements that go into the creation of the final film. The application manages the relationship between the original camera negative, the transferred videotapes, and the captured video clips on the editing computer. In order to understand why an application like Cinema Tools is needed, you need to understand the finer points of the frame rates typically used for the film and for video.
[Top]
Film Workflow Steps
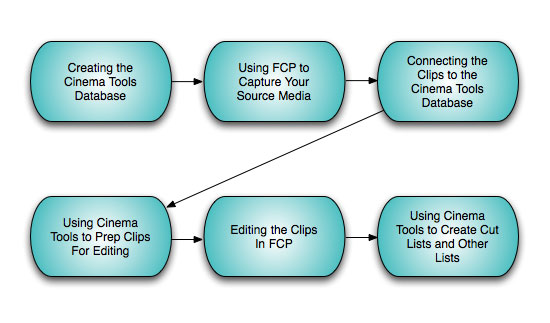
How exactly does the process of editing a film with Cinema Tools and Final Cut Pro happen? A typical Cinema Tools film workflow is outlined below.
- Creating the Cinema Tools Database
The main feature of Cinema Tools is its database, where the relationships between all of the various the elements of your movie (the film, video, and audio) are established and tracked. While it isn't required that the Cinema Tools database be established before editing begins, Cinema Tools does feature several useful tools to help with capturing clips and planning the edit.
- Using Final Cut Pro to Capture Your Source Media
You must capture the video and audio from your film on your FCP system. How you do this depends in large part on the actual media used for the transfer of your film elements to videotape or files.
- Connecting the Clips to the Cinema Tools Database
Once you have captured the source media, you can connect it to the Cinema Tools database (also known as linking the clips to the database). Connecting a clip to the database gives Cinema Tools the ability to access a record's clip while creating the cut list, minimizing the risk of timecode errors.
- Using Cinema Tools to Prep Clips For Editing
Cinema Tools features some powerful tools that can be used on your clips prior to editing them: the Reverse Telecine feature and the Conform feature. More about these features later.
- Editing the Clips in Final Cut Pro
You edit the clips in Final Cut Pro much as you would for any video project, but there are a few important considerations to keep in mind as you edit. Remember, you are usually not editing your film; you are using a digital facsimile of your negative, creating a cut list that will allow a negative cutter to assemble your film. Accuracy in your edit is of paramount importance. Unless you have copied all of your original camera negatives, you only have one negative to work with.
- Using Cinema Tools Create Cut Lists and Other Lists
Once you have edited your clips and are satisfied with the digital edit of the project, you are ready to generate film-related lists that will describe how to cut the negative or workprint.
But How Do You Actually Edit the Film?
Now that we have outlined the basic process for using Cinema Tools in conjunction with FCP for editing your film, let's explore some of the finer points about exactly how Cinema Tools is used. For many of you under the age of 30, or if you cut your teeth strictly in the video world, you may have never shot motion picture film so you may not be familiar with the process of how film-originated projects are edited. In comparison to film, digital video is amazingly simple to edit. You ingest either a tape or solid-state media and begin editing. Not so with film. Motion picture film is typically shot at 24 frames per second (fps). Film cameras have a crystal sync generator that ensures that the camera will expose 24 frames per second exactly. In order to edit film with a digital non-linear editing system like Final Cut Pro, the 24 fps film must be transferred to video so that Final Cut Pro (or other editing systems) can be used to capture and edit it.
There should be delineation here between finishing on film and finishing on video that should be explained. If you shoot a project on film and the final end product will be a videotape or file, once you transfer the film to video, you are essentially finished with the film and you really don't need Cinema Tools to manage your project. This is the typical workflow for commercials, television and music videos. It is only when your projects final output will be a film print from your assembled cut negative that using Cinema Tools becomes a necessary step.
[Top]
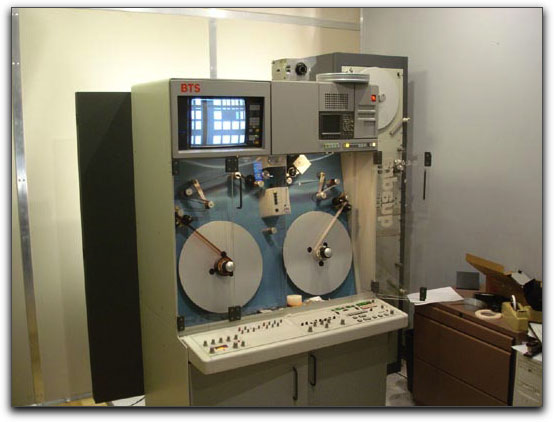
Pulling It Down

Once the film is exposed, then processed in a lab, a large and very expensive machine known as a telecine converts the film into a recordable video signal. NSTC is the video standard used here in North America and in Japan; it runs at 29.97 fps. PAL is the video standard used throughout most of the rest of the world; it runs at 25 fps. So how is film that was photographed at 24 fps transferred to video that is running at 29.976 fps or 25 fps? Okay, take a deep breath, this concept is going to be a bit confusing but I promise that just like Algebra, Trigonometry and Calculus, once you get through it, you either will know it by heart forever or will probably never have to use it again. If you can read through the next two sections and simply understand the concept of pulldown, it will be the most important takeaway for the remainder of the article.
In the NTSC world:
If film is shot at 24 fps, how can it be recorded to video at 29.976 fps? How can an editorial workflow keep track of which film frame is which video frame? In NTSC countries, where television uses the 60Hz vertical scanning frequency, video is broadcast at 29.97 (aka 59.94 in HD) frames per second. For the films motion to be accurately rendered in the video signal, the telecine must use a technique called the 2:3 pulldown, aka 3:2 pulldown, to convert from the 24 fps film into 29.97 fps video.
The term "pulldown" comes from the mechanical process of "pulling" the film down to advance it from one frame to the next at a repetitive rate (nominally 24 fps). This is accomplished in two steps. The first step is to slow down the film motion by 1/1000. This speed change is unnoticeable to the viewer, and makes the film travel at an actual rate of 23.976 fps (or 7.2 seconds longer over the course of a 120 minute movie).
Fields/Frames?
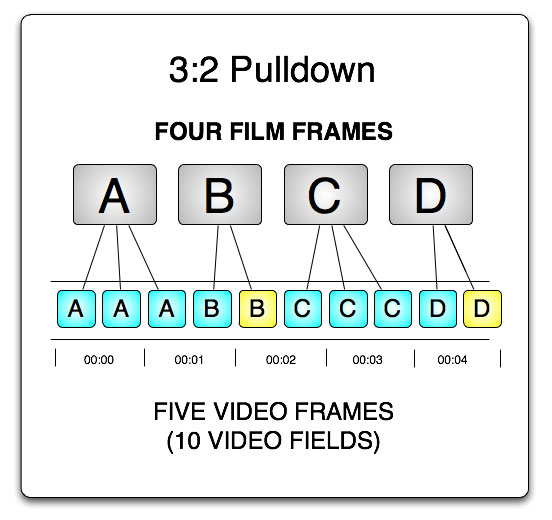
The second step of the 2:3 pulldown is distributing cinema frames into video fields. At 23.976 frames, there are four frames of film for every five frames of 60Hz video. These four frames are elongated into five by utilizing the interlaced nature of 60Hz video. For every frame, there are actually two fields, one for the odd-numbered lines of the image, and one for the even-numbered lines. There are, therefore, eight fields for every four film frames, which are called A, B, C, and D. The telecine alternately places A frame across two fields, B frame across three fields, C frame across two fields and D frame across three fields. This can be written as A-A-B-B-B-C-C-D-D-D or 2-3-2-3 or simply 2-3. The cycle repeats itself completely after four film frames have been exposed.
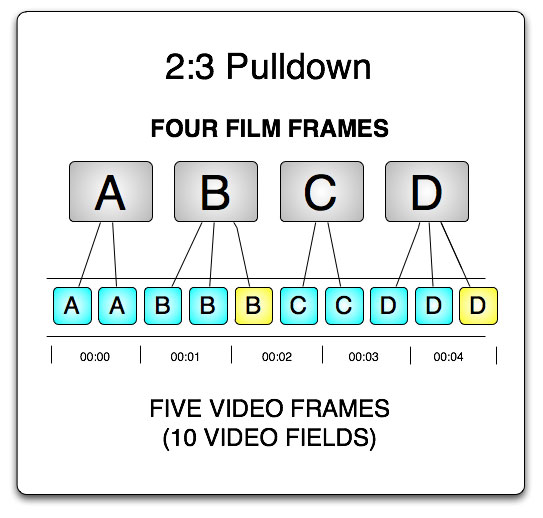
A 3:2 pattern is identical to the one shown above except that it is shifted by one frame. For instance, a cycle that starts with film frame B yields a 3:2 pattern: B-B-B-C-C-D-D-D-A-A or 3-2-3-2 or simply 3-2. In other words, there is essentially no difference between the 2-3 and 3-2 patterns, other than the terminology about how the two terms are written.
A logical question would be, "why isn't film transferred to 24 frame progressive video? Wouldn't that void all of these complicated pulldown issues?" More on this later, but suffice it to say, many 24 frame progressive video codecs are not natively displayed in a 24 frame stream, correct? For example, DVCPRO HD 108024p is actually displayed over 60i, meaning that the 24 frames are flagged for removal in playback or processing of the 60i video stream. Also, most video monitors cannot natively display 24 frames per second content; they usually display 24 frames content within a 60i stream.
In the PAL/SECAM world:
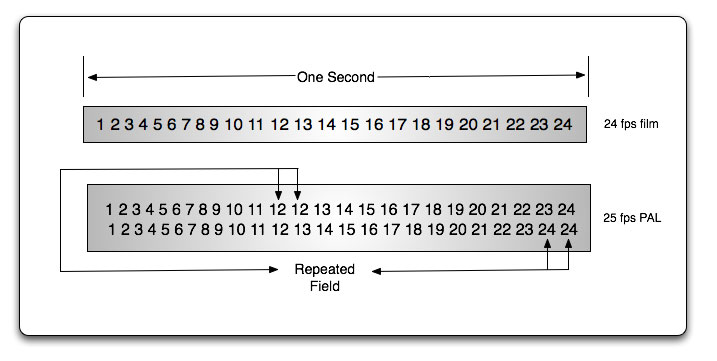
In countries that use the PAL or SECAM (a PAL broadcast variant used in the rest of the world that does not use NTSC or PAL) video standards, film for television is typically photographed at 25 frames per second. The PAL video standard broadcasts at 25 frames per second, so the transfer from film to video is simple; for every film frame, one video frame is captured.
Theatrical features originally photographed at 24 fps are shown at 25 fps. While this is usually not noticed in the picture the 4% increase in playback speed causes a slight increase in audio pitch by about one semitone. This subtle pitch change is sometimes corrected in post.
This pulldown method is sometimes used in order to convert 24 frame material to 25 frames. Usually, this involves a film to PAL transfer without the aforementioned 4% speedup. For film at 24 frames/s, there are 24 frames of film for every 25 frames of PAL video. In order to accommodate this mismatch in frame rate, 24 frames of film have to be distributed over 50 PAL fields. This can be accomplished by inserting a pulldown field every 12 frames, thus effectively spreading 12 frames of film over 25 fields (or "12.5 frames") of PAL video. The method used is 2:2:2:2:2:2:2:2:2:2:2:3 (Euro) pulldown.
Take a few minutes to process the above concepts, they will become important as you read on about what exactly Cinema Tools is accomplishing when used to manipulate and track frame rates. Although the concepts may seem somewhat arcane, they have been the basis of working with film on video for decades.
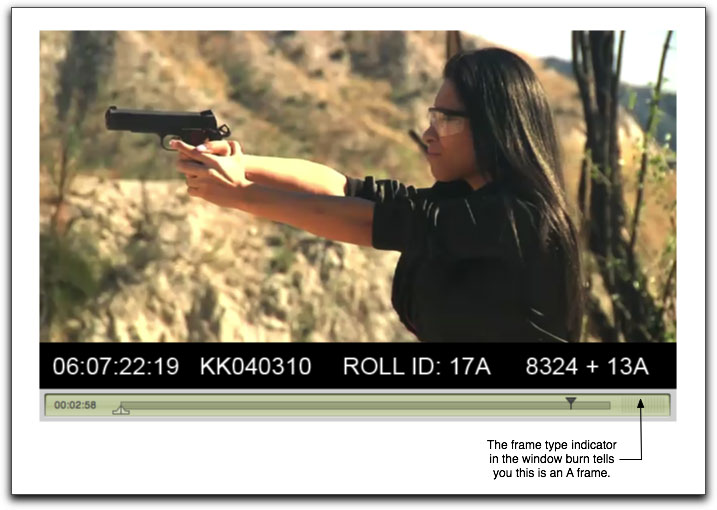
Expanding Your Vocabulary: What is the "A" Frame?
You may often hear references to "A" frames whenever you are involved with 3:2 pull-down video. The A frame is the only one that has all its fields contained within one video frame. The other frames (B, C, and D) all appear in two video frames. Because the A frame is the start of the video five-frame pattern, it is highly desirable to have one as the first frame in all video clips.
What Is the Ultimate End Product?
Cinema Tools works with Final Cut Pro to store information about how the video clips are being used and generates the cut list required to transform the original camera negative into the final edited movie. A cut list is used by a negative cutter to physically cut and assemble the final film negative, which is used to strike all the final film prints.
Interestingly, functions that we take for granted in the Final Cut Pro video world become quite a big deal when dealing with a film print. Cinema Tools checks for problems that can arise while editing the film-based material using Final Cut Pro, the most common one being duplicate uses of source material: using a shot (or a portion of it) more than once. Besides creating duplicate lists, you can use Cinema Tools to generate other components, such as lists dealing with opticals, titles and effects, the placement of transitions, motion effects (video at other than normal speed), and titles.
Cinema Tools can also work with the production audio, tracking the relationship between the audio used by Final Cut Pro and the original production audio sources. It is possible to use the edited audio from Final Cut Pro when creating an Edit Decision List (EDL) and process (or mix) the audio at an audio post-production facility.
In the typical film finish, Final Cut Pro is used only to make the edit decisions-the final edited video output is not typically used, since the video it is edited from generally is compressed and includes burned-in timecode (window burn) and film information. The final goal of the process is to end up with a negative cut list.
[Top]
Doing the DI
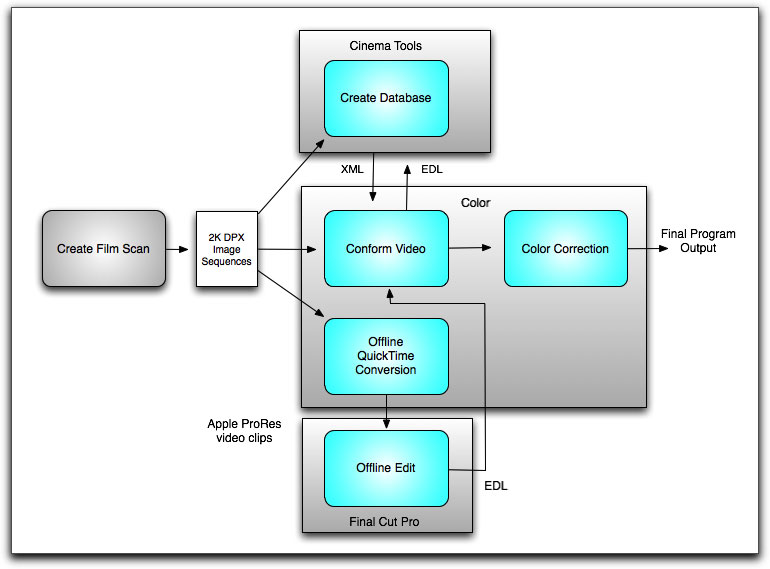
Now that you understand the traditional filmmaking post process outlined in the article so far, you can probably disregard most of the information about optical effects. Few films are being produced with traditional optical titles and effects anymore. With the advent of more powerful workstations and sophisticated software available at lower costs, the popularity of the DI, also known as the digital intermediate process, has grown immensely. The DI begins with a high-quality scan of the original film.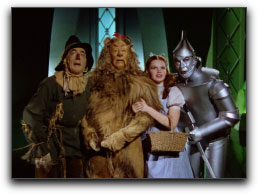 The scan results in very high-resolution video, usually in the form of digital picture exchange (DPX) image sequences whose quality rivals or surpasses that of film. The video clips created during the DI process are typically referred to as 2K video image sequences. An image sequence is actually a folder containing individual image files for each video frame. Because of the large size of these video clips, they are not generally edited directly. Instead, lower-resolution versions of the files are created, usually based on the Apple ProRes 422 codec, and then edited. These DPX sequences can then be manipulated, color corrected and have visual effects added. The standard scanning resolution for DPX sequences is typically 2k (2,000 lines), although with the advent of faster computers and better film scanners, 4k (4,000 line) resolution is becoming more common. I worked on the DVD release of The Wizard of Oz for Warner Bros. which was one of the first film restorations done at 4k resolution. Knowing the film so well, it was a truly amazing experience to see the new 4k transfer projected. As drive space, scanning tools and the workflow becomes less expensive, it seems that 4K will be the next big thing in feature films, whether it is a classic title or a brand new blockbuster.
The big difference between this process and the telecine-based film editing process is that the DI process does not actually conform the original camera negative. The DI digital output is either printed to film or more and more commonly, distributed digitally. The benefit of the DI process is that the filmmaker retains all of the desirable visual qualities of shooting on film, but gains the advantages of computer-based editing, color correction and visual effects. Once the sole domain of the highest end Hollywood visual extravaganzas, the DI has become popular because as costs have fallen, availability of DI facilities has grown.
In the Final Cut Studio workflow, once the edit is finished, the next step is to use Color to apply any needed color correction. This color correction is applied to the original media. To accomplish this, an Edit Decision List (EDL) is exported from Final Cut Pro. This EDL is used to match the edits to the original 2K media, allowing Color to conform and color correct the 2K media.
Cinema Tools databases can be used in this workflow to match the EDL to the 2K media, linking the reel names and timecode of each edit to entries in a database created from a folder of 2K image sequence clips. Using a Cinema Tools database provides tools to diagnose and resolve any issues that occur, such as non-matching reel names or other media management issues.
What About 24P Video?
Final Cut Pro supports multiple aspects of editing at 24 fps (as we will learn, generally in HD video, 24 fps is actually 23.98 fps). Film traditionally was captured and edited at 24 fps, while 23.98 fps is an evolution allowing film transferred to video to resolve easier to video frame rates. Final Cut Pro combined with Cinema Tools provide the following features and capabilities:
- The import and export of 24 fps and 23.98 fps EDLs
- The ability to convert NTSC 29.97 fps EDLs to 23.98 fps or 24 fps EDLs
- A Reverse Telecine feature to undo the 3:2 pull-down used when 24 fps film or video is converted to NTSC's 29.97 fps
- The ability to remove 2:3:3:2 or 2:3:2:3 pull-down from NTSC media files so you can edit at 24 fps or 23.98 fps
- The ability to output 23.98 fps video via FireWire at the NTSC standard of 29.97 fps video
- The ability to match the edits of videotape audio with the original production audio tapes and generate an audio EDL that can then be used to recapture and finish the audio if you intend to use an audio post facility to finish your audio
Creating The Cinema Tools Database
A Cinema Tools database can contain a single record or thousands of records, depending on how you decide to utilize it. The intent of the database is to match the edits made in Final Cut Pro so that the cut list for the negative can be created. A record must have values for the lab roll, camera, or daily as well as the edge code. In addition, the Cinema Tools record must either have a clip connected to it or have video reel and video timecode (In point and duration) values.
When you export the cut list after editing the video in Final Cut Pro, Cinema Tools looks at each edit/event and attempts to locate the appropriate record in its database to determine the corresponding key numbers or ink numbers (edge code). Cinema Tools first looks for a record connected to the media file used in the edit. If a record is found, Cinema Tools then locates the file, adds a note to the cut list, and moves on to the next edit.
Cinema Tools allows you to create a record for an entire camera roll, for each take, or somewhere in between, depending on how you work. Each record can contain:
- Scene, shot, and take numbers with descriptions
- The film's camera roll number, edge code, and related video timecode and reel number
- The sound roll and timecode
- A clip poster frame showing a representative frame from the clip
- Basic settings such as film and timecode format
The records can be entered manually or imported from a telecine log. The telecine log from scene-and-take transfers, where only specified film takes are transferred to video can provide the basic information for the database. You can add additional records, comments, and other information as needed.
The telecine log from camera-roll transfers typically provides information for a single record-the edge code and video timecode used at the start of the transfer. Assuming continuous film key numbers and video timecode throughout the transfer, that single record is sufficient for Cinema Tools to generate a cut list for that camera roll.
Importing Telecine Logs
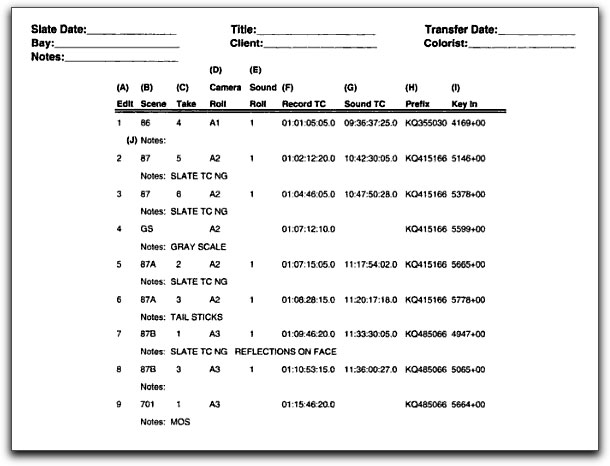
When film is transferred to video at a telecine facility, in most workflows, a telecine log is generated. The log lists:
- Edit number
- Scene
- Take
- Camera Roll
- Sound Roll
- Record TC
- Sound TC
- Prefix
- Key In
Much like most functions in Final Cut Studio, there is more than a single way to accomplish a task. You have a choice of importing the telecine log using Cinema Tools or Final Cut Pro. This is how you enter the information about your project into FCP or Cinema Tools so that the software knows all of the details about your transferred film. You can choose either method according to the workflow that you prefer.
Manually Entering Database Information
Some film-to-video transfer methods, such as film chains, do not provide logs or you may have to deal with footage that was transferred a long time ago and the telecine log was lost or misplaced. In these cases, you can manually enter records. Each record in a database should represent a media file that has continuous timecode and key numbers. With scene-and-take transfers, each take requires its own record since the timecode and key numbers will not be consistent from take to take.
With camera-roll transfers, because the film roll and video recorder run continuously from start to finish, you require only one record for the entire clip, even if you later break it into smaller clips (that retain the original timecode) and delete the unused portions. Cinema Tools uses an edits video reel number and edit points to calculate the appropriate key numbers, as long as the video reel and edit point information is part of a record.
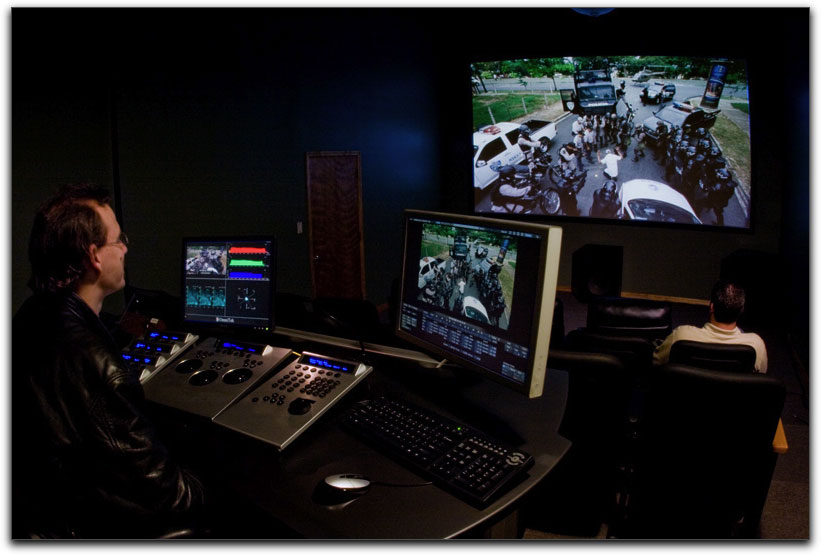
To manually enter database records, you need to know the key number and video timecode number for a frame of the clip. This is easiest when the transfer has these values burned in to the video. This is called a window burn or window dub. You will often see these numbers when behind the scenes footage is shot of the editorial process and various superimposed windows are scene on the editors monitor screen.
Capturing Your Media
When shooting film, typically when new film stock is used, an entire roll of film is exposed of a single scene or location. Unlike digital video where you can allow the camera to record for long periods of time, when shooting film, this is avoided because of the expense of the process and because rolls of film typically only allow the camera to run for about ten minutes per roll.
Transferring Camera-Rolls
Camera-roll transfers require you either to capture the entire tape or to manually capture a clip for each take. As long as the tape uses continuous video timecode and film key numbers, much like traditional video tape capturing, Cinema Tools requires only a single database record showing the relationship between the two. It's not necessary to create a database record for each clip, as long as you do not change the timecode.
Transferring Scenes-and-Takes
Scene-and-take transfers result in records in the Cinema Tools database that are suitable for performing a batch capture. You can export a capture list from Cinema Tools and import it into the Final Cut Pro Browser. Final Cut Pro can then perform a batch capture, creating clips as specified by the Cinema Tools list. These clips can then be easily linked to records in the Cinema Tools database.
Finishing with On-line Quality Video
If you intend to deliver an on-line quality video output when you have finished the project, there are several important factors you need to contemplate.
Depending on the codec used for the video and the amount of video needed to be captured for the initial offline edit, you can capture with relatively high compression and include burned-in timecode and key numbers. The compression makes it easier for your computer to work with the video and requires less hard disk space, allowing you to capture more video to use for your editing session.
After you have finished the offline edit, you can use Final Cut Pro to recapture just the video actually used in the edits, using the high-quality codec and a version of the video without burned-in timecode and key numbers. This can be a useful workflow when you may need to deliver screeners for distribution and film festival submission, even if your project is still destined to output to film eventually.
[Top]
Two Important Cinema Tools Features For Editing
Now that we have learned what the Telecine process is, let's talk about Reverse Telecine. The Reverse Telecine feature (which only works for NTSC transfers) is a way to remove the extra fields added during the 3:2 pull-down process when the film is transferred to video. You need to invoke the Reverse Telecine feature when you want to edit to edit the video at 23.98 fps, rather than at 29.97 fps.
The Conform feature is used to correct errors in video clips and to change the frame rate (timebase) of a clip. This feature is a key tool for working with material shot with DSLRs and other video cameras where you need to change or manipulate frame rates. An example would be if you wanted to turn Canon 5D MKII footage that was shot at 30 fps into 23.98, 24 or 25 fps footage. Before the current firmware 2.04 update for the 5D MKII, all video was shot at 30 fps and many users wanted to convert the footage to 24 (23.98) fps. The Conform feature is one of the tools used for accomplishing this frame rate change.
In other instances, you may want to change the frame rate of a clip. If you transferred 24 fps film to video by speeding it up (either to 29.97 fps for NTSC or to 25 fps for PAL-in each case ensuring a one-to-one relationship between the film and video frames), the action during playback will be faster than in the original film, and the audio will need to have its playback speed adjusted to compensate. You can use the Conform feature to change the clip's frame rate to 24 fps, making it play back at the original film rate and stay in sync with the audio.
How to Work With Cinema Tools Databases
To work with the database, you need to know how to open it, locate specific records, and access information about a record's clip.
Opening an Existing Database
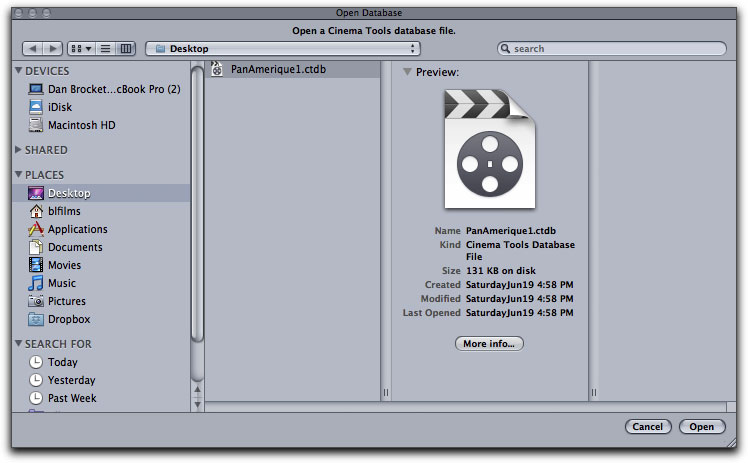
- Choose Database > Open Database (or press Command-Shift-O), then select the database in the dialog.
- Drag a database file from a Finder window to the Cinema Tools application icon.
- All the records in the open database are listed in the List View window, and the Detail View window shows the first record's details.
Viewing Database Properties
- Choose Database > Database Properties (or press Command-I)
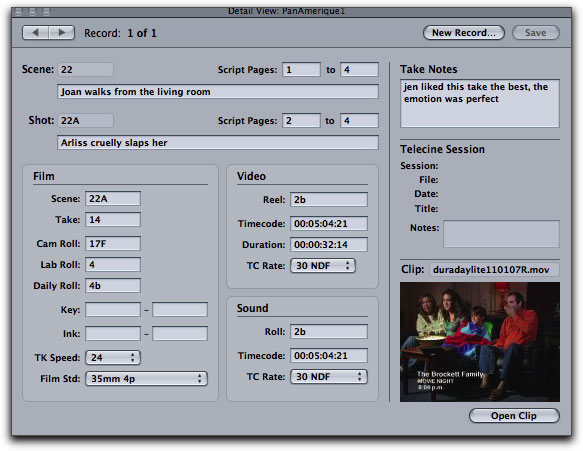
About the Detail View Window
Select any one of the following:
- Choose Window > Detail View (or press Command-2).
- If necessary, drag the List View window to a different screen position.
- If necessary, click the Detail View window to bring it to the front.
Settings in the Detail View Window
The Detail View window includes a number of fields and buttons for creating a database record. Just a few of these settings are required to create a cut list or change list.
- Lab, camera, or daily roll
- Key number or ink number
In ordered to use the timecode-based method for cut list or change list generation, these elements are also needed:
- Video reel
- Video timecode and duration
These settings are required if you intend to export an audio EDL:
- Each source clip must be connected to a record, or each record must have the video reel and video timecode and duration entered.
- Each record must have the sound roll, audio timecode, and audio timecode rate (Sound TC Rate) entered.
The List View Window
- The List View window displays a list of database records in the open database. It might show a complete list of all database records, or, if you use the Find feature, it might show only those records that are found (the "found set"). The List View and Detail View windows appear whenever you open a database.
Settings in the List View Window
The following controls along the top of the List View window determine the columns that appear and allow you to choose the records that are shown.
- Display mode pop-up menu: Use this pop-up menu to configure the List View window to show the columns most useful to you.
- Keycode: Displays information about the film, including key numbers and rolls.
- Video: Displays video timecode and reel information.
- Sound: Displays audio timecode and sound roll information.
- Ink Numbers: Displays information about the workprint, including ink numbers and daily rolls.
- Show All: Click this button to show all of the records in the current database.
- Find: Click this button to open the Find dialog. You can use the Find dialog to choose which records appear in the List View window.
Settings in the Find Dialog
The Find dialog contains the following settings:
- Scene and Take: The values you enter in the Scene and Take fields depend on what you want to do:
- To find all the records in the open database: Leave the Scene and Take fields blank and click Show All Records.
- To find all the records for a particular scene or shot: Enter the identifier for that scene or shot in the Scene field, leave the Take field blank, then click the Find Records button. (The Take field is disabled unless you select the "Show only exact matches" checkbox.) For example, if you enter "1" in the Scene field and then click Find Records, Cinema Tools finds all records associated with scene 1, including the shots 1, 1A, 1B, 1C, and so on. If you enter "1A" in the Scene field, only the records for shot 1A are found.
- To find the record for a specific scene and take: Select "Show only exact matches," enter the scene and take identifiers in the Scene and Take fields, then click Find Records.
- Results: Choose one of the following from the Results pop-up menu:
- Replace Current Found Records: Found records replace the records displayed in the List View window.
- Add to Current Found Records: Found records are added to the set in the List View window. The Add to Current Found Records option is useful when you want to find records for more than one scene, but not for all scenes. For example, to see only the records for scenes 5 and 6, choose Replace Current Found Records, enter "5" in the Scene field, then click Find Records. Then, choose Add to Current Found Records, enter "6" in the Scene field, and click Find Records. Only the records for scenes 5 and 6 appear in the List View window.
- Show only exact matches: Select this checkbox to find a specific record that matches the Scene and Take field entries.
Backing Up, Copying, Renaming, and Locking Databases
- As is the case with all-important data, it is wise to store backup copies of your Cinema Tools database files and to lock the database files if you want to make sure they are not modified or deleted. If you are going to lock a database file, make sure that the database is closed before you lock it.
- You can also use any standard desktop method to rename a database file. Changing a database filename (as opposed to a source clip filename) does not affect the content of the database or any of the database functions.
About the Clip Window
To open the Clip window, do any of the following:
- Choose File > Open Clip (or press Command-O), locate a clip, and then click Choose.
- Click Open Clip in the Detail View window (if a clip is connected to the current record).
- Click Connect Clip in the Detail View window, and then select a clip (if one has not already been connected to the record).
- Drag one or more (up to 20 total) clips from a Finder window to the Cinema Tools application icon. A Clip window opens for each clip.
Settings in the Clip Window
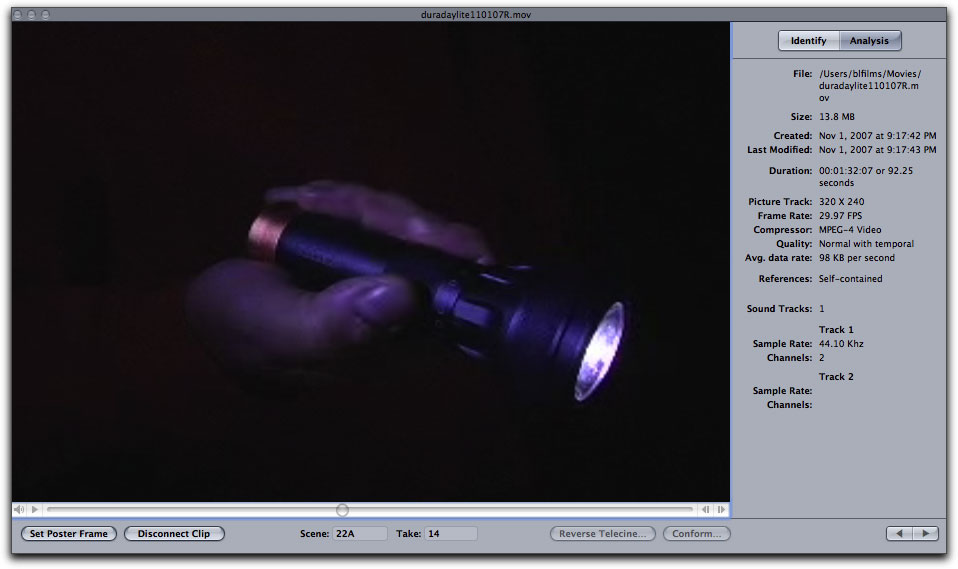
- You can play the clip by clicking the Play button (the triangle to the left of the timeline) or by pressing the Space bar. To play the clip using the Space bar, you must make sure that an Identify pane text field is not currently selected-you can press the Tab key as needed or click the Analysis button to deselect the text fields.
- mportant: Depending on your computer, high-resolution video, such as 2K media, may not play back smoothly.
- If the clip has audio, you can control the volume by clicking the speaker icon next to the Play button and then dragging the volume slider. You can also drag the playhead to scroll through the clip. You can click the left arrow and right arrow buttons at the right side of the timeline or press your keyboard's Left Arrow and Right Arrow keys to step through the clip one frame at a time.
- Figure. Clip window.
- Most of the buttons along the bottom of the window open additional windows or dialogs and are also available as commands in the Clip menu. The two buttons in the upper-right corner determine what information is shown on the right side of the window.
Accessing Information About a Source Clip
- The Analysis pane of the Clip window gives you access to specific information about a source clip.
- The Analysis pane displays the full path (location) and name of the file, along with its size and dates of creation and modification. You can also see the duration of the movie contained in the clip.
Information is also listed for each track in a clip:
- For video tracks: You see the frame size and frame rate, the compressor used and the compression quality, the average data rate, and whether it is a self-contained or reference media file. See The Difference Between Self-Contained and Reference Media Files for more information.
- For audio tracks: You see the sample rate and the number of channels for up to two tracks.
Capturing Source Media and Connecting It to the Cinema Tools Database
Establishing the relationships between the source clips and the Cinema Tools database is an important step in the creating a successful workflow and project.
Source Clips and the Database
After capturing, you establish connections between the database records and the source clips.
Preparing to Capture
- Avoiding dropped frames during the capture process. Make sure that you have the dropped frames warning turned on in your FCP prefs.
- How your hardware is set up for video capture - If you are capturing from tape, make sure that your video deck in genlocked and that you have calibrated the timecode offset.
- Considerations regarding the capture of audio - if you are capturing audio from a source that utilizes tape, make sure that you are capturing your audio at the frame rate it was recorded at.
Generating a Batch Capture List from Cinema Tools
To set up a batch capture, you specify the clips you want to capture (after your Cinema Tools database has been created) and Cinema Tools generates a list based on the information in the database. After you import this batch capture list into Final Cut Pro, those source clips appear in the Browser as offline clips, meaning they are logged and ready to be batch captured. When your source media is on multiple tapes, you can still use batch capture. When you begin the batch capture, you see a list of all the video reels needed. When all the clips from one reel are captured, you are prompted to select another reel.
Connecting Source Clips to the Database
Because source clips and database records can be created by different means at different times, you may need to establish the link between a source clip and its record after they both exist. This process is called connecting a clip to a record. How you connect clips to the database depends on how you captured your clips.
- If you created your database by dragging a folder of clips to the Cinema Tools application icon: All of the records were automatically connected to the clips. You can use the Connect Clips command to connect the records to a different set of clips later if necessary, or to reconnect the source clips if they are moved to a different disk.
- If you captured your source clips by using a batch capture list: Use the Connect Clips command to automatically connect all your source clips to the database. See Using the Connect Clips Command for more information.
- If you did not capture your source clips by using a batch capture list: You need to individually connect source clips to database records by using either the Detail View window or the Clip window. These two methods are equally easy and accessible, so the one you choose may depend on which window happens to be open. The Clip window is most convenient if you're interested in selecting a new poster frame for each clip as you go, or if you want to use the Conform or Reverse Telecine feature on each clip immediately after you connect it to the database.
Repairing Broken Clip-to-Database Links
When a source clip that has been connected to the database is renamed or moved, the link between the clip and the database breaks and the clip needs to be reconnected. For individual clips, clicking the Open Clip button in the Detail View window opens a dialog that lets you reconnect the clip to the database record. If a group (folder) of source clips has been moved, you can use the Connect Clips command in the Database menu to update any broken links to clips that are in the folder you select.
Determining How to Prepare Source Clips for Editing
The steps you need to take to prepare your clips for editing depend on the telecine speed, whether you have NTSC or PAL video, and which frame rate you plan to use for editing.
The main goals in preparing the source clips are to:
- Set the video frame rate to match the frame rate at which you want to edit
- Maintain or restore audio/video sync
[Top]
Generating All Kinds of Lists
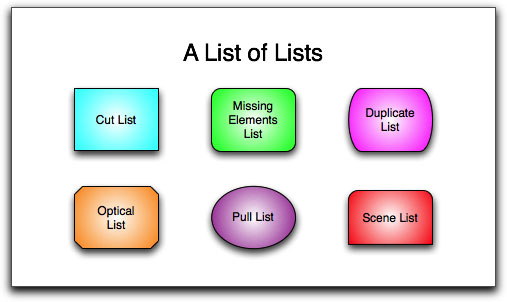
There are a number of other lists that can be generated by Cinema Tools at the same time the application is generating a cut list. A film list file can contain any of the following:
- Optical list: A list for the effects printer, describing any transitions and motion effects. Although opticals are not commonly used as much as they used to be, if you need this list, Cinema Tools can generate it for you.
- Scene list: A list of all the scenes used in your program and the shots used in the opticals
- Pull list: A list to aid the lab in pulling the required negative rolls
- Duplicate list: A list of duplicate usages of the same source material
- Missing elements list: A list of any required information that could not be found in the database
Cinema Tools can also export a change list. A change list can be useful if your production process involves workprint screenings and modifications. The change list assumes a workprint has been cut to the specifications of a cut list (or prior change list) and it specifies further changes to make to the workprint, based on edits you have made to the sequence in Final Cut Pro.
[Top]
Integrating Cinema Tools with Your Final Cut Pro Workflow
Final Cut Pro is an editing application while Cinema Tools is mostly a database application. So how do the two applications integrate? There are several options for each stage of your project's workflow. Should you import the telecine log into Cinema Tools and export a batch capture list for Final Cut Pro, or should you import the telecine log directly into Final Cut Pro? You need to examine your project's needs and workflow in order to determine how to best proceed and how streamline your workflow for maximum efficiency. Like most operations in Final Cut Studio, there are several ways to accomplish the same operation. Some Cinema Tools-related functions you can perform directly from Final Cut Pro are:
- Importing telecine log files
- Conforming 25 fps video to 24 fps
- Reversing the telecine pull-down (using the last settings in Cinema Tools)
- Opening a clip in the Cinema Tools Clip window
- Synchronizing a Cinema Tools database to a group of selected clips, film lists and change lists
Cinema Tools is used manually if you need to add information to the database beyond what the telecine log provided, or if you have a unique issue with reverse telecine and need to configure its setting.
Cinema Tools and ALE Files?
The ALE (Avid Log Exchange) file format was created so that the contents of film-based databases could be transferred between systems. ALE files are plain text files that can be opened and edited with any text editor. Cinema Tools supports importing and exporting ALE files, making it possible to share databases with other systems.
Planning Your Film Workflow Out
One aspect of filmmaking that is often neglected is the process of planning your entire production and how the postproduction workflow will be implemented.
Before you begin your project, make sure to discuss it with all parties involved in the process:
- Rental houses or owner/operators providing equipment or supplies used during the production
- Crew involved in the actual production
- The facility that will develop your film, create work prints, and create the release print
- The video transfer facility
- The editor using Cinema Tools and Final Cut Pro (if it is not you)
- The negative cutter
- The audio post-production facility
Have Foresight About Cutting Corners
There are a number of times throughout the film production process when you will have to choose between what needs to be done and what you can afford to do. Often your budget or a lack of time drives the decision. Make sure you thoroughly understand your workflow choices before making decisions that could end up costing you more, both in time and money, in the long run. Problems based on choices made early in the process could take you by surprise later.
For example, a workprint can be a great idea. A workprint is a print assembled from your negative to "test the edit". Yes, it is an extra expense to strike a workprint but you only have one original negative. If you mess it up because all of your cuts are not perfect, it can lead to disaster.
The Big One: Conforming
Conforming a clip to a frame rate means that each frame in the clip is given an equal duration in seconds based on a frame rate that is specified by the user. For example, if you conform a clip with 240 frames to 24 frames per second, each frame becomes 1/24 of a second, and the total duration of the clip is 240/24 seconds, or 10 seconds. Use the Conform feature to change the frame rate of a clip to the frame rate at which you want to edit. If the clip contains audio and video, the Conform feature also adjusts the audio rate so that the audio and video remain in sync.
It is important to note that unlike the database operations that are possible with Cinema Tools, conforming modifies the actual source media file. You must have read-and-write access to the media file to use the conform feature. You cannot use the Undo command after conforming to restore the file to its original frame rate. It is possible to use the Conform feature to return the file to its original frame rate though.
To Conform Individual Clips:
- Choose File > Open Clip, then select the clip in the dialog.
- In the Clip window, click the Conform button.
- In the Conform Clip dialog, choose a new frame rate from the "Conform to"
pop-up menu, then click Conform.
You can conform 25 fps PAL clips to play at 24 fps from within Final Cut Pro.
To conform a clip in Final Cut Pro
- Select one or more clips in the Browser to conform from 25 fps to 24 fps.
- Choose Tools > Conform 25 to 24.
The clips are conformed to 24 fps.
Batch Conforming Several Clips at a Time
As an alternative to conforming the frame rate of each clip individually, you can use the Batch Conform feature to conform the frame rates of all the clips in a selected folder.
- Make sure all the clips you want to conform are in the same folder.
- Choose File > Batch Conform.
- In the dialog that appears, select any clip file in the folder that contains the
clips you want to conform, then click Choose.
In the Batch Conform dialog, choose a frame rate from the "Conform to" pop-up menu, then click Conform. After the batch conform process is completed, the following occur:
- The clips are conformed to the chosen frame rate and placed in a Cinema Tools-created subfolder named "Conformed [frame rate]," where "frame rate" is the new frame rate for the clips. A folder might be named Conformed 24.0, for example.
- If Cinema Tools is unable to complete the conform process for a clip, that clip is moved into a Cinema Tools-created subfolder named Skipped. (A clip is not processed if it doesn't contain a video track, if the frame rate is not supported, or if no codec is found for the video track.)
- A text file named "conform.log" appears at the top level of the folder. This log gives the date and time that the process started and ended, for each clip. If any problems were encountered, such as running out of disk space or memory, an error message describing the problem also appears in the log.
[Top]
How To Use Cinema Tools to Conform a Canon 5D MKII Clip (An Example)
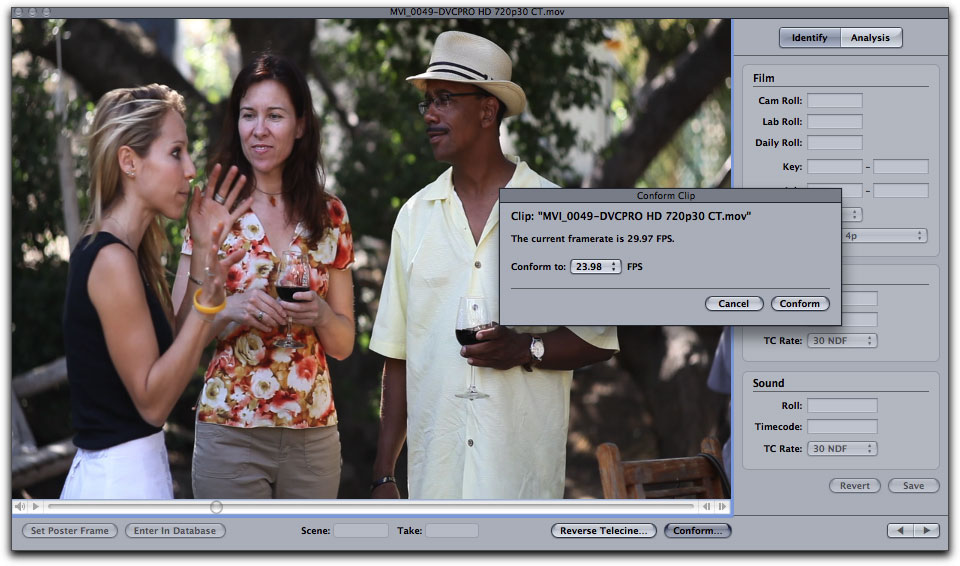
Use the Conform feature to change the frame rate of a clip to the frame rate at which you want to edit or exhibit. If the clip contains audio and video, the Conform feature also adjusts the audio rate so that the audio and video remain in sync. Conforming modifies the actual source media file. You must have read-and-write access to the media file for the Conform feature to be available.
As a popular example, in order to convert 30P video from the Canon 5D MKII to 24p (23.98), the following workflow was originally developed by cinematographer Denver Riddle and has been utilized by thousands of 5D MKII users. Keep in mind also that this example illustrates how to change 30 fps material to 23.98 fps. The same workflow can also be used to convert the same 30 fps material to 25 fps for PAL territories by merely substituting 25 fps wherever the example calls for 23.98.
There are several questions you must consider that will factor in to exactly which parts of the workflow of this conversion will need to utilized for your particular situation.
- It is assumed that you want the 30 fps footage to still playback in real time after conversion to 23.98 fps. If you only run the footage through Cinema Tools Conform feature and then edit with it without utilizing the Compressor portion of the operation, the footage will be over cranked by 6 fps. For some projects, this effect is desirable; it can give the footage a sort of "dreamy" quality that works for certain projects.
- It is assumed that the footage you are converting has sync audio that you want to use with the 23.98 fps clip
- It is assumed that you are familiar with Final Cut Pro and Compressor and are primarily learning how to use Cinema Tools
- Edit your 5D MII 30 fps material in a 30 fps FCP timeline. If you click on any of the clips that comprise the sequence in FCPs Browser, then click on item properties > item properties, you will see listed as "Vid Rate" that the clip is a true 30 fps.
- Create an identical copy of your finished edited sequence so that you will have two clips, one to convert to 24 fps and one to preserve the audio. Make sure to label the copied sequence in a logical way so that you will be able to determine which is the original and which is the copied sequence.
- Export the 30 fps copy from FCP. Make sure that you export it as a self-contained movie, NOT as a reference movie.
- Open Cinema Tools, go to File > Open Clip > choose "Conform", specify "23.98" to conform to.
Explanation: This keeps the same number of frames in the clip, it only changes the timebase from 30 fps to 24 fps, essentially creates over cranked footage by 6 frames, (desirable on some shots). As a result this makes the clip longer and slows the audio down, which is undesirable where audio is important. At this point you've already created a copy of the original clip therefore preserving the original audio, which we'll re-link to later in Final Cut.
- Open Compressor and specify deliverable format and destination. Now open the inspector window so we can do some tweaking. Under "Frame Controls" tab, click the button to the right of "Frame Controls:" to enable this feature. Once enabled, select "On" for "Frame Controls:" Underneath the "Retiming Control" section is where we'll make changes. For "Set Duration to:" click the radio button where it will allow us to put in a duration.
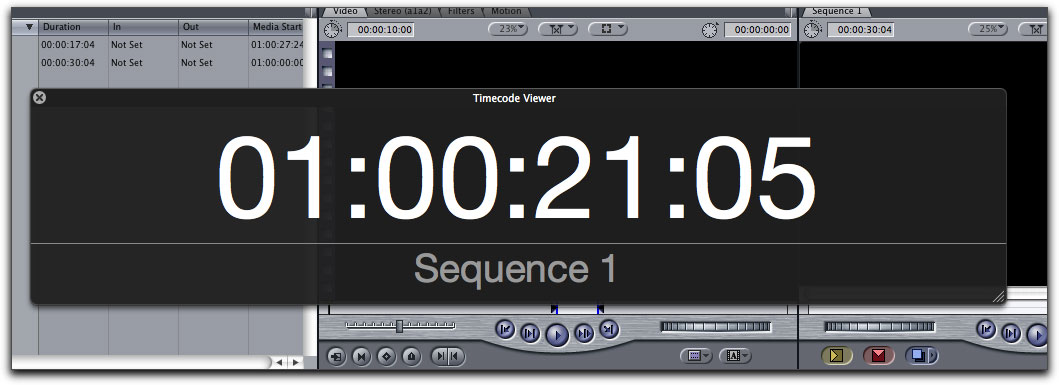
- Open the copy of the clip that we created that stills has the 30 fps timebase and put it into the Final Cut Pro timeline, Delete the video track and ensure that the timebase of the sequence is set to 23.98 fps. Go to the end of the audio and read that the time displayed is. This way we are making sure that we are retiming (speeding back up the clip) so that the clip will match the original audio in length. This number is the timecode you'll put into the duration field, (for example 01:08:01:06) then depending on how well you want the footage to look also taking into consideration the time it will require to compress it. Choose the desired quality under "Rate Conversion". I choose, "Best (High quality motion compensation)" to get superb results, however this increases the compression time.
Important: Make sure that no matter which codec you use that it remains as a 23.98 fps timebase.
- Now take the treated clip into Final Cut, we've already set up the sequence from step 3. Add the clip to video track 1, re-link and you have a 30p 5D MKII clip converted to 24p (23.98 fps)
Synchronizing Your Audio with Your Video
Since most film cameras don't record audio, production sound for a film is recorded separately; this is known as dual (or double) system recording. How you synchronize the sound to the picture depends on the equipment used and when in your post workflow that your syncing is performed. There are considerations related to your video standard, how the telecine transfer was done, and the timecode used that make a difference in how you should plan on syncing your sound.
There are four situations when audio synchronization is particularly important:
- During production - you must use the correct frame rate, slate and keep sound reports for every take. The better your sound mixer's sound reports are, the easier time you will have in post syncing audio
- During the telecine transfer
- During editing
- While creating the release print
[Top]
The Basics of Syncing Your Audio
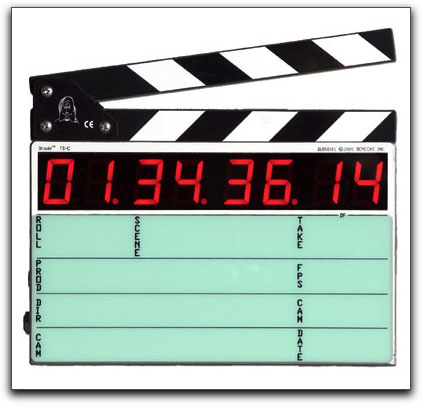
While shooting, you must provide visible and audible cues to sync on. The most common method is to use a clapper board (also called a slate or sticks) at the beginning of each take. To make things even easier in post, you can use a timecode slate that displays the sound recorder's timecode. These days, there are even slates that can be ran on an Apple iPad, iPhone or iPod Touch. To sync the audio with the video, position the video at the first frame where the slate is closed, then locate the sound (or timecode) of the related audio.
Synchronizing During the Telecine Transfer
During production, the sound recorder typically begins recording a slightly before the camera rolls and stops recording a little after the camera stops. Because you end up recording more audio than film, you cannot play the audio recording and the film through several takes and have them stay in sync. If you want the telecine transfer to record synchronized audio on the videotape, you must either use the scene-and-take transfer method, synchronizing each take on its own, or create a synced sound roll before performing a camera-roll transfer.
A large benefit to synchronizing during the telecine transfer, aside from having videotapes with synchronized audio ready to be captured, is that the telecine log usually includes the audio timecode and sound roll number information. In my opinion, this is the easiest and simplest method to work with because your audio and picture are locked from the beginning.
For NTSC transfers, it is always necessary to run the film 0.1 percent slower than 24 fps (23.976 fps, typically referred to as 23.98 fps) to compensate for NTSC video's actual frame rate of 29.97 fps. Because the film has been slowed down, audio too must be slowed to maintain sync.
PAL transfers: PAL transfers using the 24 @ 25 method (speeding up the film to 25 fps) require that the audio also be sped up if you are syncing the audio during the telecine transfer or if you intend to edit the video at this rate.
Synchronizing Your Sound in Final Cut Pro
If you don't synchronize your sound and picture during the telecine transfer, they can be captured into Final Cut Pro as separate audio and video clips. You can then synchronize them in Final Cut Pro, using the clapper board recorded at the head or tail of each shot. This process, while tedious, is not actually that difficult to accomplish, it just takes time. Once the audio and video clips are synced together, it is simple to merge the two components into one clip so that the audio and video elements stay together when moved or edited. Telecine rooms, per hour, typically cost more money than you would be paying your video editor per hour so many productions simply transfer the film to video during the telecine session, then sync their audio elements later in Final Cut Pro with their editor or with the assistant editor.
Cinema Tools Installed Easy Setups for Final Cut Pro
Unless you are an expert at what all of the sequence, capture and device control and external video presets settings do in Final Cut Pro, I am a big advocate of using easy setups. I have found that the Easy Setups generally help you avoid small errors when you forget to change a certain setting and FCP will then not function correctly. When you install Cinema Tools as part of Final Cut Studio, Cinema Tools adds several easy setups as listed below to help in setting up your Final Cut preferences easily and quickly when editing projects that have been managed with Cinema Tools.
- 23.98 fps from DV PAL: Choose this Easy Setup to capture PAL video and to set the editing timebase to 23.98 fps. This option assumes you will conform the captured video to 23.98 fps.
- 24 fps from DV PAL: Choose this option to capture PAL video and to set the editing timebase to 24 fps. This option assumes you will conform the captured video to 24 fps.
- 23.98 fps from DV NTSC: Choose this option to capture NTSC video (in the non-drop frame timecode format) and to set the editing timebase to 23.98 fps. This option assumes you will reverse telecine the captured video to 23.98 fps.
- 24 fps from DV NTSC: Choose this option to capture NTSC video (in the non-drop frame timecode format) and to set the editing timebase to 24 fps. This option assumes you will reverse telecine the captured video to 24 fps.
- DV NTSC NDF: Choose this option to capture NTSC video (in the non-drop frame timecode format) and to set the editing timebase to 29.97 fps. This option assumes you will not perform reverse telecine on the captured video.
- DV PAL 24 @ 25: Choose this option to capture PAL video and set the editing timebase to 24 fps, but use 25 fps timecode. This option assumes you will conform the 25 fps video to 24 fps.
All Easy Setups designed specifically for Cinema Tools users, except for "DV PAL 24 @ 25," include the name Cinema Tools in the setup title.
How to Synchronize Final Cut Pro Clips with Cinema Tools
You cannot manually update a clip's film information in Final Cut Pro. Because your master database records are contained within Cinema Tools, the information must be imported from a Cinema Tools database. Final Cut Pro includes the ability to synchronize one or more selected clips with a Cinema Tools database. This is especially useful when you have imported a telecine log and captured the clips: synchronizing the clips with their database automatically connects the clips to their records. You can also create a new database, which adds the information for each clip to its record.
Tracking Duplicate Uses of Source Material
When you edit digitally, it is taken for granted that you can easily use the same shot several times within a project. Remember though, with a Cinema Tools project, you are electronically editing your film negative. If you use source material more than once, where will the copies of the negative that you are using multiple times come from?
Cinema Tools allows you to track multiple uses of the same source material in your edited sequence. There are two basic reasons to do this:
- If you want to use the same source material more than once in your project: You can export a duplicate ("dupe") list and give it to your lab as a part of a duplicate negative order.
- If you don't want to or cannot afford to spend the money required to create a duplicate negative, you need to be careful not to edit in a way that uses the same source material more than once because there is only one original camera negative. When editing digitally, it's so easy to use the same material twice that you may not even realize that you've done it, but Cinema Tools lets you check for duplicate usage on a regular basis.
Other Common Items You Can Export from Cinema Tools
The main goal of using Cinema Tools is to generate an accurate cut list. For most projects, you may also it helpful to create additional items from your edited program:
- A videotape of the program: This may be useful so that you can show the program to a distributor or film festival committee or provide a visual guide to the negative cutter.
- A file containing the program's audio: You usually create this file if you want to use the program's audio but finish it at an audio post-production facility.
- An audio EDL: This is required when you intend to recapture the audio using specialized equipment and re-edit it using the audio timecode from the edited program.
The Future of Cinema Tools
While it is unlikely that Cinema Tools will ever be anything much more than a tool for filmmakers who are shooting on film, digital filmmakers are discovering that the conform feature can be a useful tool for manipulating frame rates with digitally-originated video material as well.
While the film industry continues to expand its use of digital video, film is by no means an outdated workflow. The aesthetics of film are still an undeniably beautiful part of the cinematic art. Kodak and Fuji continue to develop and introduce new film stocks that are evolving and looking better with each new generation. As a still photographer and cinematographer who grew up shooting film, I still have a preference for the look of images shot on film. We are living in a time where digital and film technology are interacting and merging in ways that we never knew were possible a mere decade ago. Cinema Tools represents a straightforward and effective way of bringing the advantages of a digital workflow to the traditional method of shooting motion pictures. For those of you who need to integrate film into your workflow, Cinema Tools is a powerful and elegant solution to film finishing.
Dan Brockett is an independent television producer based in Los Angeles, Ca. Dan's most recent project was serving as DP for the 2010 national PBS special "The Legendary Bing Crosby". Dan also writes features and a monthly column for www.hdvideopro.com and you can reach him at dan@biglittlefilms.com.
16 CFR Part 255 Disclosure
I own all the software I used in this article; I paid market rates for it, with no special deals. I have no material connection to Apple, or any other vendor mentioned. I have received no compensation of any sort to review or recommend any of the software procedures discussed.
[Top]
copyright © www.kenstone.net 2009
© 2000 -2010 Ken Stone. All rights reserved. Apple, the Apple logo, Final
Cut Pro, Macintosh and Power Mac
are either registered trademarks or trademarks of Apple. Other
company and product names may be trademarks of their respective
owners.
All screen captures, images, and textual references are the property and trademark of their creators/owners/publishers.


