
Targeting and Auto-Select November 17, 2003
Revised April 21, 2004
Targeting and Auto-Select in FCP 4
Targeting and Auto-Select November 17, 2003
Revised April 21, 2004
Aside from the more noticeable, new features of Final Cut Pro 4, there have
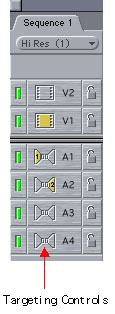
also been refinements and changes to the way existing functions work. Specifically, and also the focus of this article, are the new Timeline controls that affect how we perform many different everyday functions. These new Timeline controls, the Patch Panel and Auto Select controls replace the original targeting controls.
Final Cut Pro 4

|
Final Cut Pro 3
|
In FCP 3, targeting controls determine what tracks are affected during functions like Overwrite and Insert edits, but also for very different tasks like Mark Clip and Add Edit. It was a universal panel, but that also made it somewhat limiting.
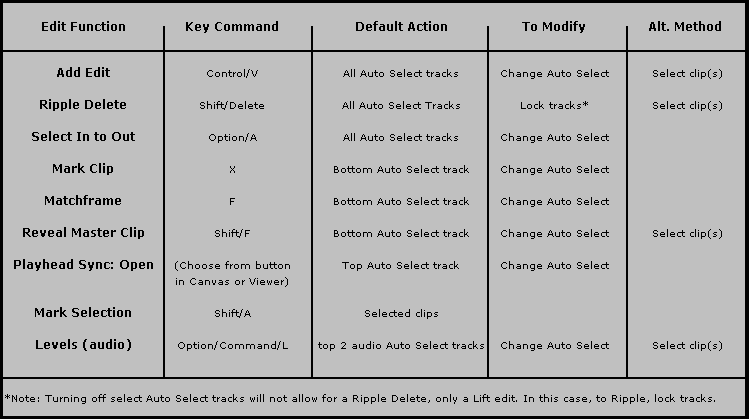
Next we'll look at working with the new controls in FCP 4, using the Patch Panel, Auto Select, selection and see which controls affect what functions, and look at different shortcuts and tips. At the end of the article is a reference chart that summarizes your options with a select group of frequently used functions. I hope you find it handy.
Patching vs. Auto Select
Ok, so which controls affect what function? In general, if the action involves adding a clip (or clips) to the Timeline, you would use the Patch Panel. If the action involves a clip(s) already in the Timeline, then Auto Select is used.
Functions that rely on the Patch Panel:
Functions that use Auto Select controls:
*Note: As of Final Cut Pro HD version 4.5, pasting a clip or group of clips
is determined first by which track was copied. For instance, if you copy a
clip on V2, then you choose to paste, the clip will be pasted to V2. To
alter this behavior, use the Auto Select controls to determine which track
to paste on to. For those of you using earlier versions of Final Cut 4, the
pasting behavior is different.
For Final Cut Pro version 4.1, "pasting" a clip or group of clips
in the timeline is now controlled by Auto Select. For those using Final Cut
Pro version 4.0, 4.0.1 or 4.0.2, pasting is controlled by the Patch Panel.
As briefly mentioned above, you use the Patch Panel during the process of adding clips to the sequence. Specifically, when a clip is edited into the sequence, these controls determine onto which Timeline track or tracks it will be placed. If the clip is composed of multiple tracks (like video and audio), these controls also determine which clip tracks are added, and which aren't.
The Patch Panel is broken down into two rows of controls- Source and Destination controls.
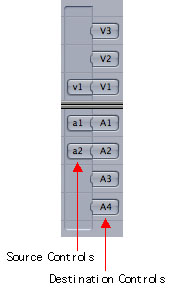
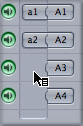
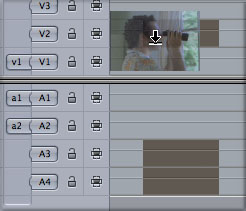
When a clip (the source) is opened into the Viewer, the Source controls in the Timeline update. These controls are basically a reflection of what's in the Viewer. For instance, if you open a clip with only two audio tracks into the Viewer, you will see two audio Source controls in the left side of the Patch Panel, labeled a1 and a2. If you then open a video only clip into the Viewer, the Patch Panel will change. The two audio Source controls disappear and are replaced by a video Source control, labeled v1.
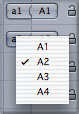
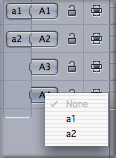
On the right side of the Patch Panel are the Destination controls. These controls represent the possible Timeline tracks where the clip in the Viewer can be placed. Before editing the clip into the sequence, Source controls can be moved up or down to different Destination controls, changing the track where the clip will be placed.
Patching
Using the Patch Panel to determine how to get your clip in the sequence can be done in any of several ways:
Using the mouse:
Using the keyboard:
To prevent any clip tracks from being edited into the Timeline, you would disconnect a Source control from any Destination control before editing the clip to the Canvas.
This can be done with the mouse or the keyboard.
Using the mouse:
Using the keyboard:
The patching will remain at the chosen settings with all subsequent clips until it is changed.
To reconnect a Source and Destination, do either of the following:
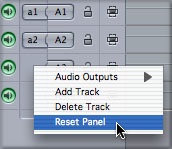
To reset the Patch Panel to its defaults:
Choose Reset Panel from the contextual menu.
The panel will be reset so that video and audio are patched to the base tracks (V1, A1 and A2).
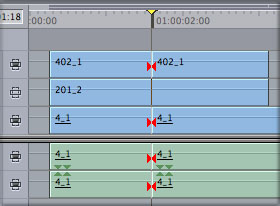
If you drag video only or audio only clips directly to the Timeline, then the current patching is ignored and you can drop a clip on any track you prefer. But, when you drag a linked video/audio clip, then patching is used as the defaults.
For instance, if a clip has one video and two audio tracks, but no destination tracks are targeted for audio, then you will notice when you drag the clip to the video track that the audio tracks don't appear by default.
Also, if a video Source control is lined up with a Destination control on one track, but you drag the clip to another video track, then the audio will also move away from their targeted tracks. For every track that you move upward, the audio will move downward by two (even when working with single mono tracks).
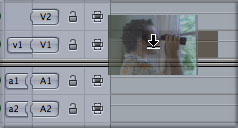
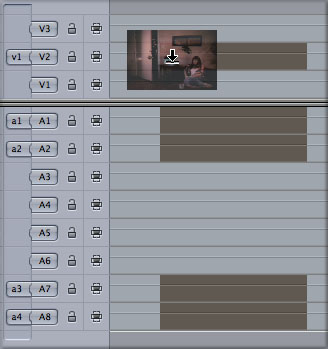
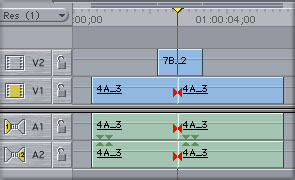
Therefore, to get the clip tracks to land in the Timeline as you desire, then set up the panel before dragging in. In the next illustration, notice that a clip is being dragged to V2. The four tracks of audio attached to the video are showing up on A1, A2 and A7, A8, just as the Patch Panel is set.
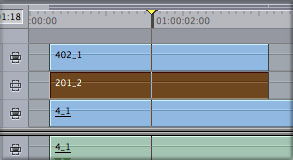
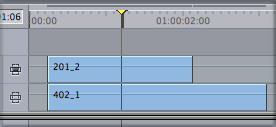
As you can now link up to 24 audio tracks to any one video clip, it is very possible that a clip in the Viewer has more tracks than there are Timeline tracks. If the clip is edited to the Canvas, or dragged as usual to the Timeline, it will only end up with as many tracks as the Timeline.
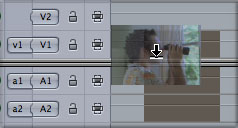
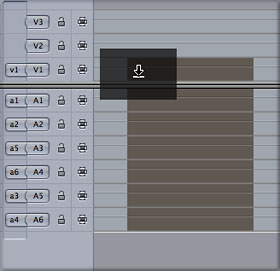
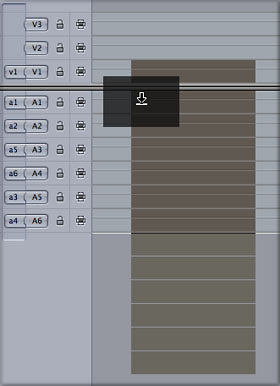
In order to get all audio tracks (without having to first create new tracks), drag the clip to the Timeline, but don't drop on the video track. Drag downward past the video track. When the cursor goes below into the audio portion of the Timeline, all the clip's tracks will show up.
As mentioned earlier, Auto Select controls affects what track will be affected during certain operations related to clips already in the Timeline. These functions range from Matchframing to Add Edit. When working with only one video track, you could basically forget about Auto Select. But Auto Select does become important if you're trying to Matchframe from a clip on V2, or use Mark Clip to mark in and out points for a clip on V4.
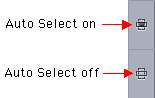
One way to handle this would be to turn off Auto Select across from the tracks to ignore, and on for the track that should be used. Clicking on an Auto Select control toggles it off or on. By default, all tracks are created with Auto Select turned on.
![]()
Control/click in a blank space in the Source side of the Patch Panel.
Audio disconnected
Audio patched
Dragging to video track
Dragging below the video track
Next are two quick ways to turn off Auto Select on all tracks but one.
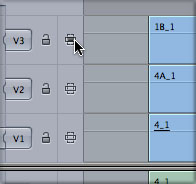
Option/Click
While pressing the Option key, click on the Auto Select button across from the track that should remain on. This will turn off Auto Select across from all other tracks.
In the above illustration, after Option/clicking on V3, other tracks' Auto Select are turned off.
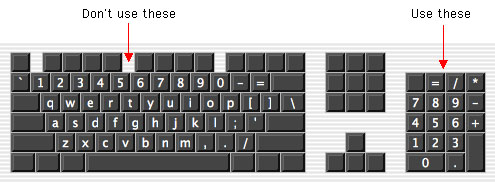
Auto Select can also be turned on and off from different keyboard commands. But its important to first mention that these shortcuts include using key combinations with the numbers from the number pad section of your keyboard, and not the numbers directly beneath the function keys. Using the wrong number keys will result in the wrong function performed.
To enable Auto Select on one video track, and turn off others:
To turn Auto Select back on for all tracks, press Command/0 again.
To enable Auto Select on one audio track, and turn others off:
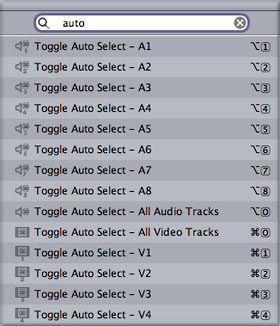
In addition, you can also use the new Keyboard Layout to change any of these shortcuts to any keys you want. To quickly find any shortcuts related to Auto Select, type the words Auto Select into the search field of the Keyboard Layout (found in the Tools menu). As you type, the area below will update to list the various Auto Select options, which can then be dragged to the desired key.
This everyday feature is a great example of a feature that performs quite differently now in FCP 4. Add Edit is used to add a cut on the chosen track(s) at the playhead position with the keyboard shortcut Control/V.
In FCP 3, you would target the tracks to be cut. After Add Edit, only those tracks would be cut.
In FCP 4, targeting, or patching, has no impact on Add Edit. Instead, this is determined by which tracks have Auto Select turned on.
Add Edit in FCP 3 was limited to just one video and two audio tracks at a time (of course you could always use the Razorblade All tool to cut all tracks, but that's a whole other topic).
In FCP 4, because all tracks start out with Auto Select turned on, then FCP will now cut across all tracks by default. To only cut across select tracks, you would turn off other tracks.
Well, that's only part of the story, because it depends on one other factor as well: clip selection. If a clip in the Timeline is selected first (clicked on), then Add Edit will ignore the Auto Select tracks, and instead will only cut the selected clip.
With Add Edit, and some other functions as well, you can use clip selection to quickly override the current Auto Select tracks. If a clip or group of clips is selected before an action, then Auto Select is ignored, and instead, only the selected clips are affected. This can be real handy, as a quick click on a clip may be faster than fuddling with Auto Select buttons.
This isn't universal with all functions that use Auto Select, but does apply to the following:
The next two illustrations are both examples of how to choose the clip on V2 when using Reveal Master Clip. In the example on the left, the clip on V2 is chosen because Auto Select is only on for V2, and the clip is at the playhead position. In the example on the right, the clip on V2 is chosen, even though Auto Select is turned off for the track.
What's nice is we have the flexibility to use either method, Auto Select or selection. Using the playhead and Auto Select or clicking on a clip.
On the other hand, there are also a couple editing functions where it doesn't matter whether something is selected or not, as FCP ignores selection. These two functions only rely on Auto Select and the playhead position:
When using Auto Select, certain actions will always be performed on the bottom-most video track with Auto Select turned on. For audio, the Auto Select would choose the top track. These functions include:
Knowing this, if we want the action to happen on the bottom video track, or
there is only one video track, then this behavior is ideal. There is no need to select anything, just simply navigate the playhead to the clip we want to use.
If Auto Select is turned off on the bottom track, FCP looks up to the next track. If Auto Select is turned on, then this track is used. If not, then FCP looks upward until finding a track with Auto Select on.
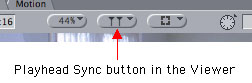
You may have already noticed, but the new Playhead Sync (the pop up menu in the Viewer and Canvas) plays a little different with Auto Select than other features.
Press Command/0(zero). This will turn off Auto Select on all tracks.
Press Command/track number to turn this track back on.
Press Option/0 to turn off and on all tracks.
Press Option/track number to turn a track back on.
Clip Selected before Add Edit

Clip after Add Edit
Reveal Master Clip is a good example of this behavior. This is a simple but useful feature to locate the original master clip in the Browser from a clip in the Timeline. When you choose View > Reveal Master Clip (Shift/F), FCP will first look to a selected clip in the Timeline. If nothing is selected, then it will look to Auto Select and a clip at the playhead location.
When using Auto Select with a function like Matchframe, FCP first looks to see whether a clip occupies the base track (V1). As we discussed, if there is no clip or Auto Select is turned off on V1, then FCP looks to the next track up. And so on.
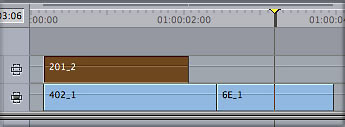
Playhead Sync works the other way around. When Playhead Sync is set to Open, the clip at the playhead position in the Timeline is automatically opened into the Viewer. It opens the clip on the top track with Auto Select turned on. If there is no clip or Auto Select is turned off, FCP looks to the next track down, and so on.
Although this default may often work for you (as it always opens the "foreground" shot) sometimes you may want FCP to open a clip from a different track. For instance, while color correcting, you may be working on only V1, moving from clip to clip. If you move to a section of the Timeline where there is a text clip on V2, it will open into the Viewer, instead of the clip on V1, which is the one to be color corrected.
In this case, you could turn off Auto Select on V2 so that FCP only opens the clips on V1.
Audio And Auto Select
If you've struggled with trying to Matchframe from an audio clip, and FCP returns with a Matchframe to a video clip, then this section is for you. Knowing FCP's hierarchy, we can Matchframe, Mark Clip and other functions with audio, without only defaulting to a video track.
Move the playhead to the audio clip you want to choose.
If there are any video tracks at this location, press Command/0 (the zero from the number pad part of the keyboard). This turns off Auto Select on all video tracks.
At this point, FCP looks to see if an audio clip is on A1 and if Auto Select is turned on. To choose a clip from a lower track, turn off Auto Select on tracks above the intended clip.

copyright © www.kenstone.net 2003