
The Basics - Getting Started January 9, 2001
How to Make that First Cut.
The Basics - Getting Started January 9, 2001
Motion picture art is of the 4th dimension: it exists over time, like music. And like music, motion pictures are creations of rhythm. There is internal rhythm within each shot - the languid pan, the speeding car-by - and each cut adds a beat of its own. Therein lies the editor's compositional power and responsibility. Others have written about setup. See "The Care and Feeding of a NonLinear Editing System", and "FCP; An Ambitious Beginning", in the Library.
1. Double Click on the 'Sequence 1' icon in the Browser

2.) Double Click on a clip in the Browser ; it will open in the Viewer.
3.) Play it and select your IN and your OUT points ('I' and 'O' on the keyboard).
4.) Click on the little red square under the Canvas window (the Overwrite button)
5.) Repeat 2 thru' 4 for your next clips in order.
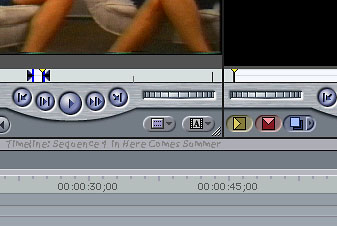
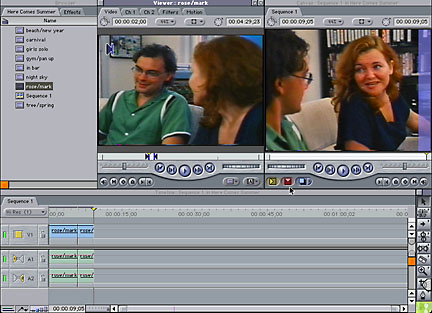
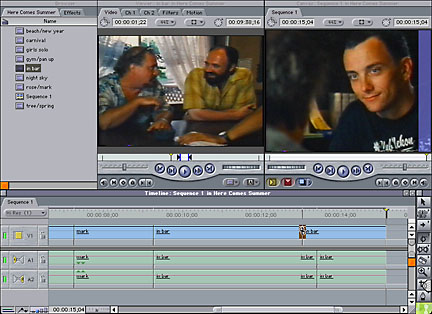
One edit has been made. The Playhead sits on the last frame of the shot, which shows in the Canvas. The next shot is shown in the Viewer with its In and Out points already chosen. When the red 'Overwrite' button under the Canvas is clicked, this second edit will be made.
This will get you an assembly of video clips with sync audio in the order you selected them. This Sequence should be perfectly playable, but without much sophistication. SAVE. SAVE after every move you make. (cmd (apple)-S)
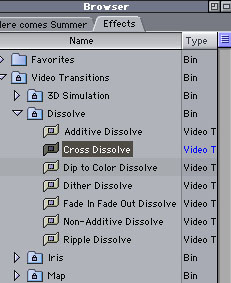
Click on the Effects tab in the Browser >Video Transitions>Dissolve>Cross Dissolve and drag a cross dissolve to the very beginning of your Sequence for a fade in (a dissolve with black), and again to any edit point in the Timeline where you want a dissolve. Again at the end for a fade out.These dissolves were dragged from the Effects tab in the Browser to the edit points in the Timeline. The red lines above them indicate that they need to be rendered before the effect can be seen in real time.
Under the Sequence menu>Render All. SAVE.
Now you can park the Playhead at the head of the Sequence, start Record on the deck/camera (record the black for 20 or 30 seconds), press the spacebar and your sequence will be recorded to tape.
The beauty of nonlinear is how it affects the working style of the editor. It is the ability to create 'successive approximations' - zeroing in on the ideal finished product - that has enhanced the creative process and productivity in post production. In other words, you don't have to get the first edit perfect before you can move on. You don't even have to start on the first shot. You can begin to edit at any scene you wish. This is one way to keep your creative juices flowing; you get to jump into your favorite scene right away. At any time you can come back and finesse each and any edit point to get it exactly right, and to get the rhythm of the whole the way you want it.
The Final Cut Pro window in which this assembling and finessing takes place is the Timeline window, and that window consists of a Sequence.
Sequence, in FCP terms is what you are working on; what you are building as you edit. It can be the entire show, or one scene, or, for example, an hour long project can be worked on as three separate sequences.
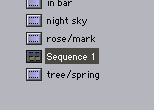
There is a 'Sequence 1', by default, in every new project. Open it to begin editing. Create others by choosing File > New > Sequence. Rename them as you wish.
Double Click on the 'Sequence 1' icon in the Browser to open the Timeline and the Canvas windows. The Canvas is the visual representation of the Timeline , and the Timeline is the graphical/linear representation of the Canvas. The Canvas shows you the frame that the playhead is on in the Timeline.
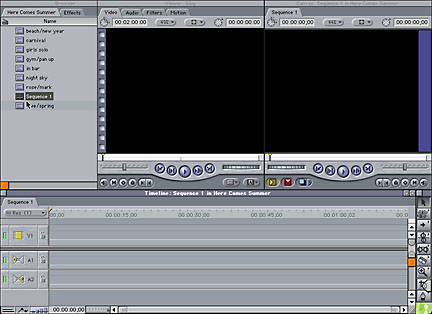
There are no video clips in this new Sequence, but it is not empty; it has endless tracks of black and silence. The playhead is at the beginning ('head'), but can be dragged to any location down the line.
The location of the playhead will be the default IN point for any edit you make, unless you set another IN point in the Timeline.
To make an edit, you must define four edit points: the in and out points defining the piece of video that you want to use, and the in and out points in the sequence where you want it to go. Final Cut Pro works on the principal of "3 Point Editing", whereby you provide any three edit points, and the program calculates the fourth.
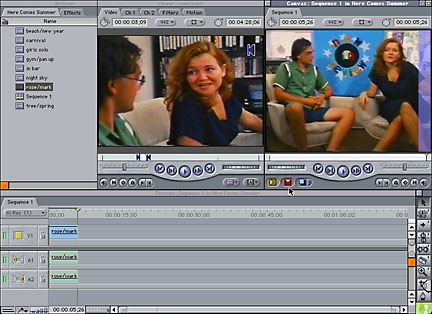
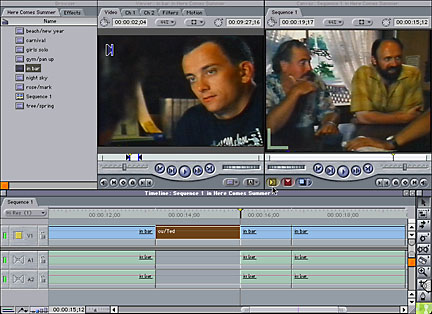
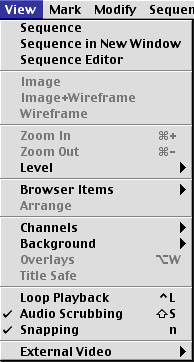
The IN and OUT points for this 3rd clip (in the Viewer), and the location of the Playhead, define the 3 points neccessary for an edit. The edit will be made to tracks V1, A1, and A2, because those are the tracks that are 'Targeted' for this edit. Click the yellow icons on or off to determine the edit you want to make.

Click the yellow icons on or off to choose tracks to be targeted. The numbers '1' and '2' on the audio tracks indicate from which channel of the source clip the sound will come. Track A1 can be targeted to recieve the sound from channel 2, for example. The default configuration is ch1 (L) to A1, ch2 (R) to A2.
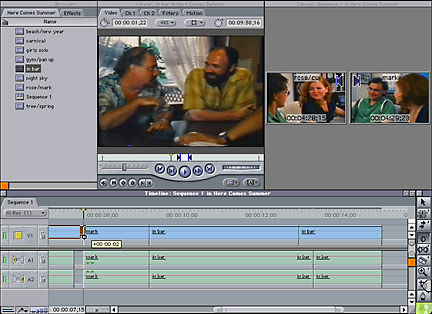
An aside to former Linear editors on 'INSERT' edits: An 'Insert' edit in Final Cut Pro means a clip that you place between two other clips. To make what we know as a 'video only insert edit', you target only the video track. For an 'audio only insert edit', click on either ch1 or ch2 on A1 and/or A2, and turn off the video track target.
A 'video only insert edit' in Final Cut Pro. Only the video track is targeted, and the video clip was placed between two other clips. The yellow icon next to the Overwrite button is the Insert button.
Here are some tips for working with The Trimming Tools:
CUT A DIALOG SCENE
First, assemble the scene with sync shots (as above) so that the dialog plays as it should be spoken; back and forth from one person to the other. If someone blows a line, and you need to use a line from another take, just cut it into the assembly so that the dialog flows. You will cover the jump cut later with a video only Overwrite edit.
Roll
If you want the second person to be seen listening before he begins talking, use the 'roll' tool to roll the second shot back to where you want to cut away from the speaker. Two ways to get this right: 1.) Park the playhead at the spot where you want to be seeing the second person, click on the edit point with the roll tool, drag, and roll his shot down to the playhead ('Snapping' ON {under the 'view' menu} helps with this placement).
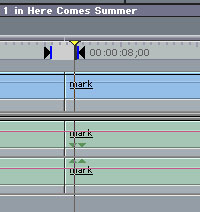
Rolling the bartender's video so that he listens to the last few words of the speaker.The bartender's lines of dialog begin at the next cut in the audio tracks in the TimeLine, and because we rolled his video, he will begin talking in sync. Rolling is also a good way to create an 'L-cut', in which the audio from the in-coming scene begins under the video of the out-going scene.
2.) If it's a gesture or reaction from the second speaker that you want to see, roll that shot until you have included as much of the action as you want. You will see the in and out frames in the 'trim edit' window that takes the Canvas space. ('Snapping' OFF helps with this kind of roll edit. Hold down 'cmd' to gear down and move one frame at a time)
As you can see, 'Snapping' is useful both on and off, and I suggest that you get in the habit of using the 'N' on the keyboard to toggle it on and off as you wish.
The checkmark means that Snapping is on. Select it again to turn it off.
Ripple
When you want to extend a clip, but not cover over the adjacent clip, you use the 'ripple' tool. Click on the edit point with the ripple tool, and point its little 'tail' in the direction of the clip you want to extend, then drag.
Here I have extended the 'cu Rose' video clip by 2 frames, which pushed everything else down and created a space/pause in the audio tracks. The two small clips in the Canvas show the new last frame of the outgoing clip and its timecode, and the first frame of the next clip: a perfect situation for making a match cut on action.
Ripple Delete
If you need to cut out a piece in the middle of a clip, or trim the end and/or beginning of a shot, 'Ripple delete' works great.
Set IN and OUT points surrounding the section you want to remove, then click Shift + Delete. The section will be removed, and the gap closed. Ripple delete cuts through all unlocked tracks, so be sure that is what you want to do.
Practice with these tools, and experiment with the others. It takes a while to speak the Final Cut Pro language, epecially if you haven't been an editor. Clicking and dragging, slip into sync, razor, select all tracks forward, slipping, and sliding, are all Final Cut Pro tools that I use every day.
copyright © Gretta Wing Miller 2001
www.downtowndailies.com
All clips from Milk Punch courtesy of Pitcher
Pictures,
www.milk-punch.com
All screen captures, images, and textual references are the property and trademark of their creators/owners/publishers.