
Basic - DVD Authoring March 15, 2004
Authoring with iDVD 4.0.1
By Ken Stone
Basic - DVD Authoring March 15, 2004
Authoring with iDVD 4.0.1
By Ken Stone
System Requirements
Installation
When Apple introduced the SuperDrive, an optical drive capable of burning DVDs as well as CDs, we were provided with iDVD 1 authoring software. While a bit simplistic, this easy to use 'drag and drop' application gave us the ability to create and burn DVDs right on our own Macs. With each new release of iDVD, additional features have been added, advancing the abilities of this product while maintaining its ease of use. Now in its fourth iteration, iDVD 4 has reached a high level sophistication, with some of the advanced features found in professional DVD authoring software (i.e. chapter markers). New to iDVD 4, is the ability to create DVD's of up to two hours in length. iDVD 4 has several additional new features (transitions for photos in slideshows and a Map feature), that are missing in the more advanced DVD Studio Pro 2. iDVD 4 is still 'drag and drop' easy to use.
iDVD 4 will accept all QuickTime formatted material except for MPEG files, QuickTime VR movies, Sprite movies or Flash tracks. You can use material from Final Cut Pro, Final Cut Express and iMovie. Photos from iPhoto and music from iTunes (even songs purchased from the iTunes Store) as well as AAC, MP3, and AIFF audio files. Images and photos from graphic applications like PhotoShop are supported. iDVD will accept bitmapped image files but not Vector graphics, as from Illustrator, though Vector graphics can be bitmapped in PhotoShop first and then used in iDVD. The native still image size for iDVD is 640 x 480.
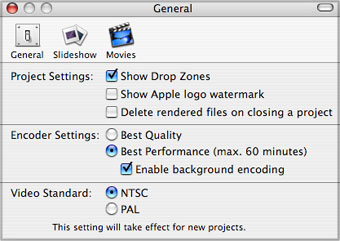
iDVD 4 is easy to set up, with only three Preference windows. You will want to go through and set up your Preferences before you create your new project. From the menu bar, choose iDVD and select Preferences. General settings is first. You will want 'Show Drop Zones' turned on, Apple logo watermark turned off and 'Delete render files on closing', off as well.
Encoding is the process of converting video to the m2v format which can then be read by DVD players. These encoder settings control the quality of the encode, the speed of the encoding process and when the encoding will take place. When Best Performance (max 60 minutes) is selected, encoding will happen quickly and you have the option of selecting 'Enable background encoding'. With this selected, iDVD will start encoding as soon as you place your video assets into the iDVD interface. You can continue to work on your project, add art work, background images and audio, create buttons, additional menus and build slideshows, all the while iDVD will be preparing your video. This is the fastest way to encode, provided your video is under 60 minutes, but quality takes a bit of a hit. If your video runs more than 60 minutes or you want higher quality, then you want the next encoding option.
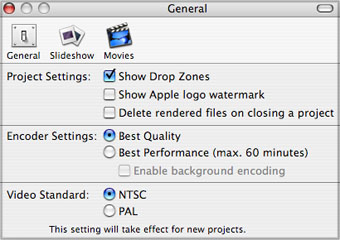
If you choose 'Best Quality' you will notice that the Enable background encoding is gray out and you will not be able to encode as you work on your project. Encoding will have to wait until you have finished your project and click the Burn button. There is a reason for this. iDVD will automatically select the best quality possible for the total amount of video you have in your iDVD project. As quality will be determined by the length of your video, iDVD must wait until you have completed your project so it will know how much video it needs to encode and can make the appropriate choices. iDVD uses the same encoding engine found in Compressor, which ships with FCP and DVD Studio Pro. Set your Video Standard to either NTSC or PAL.
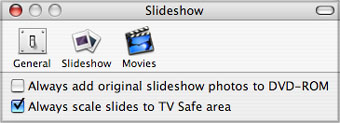
Slideshow settings are next. When you build a slideshow, the photos that you use in the show will be encoded along with the video. There is the option to include these same photos on your DVD, as data files, these data files will have a higher resolution and can be opened on a computer and used for other purposes. When your finished DVD is viewed on a computer you will see the full photos, however, when your DVD is viewed on a TV set, some cropping of the photos will occur. To avoid this cropping, select 'Always scale slides to TV Safe area'.
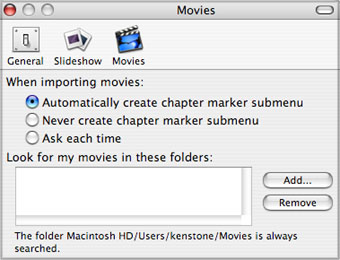
The Movies section basically covers how iDVD will handle Chapter markers that have been set in FCP, FCE and iMovie. Chapters will be covered later but you should set this to 'Automatically create chapter marker submenu'.
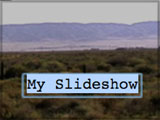
There are seven buttons along the bottom of the iDVD Editor window. The Customize button, opens the Customize drawer to the left of the main iDVD window (shown below). The Folder button (which I would rename the 'Submenu button'), creates a submenu button in the iDVD window, this new button is automatically linked to the new submenu. There are several reasons to create new menus. First would be a Scene Selection menu with buttons to each chapter of your movie. Another would be that iDVD limits you to a total of 12 buttons on any one menu. If you need to have more than 12 buttons, then using 'Folder' for the 12th button will take the viewer to a new menu where you can have an additional 12 buttons. Yes, you can add a 'Folder' to this new menu for yet another menu. More often, you'll simply want to have different menus for different subjects of your DVD. The last button on the left is 'Slideshow'. Like 'Folder', Slideshow will create a new button (My Slideshow) in the DVD window that links to the new Slideshow.
Some of the iDVD themes have motion elements, like fabric blowing in the breeze, (very impressive). You can play your video clips in the drop zones in the menu and if you choose to have button Styles (shapes) as links, you can play video on the face of each button or place a still image on the button face. You can actually replace the entire menu template with full motion video, like from your movie, using that as your background. If you are working and the motion or background audio is making you a little crazy, you can turn it off by clicking on the Motion button, green is on, gray is off. It also takes processor power to run motion, so turning off motion will speed up the interface and background encoding as well. You do want to be sure that the Motion button is enabled before your burn your DVD.
The Map button is a new feature and provides a graphic display of all menus and the links between them, more on this later. The Preview button allows you to simulate how your DVD will work when viewed on a TV. An on screen remote control is provided for you to navigate and test your DVD. When you have completed your DVD and tested it out then it's time to use the Burn button.
It is in the Customize Drawer and tabbed panes that we build, modify and customize our DVDs.
Themes
The Customize Drawer
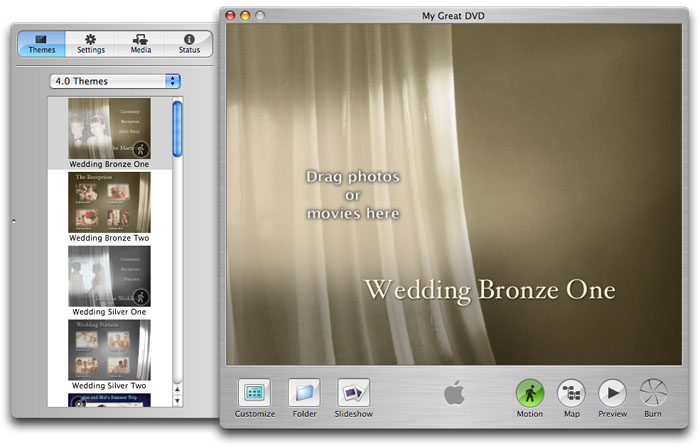
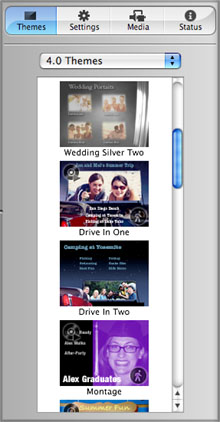
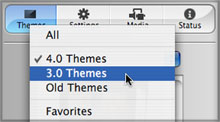
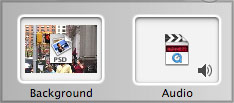
The first pane holds the iDVD Themes. 20 prebuilt menus, offering an interesting variety of art, motion and background audio. If iDVD 4 is the first version of iDVD that you have installed then only the Themes contained in iDVD 4 will be available. If you had earlier versions of iDVD on your Mac, then the Themes from those earlier versions will be available to you as well. Themes that contain motion elements are denoted by the same little motion icon that is found on the motion button. Some of the motion Themes contain background audio as well, denoted by a small CD icon. You can change the background audio to any music you like or delete it entirely. You can also add audio to any Theme, even those that have no motion. To preview or use any theme, simply click on a Theme in the Themes pane, it will load into the iDVD window. You can continue to try different themes until you find one that suits you. Selecting a different theme will replace the existing theme. Some of these motion themes are quite handsome.
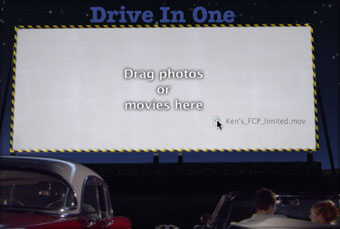
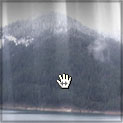
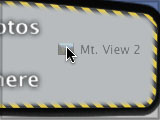
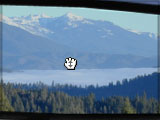
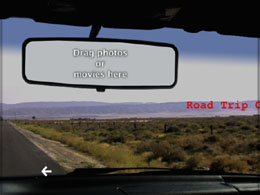
Most of the iDVD Themes have, what are called, 'Drop Zones' and are denoted by the words; "Drag photos or movies here". Some themes have only one drop zone, other themes have a number of them. A drop zone is a space in the menu designed to hold art work. You can place a still image, movie or even a slideshow that contains up to 30 images into a drop zone, you can not apply audio to a drop zone. Drop Zones are simply containers for art and can not be used as buttons or links to movies, submenus or slideshows. When you drag an image or movie into a drop zone, the borders of the drop zone will be marked by a broken yellow line. When you release your image or movie it will display in the drop zone. If you do not like your choice, simply drag a different item into the drop zone. This will replace the first item. After you have placed your image or movie in the drop zone, placing your cursor on the drop zone will turn it into a little grabber hand icon. Click on the art with the grabber hand and you will be able to shift the art either up and down or left and right, to better position your art work.
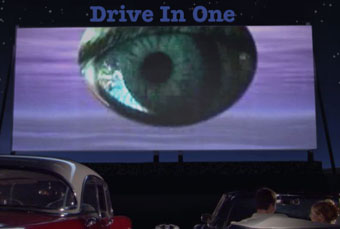
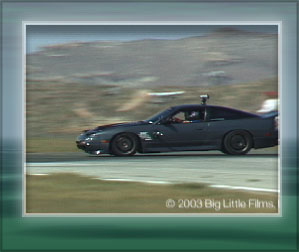
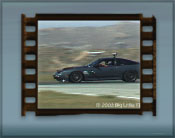
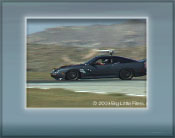
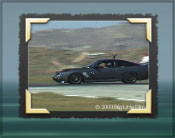
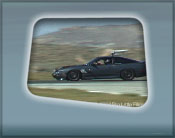
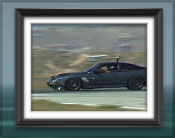
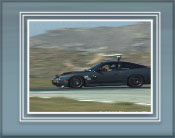
It must be sci-fi night at the local drive in. You do not have to use the stock iDVD Themes, you can use your own still images or movies to create a unique menu. When you launch iDVD 4, chances are that it will open with one of the stock iDVD template menus. You can create your own background menu using a still image, a freeze frame from a movie, or art from an image editing application or digital camera, by dragging your art into the Background 'well' found in the Settings pane in the Customize window.
Images that become background art for a menu are scaled to fit the DVD window standard of 640 x 480, however the aspect ratio of the original art is preserved. For example, if you take a freeze frame from FCP or FCE, the image size will be 720 x 480, iDVD will scale down the width of 720 to 640. Because iDVD maintains the aspect ratio of 3:2 (720 x 480) but places it in an aspect ratio window of 4:3 (640 x 480) you will have a black border top and bottom.
In this case you'll want to open your freeze frame in an image editing application and crop the width from 720 to 640, leave the 480 height as is. Now your background art will fill a standard DVD window. If you wish to use this art as the default art for your entire iDVD project, from the Advanced menu choose, Apply Theme to Project/Apply theme to Folders.
Interestingly enough, if you want to create a motion menu using footage from FCP or FCE (720 x 480), iDVD will scale the aspect ratio properly so that there will be no black borders in the DVD window.
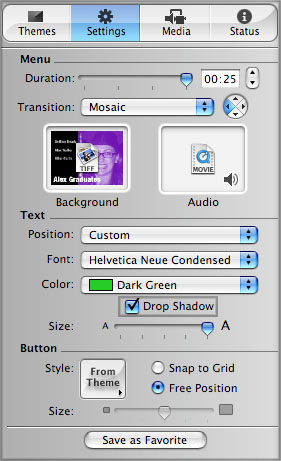
Settings
The Settings pane is where we customize and modify the look (and sound) of our menu. The Settings pane is divided into three sections; Menu, Text and Button.
Menu
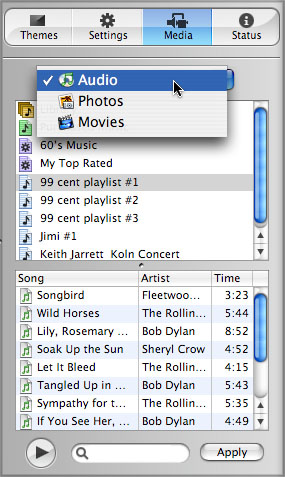
Locate the movie, audio or still image you want and either click on the 'Apply' button at the bottom of the Media window or click on the item and drag it into the iDVD menu and drop.
If you use other applications to create movies, audio or still images, you can drag these assets from the Finder directly to the iDVD menu.
If you decided to use 'Best Performance' (lesser quality) for your DVD that is under 60 minutes in length, and you have selected 'Enable background encoding', the progress of the encode will be displayed in the Status pane with a blue progress bar. As each asset is encoded the progress bar will be replaced with the word 'Done'. Wait until the encoding process has been completed before you Burn.
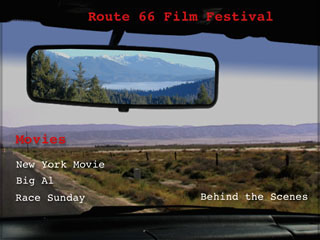
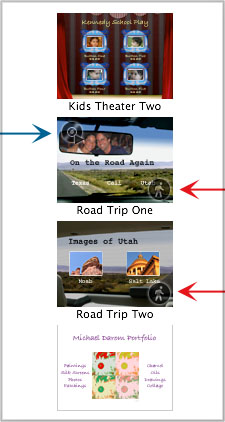
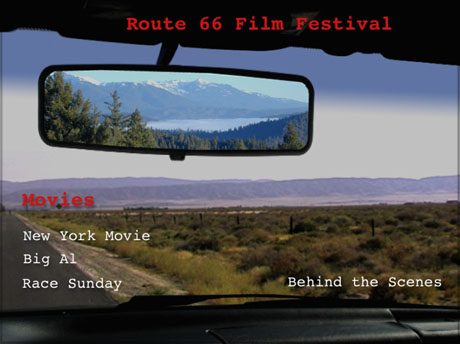
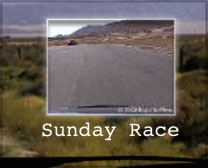
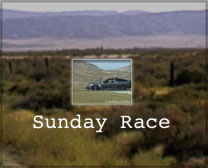
For this project I have selected the Road Trip template. First I'll dress the main menu. I have dragged a still image into the drop zone of the rear view mirror and positioned it. Next I have decided to use different music and have dropped my audio into the iDVD window (staying clear of the drop zone). You can drag your audio into the Audio 'well' to achieve the same result. I then changed the stock title 'Road Trip One' to my own, changed the size and color of the text and repositioned it. This is the basic look I want for my main menu but I can always come back later and make changes.
Text
 Button
Media
It is in the Media pane that you begin to understand the concept of iLife integration. From inside the Media pane you have access to your iTunes, iPhoto, and iMovie Libraries. If you use these three applications then it could be that all the material that you need to build your DVD is in these Libraries.
Status
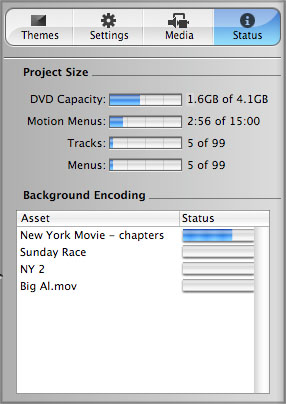
The Status pane in the Customize pane allows you to monitor how much space your DVD is using and how much additional space is left for your project. The total amount of space used is the combination of the amount of video, plus motion menus, still menus, transitions and slideshows. You will note that the capacity of a DVD-R disc is about 4.1 gigs.
The 'DVD Capacity' bar shows you how much space is being used by the video in your DVD. If you click on the text to the right of the capacity bar the figure will change to display how many minutes you have used and how much time is left.
The Motion Menu bar shows the total time used by all the menus in your project. You can have up to 15 minutes of motion menus which will use up about 1 gig of space and will limit the amount of video that you can have and reduce the over all quality. You might want to keep your motion menus short.
The Tracks bar shows the total number of video tracks (movies) and slideshows. You can have a combined total of 99 tracks.
The Menu bar shows the total number of motion and still menus in your project for a maximum number of 99.
Workflow
You can build your project in any manner or order that you like. I have found that it's best to do a little planning before starting. Know how you want your main menu to look and what it needs to contain so that your viewer can navigate your DVD. Locate all your assets so that they are ready to go.
Drag art onto Drop Zone |
Position art |
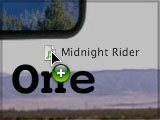
Drag audio for background music |
Size, color and position title |
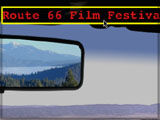
I am now ready to start adding my elements to the menu. I have three different movies and I wish to have a menu page for each movie. I clicked on the folder button three times creating three text buttons, links to submenus. I then name and position the three text buttons. Aside from the three movies, I want to have a slideshow, so I clicked on the Slideshow button, named and positioned it.
New folder (submenu) |

Three submenus buttons |
Slideshow |
Renamed Slideshow |
The last thing that I wanted to add to the menu was a 'Movies' heading. From the Project menu, I selected 'Add Text', changed the text and color and positioned it above the three movie buttons.
Buttons
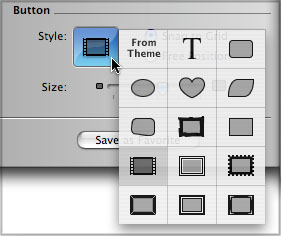
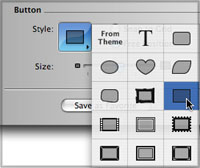
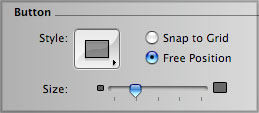
Buttons come in all shapes (Styles) and sizes, well, now that we have iDVD 4. In previous versions of iDVD you were stuck with button styles as links, whether you wanted them or not and they were only one size. We now can have text buttons, button styles, and text and button styles. When you choose 'New Folder' (submenu), Slideshow, or drop movies into the iDVD menu you will get a 'text button' that will link to those items. If you want to apply a 'Button Style' to the Text button, select the button and from the Style dropdown menu, chose a style. You can change the style by selecting a different one. Button styles are global for the menu you are working on. Apply a style to one button and all buttons will take on that style. If you have applied a button style and wish to remove it, select the button and then select the 'T' in the Styles dropdown. This will remove the button style and leave you with a text button. Once you have assigned a button style, you can remove the text portion by selecting it and hitting delete.

Text buttons - yellow highlight state |

New Folder (submenu) |
Button Style |
Text button - button style applied |
When you have selected button styles, you can place a still image on the face of the button. You can also drop a video onto the face of the button which will play that video, the duration of which is controlled by the 'Duration' slider in the Menu section of the Settings pane in the Customize window. When motion video plays on the face of a button, it will default to starting with the first frame of the video and this may not be what you want. You might have a few seconds of black at the start of your movie. You can change the starting frame of you video by selecting it and then moving the slider until you have the frame that you want as your starting frame, each time the video loops it will start with the frame that you have selected. You may also not want to have the video playing in motion on the face of the button(s). Having a number of buttons each playing video might be a little too frenetic, in this case, uncheck the little Movie box to stop the video from playing, then move the slider to select the 'Poster' frame that you want on the face of your button.

The size of the style button can be changed by selecting the button and moving the Size slider. As with other element controls, changing the size of one button will change the size of all the buttons on that menu. Changing the size of a button will not effect the size of the text that goes with the button. The size of the text can be changed independently, a nice feature. These buttons can be enlarge to a good size, as shown below right (actual size).
I have sampled six of the 14 button styles available, shown below with no text. When the viewer moves the remote control over each button, the button will display a yellow boarder, if there is text with the button, the text will turn yellow as well. Yellow is the highlight color for all text and style buttons.
|
|
|
|
|
|
Submenus
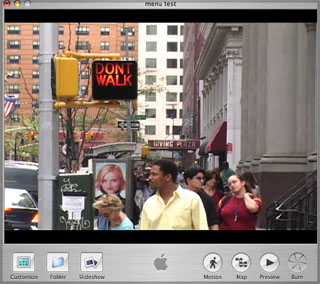
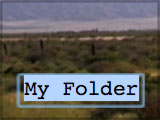
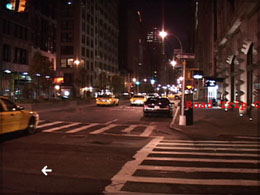
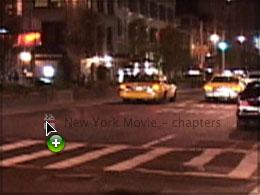
When we click on the Folder button (submenu), two things happen. A text button (my folder) is placed on the menu and iDVD creates a new menu page. To get to the new menu page double click on the text button. When the new menu opens you'll see that it uses the same template as the page you just came from. The drop zone is empty, the title of the template appears, (select and delete), and there is a small white arrow, which is the link back to the main menu, (below left). I could stay with this template, add new art to the drop zone and continue. However, as this page is for 'New York Movie', I prefer to use art from the movie. I will use a freeze frame from from the movie, however, if I drag this still into the menu and release I discover that the drop zone (rear view mirror) is still there. In order to replace the entire menu page with the still (or a motion background), I must drag onto the menu, continue to hold the mouse button down staying clear of the the drop zone, then holding down the Command key, release the mouse button. I now have new background art for this menu, the white arrow remains.
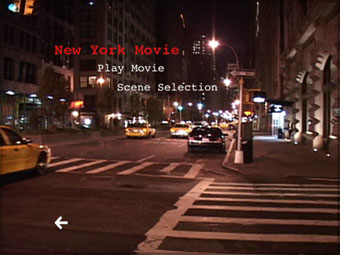
Our new menu is ready, my asset is a FCP movie which has four chapter markers. When I drag my FCP movie onto the menu iDVD does several things.
It creates a text title using the name of the movie. iDVD recognizes that this movie has chapter markers, so it creates two text buttons, shown below left. The first, Play Movie, will play the entire movie, playing through the chapters non stop and then return to this menu. The second text button, Scene Selection is a link to yet another menu. You can have up to 12 scenes per menu. If your movie has more than 12 chapter markers (scenes) iDVD will create another menu that will display the additional scene text buttons. You can have a total of up to 99 chapter markers.
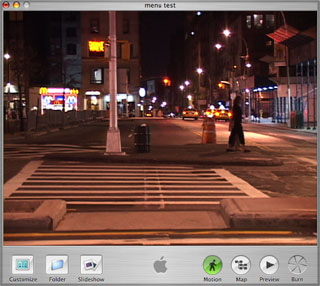
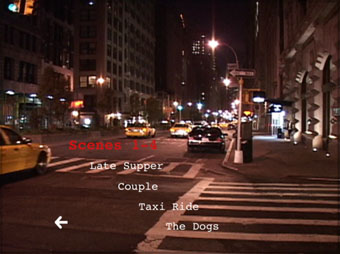
Double click on scene selection button to move to the new menu. You will notice that this new menu has the same background art as the previous menu, below right. The title text for this menu is 'Scenes 1-4', the four scene text buttons have the names of the scenes (chapters) that you assigned when you created the chapter markers in your video editing application. There is a white arrow that will return you to the previous menu.
While building these menus and moving back and forth between then, some of the art disappeared (shades of iDVD 3), it was necessary to reset the art and redo the text several times before I was able to get it to stick.
Chapter Markers
Chapter Markers can be created in FCP, FCE and iMovie for use in iDVD 4. With Chapter Markers it is possible for the viewer to move from scene to scene, via the remote control, using the Scene Selection menu that iDVD will automatically create for you when it detects chapters markers that have been set.
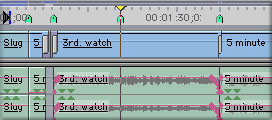
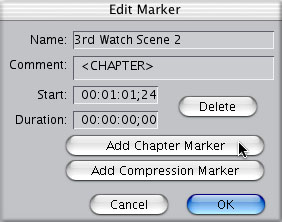
When creating your chapters in your video editing app, do not place a Chapter Marker at the start of your movie as iDVD will create the 'Beginning' chapter marker for you. With FCP and FCE, place your playhead at the position on the Timeline that you want to mark as the start of a scene. Now tap the 'm' key on the keyboard twice to set a marker and open the Edit Marker window. In the name section enter the name of the scene remembering that this is the name that will appear in the iDVD scene selection menu in your finished DVD, so give it a proper name, (you can change the name in iDVD if necessary). Next, click on the 'Add Chapter Marker' button, this will set the chapter marker and will enter "(CHAPTER)" into the comment box. Leave this exactly as it is as this comment is needed for the process of embedding the chapter markers, if you change this, Chapters will not work. Click okay and move your playhead to the next position and repeat the process. There is a limit of 99 Chapter Markers.
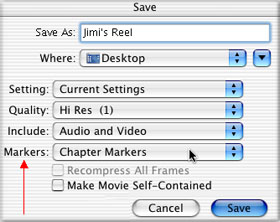
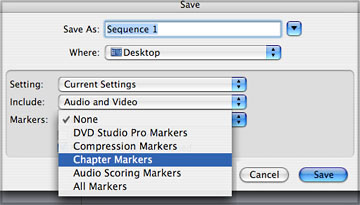
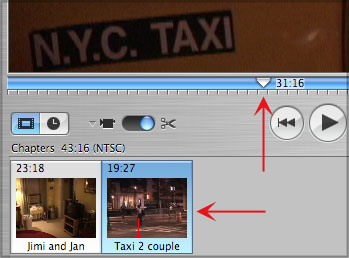
Once you have set all your markers, set an in and out point on your Timeline and File Menu > Export. To export from FCP 3 and FCE 1, select Final Cut Pro Movie. From FCP 4 and FCE 2, select QuickTime Movie. There is an option in the Save box, "Make Self contained". If you uncheck this box the movie that is generated will consist of pointers to your media. The export process will happen quickly and the resulting file will be small in size. This is a good choice if you will be using iDVD on the same Mac as your editing application. If you chose to "Make Self contained" the resulting movie will contain all of the media, it will take longer to export and the file size can be quite large, (about 22 gigs for a 100 minute movie). If you will be moving to a different Mac to work on iDVD then you'll need to have your movie be self contained. In The Save dialog box set the 'Markers' drop down menu to "Chapter Markers", red arrow below. Then click Save. You are now ready to drop your exported movie into iDVD.
FCP 3 and FCE 1 |
FCP 4 |
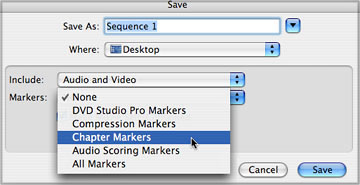
FCE 2 |
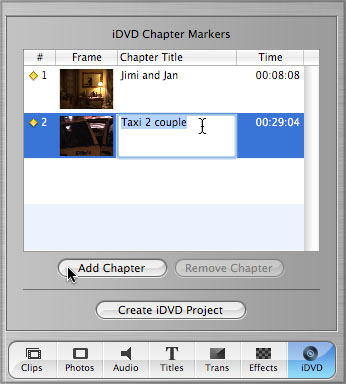
In iMovie 4, select a clip in the timeline viewer and move the playhead to the place that you want to set your chapter marker. Click on the iDVD button lower right, then click on the 'Add Chapter' button. You can click on the clip name to the right of the clip image and change the name to an appropriate scene name. When you have finished with your iMovie and added chapter markers, which should be the very last thing you do, click on the 'Create iDVD Project' button. This will launch iDVD and move your movie with chapter markers into iDVD.
Slideshow
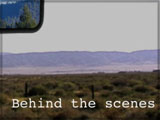
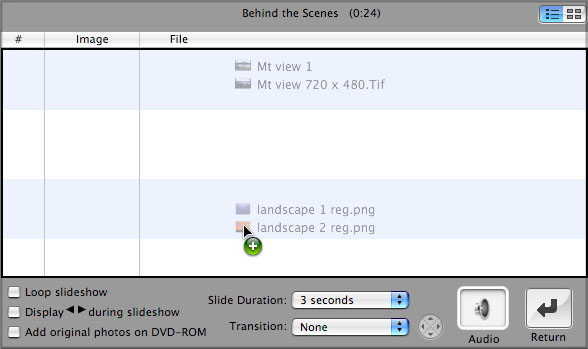
We have already added a Slideshow link (Behind the Scenes) to our main menu. Double click on it to open the Slideshow Editor. The first thing to do is to bring the photos into the editor. You can select images from iPhoto in the Media pane or you can drag images in from the Finder. Bottom left of the slideshow editor are several controls. Loop Slideshow, for continuous display. Display arrows during show, gives the viewer the chance to move forwards and back using the remote control and a must when you have set Slideshow Duration to 'manual'. Add photos on DVD-ROM will add the photos in the slideshow to the DVD as separate data files for use on computers.
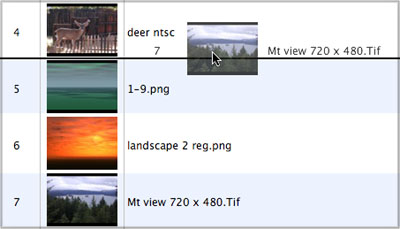
Once you have your images inside the menu editor you can re arrange their order by dragging them to a new position. The slideshow editor offers two 'views' of your photos, (upper right in the editor), icons or list. List view is shown below. It would be helpful if we could make the thumbnails smaller. You can remove an image by selecting it and hitting the delete key.
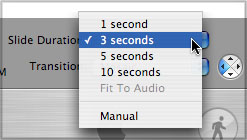
You can control the display duration of the photos to; 1, 3, 5, and 10 seconds. If you have added audio to your slideshow then 'fit to audio' will be available. There is also a 'Manual' option which would be used in conjunction with the 'Display arrows' during slideshow so that your viewer can navigate through the show.
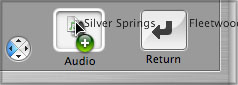
There is an Audio well into which you can drag your background music, either from the iTunes media pane or from the Finder.
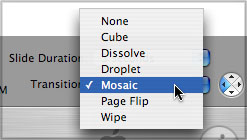
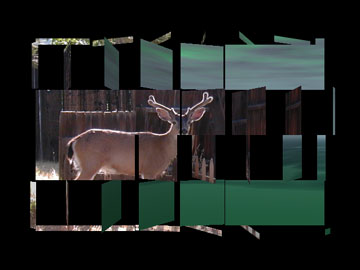
You can apply transitions to the photos in your slideshow, just as you can apply transitions between menus. You control the direction of the transition using the control circle to the right of the transition selection menu. Below right, there is a large black border around the photo because, in iDVD Prefs, I have 'Always scale slides to TV Safe area' selected.
You can have up to 99 photos per slideshow and iDVD will support a total of 99 movies and slideshows per DVD. To exit the Slideshow Editor, click on the black 'Return' arrow at bottom right of the window.
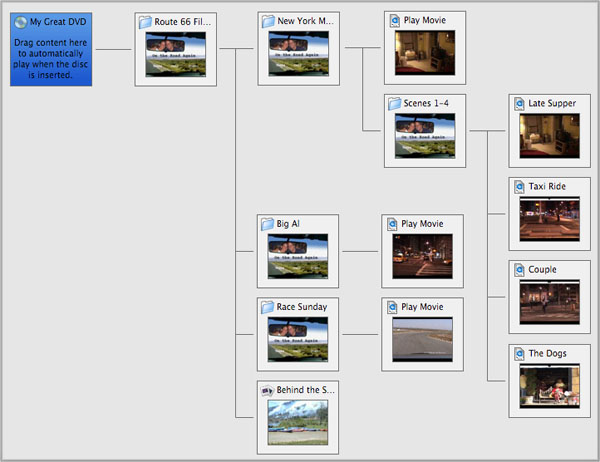
Map
This is a new feature in iDVD 4 and is a graphic flowchart of all your menus, submenus, movies and slideshows. This is an excellent feature as it allows you to see how the different elements and assets in your DVD are linked together. You can also create an auto play DVD by opening the Map view and then dragging a movie or slideshow from the Media pane or Finder and dropping it onto the 'AutoPlay' icon (blue square far left in the map window). Then select the auto play icon and from the Advanced menu, select 'loop movie'. You can remove an autoplay movie or slideshow by dragging it out of the project (autoplay) icon. While in Map view you can jump to any menu, submenu, movie or slideshow by double clicking it's icon in Map view. To exit Map view, click on the Map button.
Archive Project
When Apple started shipping boxes with SuperDrives, iDVD was supplied so that we could author DVDs on the Mac and use the SuperDrive to burn them. As Apple provided iDVD for use with the SuperDrive, adding a DVD optical burner to your Mac or using an external FireWire DVD burner would not work. iDVD can only see a factory installed SuperDrive. If your Mac did not come with a SuperDrive, or if your SuperDrive went South on you, (like mine did), you are out of luck. This left a lot of people out in the cold. In fact, up until now you cound not even install iDVD on a Mac that did not have a SuperDrive.
New in iDVD 4 is the 'Archive Project' feature. This feature can be used to backup your iDVD project but more importantly, it can be used so that you will be able to build your iDVD project on one Mac, even one without a SuperDrive and then transfer the entire project to a different Mac, one that has a SuperDrive. When a project is 'Archived', all elements of the project are written to a new file and all assets, movies, audio, themes and stills, including any images that you may have added to the DVD-ROM section. If you have used a special font in your iDVD project, you must insure that that font is available on the Mac you are moving your project to, if the font is missing, no text will appear, yikes.
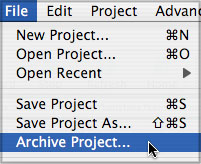
To archive your iDVD project, select 'Archive Project' from the File menu and click on Save. In the Save dialog box, name your project and select a destination to save it to. If the Mac that you are moving the project to does not have the theme used in your project or if you have built a custom theme, then select 'include themes'. If you have already encoded your project then you can move the encoded files as well. If the Mac you are moving it to is faster than the one you are working on, you may wish to uncheck 'include encoded files', or not bother encoding in the first place. If the encoded files are not included, then the archive process will go much faster and the archived file will be much smaller. The archive process my take some time, you will be provided with a progress bar.

Burn
When you have finished building your DVD and feel that you are ready to burn it, "Preview" and test the complete DVD. Using the on screen remote control, move through all your menus and links. Test everything to make sure that your DVD is as you want it and that everything works.
Before you start the burn process make sure that the Motion button is enabled, also check in the Settings pane to ensure that the little speaker icon in the audio 'well' is turned on. Check this for each menu that has background audio.
iDVD 4 can process up to two hours of video and you can check the amount of space used in the Status pane in the Customize window. You will need to check to see how much open space you have on your hard drive as well. If your DVD runs to two hours, you'll need about 4.5 gigs of space to encode (.m2v) your video and then an additional 4.5 gigs of space for the build process. Of course the Mac OS needs some additional space as well. While it's true that in OS X you can work in other applications at the same time, I would not not recommend it as the encode, build and burn process is very processor intensive. The amount of time required by iDVD to complete this entire process will depend on the amount of material that you have and the power of your processor. When ready, click on the Burn button, then click on it a second time to start the actual process. You will be prompted to insert a blank DVD-R disc and the process will continue.
The burn process goes through four stages (stages 2 and 3 will take the longest) and you will be provided with a progress bar.
If your Mac has only one hard drive and you are running everything off your boot drive, check to insure that 'FileVault', found in the Security section of System Preferences, is turned off. Energy Saver, in System Preferences, should be disabled as well. Remember that the encode and burn process is very processor intensive, so it would be a good idea not to be working in other applications during this process. Also remember that If you use 'Best Performance' (lesser quality) for your DVD that is under 60 minutes in length, and you have selected 'Enable background encoding', wait until the encoding process has been completed before you Burn and be sure that Motion is turned on.
Note, When iDVD 4 first shipped there was a problem burning on a G5 dual processor when 'Best Performance' was selected in the iDVD Encoder Settings section. With the 4.0.1 update this problem has been fixed iDVD 4.0.1 update TIL.
Never having been a big fan of VHS as final output from FCP, having the ability to author and burn DVD's on my Mac has opened new doors for me. iDVD got me started and even though I now use DVD SP 2 for my DVD authoring, I am delighted to see that iDVD 4 has continued to grow and add advanced features, all the while maintaining it's ease of use. The only shortcoming I see is for those who are starting to use iDVD 4 for the first time, as they do not have access to the iDVD themes in earlier versions of iDVD. I think that Apple should make all iDVD themes available, possibly as a download. This would be icing on an already excellent cake.
Enjoy,
--ken
copyright © Ken Stone 2004
All screen captures, images, and textual references are the property and trademark of their creators/owners/publishers.