
The Basics - Mattes September 24, 2001
Using Matte Filters in FCP
The Basics - Mattes September 24, 2001
Using Matte Filters in FCP
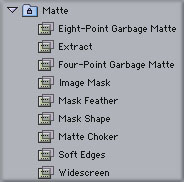
It has been said that Compositing takes place whenever there is more than one video track on the Timeline. Mattes are used in FCP to make parts of a video image transparent so that video on the tracks below can show through. In the Matte Bin of the Effects Browser are nine different filters. A number of these are actual Matte filters, the remaining items are filters that can be applied to the matte filters for additional control. Matte filters are used to shape that area of the video that we want to become transparent and that part of the image that we want to remain opaque.
Garbage Mattes - 4 and 8 Point
The Four and Eight Point Garbage Mattes work in an identical manner. The Eight Point Garbage Matte has four additional crop points that can be set.
Drag either the 4 or 8 point Garbage Matte filter from the Effects Browser, Video filters, and drop on to the clip on the Timeline. Park your playhead over the clip. Double click on the filter to load into the Viewer, click on the Filters tab.
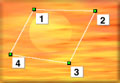
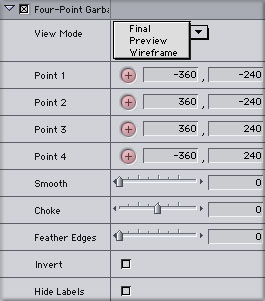
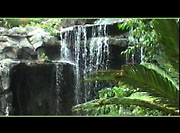
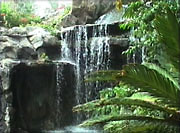
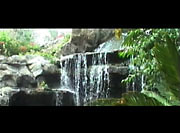
In the Controls box. View Mode defaults to 'Preview' which shows both the numbered crop points and video with the matte active and transparent, showing the video on the track below. My examples below have two video tracks, V1 and V2, with two different landscapes. The Four Point Garbage Matte is on V2. Final Mode shows the video only, no crop numbers. Wireframe, the last option shows V2 only, crop points, and a white line connecting the points.

View Mode - Preview |

View Mode - Final |
View Mode - Wireframe |
There are several other controls used with a Garbage Matte. 'Smooth' which rounds out the corners of each of the Crop points. 'Choke' is used to enlarge or reduce the size of the Matte created by the Crop points. The more 'Smooth' that is applied the greater the changes that the 'Choke' setting will produce. 'Feather Edges' is a must. This produces a semi transparent border around the Matte that will soften or fade the edges of the matte. There is an 'Invert' box which will flop the transparent and opaque parts of the matte. 'Hide Labels' will hide the Crop point numbers but not the green Crop points.
Default |
Point 1 set |
Points 1, 2 and 3 set |
Final with 'Feather Edges' |
Extract
This Matte offers 4 different views, with 'Source, Matte, Final' offering a 4-up view. I get the best results when 'Final' is selected. There are three control sliders which default to 50. There is an Invert box and 'Copy Results' drop down.
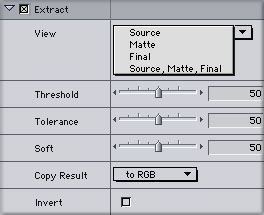
With Copy Results at its default setting of 'to RGB' no compositing ability is present, this filter needs only one clip. The RGB setting will produce a Black and White image (shown below). Adjusting the slider controls will vary the look. Adjusting the Soft slider higher than 50 will produce more tone. Moving the slider below 50 will add contrast.
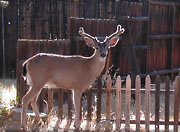
Normal video - no matte |
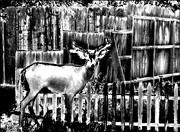
Copy Results - to RGB |
The Extract filter definitely becomes more interesting when Copy Results is set to 'Alpha'. In this mode the filter works like a luminance matte and composites with a clip that is below it on the TL. Using the sliders you can control which parts of the clip (V2) become transparent and which parts stay opaque based on brightness.
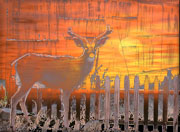
Alpha - Threshold 57 - Tolerance 58 |
Alpha - Threshold 23 - Tolerance 38 |
Image Mask
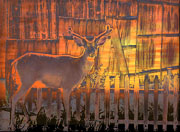
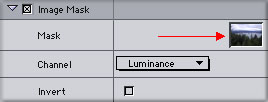
The Image Mask filter uses only one video clip on V1. In its Controls is an 'Image Well', Red arrow. The video or image that is placed in the Image Well is composited with the clip on V1. This is a simple tool with only two controls. In the Channel drop down is Luminance, the default setting and Alpha which does not seem to do much. The other control is 'Invert' box which when checked reverses the composite.
This filter works by using the image in the Image Well as a mask. Whatever parts of the Well image are light in color become transparent allowing the video from V1 to show through. Those parts of the image in the Well that are dark become opaque blocking out the image from V1. Clicking on the 'Invert' box will cause the light parts of the image in the Well to become opaque and the dark parts to become transparent.

Video on V1 |

Image used in 'Image Well' |

Final Composite |
Mask Shape
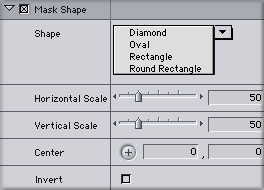
The Mask Shape Matte is a very useful tool. It has four shape presets which you can then modify to fit your needs. Diamond, Oval, Rectangle and Round Rectangle. The size of the shape is controlled by the Horizontal and Vertical settings which have sliders and numeric fields for control. I have found that using the numeric fields to size the Matte is the most useful. Clicking on 'Center' button in Controls and then clicking in the Canvas window will set the position of the Matte. There is an 'Invert' option for reversing the transparent and opaque parts of the Matte.
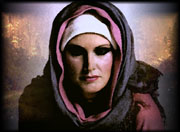
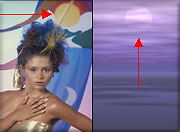
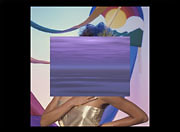
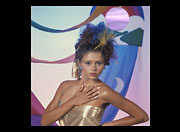
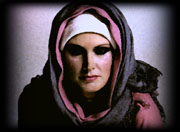
In my example below I want to replace the yellow sun in the fashion shot with the purple moon from a landscape, Red arrows below. I have placed the fashion shot on V1 and the landscape on V2 with the Mask Shape filter on the landscape. This filter opens with the Rectangle shape as default and a matte size of 50 x 50 pixels. You will notice that at this point you can not see the purple moon in the landscape image.
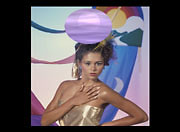
I have selected the 'Oval' shape from the Shape menu. Using the 'Center' button I have moved the matte up so that it now shows the purple moon. I then further change the shape and size of the matte so that it traps the moon.
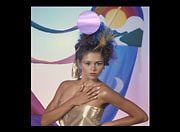
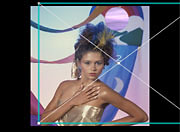
In the Canvas window I have selected 'image+wireframe' from the Canvas drop down menu and dragged the purple moon over the yellow sun in the fashion shot. With the moon in position I got the 'Mask Feather' filter from the Effects Browser and place it on V2, loaded it into the Viewer. Setting 'Soft' to '1' feathers the matte and softens the edges of the matte blending the two composited images.
Mask Feather
The Mask Feather is not a matte. It is to be used in conjunction with a matte and is used to soften the edges of the matte. This is a very useful filter as it is used to blend the edges of the image being composited.
I have started out with one image on V1 to which I have applied the Shape Mask filter. After shaping and sizing the matte I placed the Mask Feather filter on the clip and set 'Soft' to 63.
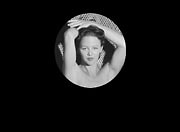
Mask Shape |
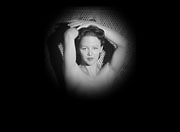
Feather Mask at 63 |
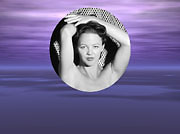
Moving my image with Mask Shape and Mask Feather up to V2, I placed a landscape beneath on V1. My one last adjustment was to lower the Opacity of the clip on V2 to blend it further into the landscape image.
Mask Shape - no Feather |
Feather Mask - Opacity reduced |
Matte Choker
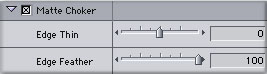
The Matte Choker filter is used in conjunction with a matte. It's purpose is to change the size of a matte in very small increments. Very small. By default this filter's control 'Edge Thin' is set to 0 in the middle of the slider. Moving the slider to the left into negative numbers will make that matte smaller, moving to right will make it larger. Again, I am talking about very fine adjustments of maybe a pixel or less. The other control, 'Edge Feather' will soften the edge but like 'Edge Thin' the amount of change is minuscule.
Soft Edges
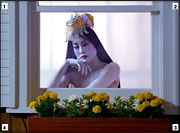
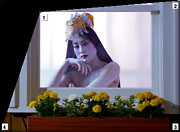
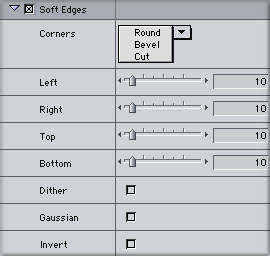
The Soft Edges filter creates borders around the video frame. The width of each border is independently adjustable. When the border is set there is a choice of three different corner styles; Round, Bevel and Cut. There are two ways to soften the edges of the borders. Dither, which does not seem to do much, and Gaussian, which does a great job of blending the Edge area.
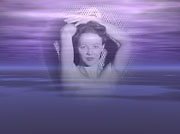
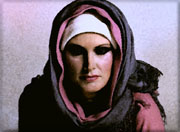
I really like this filter for two reasons. If there is only one clip and Soft Edges is applied to it, the Edges or borders default to black. You can achieve either very soft edges or more dramatic ones if you like. But this is just not an Edge filter, it's a compositing filter as well. In my example, below right, the fashion clip with Soft Edges filter on it has been moved up to V2 and a landscape image placed below it on V1. Now the width of each border becomes an area of transparency allowing V1 to show through. The lighter colored areas of V1 will show through the edges area. In my example I left the top and bottom edges set to 5. I brought each side edge in by 60. The edge of each boarder is almost completely transparent. This creates a very soft look. I then used Gaussian to smooth it out even more.
No Filter |
Soft Edges - V1 only |
Soft Edges - V1 and V2 Video |
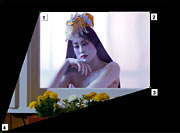
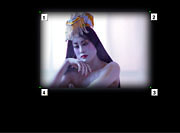
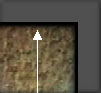
In my examples I show the full video image including 'overscan' with 'Soft Edges' applied to the outer borders of my video image. As you know TV sets crop out the outer edges of the video that we see in the Canvas window, the 'overscan' portion. For this reason it is essential that you have 'Title Safe' turned on in your Canvas window to judge where to place your borders so that they will not be cropped out. It is equally important to view your work on a NTSC monitor as well.
I have demonstrated this problem below. The first image shows a full frame from my Canvas window. The Soft Edges filters is applied to the outer edges of the Canvas image (White arrow). The second image shows the same shot with Title Safe turned on. As you can see, my Soft Edges are well outside the Title Safe area (Red arrow) and would be lost when viewed on a TV.

Widescreen
So you want that Widescreen look. This filter will do it for you. It offers 7 different prebuilt Widescreen formats. In addition to these seven sizes there is a 'Border' setting which will allow you to further tweak the exact size of the borders. You can use the 'Border' control to add a colored border as well. You can click on the 'Color' box which will produce a 'color wheel', you can use numeric values or you can use the 'eyedropper' to sample a color from your video to use as a border.
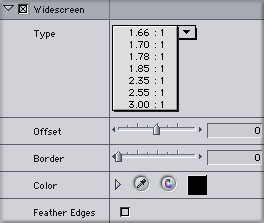
In the example lower right I used the eyedropper to sample some green from my video. My border size is set to two. There is also a 'Feather Edges' option which will slightly soften the border edges. This setting has no controls and only one option for the amount of the Feather.
2.35 Widescreen |
1.78 Widescreen - Border at 2 |
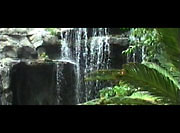
This filter would be some what limited except for the fact that it has one last control called 'Offset'. When you choose the format type from the Widescreen controls you may not be happy with the placement of the video between the top and bottom borders. With the 'Offset' control you can actually shift your video up or down within the fixed borders. Shown below, the first video on the left, is full frame video. The middle example shows 'Offset' set to -100 which displays the top part of the video and crops out the bottom part. The example on the right shows a setting of +100 which displays the bottom part of the video cropping out the top. Somewhere between these two settings will be an optimum position for your video.
Normal Video |
Offset -100 |

Offset +100 |
As mentioned before it is essential that you have 'Title and Action Safe' overlays turned on in the Canvas window when you set your Widescreen. You must always view your final output on NTSC to check your work.
Conclusion
The Matte Bin in the Effects Browser really is a mixed bag. The two Garbage Mattes and Mask Shape Matte are workhorses of FCP compositing. Mask Feather and Matte Choker are often used as well. You will often find that when matting out images for compositing work, one matte will not do the entire job. It is often necessary to apply several or different mattes to the image to accomplish the job.
Enjoy,
--ken
copyright © Ken Stone 2001