
The Basics - Stylize October 8, 2001
Stylize Filters in FCP
The Basics - Stylize October 8, 2001
Stylize Filters in FCP
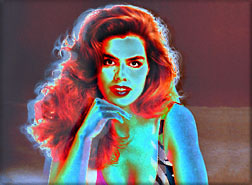
The Stylize filters in FCP are fairly simple to use. Two of these filters; Anti-alias and Replicate are single purpose filters. The other filters have more controls to help create unique looks. I know that some of these Stylize filters will look familiar to you.
Anti-alias
The Anti-alias filter is a speciality filter intended to fix problems with 'Aliasing'. Aliasing, or 'stair stepping' is often seen with type or any lines that do not run in a perfectly horizontal or vertical direction. This phenomenon is most often found in DV video and is a result of compression. Video formats that use less compression have less of a Aliasing problem. This filter has only one control, 'Amount', which works a bit like a softening or feathering filter. It fills in the areas around the stair stepped lines or pixels with image of lighter values, smoothing out the stair stepped image.
In the picture below left, you can clearly see the stair stepping on a letter of type. In the picture below right, you can see the effects of the Anti-alias filter. The problems is that this filters softens everything in the video image. To use this filter properly you first would want to duplicate your video on the video track above. Working with the top layer of video, isolate the stair stepped area with a matte and then apply the 'Anti-alias' filter to this layer. This will soften the stair stepping without softening other parts of the video.
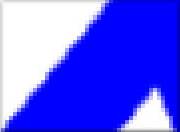
Anti-alais - No effect |
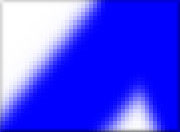
Anti-alais - Amount 6 |
Diffuse
Apple calls this filter 'Diffuse', I call it the 'glass shower door' filter. It works by looking for areas of contrast in your video and then shifting those areas over as colored splatter. Areas of no contrast are uneffected. 'Direction' (circular control, Blue arrow) in the Control panel, determines which direction the effect shifts. You will use this control later. Radius sets the amount of effect. There is, of course, a second 'Direction' control (drop down menu, Red arrow). You should set this second control first. Looking at your video, try all three settings, each one gives a different look. Then use the "Direction' control at the top, the circular one (Blue arrow), to explore the effect.
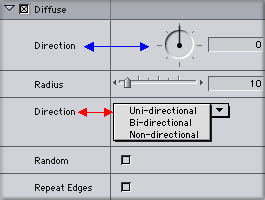
The 'Random' control gives a small tweak to the pattern of the scatter. When the effect shifts the image there can be a black border. To eliminate borders check the 'Repeat Edges' box. Of course these borders are way outside of the 'Title Safe' zone and will not appear on NTSC.
I like this effect, my NTSC monitor hates it. Many of FCP effects filters can generate video noise that will have the image on your NTSC dancing. To calm things down add the Gaussian Blur filter to the clip. Enter a numeric value of .3 or .5. Just enough to take the edge off. It works. Okay, so it only looks a little like a 'glass shower door' filter.
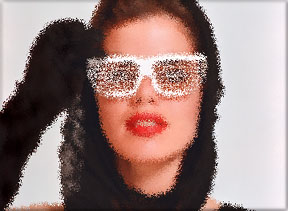
Direction 221 - Radius 4 - Uni-directional - Repeat Edges |
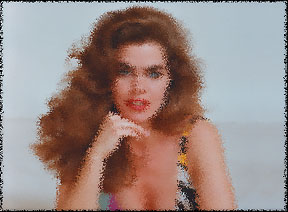
Direction 246 - Radius 2 - Bi-directional - no Repeat |
Emboss
The Emboss filter is used to create a 3D quality like an embossed letterhead. We see an embossing as 3D because the raised image throws a shadow telling our eyes that parts of the image are raised up. The Emboss filter simulated this look by creating shadow and highlight lines around the image. Like a Drop Shadow filter we can control the Direction of the shadow and highlight lines by using the 'Direction' control.
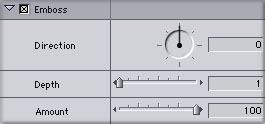
The 'Depth' control sets the thickness of the shadow and highlight lines. Too much Depth and the image becomes unrecognizable. The 'Amount' controls the amount of effect that is applied. At 100 the effect is absolute. The image will be monochromatic with black, white and colored outlines. There will be a little color tone that breaks through. As the 'Amount' slider is lowered more of the actual video shows through. A setting of 0 will produce no Emboss effect.
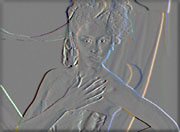
Emboss 0 - 2 - 100 |
Emboss 117 - 2 - 100 |
Emboss minus 350 - 3 - 100 |
Find Edges
This filter looks for the edges between high and low contrast areas of the image and then draws colored lines to represent the contrast borders. The balance of the image goes to black. Lowering the 'Amount' setting down from 100 will introduce the regular video back into the image. A setting of 0 produces no effect.
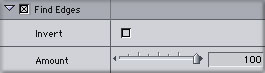
I don't know that I care much for the default setting. There is an 'Invert' box which reverses the image. This produces an image that looks like a sketch drawn with colored pencils. I find this to more appealing and this 'Inverted' image can be added to other filters or video through compositing.
No effect |
Find Edges - Default |
Find Edges - Invert |
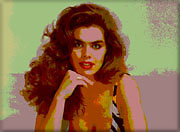
Posterize
I have reviewed other FCP filters and have said that some act like a 'Posterizing' filters. Well this is a Posterizing filter. We are provided with three sliders, one each for the three color channels, R-G-B. The lower the settings of these sliders the stronger the Posterizing effect.
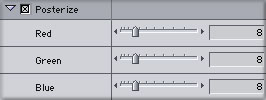
I find the effects offered by this filter to be a bit simplistic and bland. If you are looking for more of a Posterizing 'psychedelic' look check out Channel Control filters.
Posterize 17 - 4 - 4 |
Posterize 4 - 2 - 60 |
Posterize 6 - 4 - 2 |
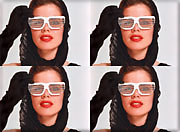
Replicate
This filter will allow you to repeat your image multiple times in both a horizontal and vertical direction. You can repeat your image up to16 times in either or both directions.
You will notice in the middle image below, that there is distortion in the 4 x 2 replication. To avoid distortion the numbers of horizontal and vertical repetitions must be the same.
Replicate default - 2 x 2 |
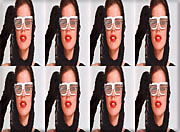
Replicate 4 x 2 |
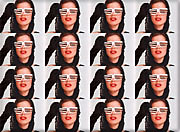
Replicate 4 x 4 |
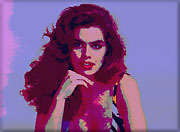
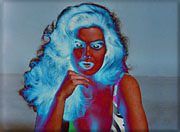
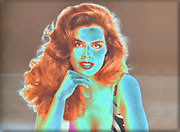
Solarize
The 'Solarizing' filter works by shifting the midtone parts of the images towards either highlight or shadow but reverses the values as it does so. Midtones that are light will become darker, midtones that are dark will become lighter. This produces a 'color negative' effect. An 'Amount' setting of 100 will produce maximum effect.
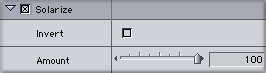
This filter does have an 'Invert' box which reverses the image producing what I think is a more interesting image. The 'Solarize' filter is lacking features like color control. What you see is what you get. To enhance the image you might want to add some other filters like the 'Proc Amp' filter for color adjustment.
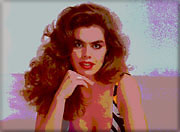
No effect applied |
Solarize effect at 100 |
Solarize effect at 100 - Invert |
Conclusion
These filters have value as they are. However, adding additional filters on top of these Stylize filters will enable you to get much more out of them.
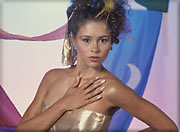
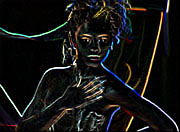
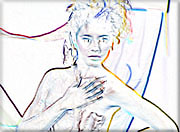
The image below was created by placing a clip twice on the TL, one clip exactly above the other. I applied the 'Emboss' filter to the clip on V1, Direction of 180 and Depth set to 10 for maximum effect. The clip on V2 got the Solarize filter set to Invert. I then used the 'Hard Light' composite mode on the clip on V2, combining the two clips. Lastly the 'Proc Amp' and 'Contrast' filters were applied to the clip on V2.
Enjoy,
--ken
copyright © Ken Stone 2001