September 8, 2008
By James Fields
If you are like me, you have been recording in HD, or HDV since the cameras
first became available. Filming with a HD/HDV camera is nice, video looks great
in the timeline, looks great finished, but you can't watch it on your HD TV,
unless you burn it to HD DVD using DVD Studio Pro (on
DVD-Rs).
But why is there no solution using Apples Final Cut Studio? Today there is.
We explore the Blu-ray work flow, also known as Blu-ray Disc (BD), from burner purchase, installation, editing in Final Cut Pro, and burning all without leaving the Mac OS. Tiger is preferred but if you are running Leopard you will need to update Encore.
This workflow works for Both HD material Edited in Final Cut Pro, and yes Standard Definition edited with Final Cut Pro.
What we are going to cover is.
- Blu Ray Burner Purchase
- Install
- Software needed
- Editing
- Compression
- Authoring
PURCHASE
First thing first, we need a burner. I personally chose an LG GGW-H20L
because it has HD DVD Read support, Lightscribe, Blu Ray Burning, and
regular DVD burning.
I still have a fairly large HD DVD collection along with my Blu Ray's, so I wanted a DVD Drive as a backup, besides, it was a little cheaper than the new version that did not have the HD DVD support.
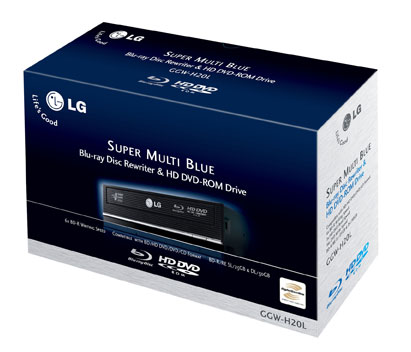
I picked my Burner up at Fry's Electronics for $250.00 US. Fry's web site retail price is $279.00 US, but the store was marking them down due to the arrival of newer models.
INSTALLATION
For Mac Pro owners, there are 3 ways to connect the Blu-ray Burner to
our Macs.
- Internal with IDE
- Internal SATA with Sata Card
- External
You can also put the burner into an external case, I would recommend Firewire 800, or use eSATA if you have an eSATA card.
I went with the IDE route as it was the easiest for me at the time.
There are IDE Blu-ray burners on the market now, Pioneer makes one, however the least expensive price I found was $400.00 US. The price of the LG SATA Burner and Adaptor are less than $300.00, this seemed like the logical way to go. In the event that Apple ever releases a firmware update for the Mac Pro, that opens up those SATA Ports behind the fans, you already have a SATA burner, so you would just remove your adaptor.
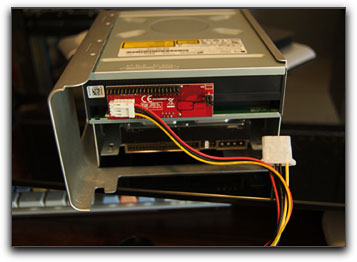
The least expensive Blu-ray setup is with an internal IDE Blu-ray burner, but you will need a SATA to IDE adaptor to make this work.
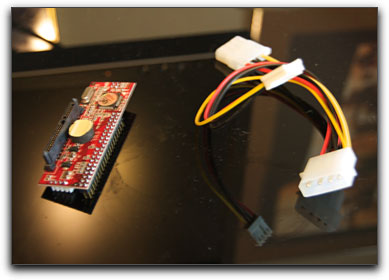
I picked up my SATA to IDE adaptor at a local Comp USA for $14.00 US.
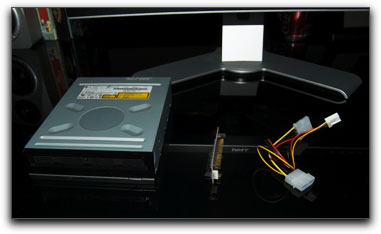
Now remove your Optical Drive sled from your Mac Pro and take out the old Optical drive (if you have a second bay open you can place the new burner in the second bay), remove the screws and replace it with yours. As you can see I used the extra IDE spot in the sled for another Hard Drive.

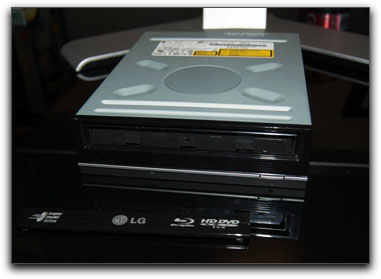
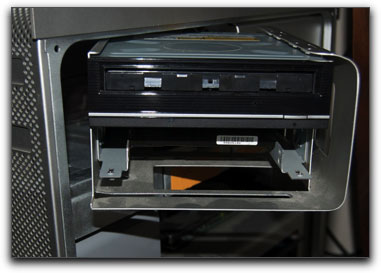
It is necessary to remove the 'fascia' (front cover) of the Blu-ray drive, as we can not install the new drive without doing this. Mac Pros are designed so that when you eject a DVD, the optical drives tray comes out of the front of the Mac Pro and the front cover needs to be remove for this to happen.
The easiest way to do this is connect the SATA to IDE adaptor to the optical drive and insert the optical drive sled part way into the Mac Pro, so that it sticks out enough for the optical drive bay door to open without hitting the side of the Mac pro. Turn on your computer, then go ahead and press your eject key to open your optical drive. Once the optical drive is open gently pry up the 'fascia' at the front of the Blu-ray optical drive tray until it comes off, you can now close the optical drive and slide the optical drive sled all the way into the Mac Pro.
Once the drive in is the Optical drive sled, you will need to plug in the provided power cable adaptor to the back of the SATA to IDE adaptor.
Replace the sled in your Mac Pro and turn on the computer.
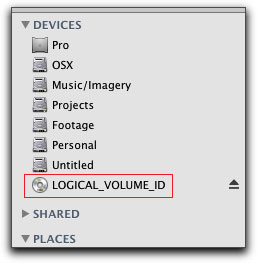
You can test out your new burner by putting in a Blu-ray, or HD DVD movie. The Finder will mount and show the contents of the disc, but it will not be able to play the DVD.
SOFTWARE NEEDED
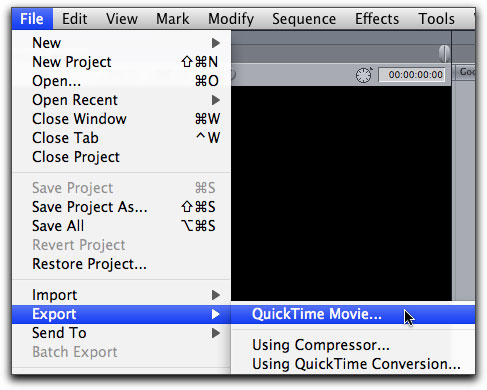
Well this is a Final Cut Pro work flow, so lets get started in Final Cut Pro. I started with a simple 1080P Photo Montage using Images of my daughter, but any project of any format being DV NTSC, any flavor of HD, 720P 24, 720P 30, 1080i, 1080P, etc. will work. Finish your project as you would and Export a Quicktime Movie. you can use a Reference file, or a Self contained movie, the preference is yours.
Now open up Compressor and Import your Quicktime files as you would any other time while working with Compressor.
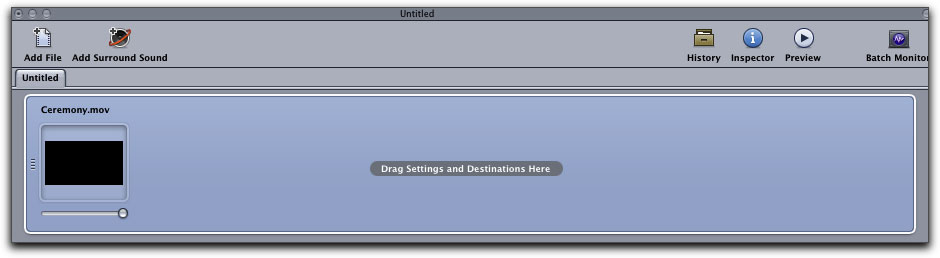
Now, normally we use a pre-configured Mpeg-2 for Standard Definition DVD, DVD Best quality, or Fastest Encode. Today we move to a whole new level of Compression pain.
Mpeg 2 Program Stream.
Background Info on MPEG-2 Streams.Types of MPEG-2 stream: There are three common Mpeg-2 stream types that are used to deliver MPEG-2 encoded video in Compressor(v3.02)
By default, the Compressor Mpeg-2 encoder creates elementary streams. You have to configure the Mpeg-2 encoder to Program streams to create Mpeg-2 files for Blu-ray.
- Elementary streams: These streams contain only one Mpeg-2 content and no audio.
- Transport streams: These streams can contain several Mpeg-2 content channels and associated audio.
- Program streams: These streams contain only one Mpeg-2 content channel and its associated audio.
Once your project files are in Compressor, Navigate to Apple/Formats/MPEG-2 and you will see,
*Elementary Stream
*Program Stream
*Transport Stream

You want to choose Program Stream and apply that to your imported video.
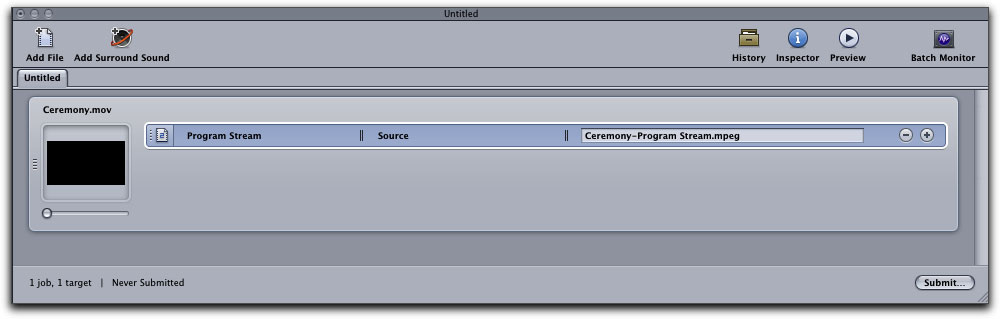
Also. Apply the audio format you prefer, I chose Dolby Digital 2.0 for this project.

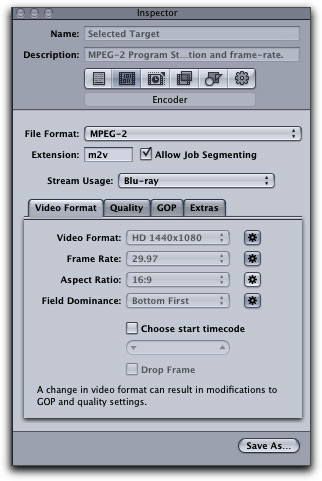
Select the video in the Batch window, then go to Inspector - Video Format tab, under the 'Stream Usage' dialog box, choose Blu-ray.
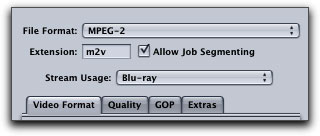
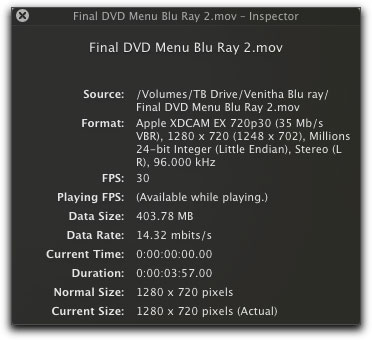
Take note on your video format size as well, you'll need to know if your footage is 1440x1080, or 1920x1080 for Encore later.
Once your project has made it's way through Compressor, it is now time to talk about Encore.
Encore CS3 has some pretty neat features. One of which is the ability to create your DVD project, then choose to burn it to a Standard DVD, a Blu-ray DVD, or Flash for your Website.
If you are running Leopard you will need to follow this process. Install Your Encore CS3 as you would any other program. Do not launch Encore but go directly to your /Applications/Utilities/Adobe Utilities folder and run the updater for CS3. In order to avoid issues with Encore and Leopard you must be updated to Enccord 3.0.2.007.
Encore CS3 came out before Leopard, and therefore has some issues with Leopard. So do your updates and then open Encore CS3.
I can not take the time to show you all of the many features of Adobe Encore CS3 right now, however, I will show you what's needed to author a Blu-ray DVD.
Authoring with Adobe Encore is very similar to DVD Studio Pro, you will still need to create timelines for your media, ensure end jumps are set, links are proper, and keep a close eye on project size.
Let's go ahead and Open Encore now for the first time.
Once you choose to open a new project, you are greeted with a "New Project" dialog box.
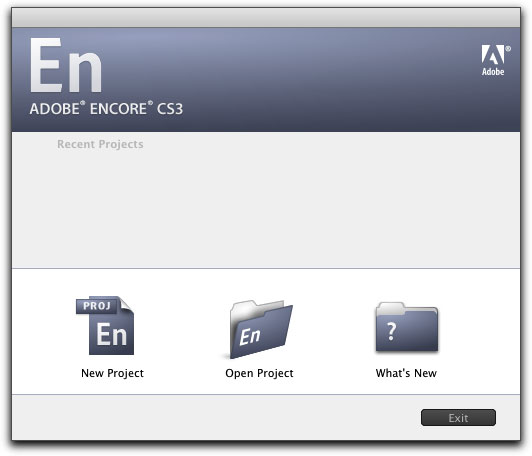
Choose New project and let Encore load.
Encore asks you for information on your new project.
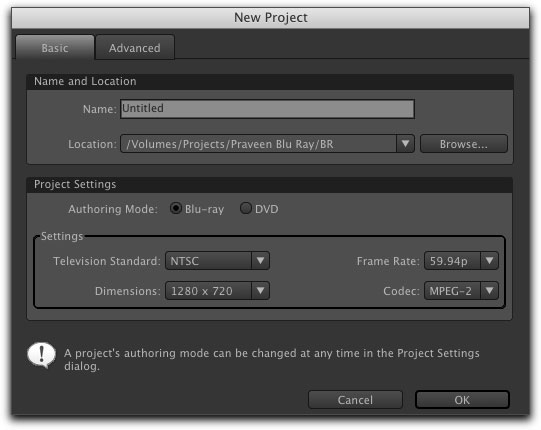
In this box we are asked who/what/where?
Give your project a name.
Choose the save location.
Authoring mode ( SD or Blu-Ray)
Settings.
We need to choose our settings, remember when I told you to write down your video format size, well that is because Encore needs to know. If you are not sure or did not write it down, go back to Compressor and check the Inspector for your video file, or repeat the process of setting up Compressor and check the Inspector.
Choose your Codec "Mpeg-2" as we will be using Mpeg-2 Program Streams.
A quick note about the choice of Mpeg-2 and the other option H.264. I am sure some of you will see this and wonder if you can H.264 instead of going the Mpeg-2 Program Stream method.
I tried it once and let me tell you about the nightmare.
Yes you can build a Blu-ray using H.264 Quicktime files, however, Encore wants to "Transcode" all of the H.264 files before building or burning. My project tab showed me a project file size of 19.86 GB, however the project was almost 40 GB in size in reality, and when Encore did Finish the "Transcoding" of those H.264 files, 32 hours later (yes 32 hours), I was left with a folder full of ... Program Streams. So save yourself the trouble and stick to the much faster and more configurable Compressor method using Mpeg-2.
Your New Projects window should look like this.
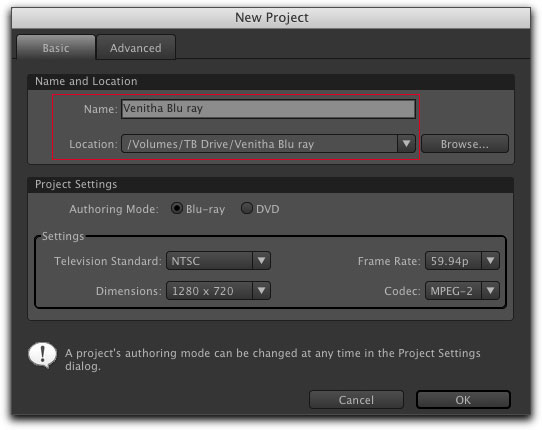
Click OK and move on to the next step, Encore now opens.
The first step is bringing in your Mpeg-2 Program Streams.
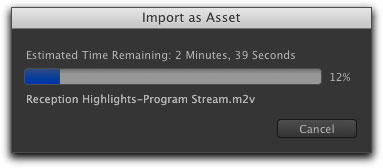
However, a note for you Leopard users. I am on an early 08, 8 Core Mac Pro with 4GB of memory and the Nvidia 8800 video card. It can and will take up to 2 hours to import assets. it is no big secret that Encore and Leopard dont really get along, however maybe it is just me, but if you have Tiger and some of the following issues do not happen to you, please email me and let me know.
Look out for these issues while importing assets,
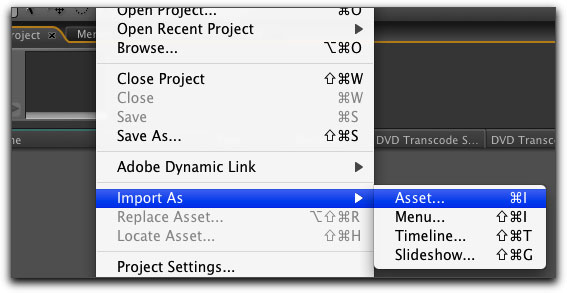
If you choose to import assets by dragging them from the finder to your project tab, Encore can take up to 2-3 hours to process them and sometimes, Encore never finishes processing, resulting in a force quit to re-start the process. Once in awhile, choosing File/Import/Asset from the Encore menu (the better way), will do the same thing. Using Import, I have only experienced this problem twice in the 15 Blu-ray DVDs that I have made. However you can play it safe while dragging media from the Finder to the Projects tab, by dragging one file at a time.
So lets do that, start by importing assets into your project.
Once all of your assets are imported, your project tab should show all of your media.

For those of you that noticed the .mov file among the Mpeg-2 files, lets go over that now.
Unlike DVD Studio Pro, Encore uses Photoshop files for menus. I have only ran across one menu template that has motion, and trust me, unless your making a baby based Blu-ray for your child, you might not want to use it.
So what I did was create a menu in Apples' Motion application. I did everything I would normally do, backgrounds, effects, and put in a title as well (instead of having Encore put the title in for me). I did export the QT menu from Motion as an XDCAM EX 1280x720 30P as this specific project was shot 720P 30 and I wanted all aspects of the Blu-ray to match.
Import the movie as an asset into Encore. Program Streams work just as well. I recommend adding any music for the menu in Motion. I have yet to figure out how to add music to Encore menus.
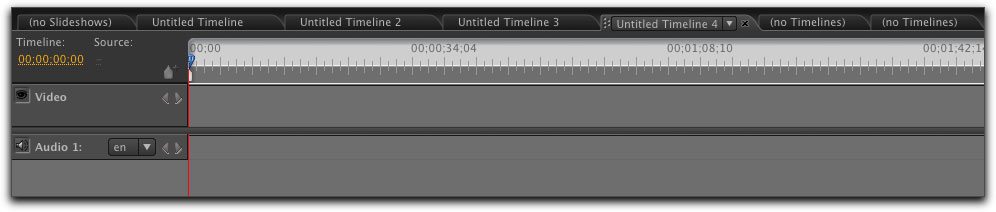
Now it is time to create timelines for your media.
Hit Command T to create all the required timelines for your project, my project required four timelines, so I needed to create four timelines.
Now it is time for the menu.
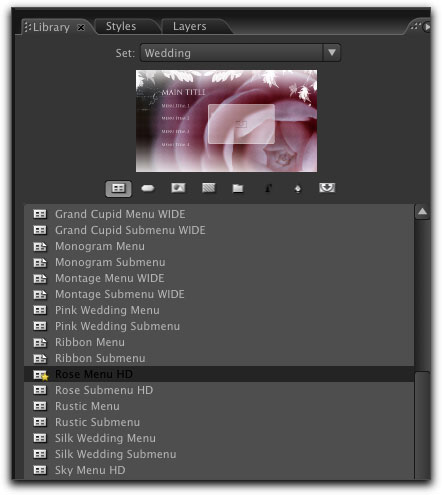
For my specific project, and my lack of expertise with Encore, I chose a template that had the fonts, buttons and layout that I wanted. I wont be using the rest of the template just the links and fonts.
Go to your Library tab and select the menu template you want by double clicking it, Encore will apply the template to the project.
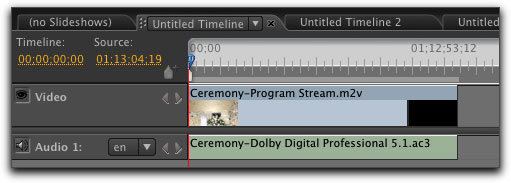
Once done, lets start by adding your media to the timeline. Just select a program stream and drag it to the timeline you created.
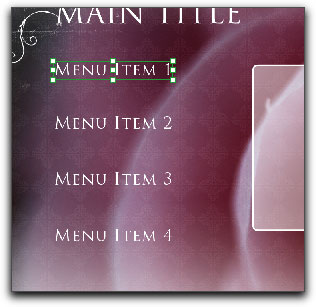
Now go to your menu and click on the button you want to associate with that track.
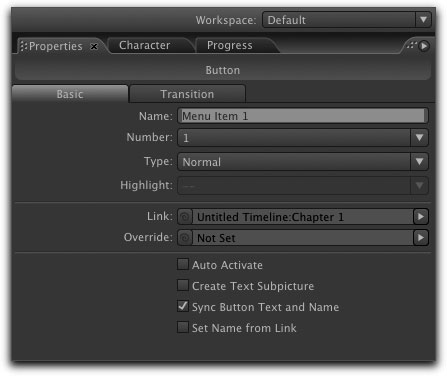
In the properties tab you can name the button, set the link, and change the transition. Set your Link to the track of the media you are currently working with.
Now, click on the timeline and the timeline properties show up.
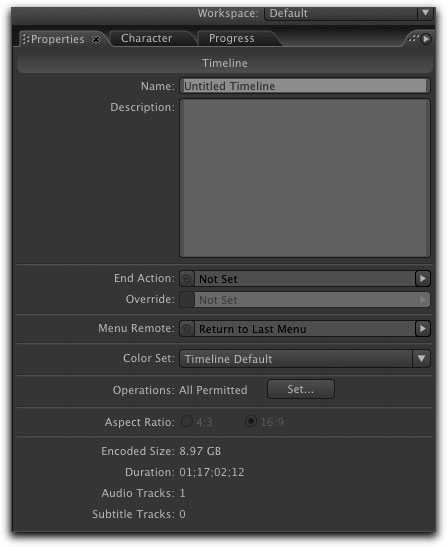
Set your End Action to go back to the menu.
Repeat this process for each of your timelines.
Once your done, if you chose to have a custom motion menu, now is the time to add it.
Select your media in your project bin, holding down the Option (ALT) key drag the movie to the menu and let go of the Option key then the mouse button. You now have a motion menu.
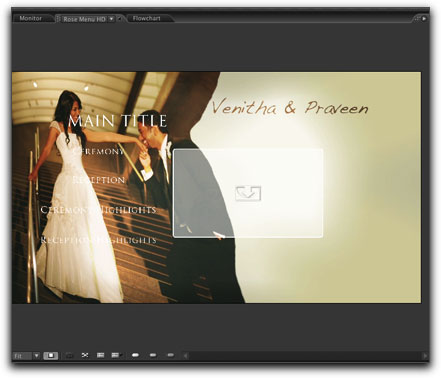
However as you can see, the menus drop zone, and title still show up, and the buttons are in the wrong place.
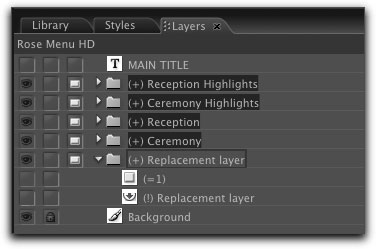
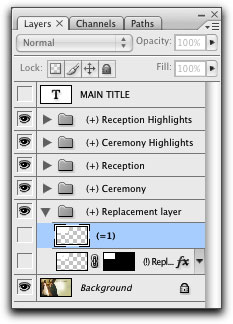
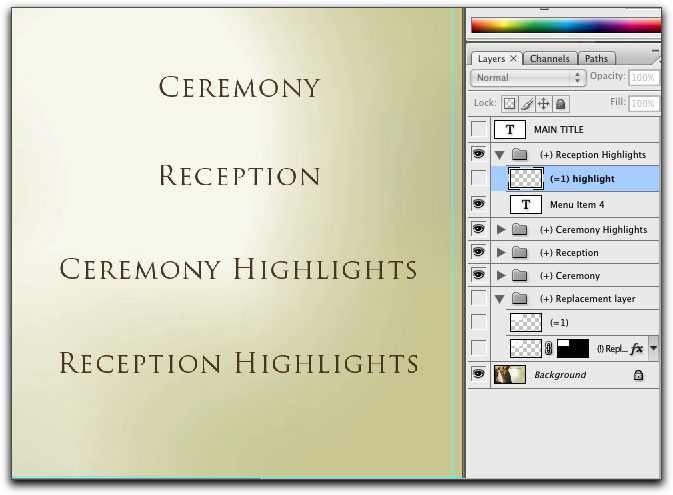
Go to the layers tab for the menu by clicking anywhere in the menu, then by selecting the layers tab.
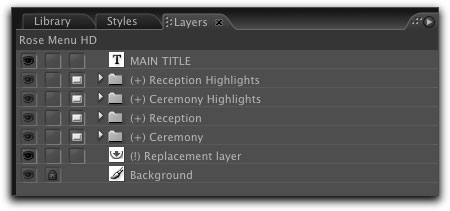
Now you can choose to turn on or off different layers just like in Photoshop.
Once that is done, move over to the menu and drag your mouse over all of the remaining links to select them all, and move all of the buttons to the right of the screen.
Your menu should look like this.

However, you can't see the links.
Right click in your menu and choose Edit in photoshop. The entire menu as is will load in Photoshop.
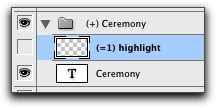
Now go ahead and select your Text layer and make the needed color changes to the Text.
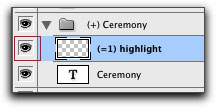
Then, enable your Highlight layer and turn it on, then make the needed color change to it, this is your highlight button.
When you are done, turn the layer back off.
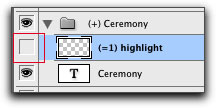
Repeat this as many times as you need to.
The menu will now look like this.
Go to File/Save and then exit Photoshop.
Back in Encore, the changes will take effect immediately.

Remember to save your work often.
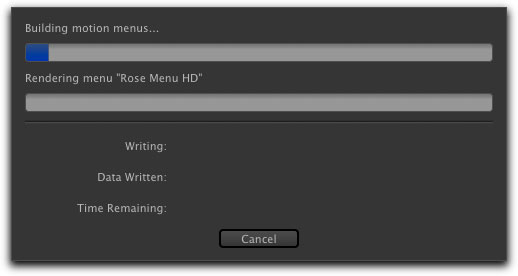
We now need to enable the Motion in the menu. Unlike DVD Studio Pro, we have to Render the menu. Go to File/Render/Motion menus and let Encore Render the menu.

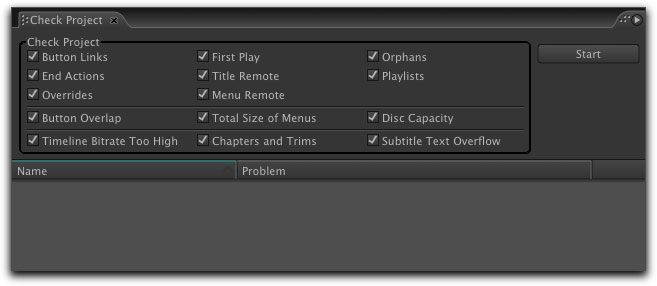
Once your render is complete, it's time to check our build for problems. Go to the Build tab, and choose Check project.
Another window will pop up.
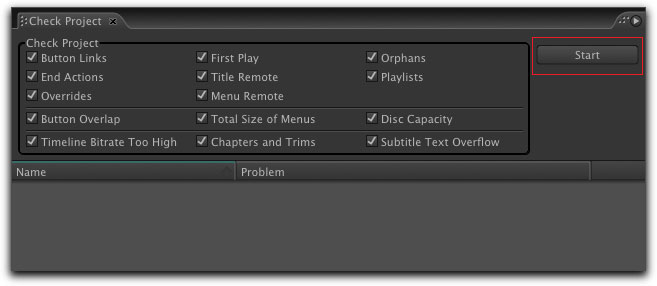
Make sure everything is checked, then hit start. If you have any issues, they will show up like this.
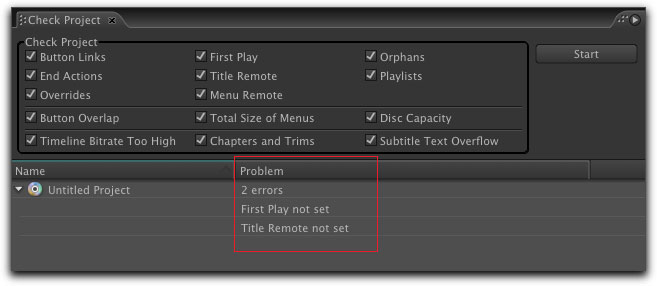
If you have no issues, or fixed the ones listed, then the problem area will be empty.
It is now time to simulate our build. In the tool bar, far right, you'll see a DVD icon with an arrow, click on it.
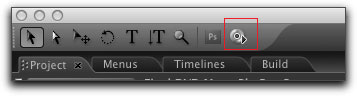
The simulator will open.
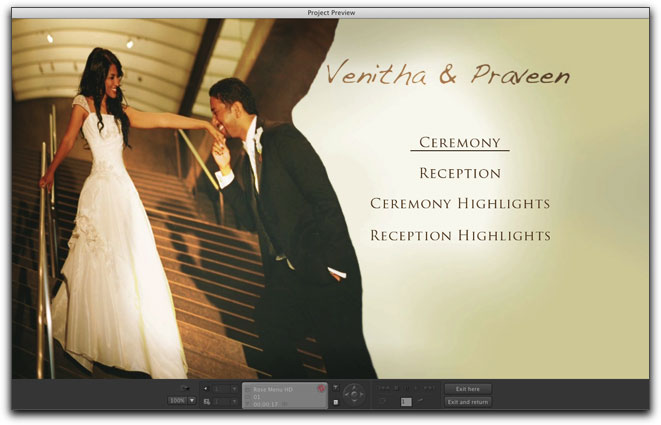
Test your project. If you have any issues, it might be those pesky Highlight buttons. I had alot of trouble with them before I started to lock my layers when making changes to the menu in Encore.
Once everything is checked it is time to burn your project.
Now, a warning.
I would recommend buying a few Re-writable blank Blu-ray discs, or use Re-writes for the first 5-10 projects. Some re-writes are just as cheap as the write once Blu-ray blanks. There are benefits to using BD-RE discs. If the build fails, you forgot something important, you noticed something wrong when you watch it on an actual Blu-ray player, you can always erase the disc and start over.
When I started the transition to Blu-ray, and was working on a workflow, I must have gone through 11 burns that were messed up in some fashion. Even if I was able to get blanks at 10.00 per disc, that would have cost me over 100.00 in beta testing.
So buy some BD-RE media and if necessary use BD-RE media for clients.
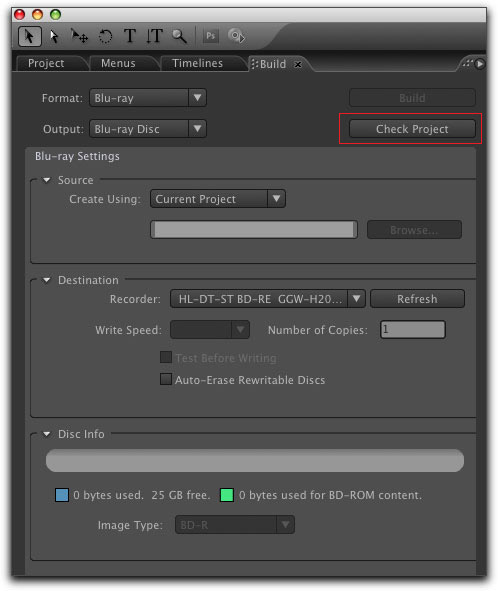
Now it is time to burn your project. Go to your build tab and select build.
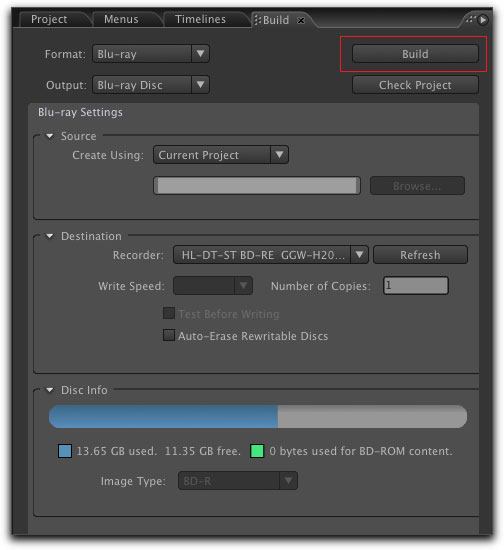
Once you click Build, Encore is on Auto Pilot. This is a long, long process. Encore needs to encode all of the media before burning, look to it taking at least 3 hours before the disc was done.
When done, you willl be the proud owner of a Blu-ray DVD created on Your Mac, edited in Final Cut Pro, and encoded in Compressor.
When will Apple come to the Blu-ray camp with DVD SP? We may never know. I hope that this workflow will help.
Also keep in mind that this is pretty much a beta workflow. If you are like me and monitor your 'time to work ratio', then Blu-ray will cost you more per disc than DVD. With my first try, I spent 90 hours, I am now down to 12 hours from start to finish. If you need to burn more than one then look forward to spending a lot more time, as unlike DVD SP, Encore does not ask you if you want to re-use a Video TS folder, and I have been unlucky with getting Toast to copy a Blu Ray for me.
Note: If you are experiencing problems with playback on your consumer Blu-ray player, such as no playback, please go to the manufactures website and download the latest firmware update for your player. Once updated your player will be able to play burned BD media. The Sony S300 DOES need to be updated to firmware 4.20, the Sony S300 is the most common BD player out right now and one of the most inexpensive models, it is also the model I used to proof my BD when writing this workflow.
James Fields started in this industry editing small videos for friends, and
graduated to full time editing 3 years ago. After working for a
company in Dallas he ventured off to work on his own company Black Mug Media, specializing in HD weddings in Dallas/Fort Worth, as well as commercial events. He and his wife's big break came when they were
invited to film a concert event for Dramarama back in February 2006.
That project has led to multiple concerts with 80's bands such as
Animotion, When in Rome, Gene Loves Jezebel, and of course Dramarama.
Their company is now involved in shooting television pilots and shows in Dallas.
are either registered trademarks or trademarks of Apple. Other company and product names may be trademarks of their respective owners.
All screen captures, images, and textual references are the property and trademark of their creators/owners/publishers.