June 27, 2005
By Andrew Balis
There is a great new set of video generators included with Final Cut Pro 5 called Boris Calligraphy 2. The company Boris FX is well known for its full featured titling and effects products like Boris Red and Boris Continuum, and has supported Final Cut in the past with Boris Calligraphy 1. Final Cut's built in text generators are okay for basic titling, but if you need more, and you don't want to go to another application then you should check these out.
There are now four generators from Boris:
- Title 3D
- Title Crawl
- Text Scrambler
- Vector Shapes
Title 3D and Title Crawl have been much improved and updated from version 1. In general, the original titles have been improved by allowing for more animating options, like being able to animate a title "typing on" to the screen or animating tracking and scale, and many more options as well.
The Text Scrambler generator is a new and interesting variation on Title 3D. Its good when you want a variety of other options like a word "un-scrambling" to appear as intended, or simulating the look of something being en-crypted or de-crypted. But you can even use this to have the letters fly into the frame, in or out of order, with many variations. It can also be used to create the commonly used effect of a title appearing to jitter around.
Vector Shapes is also new. Its a great but simple shape generator, perfect for text backgrounds. Vector Shapes is a nice way to create a solid, semi-transparent or transparent shape, with all kinds options for adding edges and even animating them.
In this article I'll take you on a tour of these generators, a few tips, some of the highlights and things to look out for. For a more detailed look at all your options, refer to the manual. Its found on the 1st Final Cut install DVD. From the desktop, double click on the disc and go to Documentation folder > Boris Calligraphy User Guide.
The Basics (and a few tips)
First, the basics on working with the Boris interface. If you used this generator in the past, you can skip to the next section.
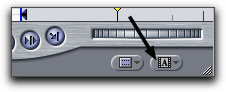
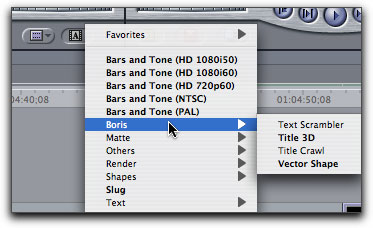
The Boris generators are found in Final Cut by clicking on the Video Generator pop up button in the bottom right corner of the Viewer window. From the menu, there is a Boris category, and from there all four generators.
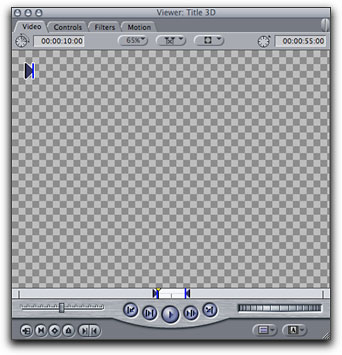
Below, we'll first look at the Title 3D generator, since its got the same basic parameters as Title Crawl and Text Scrambler. Once clicked on, a Boris generator will load into the Viewer. At first the window will appear blank, but that's simply because text is not yet entered into the text entry field.
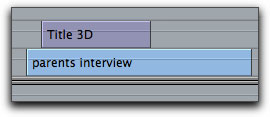
Tip: so that you can view the title in the Canvas after you make adjustments, add the clip to the Timeline, place the Timeline playhead over the clip and double-click it back into the Viewer. An example is shown below, where the clip is placed above a video clip, allowing the title to appear superimposed over the video.
To access the clip's options, click on the Controls tab. Here you'll find two different sets of controls, either globally to all the text, or down to individual characters. To enter text and set different styles click on the click for options button found at the top of the window.
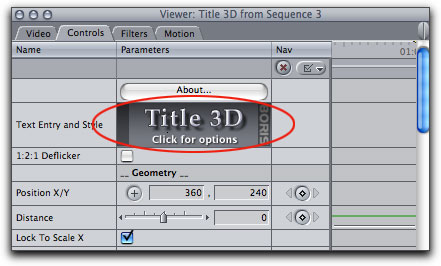
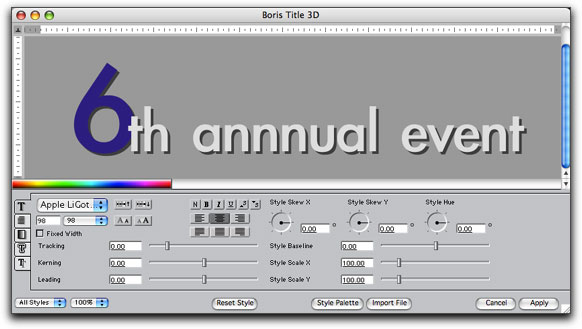
This opens a new window with a Boris interface. Click into the top part of the window to enter text. One of the benefits of this title window is that you can set styles on a character level, allowing for a lot of customization as we'll get into next.
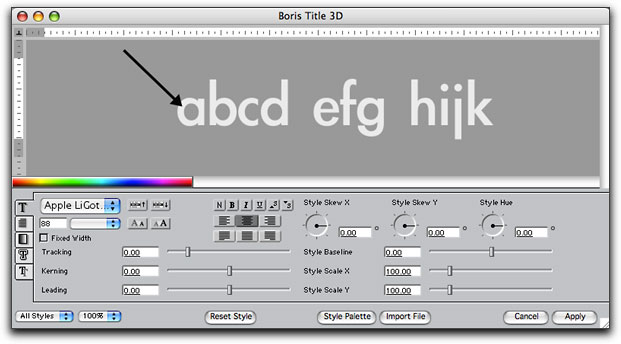
Once text is entered, to make changes, click and drag in the window to select what portion of the text you want to affect.
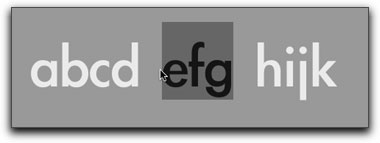
Tip: when you first select the text, it will be actively highlighted, making the selection appear opposite in shade and color. To keep the text selected, and keep the title's appearance normal, click into any of the numerical fields in this window.
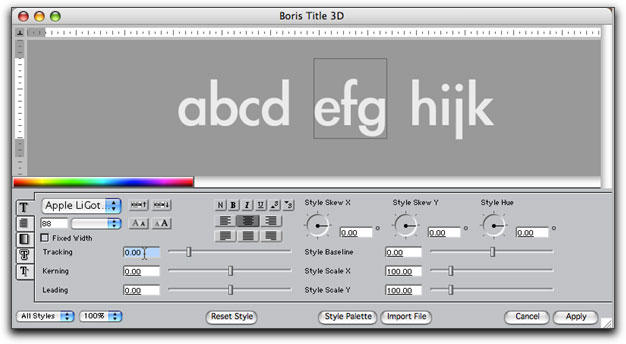
The text will stay selected, as indicated now only by an outline. Boris calls this passive selection.
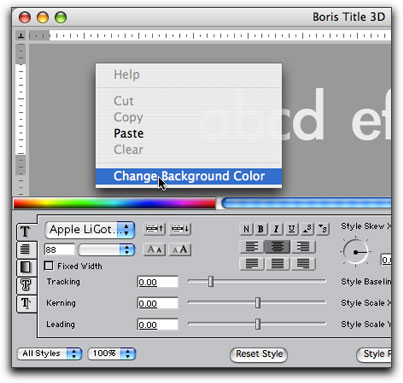
Tip: Since you are not typing your titles directly over your video in the Canvas, it may be helpful to change the background color in this window. Right/click (or Control/click) on any blank part of the gray space in the window and choose "Change Background Color".
This opens the color picker. Choose a specific color or click on the eyeglass in the upper left corner of the color picker and then click on a dominant color in the Canvas to make that color the background in this window.
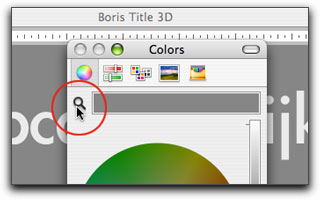
After choosing a color click OK in the color picker to change the background's color. This is only for viewing purposes and does not become part of the final title.

The bottom of this text window has controls for all the usual stuff, like font, size, bold, italic, tracking (spacing between letters), alignment, etc.
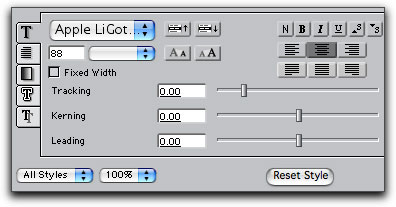
In addition you'll also find parameters to control a letter's scale, aspect ratio and distortion.
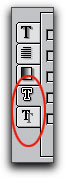
Tip: to re-size all of the text proportionally (especially helpful when different letters are a different size from one another), click on one of these two buttons below.
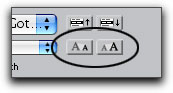
It doesn't matter if any of the text is selected, it will re-size all the text proportionally- small and larger text will still be larger and smaller in relation to one another, but both text sizes will change together.
Another note about the text window- if you plan to enter multiple lines of text, you can expand this window by click/dragging on the bottom right corner of the window.
Color
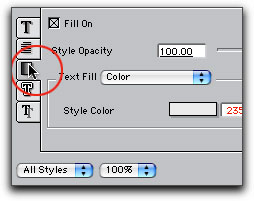
To change a title's color, click on the color tab in the left side of the window. This brings the color "tab" to the front.
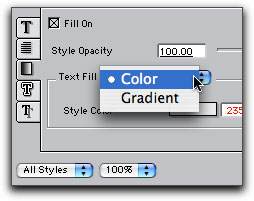
This title tool can create solid colors or gradients, depending on your choice from the menu shown below.
Gradient Options
When creating a gradient, there are many more options than I have room to write about here, but next are a few of those options. After choosing gradient, Click on the "click to edit" button to open the gradient editor. Use the Angle rotation wheel to change the angle of the gradient. Here its set to -90 degrees to create a vertical fade in the text.
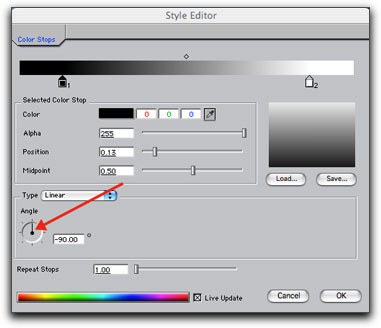
Tip- to see the color changes applied to the letters in real time, click on the button at the bottom of this window labeled Live Update.
To change's the gradient's colors, click on a color stop to select it. Then click on the selected color below to change that color stop.
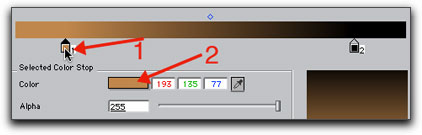
To change another color stop, click on it first. To change the overall contrast or the proportion of one side to the other, use the position and Midpoint sliders.
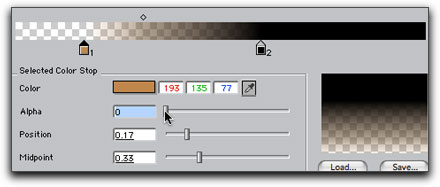
Tip: for semi-transparent text, click and drag left on the Alpha slider and that side of the gradient will become more transparent.
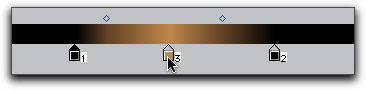
You can also use the editor to create a multi-point gradient. Simply click under the color bar to add another color stop. To remove a stop, click on it and drag it down away from the line.
One other note about color. You can also make the entire text transparent if you have also added an edge or shadow. To turn off a text's color to transparency and only see an outline, un-check the box labeled "Fill On" on the color tab.
To add a multitude of shadow types and edges, then click on the Edges or Shadows tab.
Tip: when adding a shadow or edge, first click on a checkbox then click on the tab across from that checkbox to bring that particular edge/shadow's options to the front.
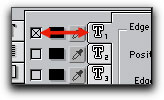
If you don't see your edge/shadow's options being updated in the text window, make sure that the checkmark is on for the tab that's in front. To add additional shadows or edges then make sure to select new tab, and check the box.
Style Palette
Just a brief mention of the built in Style Palette. Click on the button at the bottom of the Boris window labeled Style Palette to open a window with all kinds of presets. On the various tabs, there are options for color, pre-generated gradients (simple and multi-point), all kinds of edges simulating all kinds of things from glows to beveled chrome to a simple black outline.
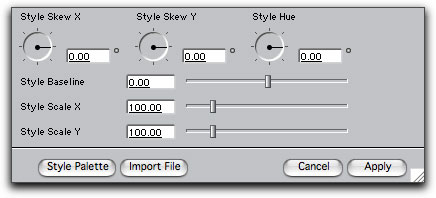
Applying Changes
After you're done, apply the changes you've made here by clicking on the Apply button in the bottom right corner. If the title was already placed in the Timeline, you'll now see it appear in the Canvas.
One of the good things about these generators is their wide array of styles that can be created. Here's just a small sampling.

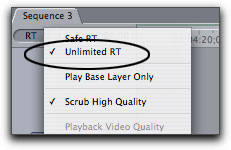
Tip- To play all of the Boris generators in real time, you may need to switch the RT pop up button in the left of the Timeline to Unlimited RT.
Global Controls
Once exiting the window, there is another level of control that you can access on the Controls tab of the Viewer. Every control below the "click for options" button would apply to the title as a whole.
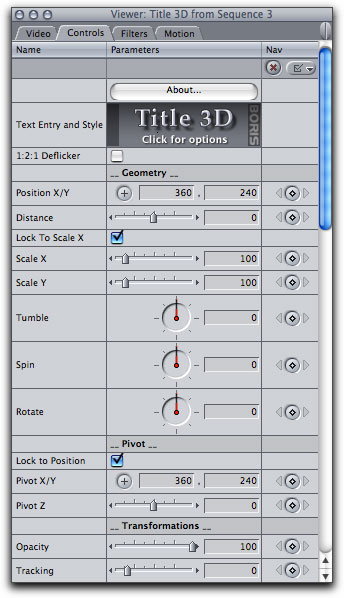
This is where things have really changed from Boris' previous version. Before, we had a certain amount of controls, but many more options have been added to these global settings. The benefit- almost all of these settings can be animated. Of particular note, scale (vector-based) and tracking can be animated- pretty important with today's fads for titles. Additionally, the title's letters can be rotated and or skewed in different ways.
Another important option on this tab: Lock to Position. When this is checked, and you animate tumble, rotation or spin, the image transforms out from the center of the image. For instance, a title wound rotate around the center of the title if the checkmark stays checked. If you un-check this box, then you can use the Pivot X/Y control to create some interesting perspective angles on the title. If you click on the Pivot X/Y crosshair, then click in the Canvas on a new pivot point (in this case on the outside edge of the first character, the number 1).
Then, if you use Tumble, Rotation or Spin above, the image will pivot from that new position.
Type On Effects
Another new set of controls that have been added allow you to have the text type on to the screen, located on the Controls tab near the bottom. These are found in the Type On section. Use keyframes to animate the text from off to on or on to off. For example the next example shows that the Text Type On setting is keyframed from 0 to 100, which would animate the title on to the screen. If this setting is not animated, then there is no effect.
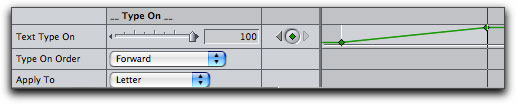
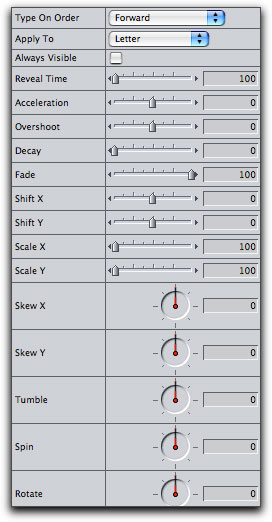
Below this setting are options for whether the text animates on from different directions, sizes, overshooting and bouncing back, position, etc. You can also even control the typed on text in order, out of order, to word, letter or line. One important note here- just by animating Text Type On, most other settings don't need to be keyframed. Just by changing the sliders, these parameters will be automatically animated.
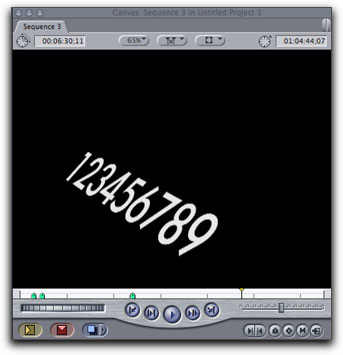
The following is an example of some of these parameters the middle of a type on effect

Vector Shapes
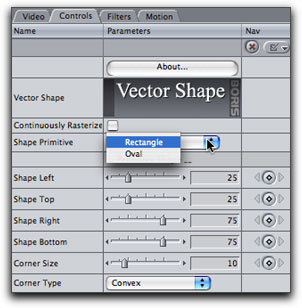
Before moving on to the other titling tools, let's look at a great new generator that can be used as text backdrops but can also be used for a whole host of things. Open the Vector Shapes generator into the Viewer. At first a default shape is shown. When you click on the Controls tab you can access all of the controls. Almost all of these can be animated for any type of look.
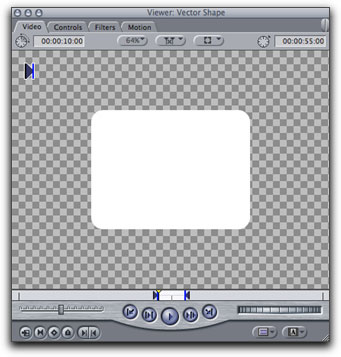
At the top of the Controls tab is an option for the overall shape type, whether rectangular or circular. Because the shapes is so malleable with the controls beneath it, you can create a wide variety of shapes and corner styles.
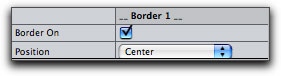
You can also add up to three borders, and even animate them on or off. To turn on a border, click the checkbox Border On.
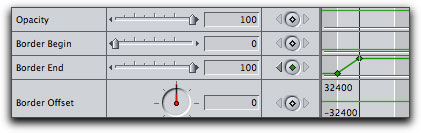
Of particular interest, the borders can be animated to draw on to the screen. This is controlled by adding keyframes for Border Begin and End.
After the border controls, near the bottom of the Controls tab there is a Shape Fill section. Use the Opacity slider to make the shape more or less transparent.
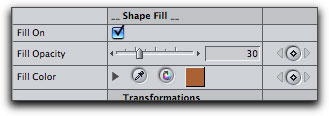

You can change the shape's color, or un-check Fill On to change to be completely transparent. Below is an example of a transparent fill with a thin white border drawing on to the screen. Simple and cool.

Down near the bottom of the Controls tab is a Transformations section where you can make some global changes to the shape and all of these settings can be animated. Additionally, at the bottom of the Controls tab is an option to add a drop shadow to the shape.
Title 3D Crawl
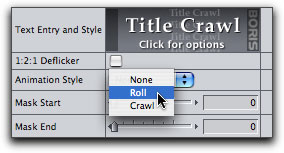
The Title Crawl generator is the same as the Title 3D generator, with two notable distinctions- you can add a roll or crawl for creating end credits or have text crawl along the bottom like a news ticker. It is an automated animation, no keyframes needed. The duration of the title determines the speed of the roll or crawl.
Tip: After entering text into the text window you will notice that the titles don't roll or crawl by default. On the controls tab of the Title Crawl in the Viewer is the menu labeled Animation Style, which is set to None by default. Choose Roll or Crawl from here to turn on the animation. Then play the clip and the titles will move.
One more note about rolling titles, those titles that move up or down. You may find that the title vibrates of flickers as it moves up the screen. There are a couple things to try to improve the text when working with standard definition interlaced video. Click on the 1:2:1 Deflicker checkbox near the top of the Controls tab. This will add a small vertical blur, making it possible that the title's move appears more smooth while moving up the screen.
Other things that may help with the roll- speed up the move by shortening the clip, and use bold text styles with no thin, horizontal lines. Also, the larger the text the better.
Text Scrambler
This text is also a variation on Title 3D. Instead of some of the features of Title 3D, some options on the Controls tab in this title include options for, as you would imagine, how your final text will appear as its typed on to the screen.
Of particular note, the option near the top of the Text Scrambler on the Motion tab, labeled User Text Variation. By default, the slider is set to 0. this means that there will be no change in the text. The higher the number entered here, the more variation from the original text. Therefore, if you animate this setting with keyframes down to 0 then the title will reveal itself by the end of the animation.

This could be something simple like flipping the letters on from left to right, but you can also have the letters randomly appear using the Progress Order menu, or even have letters fly on to the screen with a number of different looks. The Progress slider affects how much of the text is altered, at 0 none of the text is affected and at 100 all the text is affected. As expected, this can also be animated with keframes.
Jitter control
Near the bottom of the Controls tab for the Text Scrambler is a Jitter section.
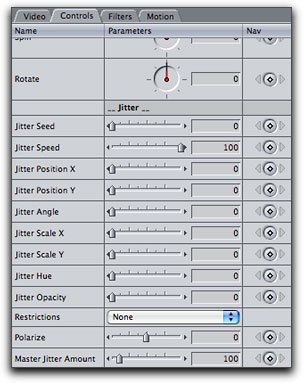
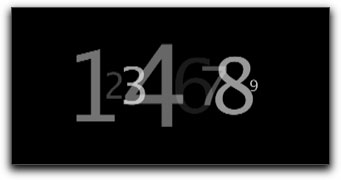
Here you can do a lot of interesting jitter type animations, where text seems to randomly shake or alter in some way. What's really cool about this section is its really easy to use, and no keyframes are necessary. If you change any of the following parameters you instantly get an animation. If you change scale, for example, you will get an effect where all of the letters will randomly change size up and down over the duration of the clip. Below is a frame where opacity, scale (x and y), and Position have been changed. As the clips plays, these parameters are randomly changing.
If you were to change the Jitter Position sliders (X and Y), then the letters would appear to shake around in place, an effect very heavily used in titling.
Of course, you could use keyframes if you want a beginning and end to the effect. The speed and amount of random variation can be controlled with Jitter Speed and Master Jitter Amount.
Overall, I'm impressed. Of course these generators have their limitations, but they are pretty useful for quite a lot of scenarios.
Have fun titling.
Andrew Balis is a cinematographer, editor, post production consultant and Apple certified instructor teaching classes in Final Cut Pro to industry professionals at Moviola Education and UCLA. He is co-author of the Apple Pro Series book Advanced Editing Techniques in Final Cut Pro 4. Andrew co-authored the original Apple certified curriculum for beginner, advanced, and effects classes developed at Moviola Education, and wrote the Final Cut Pro curriculum for the Apple Education/CNN Video Journalism classes offered in the K-12 market.

copyright © www.kenstone.net 2005
are either registered trademarks or trademarks of Apple. Other company and product names may be trademarks of their respective owners.
All screen captures, images, and textual references are the property and trademark of their creators/owners/publishers.