
'White Paper' - Carbon Copy Clone a Boot drive June16, 2003
Carbon Copy Cloner - OS X - Jaguar
'White Paper' - Carbon Copy Clone a Boot drive June16, 2003
Carbon Copy Cloner - OS X - Jaguar

By Ken Stone
To clone or not to clone-and we're not talking sheep here. Back in the 'good old days' of Mac OS 9 and earlier, it was easy to create a second 'Boot' drive. One simply dragged the System folder from your start up drive to a second drive, that was all there was to it. Everything need by the Mac to start up from a drive was contained inside the System folder. Things are very different now in OS X. As OS X is UNIX based there are now a number of invisible files that are need by the Mac to be able to boot from a drive. So simply dragging the Mac OS X System folder to a second drive won't do it. You can't drag what you can't see and those invisible files are essential to creating a boot drive.
So how does one create a second boot drive in these days of OS X? Actually is rather simple using Carbon Copy Cloner © by Mike Bombich. While this five dollar shareware utility is simple to use, it does more than just create a new bootable drive. It also enables you to create an exact clone of your startup drive; applications, files, folders, internet settings, etc. It even goes beyond generating a cloned drive. This utility also allows you to automatically update (from your main startup drive) your cloned drive on a regular scheduled basis. It is also possible with CCC to clone your system from a drive or partition to an other drive or partition.
So why would you want to have an exact clone of your startup drive? Several reasons actually. If you started having problems with your main drive (even a crash) you could reboot from your clone drive and continue on with your work until such time that you could go back to the problem drive and deal with it. Another reason would be for installing OS, QT, or application updates when you are not sure of the outcome or are in the middle of a project and do not want to risk encountering problems that could be caused by updating. There is one addition reason for having a cloned startup drive. I purchased a LaCie external FireWire hard drive which I partitioned and then cloned my OS X drive to. This gives me portability as I can plug the Firewire drive into any Mac, anywhere, and boot from it, putting me right back into my own system. When I cloned my OS X startup drive I included everything, all my applications as well. I need to point out that not all third party applications will run from a Mac other than then one they were installed onto as when you serialize an application it may also include the system ID for the Mac that it was installed into. Thus, for example, Final Cut Pro will not launch when the cloned drive is attached to a different Mac as the system IDs will not match.
Using Carbon Copy Cloner
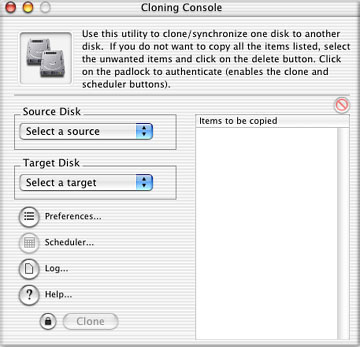
Download Carbon Copy Cloner and place the application in your Utilities Folder found inside your Applications folder. Double click to launch. You will be presented with the 'Cloning Console'.
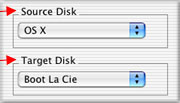
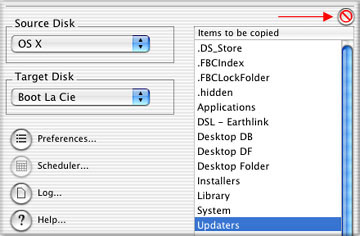
1. Select your Source disk and your Target disk (red arrows, below left). After selecting your Source disk The 'Items to be copied' window will show all items to be transferred, including those invisible files. If there are items that you do not want to transfer to your clone drive, select the items in the 'Items to be copied' window and then click on the red 'delete' button (red arrow, below right). Be careful here and do not delete any files that you don't recognize, they are items that your Mac needs to make a bootable disk.
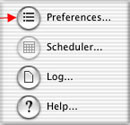
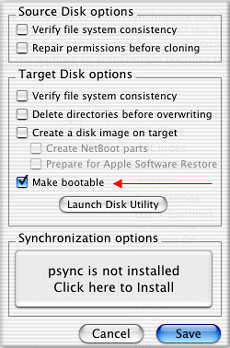
2. Click on the Preferences button (red arrow, below left). This will open the Preference window. The important item here is the "Make Bootable" box (red arrow, below right) which you will want to check. In this same box, at the top, are several boxes for performing disk maintenance on the Source disk before you clone. Always a good idea. Typically I do all my disk maintenance on both the Source and Target drives before I launch CCC. In addition, just below the "Make Bootable" box, is the "Launch Disk Utility" button so that you can do your maintenance from inside CCC. When done click 'Save' which will return you to the Cloning Console window.
3. Click on the padlock (below left) and enter your Administrative Password (below right).

This will activate the Clone button (below left) and will also give you access to the Scheduler dialog box (below right) if you choose to set up the automatic update process.

4. Click on the Clone button and the process will begin. The time that CCC needs to make the transfer will depend on how much stuff you have on your OS X drive. The process can take some time. Once completed, open the 'Startup Disk' panel from your System Preference window and select your new 'bootable' drive. Interestingly enough, even though this is an exact clone I have found that several system settings return to default, 'Energy Saver' will be turned back on and 'Software Updates' may also be enabled.
For me, having a perfect clone of my OS X boot drive, as a backup, gives me a feeling of security in this new world of OS X.
Enjoy,
--ken
Recommended Reading
Care and Feeding of Jaguar - OS X Drive Maintenance - By Charles Roberts
"With the leap to OSX, many have been left in complete confusion about how to keep their Mac OS in shape. No Desktop rebuilding? No inits to troubleshoot? Of course, we all KNOW better than to believe that we should no longer worry about periodic maintenance. Mac OSX Jaguar doesn't look or act like the so-called "old world" Mac OS's, OS 9. It is built on a UNIX system that administrates itself. That UNIX core gives it the ability to repair and maintain itself to a limited degree.
So what do you do? You guessed it. Ya still have to do a regular maintenance routine to keep things in order. The good news is that this is very simple stuff and much of it can be automated, except in the most extreme situations. What follows is a good system to follow on a weekly basis to make your editor bullet-proof, or at least easy to restore in case of disaster." More
copyright © www.kenstone.net 2003