Revised November 5, 2007
May 9, 2005
Using the 'New Burn Folder'
By Ken Stone
Leopard
Using the Finder in Leopard, to burn data to CDs and DVDs, has never been easier or faster with the Leopard's 'New Burn Folder' feature. Discs burnt in the Finder are burnt in a 'hybrid' format (ISO-9660) and are cross platform compatible (Macs and PCs).
- In the Finder, choose File > New Burn Folder.
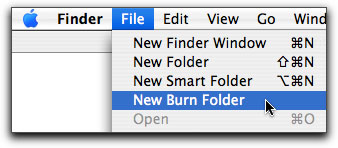
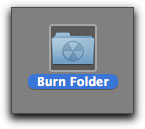
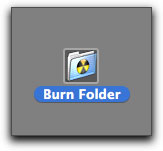
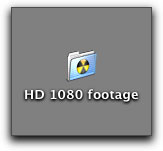
- This will place a new 'Burn' Folder on your desktop
-
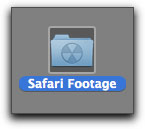
Change the name of your Burn Folder.
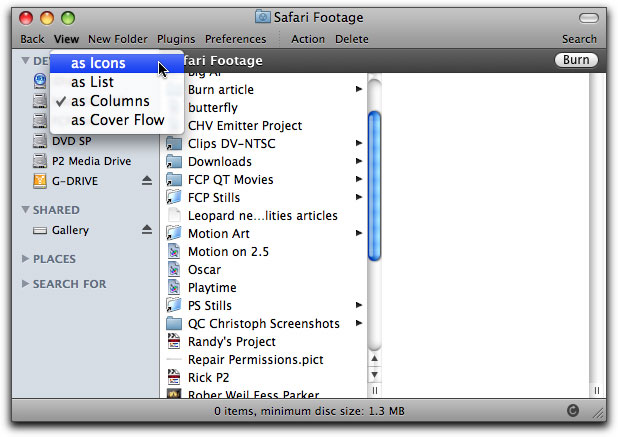
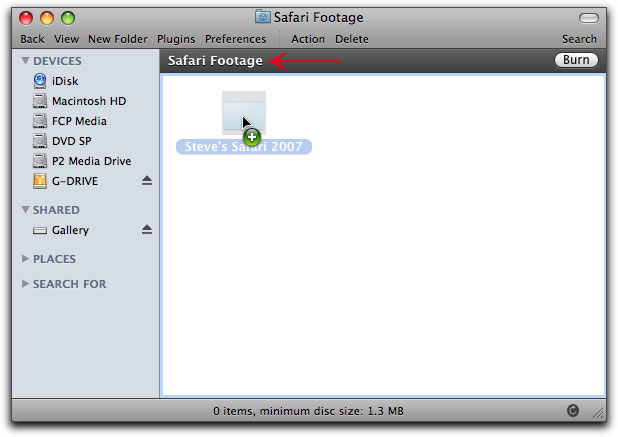
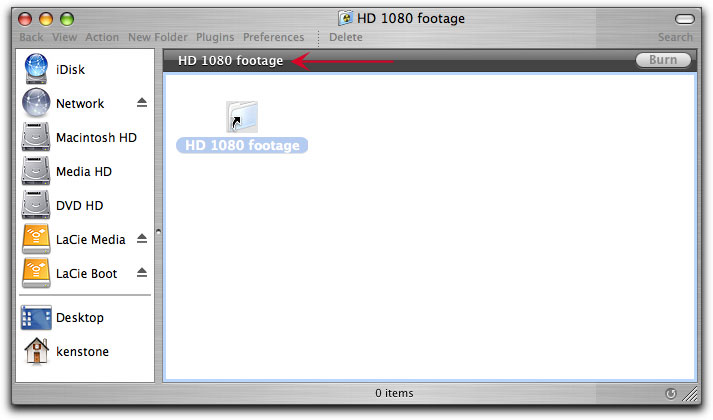
- Double-click on the Burn folder icon to open the folder in a Finder window. You can change the View to something that works better for you, I have chosen icon view.
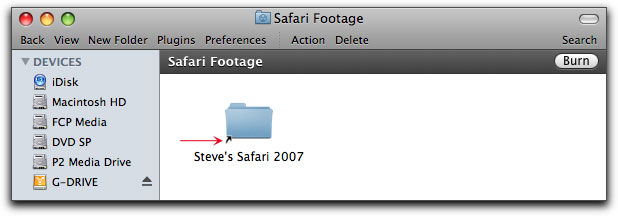
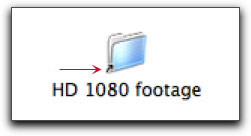
- In the dark gray bar near the top of window you will see the name of your disc, (Red arrow). Drag all the files and folders that you want to burn to disc into the main window.
Before Tiger and Leopard, the Finder first made a full copy of the data to be burnt, which could ... take forever. Now, an alias is created, eliminating the copy step completely, thus speeding up the entire process. There is an additional advantage to using aliases in the New Burn folder. As the alias links back to the 'real' folder, you can add or delete items in the real folder without the need to change anything in the 'New Burn' folder. When it's time to burn, Leopard or Tiger will follow the alias back to the 'real folder' and burn it's current content. This is an excellent way to do regular back-ups of specific folders. For example, you could place your iTunes Music folder and E Mail folder into a New Burn folder on your desktop. Once a week, open the New Burn folder add the date to the Name and click Burn.
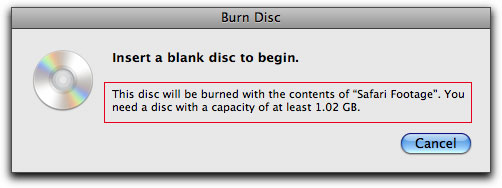
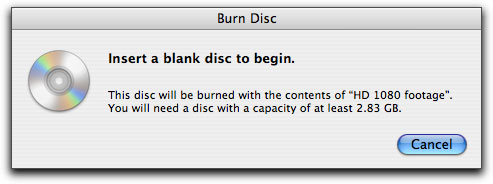
- Click on the Burn button, top right. You will be asked to insert a blank disc. The disc space required for you burn will be noted in this box.
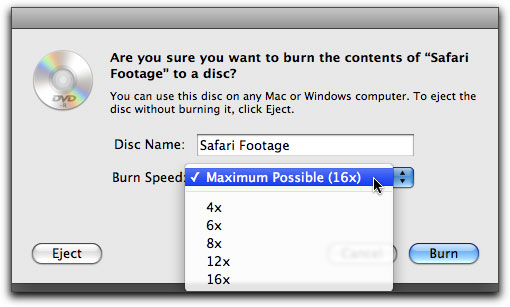
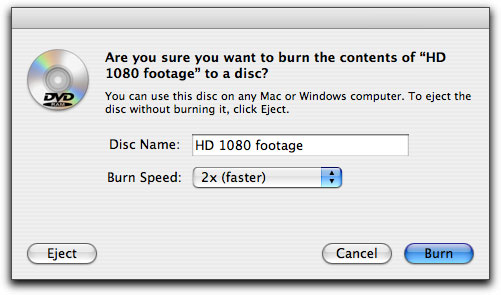
- Insert a blank CD or DVD disc (regular or rewrite-able) into your Burner. The 'Are You Sure' dialog box will open. You can rename your disc if you need to and select your burn speed. You will note that there is no 'Verification' option check box. Verification will run automatically upon completion of the burn.
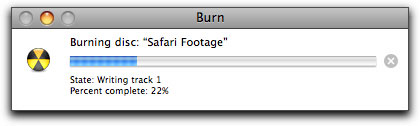
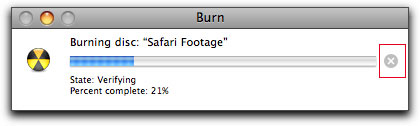
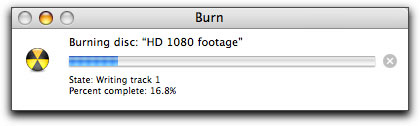
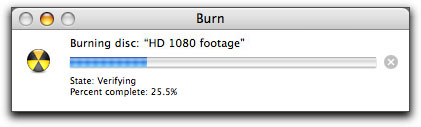
- Click the Burn button to start the process. You will be presented with a Burn Progress bar. When the burn process has been completed you will see the 'Verification' progress bar, you can cancel the Verification, if you wish by clicking on the 'x', red box below right.
- When the process has finished, you will have your new disk mounted on your desktop.

Tiger
Using the Finder in Tiger, to burn data to CDs and DVDs, has never been easier or faster with Tiger's 'New Burn Folder' feature. Discs burnt in the Finder are burnt in a 'hybrid' format (ISO-9660) and are cross platform compatible (Macs and PCs).
- In the Finder, choose File > New Burn Folder.
- This will place a new 'Burn' Folder on your desktop
-
Change the name of your Burn Folder.
- Double-click on the Burn folder icon to open the folder in a Finder window. In the dark gray bar near the top of window you will see the name of your disc, (Red arrow). Drag all the files and folders that you want to burn to disc into the main window.
Before Tiger, the Finder first made a full copy of the data to be burnt, which could ... take forever. With Tiger, an alias is created, eliminating the copy step completely, thus speeding up the entire process. There is an additional advantage to Tiger's using aliases in the New Burn folder. As the alias links back to the 'real' folder, you can add or delete items in the real folder without the need to change anything in the 'New Burn' folder. When it's time to burn, Tiger will follow the alias back to the 'real folder' and burn it's current content. This is an excellent way to do regular back-ups of specific folders. For example, you could place your iTunes Music folder and E Mail folder into a New Burn folder on your desktop. Once a week, open the New Burn folder add the date to the Name and click Burn.
- Click on the Burn button, top right. You will be asked to insert a blank disc. The disc space required for you burn will be noted in this box.
- Insert a blank CD or DVD disc (regular or rewrite-able) into your Burner. The 'Are You Sure' dialog box will open. You can rename your disc if you need to and select your burn speed.
Enjoy,
--ken
[Top]
copyright © www.kenstone.net 2005
are either registered trademarks or trademarks of Apple. Other company and product names may be trademarks of their respective owners.
All screen captures, images, and textual references are the property and trademark of their creators/owners/publishers.