January 8, 2007
Using Final Cut Pro
By Ken Stone
Two cavemen were working on a cave drawing depicting a great tribal hunt when one of the artist realized that they did not have a 'model release' for one of the hunters in the picture. He asked his companion, "How do we blur this guy's face out?"
There is a technique that enables us to obscure someone's face and is often used in the TV show, 'Cops'. So many people associate this technique with the TV show that the process is now called 'Cops'. Of course you can use this process to obscure anything in your video, faces, license plates, signage, even words on a T-shirt. In addition, using this same basic technique, you can replace visual elements of your video, like changing the art on a billboard or sign. This is pretty easy to do in FCP.
For this article we will work with the 'blur' process. To achieve this effect we will need to have two copies of the video clip, one above the other in the timeline. The clip on V1 will be left as is. The clip on V2 (a copy) will have a matte applied and adjusted so that the matte isolates just that part of the video that we want to obscure. With the matte positioned and sized, a blur filter is applied to the matte on V2. When the timeline is played back in FCP, the two clips on V1 and V2 will be composited together, with the unaffected video coming from V1 and the isolated section of the video, the area defined by the matte, which has been blurred, coming from the video on V2.
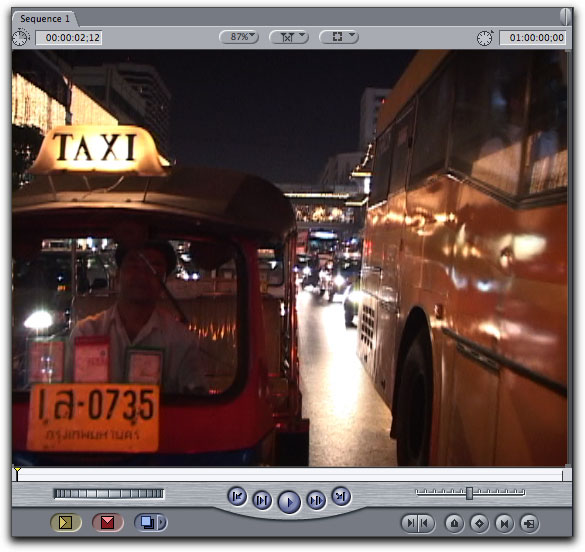
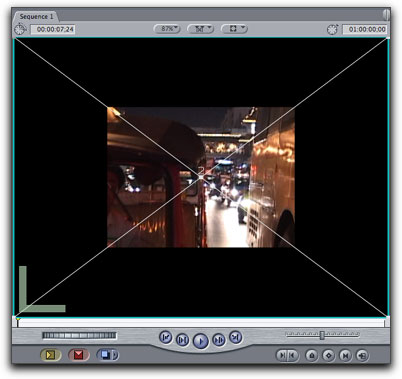
For this example I am going to blur out a license plate in some video shot in Bangkok by Steve Douglas of San Diego, California.
1. Place the clip on V1 in the timeline.
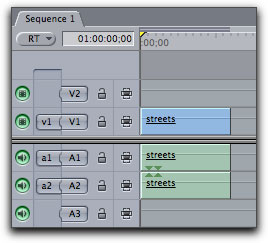
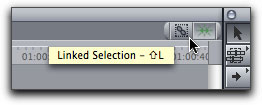
2. In the upper right hand corner of the timeline, click on the 'Link' icon to unlink the audio and video tracks of the clip on V1.

Green Link icon, audio and video tracks linked. |
Grayed out icon, audio and video tracks unlinked. |
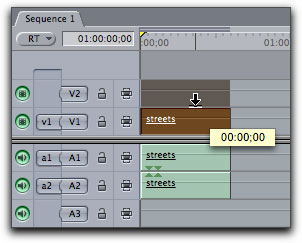
3. Select the clip on V1, hold down the Option key and drag up to V2 to make a copy of the clip. Holding down the Shift key at the same time will constrain side to side movement of the clip.
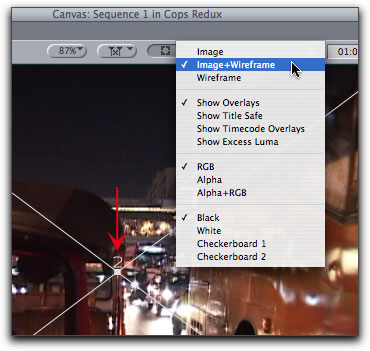
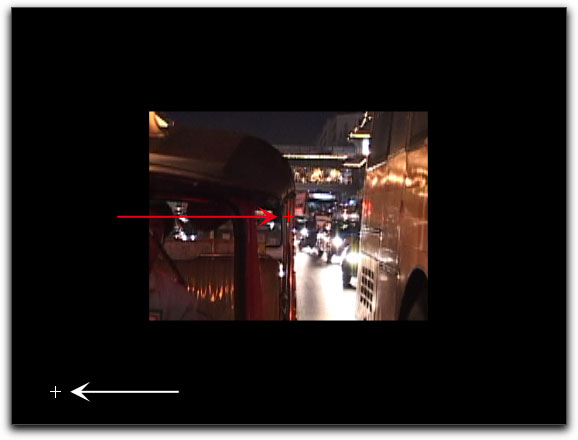
4. When working with multiply video tracks it can be difficult to tell which track is active in the Canvas window. In the Canvas drop-down menu turn on 'Image + Wireframe. You can tell which track is active (selected) in the Canvas window by the track number displayed just above the Wireframe white 'X', red arrow below. If you are comfortable with track selection you do not need to turn Wireframe on.
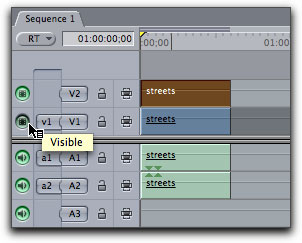
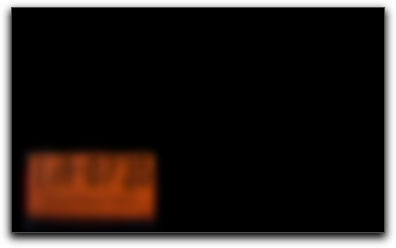
5. As we will be working with the clip on V2 to achieve our effect, turn off 'Track Visibility' on V1 so that we can see only the video of V2.
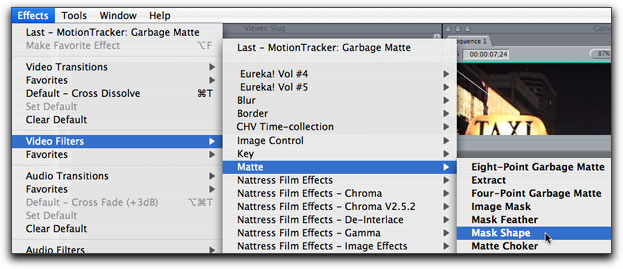
6. Move the playhead in the timeline to the first frame of the clip. With the clip on V2 selected, we are going to apply a matte to the V2 clip. From the Effects menu > Video filters > Matte > Mask Shape.
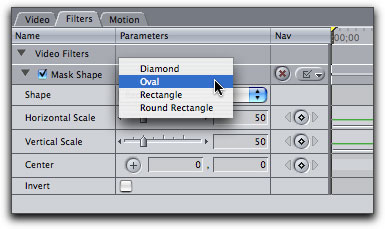
7. Double click on the clip in the timeline to load it back into the Viewer window. Click on the Filters tab to reveal the Mask Shape settings. The Canvas window shows the Mask Shape matte at its default settings. The shape is set to 'Rectangle' and is centered in the Canvas window.
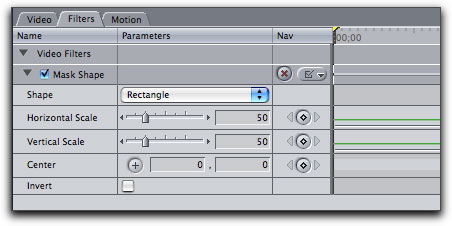
8. The default Shape is a Rectangle which is perfect for working with a license plate. If we were working to obscure someone's face we would select the Oval shape.
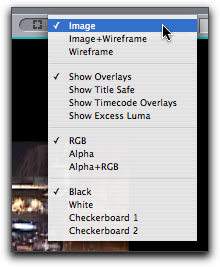
9. At this point it would be helpful if we turned off 'Image + Wireframe by selecting Image in the Canvas drop-down menu.
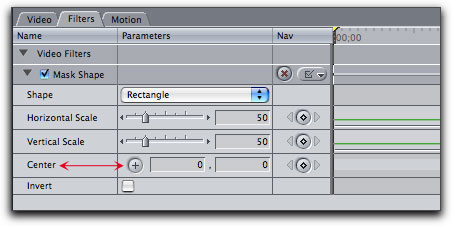
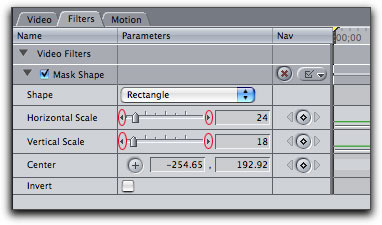
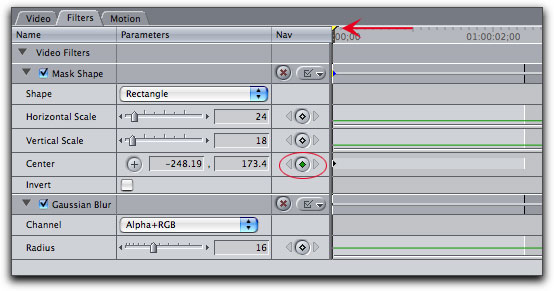
10 With the mask position defaulting to the center of the window we need to position it in the lower left corner of the window where the license plate is. To reposition the mask we will use the Center setting, which I like to think of as the position setting, red arrow below.
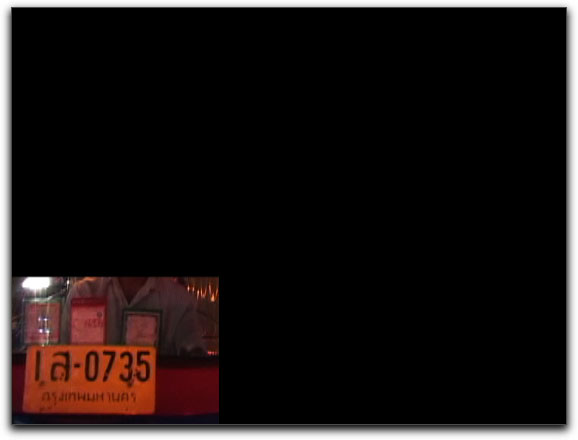
11. Click on the '+' button in the Viewer. When the Center '+' has been activated, a red + will be displayed in the Canvas showing the existing placement of the center of the mask, red arrow below. You will note that your cursor has now change to a white +, white arrow below. I have positioned the white + cursor in the lower left corner of the window in the approximate position of the license plate.
12. With the white + cursor in position, clicking will move the mask to its new position.
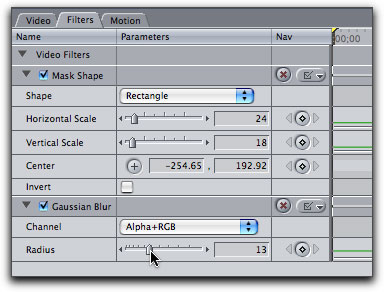
13 Now it's a matter of adjusting the Horizontal and Vertical Scale to the size of the license plate. It will probably be necessary to reposition the Center setting as you make your adjustments.
14 You can make very fine horizontal and vertical adjustments by clicking on the small left and right facing triangles at either end of the sliders.
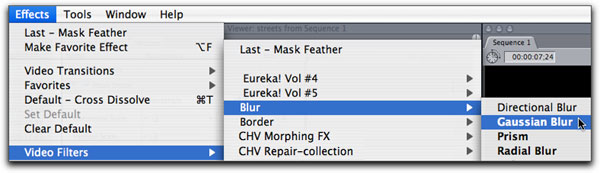
15. Now it's time to blur out the license plate. With the clip on V2 selected, Effects menu > Video Filters > Blur > Gaussian Blur.
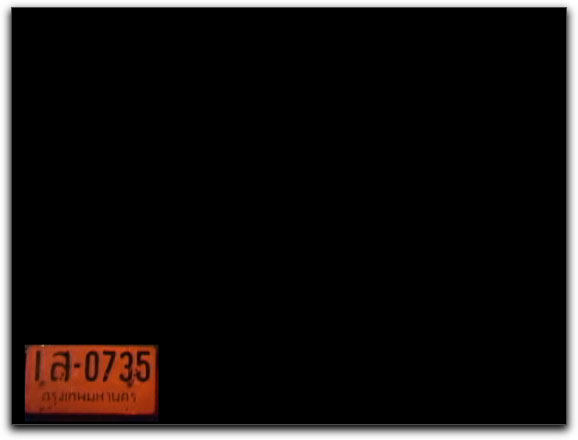
16. With the Gaussian Blur Radius set to 13 the license plate is now unreadable.
17. Now it's time to turn the track visibility for V1 back on so we can see the video tracks composited together.
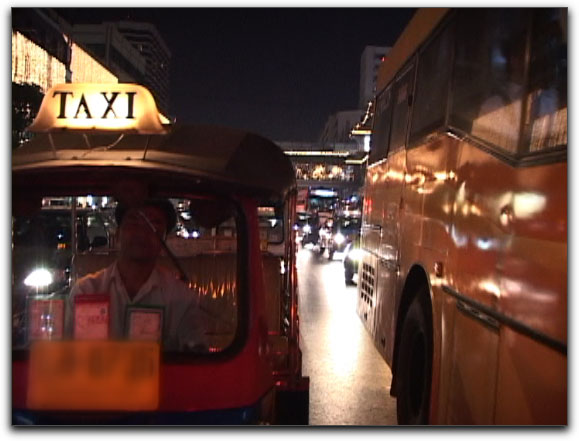
18. It's looking pretty good and if the object that you wish to obscure is stationary then your job is done. However, car license plates and peoples faces do not always stay in one place. If the object moves then it will be necessary to 'motion track' the matte to keep it positioned over the object. We will have the matte track the position of the object by setting keyframes for 'Center' (position) of the matte in the Filters tab of the Viewer.
Double click on the V2 clip on the timeline to load it into the Viewer and move the playhead to the start of the clip and click on the Filters tab. As we have already positioned our matte to cover the license plate we will set our first 'Center' keyframe by clicking on the the 'Center' keyframe button. You will know when a keyframe has been set as the keyframe icon will turn green.
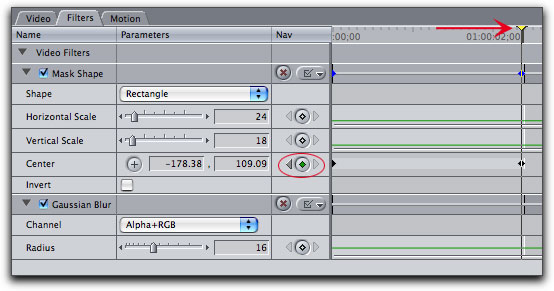
19. Now move the playhead to the end of the clip. Again, you will use the 'Center' setting to reposition your matte, you might find it helpful to toggle V1 track visibility on and off to see the positions of the license plate in this last frame. You will note that as soon as you reposition your matte using the 'Center' button, FCP will automatically set a keyframe for this new position and the keyframe icon will turn green.
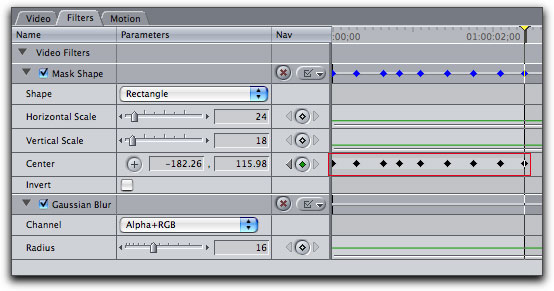
20. Now that we have trapped the blur over the license plate in both the first and last frame, move your playhead to the start of the clip and move down the timeline using the right arrow on the keyboard. If you get to a frame where the matte does not cover the license plate, use the 'Center' button to reposition the matte, remembering that each time you change the 'Center' setting FCP will automatically set a new keyframe. Continue down the timeline repositioning where needed. As you can see, I have set a number of 'Center' keyframes, red box below.
The 'Cops' technique can be used to accomplish other tasks as well. If you need replace an object in the video, like a sign, you would follow this process except that the video on V2 would contain the replacement art and, of course, you would not use the Gaussian blur filter.
Enjoy,
--ken