
July 2, 2007
Creating that Cartoon Effect
By Steve Douglas
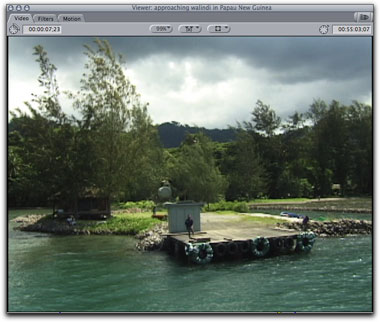
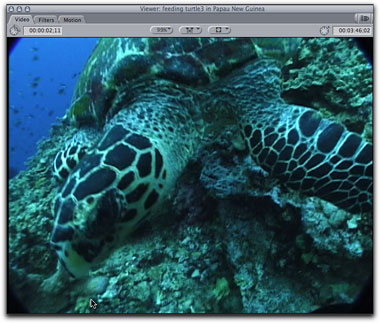
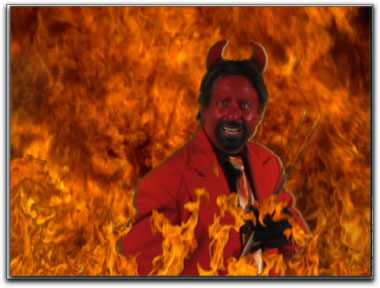
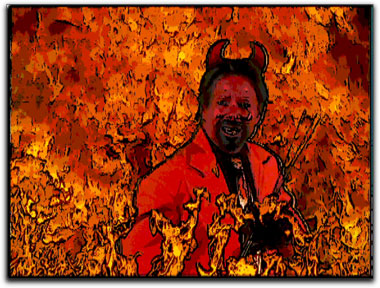
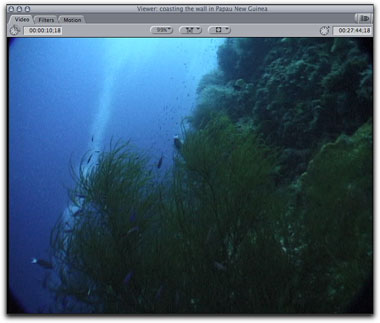
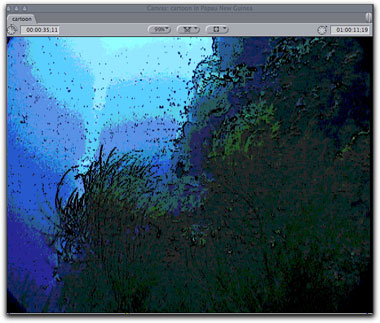
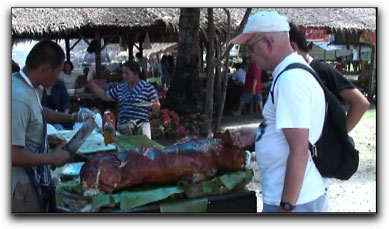
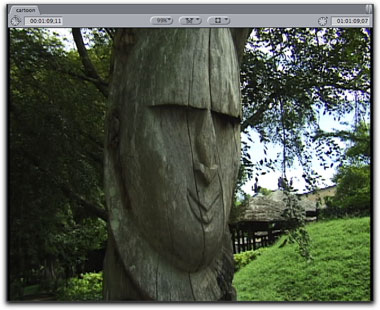
Have you noticed the influx of T.V. commercials shot using real people and environments and then processed to create a cartoon like appearance? You've seen this same effect in movies such as Sin City and more. While I do not have the same high tech resources as the major studios, creating this effect is not too difficult and can be done in Final Cut Pro without the need for third party plug ins or alternative applications.
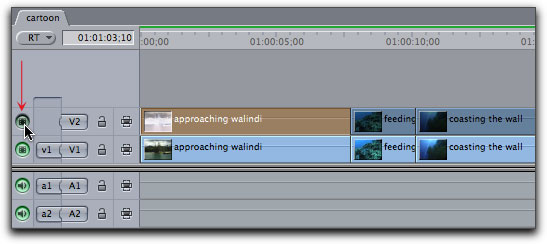
Lets get started. First bring your sequence clips into the first layer of your timeline. We will need to duplicate this sequence onto layer two. Highlight all the clips in layer one that you intend to cartoonize. Press the option key, which will duplicate the clips, and the shift key, which will constrain side to side movement, at the same time, as we drag the clips up to V2.
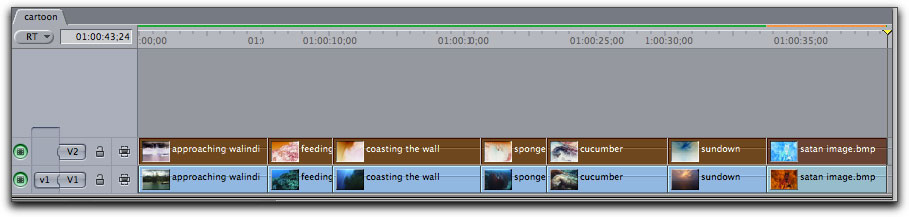
Pressing the shift and option keys while dragging your highlighted sequence to layer 2 will place an exact copy of the sequence clips to V2.
The second step calls for you to highlight the first clip on layer 2, click on the effects tab in the browser and scroll down to the filters bin.
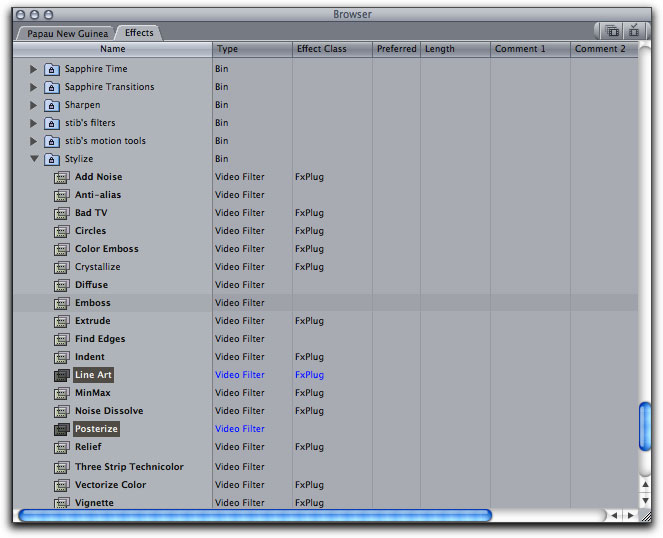
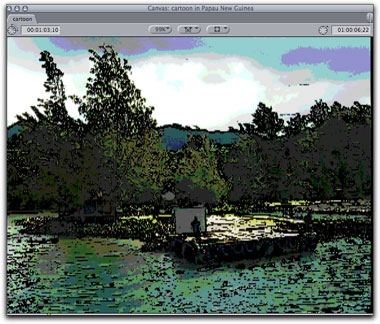
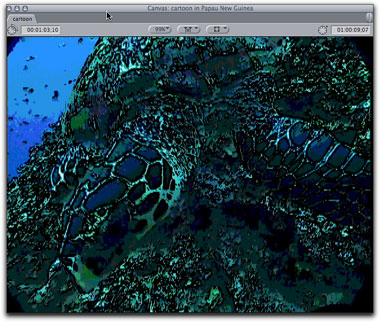
The Line Art and Posterize Filters are the one's you'll be using to create the Cartoon effect.
Once there, scroll down until you locate the Stylize bin and find the Line Art filter. The Line Art filter is the first filter we will be using and will only be used on the 2nd layer. Drag this over to the first clip in layer 2. Open up the filters tab in the Viewer and bring down the Threshold parameter to about 0.02 or 0.03, adjust the smoothness parameter to zero and leave the opacity set at 1.
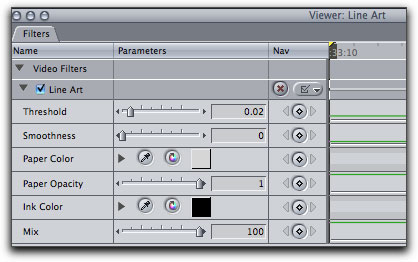
These settings are a good jumping off point. Experiment to find the settings to fit your exact vision.
Great, we're almost there. Now turn off the 2nd layer by clicking on the green enable button on the far left of V2.
Next we highlight the first clip on V1, go to the Filters bin, and scroll down to Stylize again. Place the Posterize Filter onto that first clip. The default settings for the parameters of the posterize filter are set at 8, and while you can experiment all you want, I just left them at their default settings.
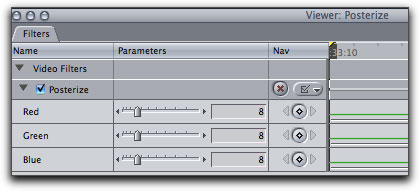
The default parameter settings worked for me.
We then proceed back to V2. Enable the layer by clicking the far left button again and highlight the first clip. Right click and and go to the composite mode in the pop-up menu. Apply the 'Overlay' composite to the first clip.
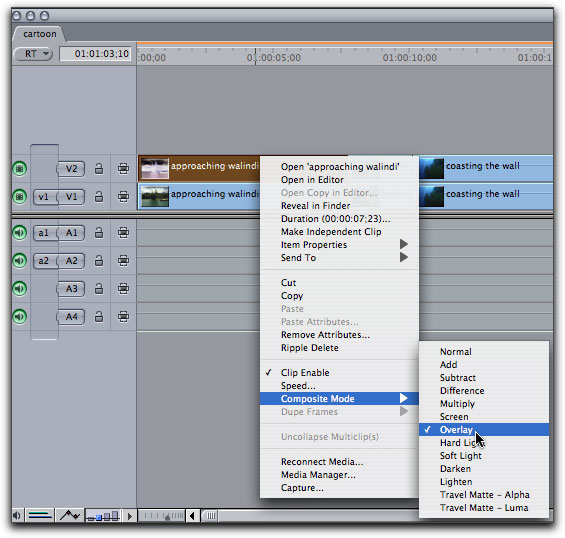
Pop up menu will bring you right to the composite mode and overlay.
While it is still highlighted, right click again and click on Copy.
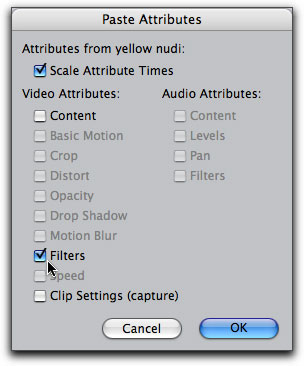
Next, highlight all the remaining clips on V2, then right click and, from the pop up menu, click on 'Paste Attributes'. When the paste attributes window comes up check on 'Filters' and click 'OK'.
The 'Paste Attributes menu will save a lot of time in your workflow.
Now all the remaining clips on V2 will have the same filter and settings as does the first clip. Again, while they are still highlighted, right click, go to composite mode and click on 'Overlay'.
We have finished our tasks for V2. Now lets proceed to our first layer. Once again, highlight the first clip of the first layer and from the pop up menu click on copy. Highlight the remaining clips on V1 and right click again to bring up the pop up menu and go to 'Paste Attributes'. We do the same as we did in V2 by checking only 'Copy Filters'. At this point you've completed the cartooning of the sequence and you can apply whatever transitions you might like. Just make sure that the same transition is applied to the clips in both layers one and two. An easy way to do this is to first make sure that your default transition is set to the transition you intend to use and then drag first the highlighted sequence on layer one up to the canvas and drop it into the overwrite with transition window. Next, do the same for your highlighted layer two. Now all your clips will have your desired transition on both layers and you're good to go.
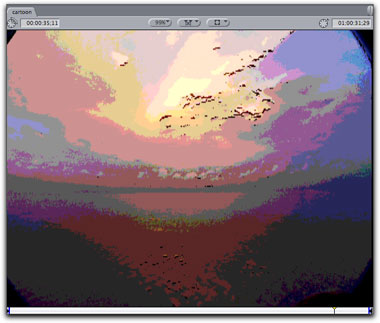
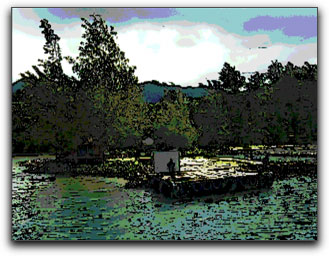
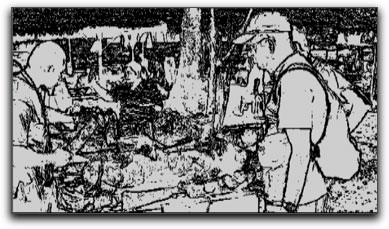
As a little side bar, you might want to experiment with the Solarize filter on the clips in layer one as a replacement for the Posterize filter. You'll have to bring down the 'Amount' parameter a good deal to get a similar effect.
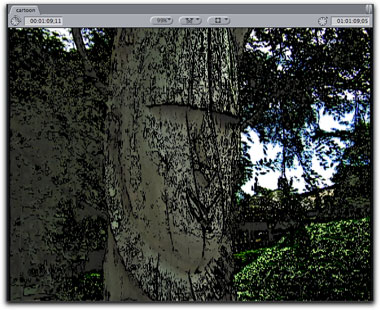
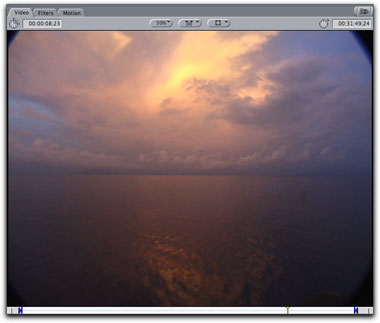
In the 'After' frame, I substituted the Solarize filter turned way down to 8 in order to achieve a similar effect.
Congrats, you've just finished this little tutorial. I hope you will find it just the technique you need for that special project.
Steve Douglas is a certified Apple Pro for Final Cut Pro and underwater videographer. A winner of the 1999 Pacific Coast Underwater Film Competition, 2003 IVIE competition, 2004 Los Angeles Underwater Photographic competition, and the prestigious 2005 International Beneath the Sea Film Competition, where he also won the Stan Waterman Award for Excellence in Underwater Videography and 'Diver of the Year', Steve was a safety diver on the feature film "The Deep Blue Sea", contributed footage to the Seaworld Park's Atlantis production, and a recent History channel MegaDisaster show. Steve is one of the founding organizers of the San Diego UnderSea Film Exhibition and leads both underwater filming expeditions and African safaris with upcoming excursions to Kenya, Bali & Komodo, & Lembeh Straits in Indonesia in 2007, the Coco Islands, Costa Rica & Vietnam in 2008 and safari in Africa for 2009. Feel free to contact him if you are interested in joining Steve on any of these exciting trips. www.worldfilmsandtravel.com
[Top]
copyright © Steve Douglas 2007
© 2000 -2007 Ken Stone. All rights reserved. Apple, the Apple logo, Final
Cut Pro, Macintosh and Power Mac
are either registered trademarks or trademarks of Apple. Other
company and product names may be trademarks of their respective
owners.
All screen captures, images, and textual references are the property and trademark of their creators/owners/publishers.