
Cutting A Music Video 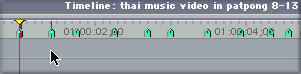
November 19, 2001
Cutting To The Beat with FCP
By Kevin Monahan
Sooner or later, we all have to do it. Yup, that's right, make the proverbial music video. Although we may never get to edit the next Britney Spears or Incubus video, in all likelihood, we will be faced with a "Smiling Faces" montage piece, or similar thing, sooner or later in our careers as video editors.The question almost always arises, "How do I approach this? Is there some sort of methodology?" As most will tell you, there is, indeed, no right way or wrong way to edit, however, there are techniques to help you get pointed in the right direction while editing a musical piece. Hitting the musical beat of your choice with a video shot is a crucial thing you can do to help simplify your editing process while editing a music video.
Editing a video to a musical beat isn't too hard, and here I will demonstrate some tips on how to do this efficiently. However, it should be said here that in today's music videos, the cut is not always on the beat, and sometimes, it is never on a beat! Usually this can be pulled off only when there is a lot of extra camera coverage, but as in editing, cutting a music video has very few restrictions, so cut the piece the way you see fit. Cutting to the beat is one thing you should know how to do, however, because that is exactly what you usually will want to do.
The FCP "Drum Set"
Hey! I've seen you tap tapping on the steering wheel of your car at the stoplight, so don't tell me you don't know what I am talking about! Tap, tap, tap. That is the secret to getting your beats into the Timeline, at least roughly. What to tap? Your Marker and/or your Tilde keys of course! They are your "drum set" in FCP.
Before you start banging the skins though, you'll want to lay in your music track into a new Sequence. Make sure the music has been imported or upsampled to 48Khz now! You should do this in Quicktime Pro or even I-Tunes to ensure the quality of your music track is at its best.
Proper Set Up is Crucial
It is of crucial importance to set up your system to spec. This way, the following methods I am about to talk about will work correctly. If you are not set up correctly, you will not be cutting to the beat accurately. A proper FCP set up has both the NTSC (or PAL) monitor and powered speakers coming out of your DV Deck, DV Camcorder or DV Transcoder box. Check the Final Cut Pro Manual for any questions on this. Cut to the beat while looking at the NTSC or PAL monitor and NOT the computer monitor. This is really an important thing to do. Always check the playback on the NTSC monitor and speakers before moving on to the next cut.
Got no rhythm? Sure you've got rhythm! Get ready to start drumming brothers and sisters! Hopefully, you took some kind of musical training at some point during your public school education, so I won't explain time signatures, 4/4 time and other musical mumbo-jumbo. You're a rocker and you KNOW that stuff right! BOOM-tap-BOOM BOOM-tap (repeat!). Make the M key the Bass drum and the tilde key the snare drum. That's how I work it.
Tapping Out Markers
After the track is laid in where you want it, hit the space bar and begin tapping the beat out with the M key and the tilde key. The markers will be very close to the actual beat of the music. Keep in mind that you can hit the downbeats if it is driving rock, dance or techno music. If it is a world beat type of rhythm, like reggae or ska, you may want to tap out the upbeats. You can really tap out the beat as you see the cut happening, so you may be tapping both down and upbeats.
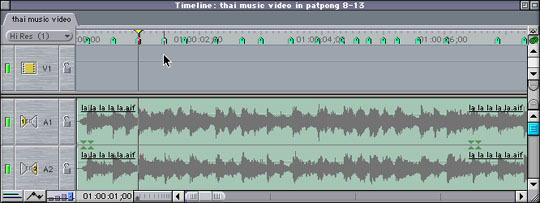
After you have all your Markers laid in, it is time to get to work. The first and most important thing to do at this point is to force audio waveforms into the timeline. There's a very cool keyboard shortcut you should use here, and that is, Apple + Option + W. Presto! Your waveforms will now be in the timeline. You may also want to Zoom in on those waveforms with the Zoom Tool (shortcut is Z) for a closer look. To really see those waveforms well, you can alter your Track Size. The keyboard shortcut to do that is Shift + T. Make them really thick as is shown in the example below.
Now that you have Markers roughly in place, with waveforms standing by to help you find your beat, you are pretty much set as far as having some guidelines to edit a decent music video piece. To refresh your memory, Shift + M will get you to your next marked beat, then you can lay Ins and Outs in to place in your cut. Note, you may want to lock your audio first. Make sure you use either Overwrite Edits or the method I describe a bit later in the article utilizing pieces of Slug and Replace Edit.
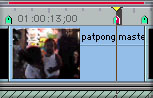
Take Note When Using the Playhead to Mark Out
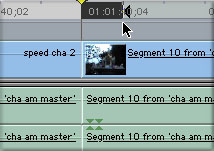
Note that if you choose your Out Point utilizing the Playhead, using with a "snapped-to" cut point or a Marker as a guideline, you will actually be one frame too late on the true cut point. Check out the figure at the right to see an up close view. Always, when first going to the Marker that signifies your Out Point, tap once on your Left Arrow Key BEFORE marking the Out Point to ensure it is in the exact spot you desire.
There are more things you can do to further refine the process of hitting beats, so read on if you are interested.
Adjust Lagging Markers
You may notice that your Markers are lagging slightly behind what you originally tapped out. This is due to fingers not being as snappy as they should be and the fact that USB keyboards are a bit slow in this regard. In fact, this method worked great on ancient Avids using old ADB keyboards! For now, you can either adjust the Marker using Shift + Tilde (they only adjust forward unfortunately) or ignore the Marker and cue the in point based upon the waveform or what your ears are actually hearing while scrubbing with your J-K-L keys. If you need to, you can remove a Marker using Apple + Tilde.
Analog Scrub to Find the Beat
Usually, I do an "analog" scrub with the J-K-L keys to find the true beat I want to hit. Waveforms are fine, but I can really find my beat while scrubbing without even looking at the waveforms, and THAT saves time. If you don't know how to do an analog "scrub" with J-K-L, you merely hold down the K key and engage the J or L keys. By alternating my fingers from J to L, I can "rock and roll" over an audio cue quite easily to find my mark In point. Try that now, won't you? Just sneak your middle finger from the K key up to the Mark In Point. It's very convenient to J-K-L as is the Mark Out Point. You can also slip your Pointer Finger down to the M key to make a Marker here as well.
Laying in Add Edits
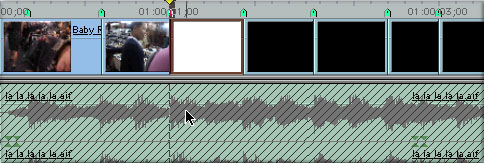
Another cool trick you can do is to lay in a track of Slug for a placeholder for your Video Track(s). At each Beat you can put a Blade splice, or faster yet, tap Control + V. This puts in a cut (Blade Slice) or what is known as an "Add Edit" in the chosen Targeted Track.
The advantage of doing this extra step is that you can then easily use this dummy Clip segment as a place holder for laying in your next potential Clip. You can use the Mark Clip function to quickly define the In and Out for an Overwrite Edit or you can merely use the Replace Edit function to quickly lay in a Clip right on the Beat.
The Power of Replace Edit
Knowing how to use Replace Edit in this regard is a real time saver in that you don't even have to mark In Points or Out Points to lay in the cut. In the Timeline, put the Playhead at the cut point using your down arrow key. Then put the Viewer's Playhead where you want the cut to be and Replace Edit that piece in there with lightning speed! F11 is the shortcut for Replace Edit. You can also drag and drop the Clip onto the "Double Blue Boxes" icon or into the Canvas Overlay to Replace Edit the Clip.
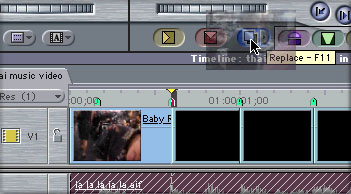
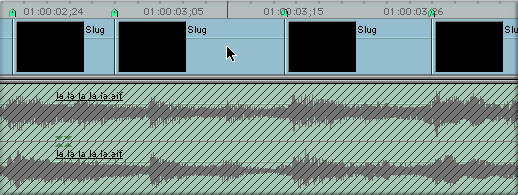
You can continue on editing your entire piece this way. The Methodology: Hit the Down Arrow Key to place the Timeline's Playhead on the beat/cut point, Place the Viewer's Playhead on the prospective In Point, Tap F11. Repeat as shown in the following graphic.
Replace Edit to time Action to a Beat
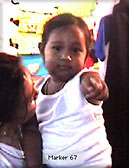
You can also use Replace Edit in this manner if you desire to have a piece of timed action hit the beat. Say, you've got a car flying coming through flames (or a baby that points to the camera!) and you want a beat to hit right when the car goes through the flames (or the baby pointing to the camera on a cymbal hit!). First remove all In and Out Points on the Timeline and the Viewer. Place the Playhead in the Timeline on the Beat you want to hit. Then place the Viewer's Playhead on the piece of source you want to also hit the Beat. Finally, hit Replace Edit (F11). Your car will now hit the flames on the beat!
Using Fit to Fill
Not enough media to cover the space between the beats? I've got three words for you dear reader: Fit To Fill! Just mark Ins and Outs around your source, Mark Clip in the Timeline and Bingo! You've got a groovy slo-mo shot that's ready to rock.
Biggest Tip: Learn to Trim in the TimelineThere are lots of other small tricks you can use to fine tune the cut and they usually involve trimming and knowing the fastest and best way to trim a shot to hit the beat precisely. I would suggest that you learn all of the methods of trimming and the shorcuts to assist in your speed and flexibility, particularly trimming directly in the Timeline. I am constantly toggling the U Key to set up a Ripple or Roll trim. Once I am set to Ripple on the desired side or both sides if I prefer to Roll, I have the flexibility to use my keypad or my Bracket Keys and looping"Play Around Current" to dial in the cut.
Don't Neglect Play Around Current
In conjunction with the methods of trimming in the Timeline as described above regarding hitting beats is using the "Play around Current" key. For "Play around Current", you may want to shorten the loop time to 3 seconds pre-roll and 3 seconds post-roll in Prefs, that's what works best for me. I first park my Playhead directly on the cut I wish to evaluate, then I tap the Play Around Current Button and see if the cut is working for me. This is one of the better ways to find out if the cut is indeed hitting the beat. If the cut just isn't working for you, use the Bracket (and Shift modifier) keys to trim forward and backward until you are satisfied with the cut AS you are looping. You see, I keep "Play around Current" in Loop mode so I can monitor (see and hear) the trim adjustments I had just made a split second before until a voice inside me says, "mmhmm, there's the cut!". Then I move on to the next adjustment.
Using Extend Edit to quickly adjust a Cut
I also may use "Extend Edit"(E) to adjust my cut right to the beat. To do this, merely place the Playhead over the beat by J-K-L'ing your way over to it, then just hit E to extend the edit to the new cut point. It's amazingly fast and easy to use the Extend function in many cases such as this. It's essentially a Roll Edit without having to click and drag to the cut point. As long as there is enough media there, you can Extend Edit in either direction.
You will usually want to Roll Trim
A Roll Edit is usually called for, especially if you already have Markers and/or cuts locked to the beat further down the sequence. A Ripple edit will often pull shots out of sync so be sure you know what you are doing there before you Ripple. If you did Roll trim or Extend Edit, You may then need to slip the shot, or Replace Edit an offset copy of the shot to re-tighten up the In Point.
Trim Edit Window not as useful here
In my experience, using the Trim Edit window in making Music Videos isn't as useful as just staying in the Timeline. It's powerful, but a bit slow, and is more useful in editing dialogue and split edits.
After reading this article, you should have a better handle on how to accurately hit the beat as you are working on a music video. You should also have learned techniques on how to have a piece of timed action hit a beat as well as some approaches for trimming your piece. My hope is that you'll have more fun and get your work done more productively the next time you edit another one of your music video masterpieces!
Good Luck!
Kevin Monahan, aka "Telly", is a video editor, motion graphics artist and educator from San Francisco, CA. Kevin has a degree in Radio, Television and Film from San Jose State University and has been working professionally in radio and television for over ten years. He also teaches Final Cut Pro Classes both privately and at the Bay Area Video Coalition (BAVC) in San Francisco. Kevin co-founded the San Francisco Final Cutters, the world's first Final Cut Pro User's group and runs a small video post-production house called Shadowcraft Studios. For bookings and more information, contact Kevin by e-mail at: videoweb@pacbell.net
copyright © www.kenstone.net 2001