
November 10, 2008
DVcreators.net $79.95
By Ken Stone
Awhile ago I published several articles on moving video from FCP to the web using H.264, one article was based on QuickTime and the other Compressor. These processes do work well, but there are a number of steps that you must go through and a number of settings that need to be adjusted. Could there be an easier way to create H.264 movies for the web?
DVcreators.net has release an application that does most of the work for us and also has some additional cool features. It's called DV Kitchen but don't let the name fool you, it works with all video formats, including HD.
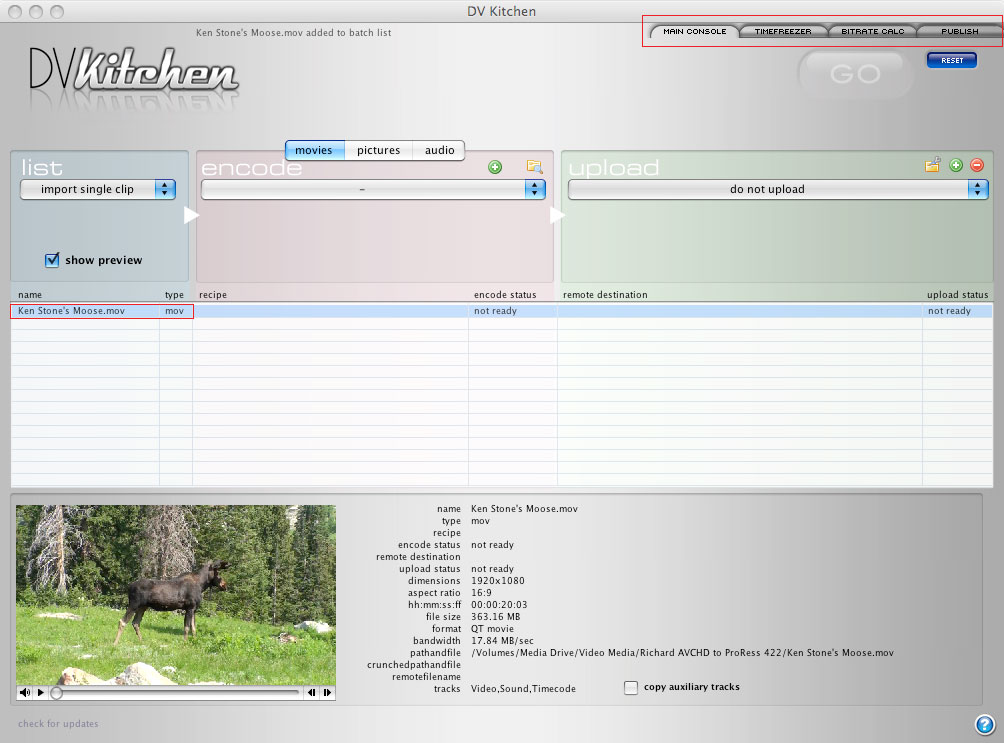
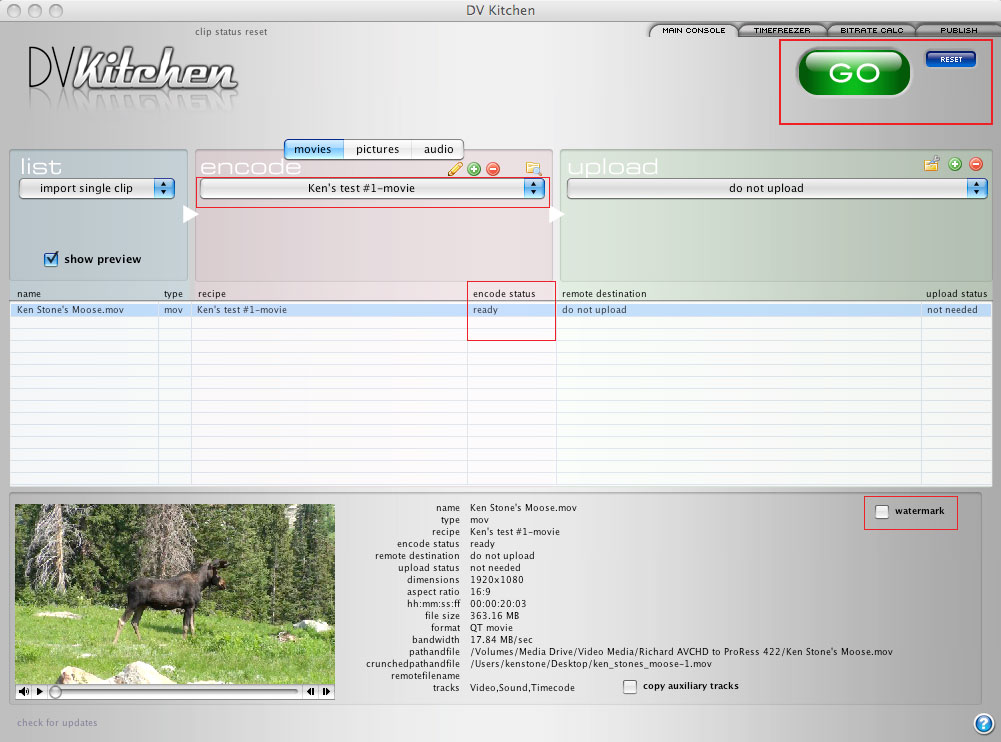
DV Kitchen is a stand-alone application that combines many different functions into one professional program. Integrated batch encoding and uploading (via FTP) for publishing high quality video, images and audio. SampleLab for testing different encoding settings. TimeFreezer for exporting stills from video clips. Bitrate Budget Calculator for estimating the right bitrate settings for your clips. Media Publishing that automatically generates your HTML code for you and makes publishing your webpage a one-click process. When you launch DV Kitchen the 'Main Console' window opens, at the top right are tabs used to access other functionalities of DV Kitchen.
SampleLab
We will start with 'SampleLab'. In the Main Console, import or drag the movie that you want to encode into the window. Click on the movie name to open the preview and information section of the Main Console, bottom of the window.
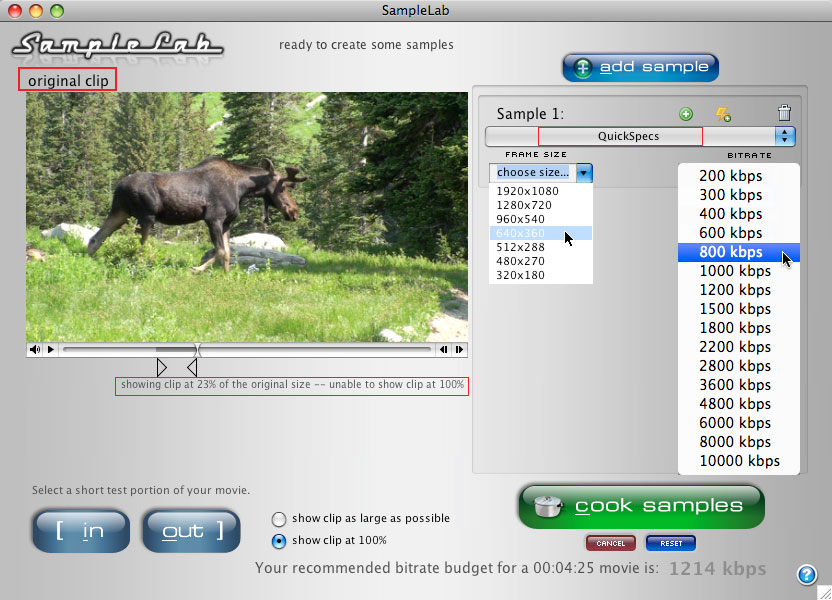
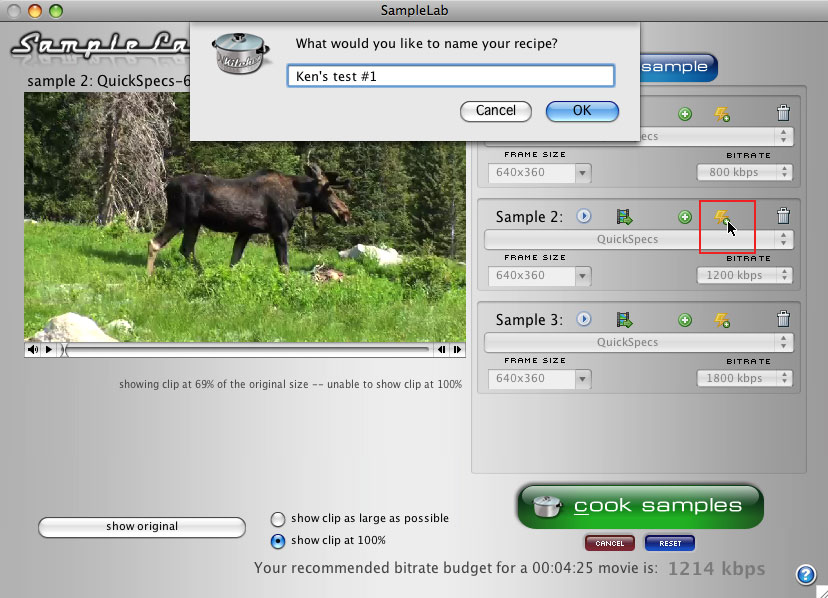
Double click on the video in the Media List to open it up in 'SampleLab', where you can test out different encode settings and then save the best settings as a preset. SampleLab is very automated and does all the work for you by using simple drop-down menus. SampleLab is shown below. I have greatly reduced the window size for this article but you will want to have the window enlarged when you work so that the Preview window shows your video at full size.
The Preview window will show your movie (clip), you can scrub or play through the clip. I would suggest that you set In and Out points around a small section of your movie for testing, a section that would be hard to encode well, like rapid motion or transitions. The beauty of SampleLab is that you can create a number of different test samples at different sizes, and bitrates with just a click or two and then preview the quality of each test right in the SampleLab window.
As shown below, I have selected 'QuickSpecs' (x.264) as my codec. The X.264 codec is the Open Source version of Apple's H.264 codec and is at least as good as Apple's version. From the Frame size drop down I have selected 640 x 360 and have set my first sample bitrate at 800 kbps. The bitrate setting is very important as it sets the amount (or rate) of data that can flow down the pipe to your audience. Dial-up connections can handle only low bitrates, DSL can handle more information and high speed internet connections, like cable, can flow a greater amount of data. The higher the bit rate, the higher the quality of your movie. So selecting a bitrate is a compromise between download speed and quality. DV Kitchen provides a Bitrate Budget Calculator that assists you in picking a bitrate, shown later in this article.
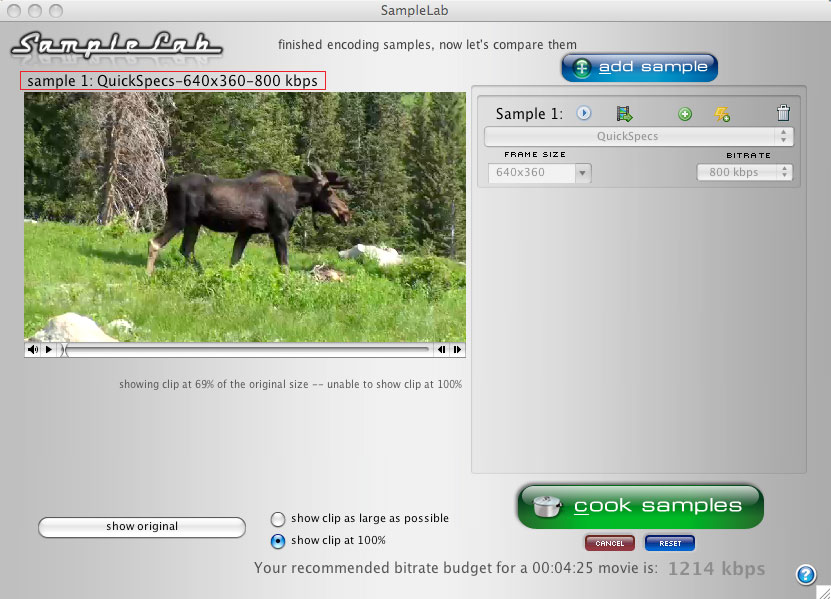
After you have made your selections, click on the 'Cook Samples' button. You will get a Progress bar, when done, click on the number 1 on your keyboard (because this is sample number 1), and the encoded test will now show up in the window with the encode settings shown above the clip. You can play through the encoded clip to view the quality of the results.
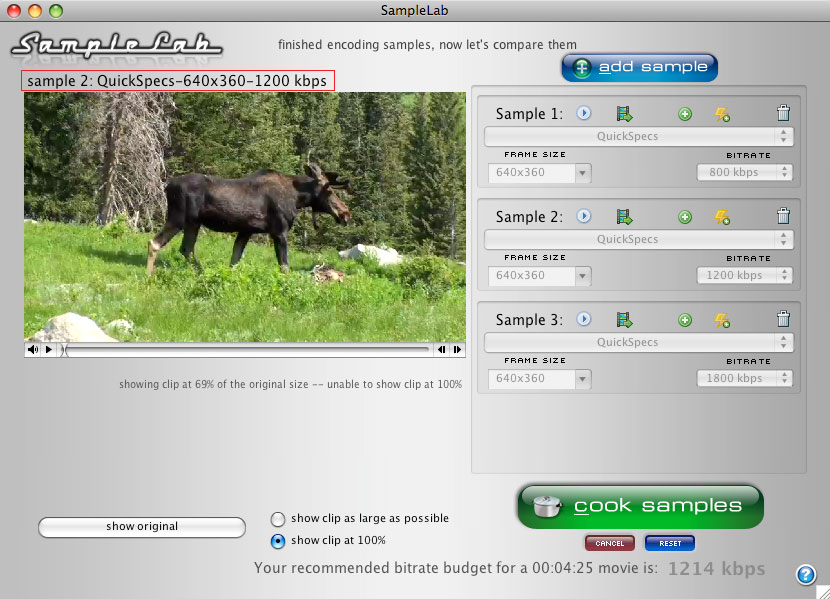
Now here is where SampleLab is really efficient. You can make as many different test samples as you want, each with a different bitrate setting, by clicking on the 'Add Sample', (shown below). I have created two more samples at different bitrates and can test them in the SampleLab Viewer. You can bounce from one sample to another by entering the sample number on the numeric section of your keyboard. At the top of the Preview window, the sample number and specs are displayed. It gets even better. Scrub through a sample until you find a particularly difficult frame of video and park your playhead there. Now, using the numeric keys, you can cycle through all of the samples, you will be able to see the exact same frame in each of the samples and you will then be able to make the best judgement as to which sample is the best for your needs. You can continue to add more samples if needed. Click on the trash can next to any sample to remove it from the list.
Once you have previewed your test clips and have decided on your choice, you can now save the settings. Click on the Lightening bolt, (shown below in red box), for your chosen settings and give it a name.
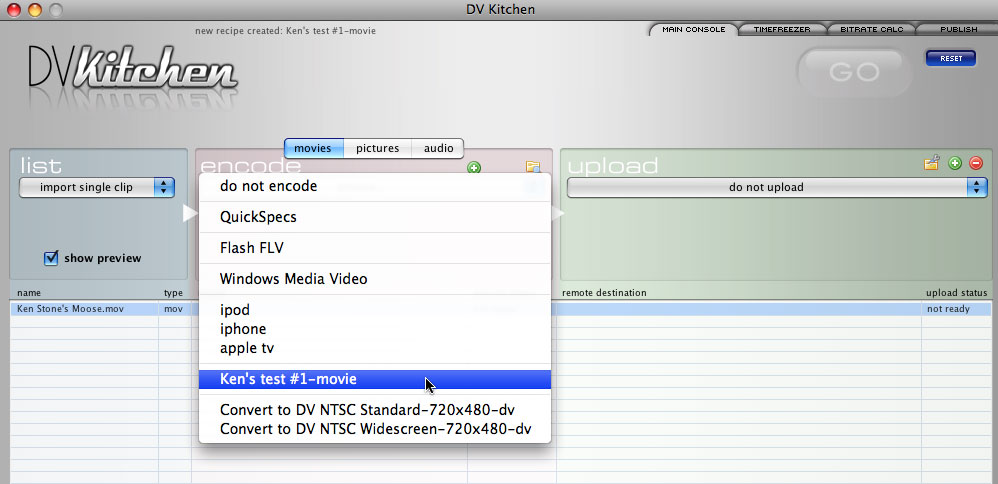
After you have saved your settings move back to the Main Console and in the Encode panel, click on the 'Choose' drop-down menu.
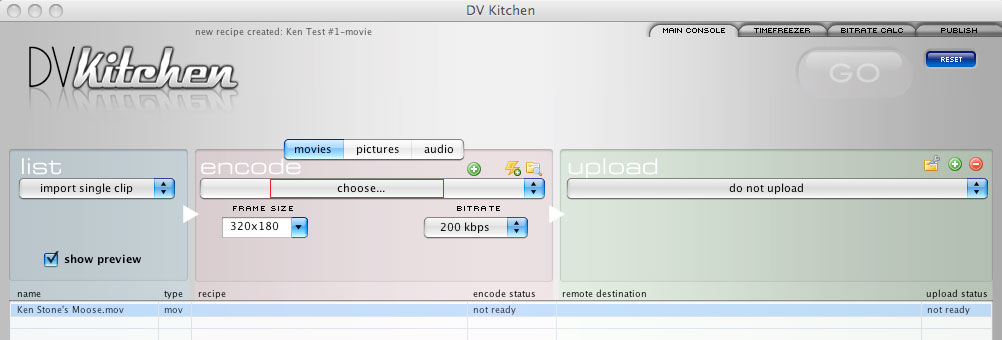
You will see the setting that you just saved. You will see that DV Kitchen also provides additional codecs; Flash FLV, WMV, iPOd,iPhone and AppleTV.
If needed, you can further edit this setting by clicking on the 'pencil' icon.
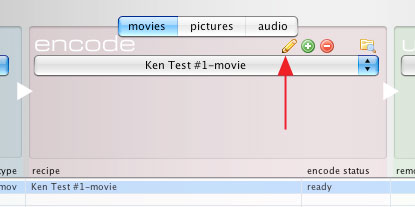
With the settings in place, you will see that the 'encode status' column now shows ready. Click the GO button to begin encoding your clip and you will be asked about the export destination of the encoded clip. In the DV Kitchen Preferences, I have set the destination to my Desktop. If, for any reason, you want to make a change after you have encoded, you can click on the 'Reset' button and you will be returned to the pre-encode status where you can make changes to your encode settings.
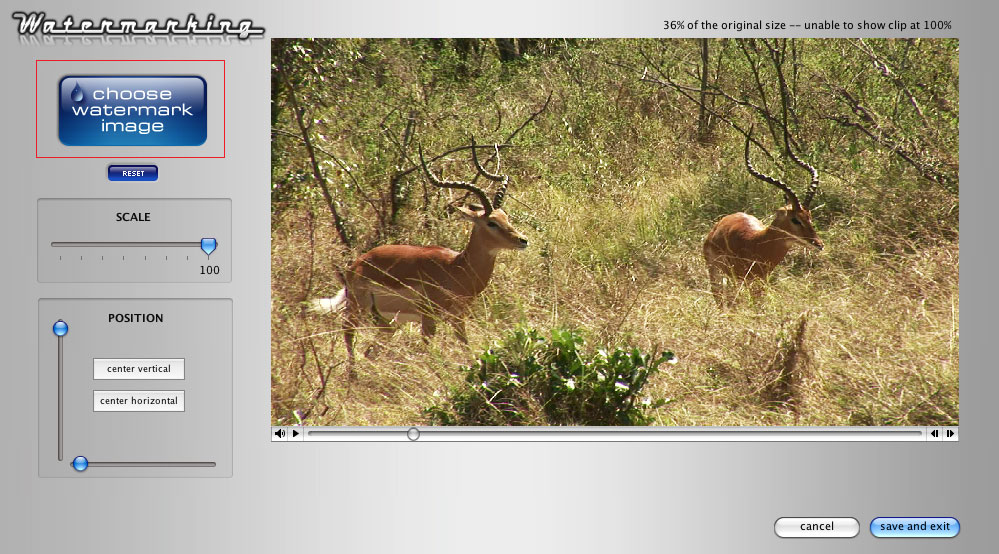
DV Kitchen has a built in Watermark feature. You can create your Watermark (bug) in FCP or in Photoshop. When you check the Watermark box, the Watermark window opens up. From here you can import, scale and position your Watermark.
TimeFreezer
From time to time we've all needed to grab still frames from our video. In FCP, with the playhead placed on the frame you want, from the Modify menu > Make Freeze Frame. You can also Export using QuickTime with Conversion > Format > Still image. As we have all done this we know that there can be quality issues with the stills. Interlaced video can be problematic, showing combing artifacting. Go back to the timeline and drop the de-interlace filter onto the clip and make a new still. Artifacting is better, but the overall quality of the image is now less than before because we have thrown away half of the visual information. Not only that but as we often need to export a number of stills, the process is anything but efficient. Simply put, it's a bit of a pain.
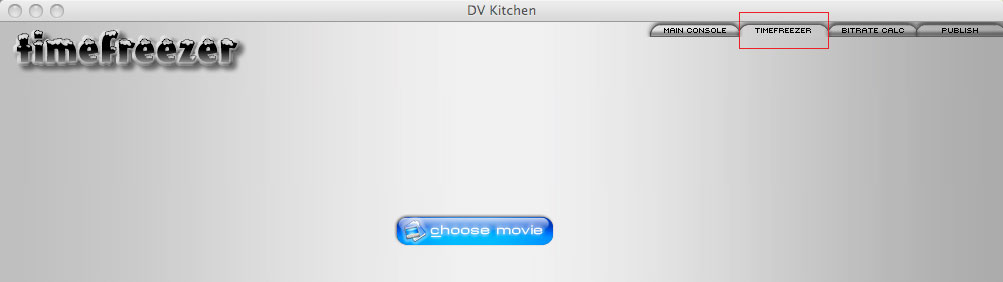
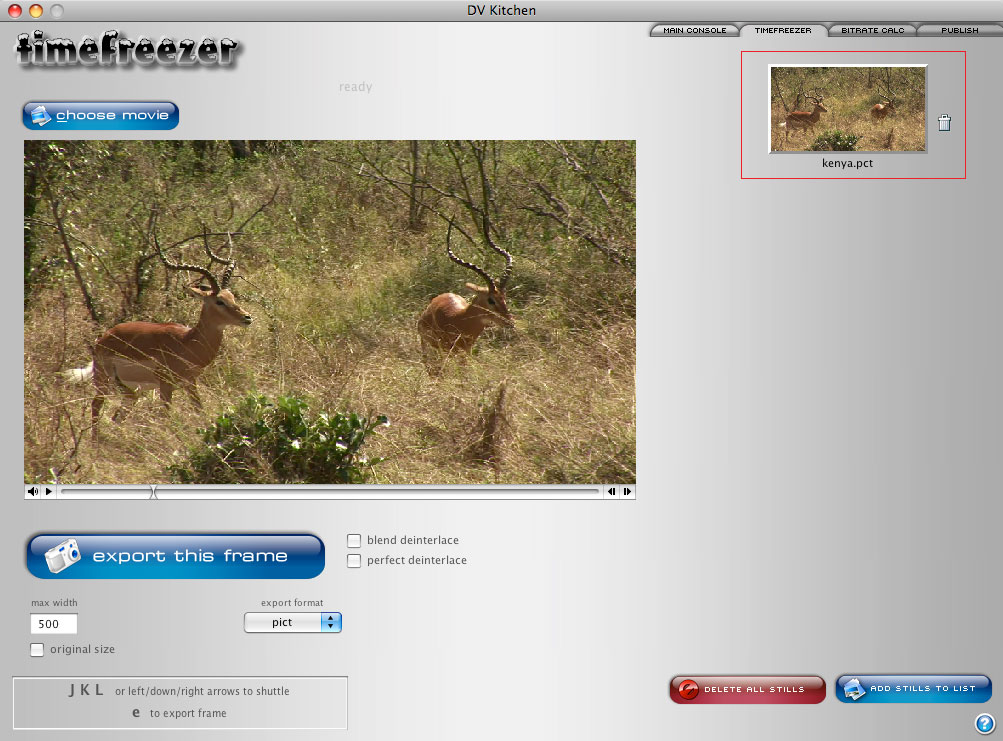
DV Kitchen has 'TimeFreezer', a much better way to make still images from video. Click on the TimeFreezer tab at the top the DV Kitchen Main Console window. This will open Time-Freezer. Click on the 'Choose Movie' button and navigate to the clip you want to work with.
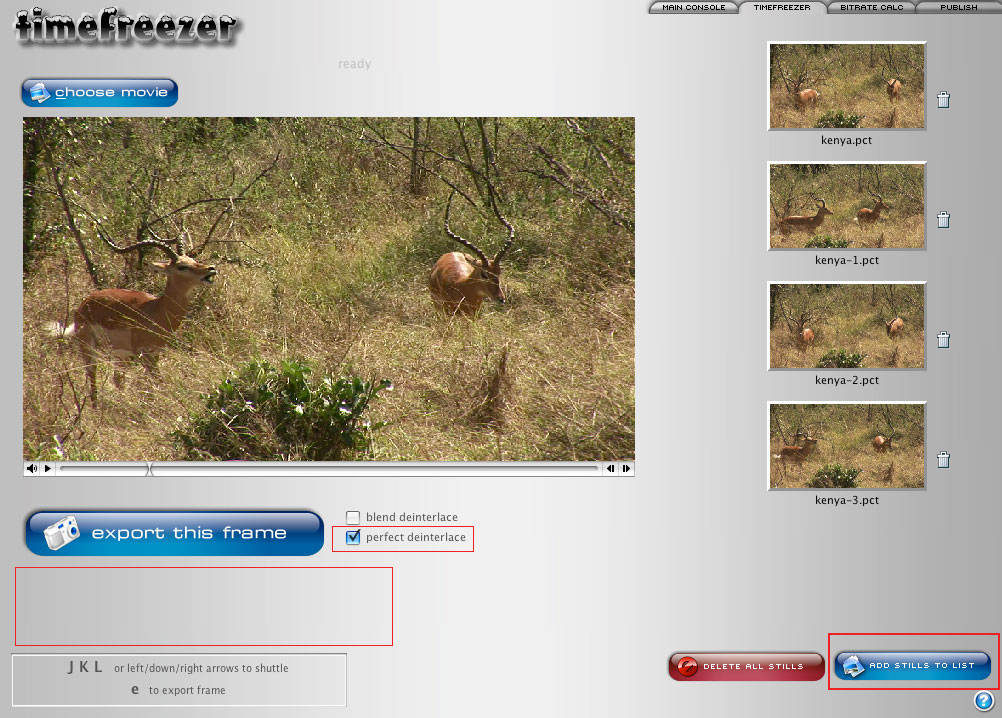
This will load the clip into the TimeFreezer preview window. You can scrub through the window to find the frame that you want. There are three format export options available; Jpeg, PNG and Pict. As shown below, Jpeg has been chosen. You can set a specific width dimension or choose original size. There is also a quality slider.
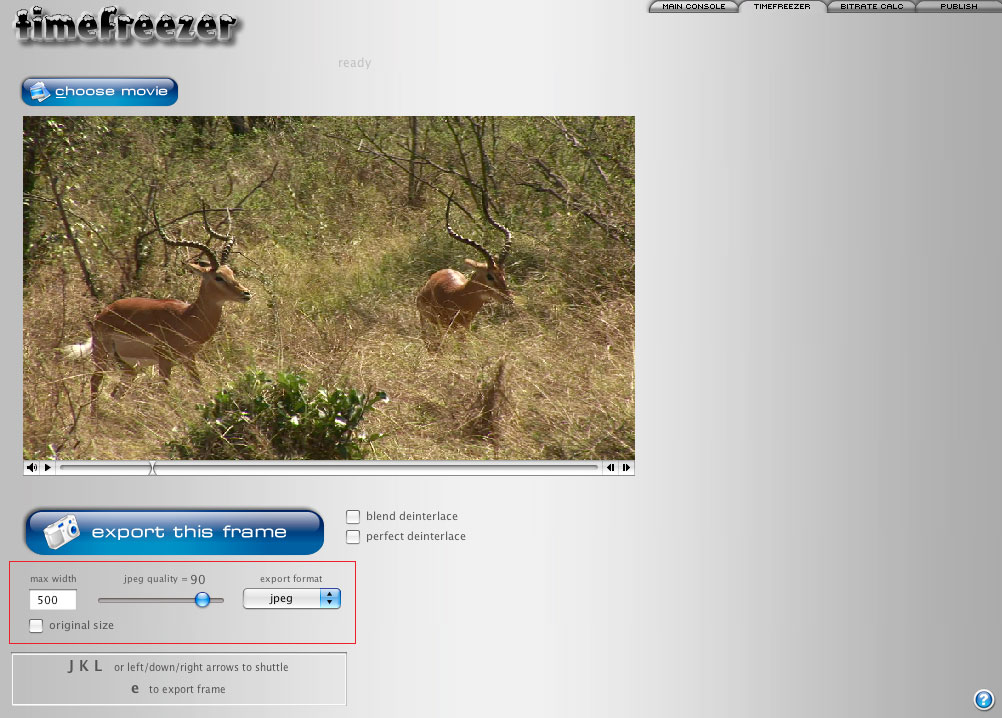
Not being a big fan of Jpeg, I have chosen 'Pict' as my format (if you are saving for the web then you'll have to use Jpeg). When Pict or PNG is selected, the Quality slider disappears, because unlike Jpeg, Pict and PNG do not use compression. With a frame selected, click on the 'export this frame' button. The exported still will show up in two places. As I have sent my export destination in DV Kitchen Prefs to my Desktop, the still will show up there. But the still is also placed in the TimeFreezer window on the right, shown below.
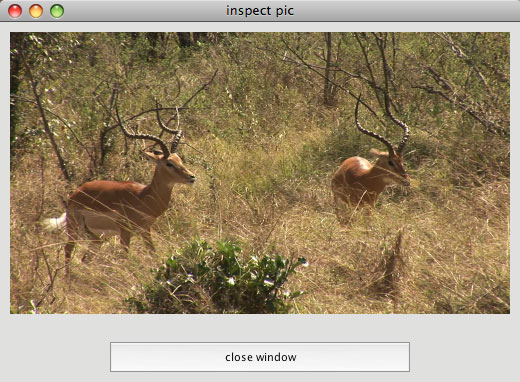
If you double click on the still image on the right hand side it will open in it's own window at full size for you to consider.
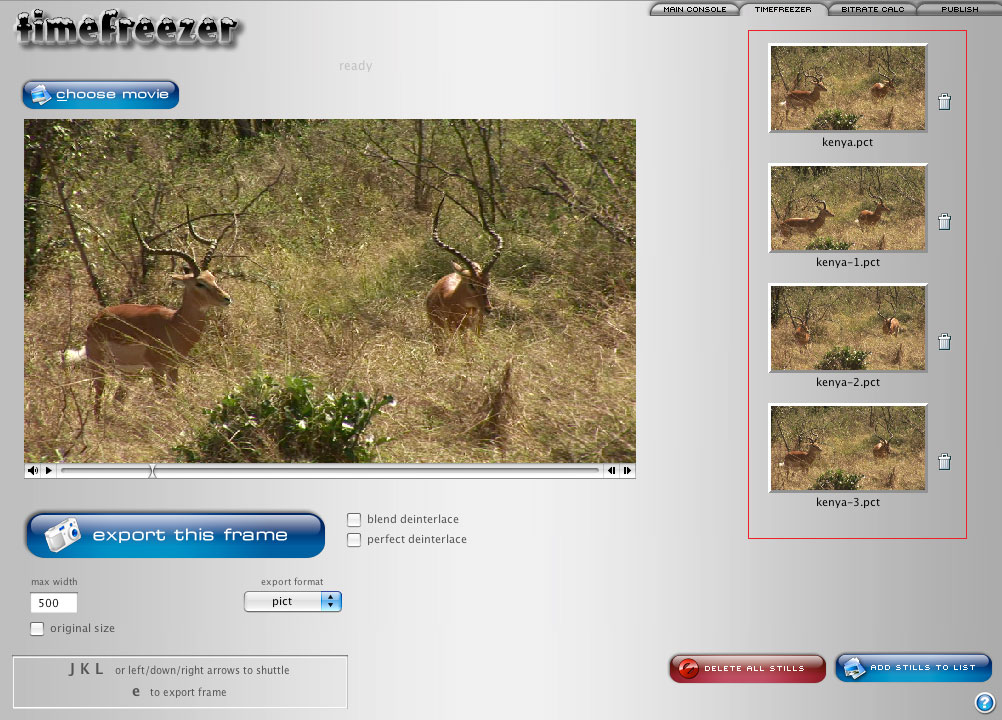
I have gone through the clip and created several more still images. Remember that by clicking on any of the stills on the right, they will open up for you to compare your still images.
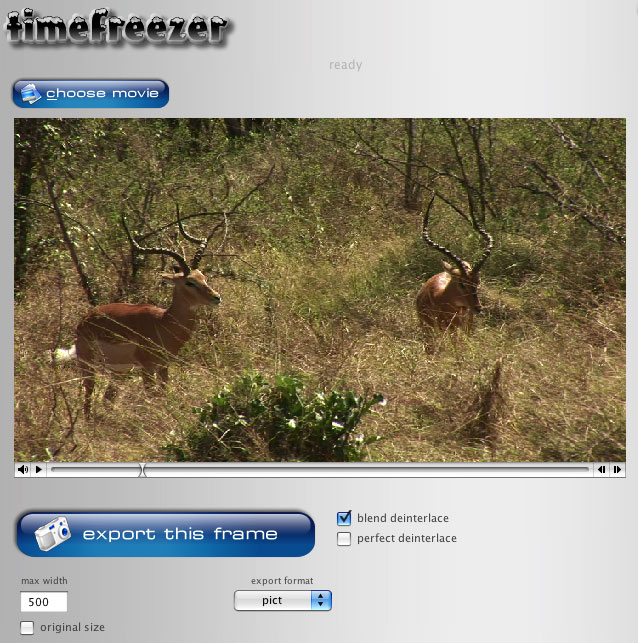
Obviously, if you are working with Progressive footage, then interlacing is not a problem, but many are shooting 1080i and TimeFreezer has two additional options what really help with interlacing issues. These two options work with Jpeg, PNG and Pict. If the frame that you need has rapid motion and heavy combing artifacting, selecting the 'blend deinterlace' option will add some motion blur to the image which helps mitigate the combing effect.
The second option is 'perfect deinterlace', which deinterlaces the image but also then reduces the image size to half, returning the resolution to the image. This really does work well. When you choose 'perfect deinterlace' you'll notice that the size and format options are gone from the window, images will be exported in the PNG format.
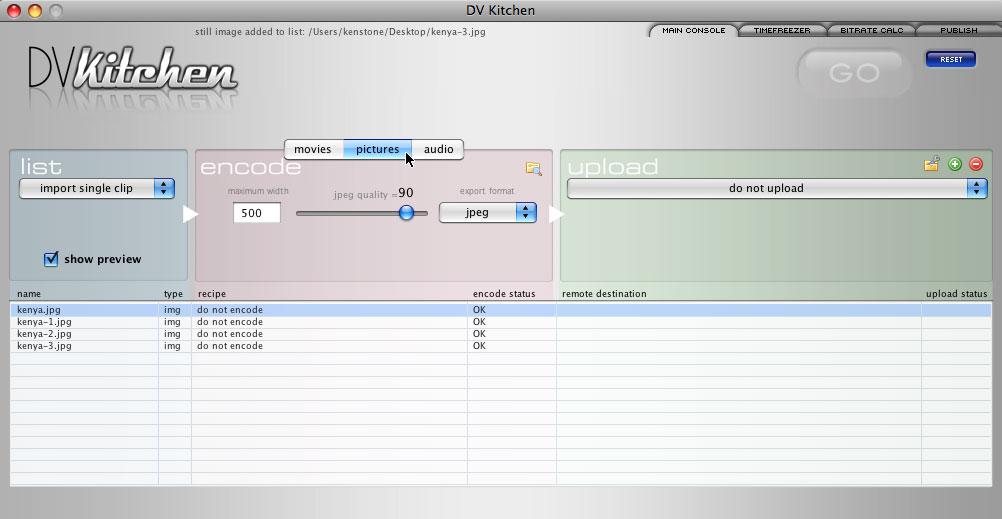
When you have the still images that you want, they will be ready for you on the Desktop, but you can also move the stills back to the Main Console by clicking on the 'add still to list' button. Once your selected stills are in the Media List, you can upload them to your FTP server and then use the Publish function to embed your images into an HTML page or generate forums tags for easy posting. The Main Console with the still images added is shown below. In the Main Console you can encode your stills further, for example to JPEG format for the web or simply select a remote destination and DV Kitchen will automatically upload (via FTP) your stills to your server for you.
Bitrate Budget Calculator
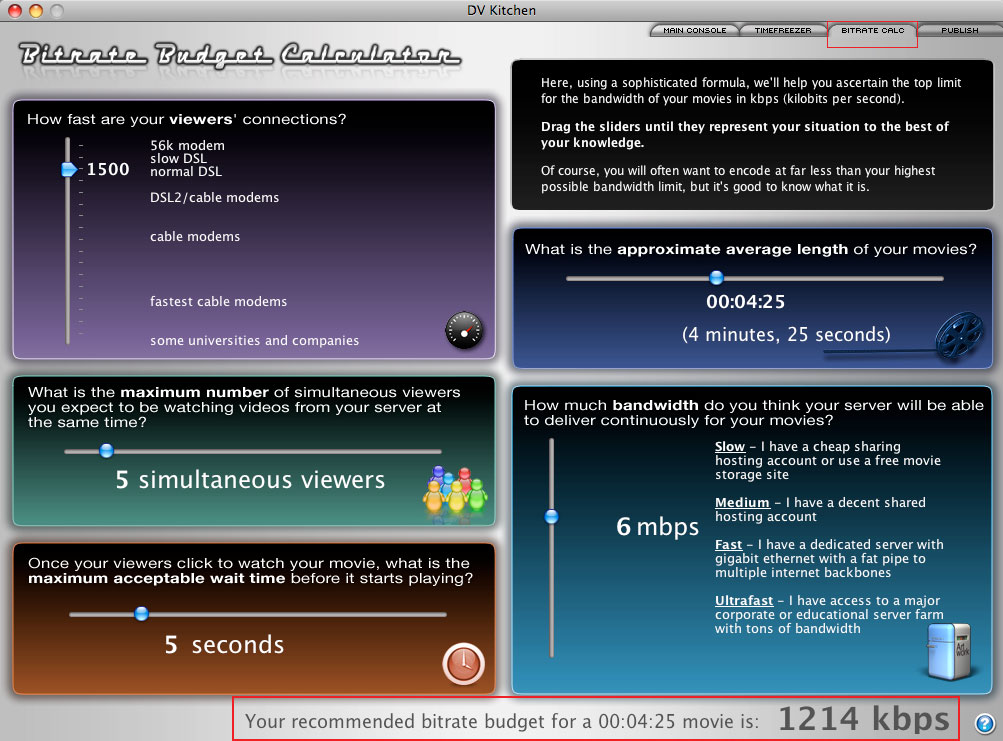
The Bitrate Budget Calculator is use to calculate the encode settings to produce the highest quality video at the lowest possible bitrate. There are five sections with setting sliders into which you enter information about your situation. A recommended bitrate will be shown at the bottom of the window. This bitrate will be a starting point for you to use in 'SampleLab'.
Publish
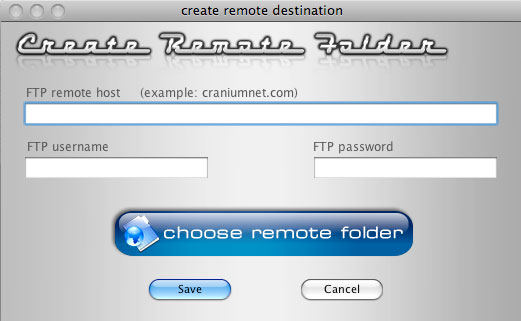
To use the Publish section of DV Kitchen, you need to first upload your clips from the Main Console window. Under the "Upload" area of the Main Console, you can easily setup, save and edit your frequently-used FTP destinations.
Just select a destination from the upload popup menu to apply it to your clips. Then, just hit the "GO" button, and DV Kitchen will upload your clips, making them ready for you to publish to the web.
Once you've setup your FTP remote folder destinations with your server information, transferring your encoded files to your server is just a one click affair. Built-in FTP makes the uploading process easy and quick and right from the Main Console of DV Kitchen. Publish will create all of your .html tags for you, which will embed your movies or stills into web pages or blogs. It can even generate a complete web page for your movies or stills with a title and caption. DV Kitchen will even create the html code need to display 'Shadow Boxing' of your video for your viewers.
In the lower right had corner of the DV Kitchen window is a 'question mark' button. Click on this and a new window opens up. From in here you can access the PDF manual, go to the DV Kitchen discussion page for assistance and a 'check for updates' button. This is very convenient as it seems that new features are added to DV Kitchen on a regular basis and getting these update is very easy to do.

Conclusion
Josh Mellicker of DVcreators.net has created a number of tutorial movies that teach you how to use DV Kitchen, the process is very simple and the movies will teach you most of what you need to know. At the very bottom of the DV Kitchen web page is DV Kitchen Theatre which lists all of the movie tutorials. If you watch any of the movies you will see that each movie opens with the 'Shadow Box' effect. I point this out because you can have DV Kitchen add the 'Shadow Box' effect to movies that you create. It does this with one click and writes the html code for you automatically, sweet. There is also a manual and a 'free trial' version of DV Kitchen that you can download and play with.
Additionally if you need to upload your movies to your server but have not used or don't like FTP (File Transfer Protocol) software, DV Kitchen will do your uploading for you and allow you to manage your server account. TimeFreezer is a very efficient way to make good stills from video, for some of us, this can be a real blessing.
If you find yourself making a number of movies for the web, or often need a lot of good quality stills from your footage, then you should take a look at DV Kitchen. DV Kitchen is a finely crafted application, very easy to use and stable. With it, you have the ability to drop a video into SampleLab, pick different frame sizes, bitrates and even codecs. You can 'Cook' the video and playback the tests right there in the Preview window and cycle through the different test samples. This is simply the best way I have ever seen to visually check the quality of your encoded video.
Enjoy,
--ken
[Top]
copyright © www.kenstone.net 2008
are either registered trademarks or trademarks of Apple. Other company and product names may be trademarks of their respective owners.
All screen captures, images, and textual references are the property and trademark of their creators/owners/publishers.