
DVD Studio Pro 2 - Basic Mode 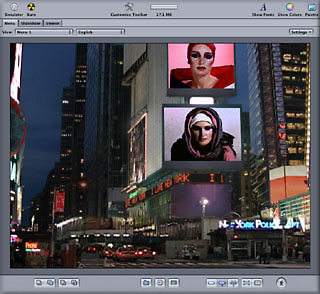
September 8, 2003
Authoring with DVD Studio Pro 2 - Basic Mode
DVD Studio Pro 2 - Basic Mode September 8, 2003
Authoring with DVD Studio Pro 2 - Basic Mode
System Requirements
Price
Full Version $499.00
Upgrade $199.00
This article is about DVD SP 2 in Basic Mode, hereafter referred to as SP 2. Some might say that SP 2 is like iDVD 3 on steroids and in Basic Mode SP 2 does resemble iDVD in look and ease of use but that is where the similarity ends. The awesome power and flexibility of SP 2 Basic Mode goes far beyond iDVD. Basic Mode of SP 2 sits on top of a completely re- written application and draws from the full feature set of SP 2 Advanced Mode which lies just beneath the surface. The integration of the Advanced feature set is so seamless that you will find yourself using Advanced features, like the Inspector, without even leaving Basic Mode. There is much to explore, so let's get started.
Installation
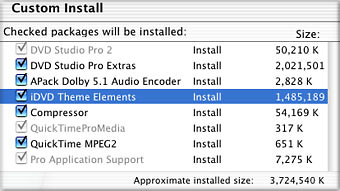
Installation is straight forward and all elements required by SP 2 will be installed automatically. SP 2 must be installed on your boot drive. There are several situations where you will want to perform a 'Custom' install. SP 2 has the ability to accept projects created in iDVD 3. If you plan to move iDVD 3 projects into SP 2 then you will need to install the item 'iDVD Theme Elements' in the Custom install window. SP 2 uses these iDVD Elements to build your iDVD 3 project so that it will look the same, same templates and buttons, as it did in iDVD 3. While these iDVD 3 elements are available to projects started in iDVD, they are not available for projects created in SP 2. SP 2 can not access these items on it's own. If you install 'iDVD Theme Elements' and then later decided that it is not needed - Boot Drive > Library > Application Support > DVD Studio Pro, drag to the Trash. You should also consider installing 'Pro Application Support' if it is not already installed on your Mac. Pro Application Support is required to access software updates for FCP 4, SoundTrack, LiveType, Compressor, etc. from the 'Software Update Panel' in the Mac System Preferences.
Before you Launch SP 2 you'll want to create a Project folder and consider where to place this folder. By the time you have finished your SP 2 project with assets, encode and build, this folder will contain a number of very large files, up to 9 gigs. Whenever possible, export from FCP 4 (FCE and iMovie) as a QT Movie, Not Self Contained and from FCP 3 as a FCP movie, not self contained, a Reference movie. If you use a self contained movie you will be adding about 12 gigs per hour to the folder. If you place the Project folder on your desktop, the folder will actually reside on your boot drive. Check to insure that there is at least 9 gigs of free space. This figure would be above and beyond your system hard drive requirements for Virtual Memory. If you have a media or second hard drive you might want to consider placing the Project folder there. You can make an alias of the project and place it on your desktop.
Launching SP 2 for the first time you will be asked which Mode you wish to work in; Basic, Extended or Advanced. Click on the Basic mode. You can change the Mode at any time, even mid project, from the Window menu > Configurations. Name and Save your Project inside your Project folder. There is a reason for Saving your Project before doing anything else. One of the important Preferences, 'Destinations', will need to be pointed to the Project folder, so it must be in place before setting Preferences.
Preferences
There are nine different Preferences panes and most are self explanatory. There are several that you'll need to set before you start work on your Project. When you have completed your settings in any of the Preference windows remember to click the 'Apply' buttton before clicking 'OK' to close the window.

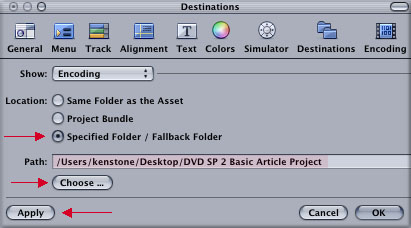
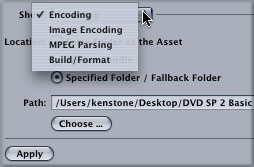
But wait, there's more. Clicking on the 'Show' dropdown menu reveals three additional items that will be generated by SP 2; Image Encoding, MPEG Parsing, and Build/Format. Each one of these items will need to be pointed to your Project folder, one at a time. A bit of a chore. (grin)
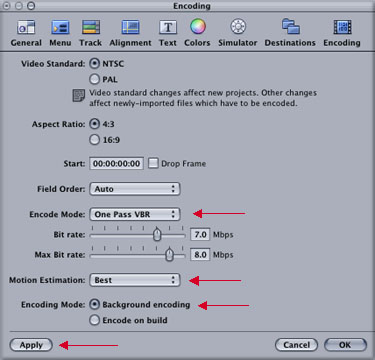
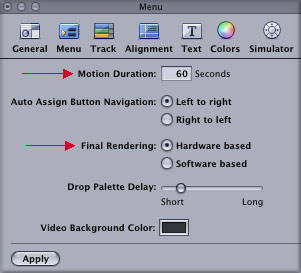
Final Rendering defaults to Hardware based which uses your video monitor card to assist with the rendering process. Leave this set to the default.

When SP 2 opens in Basic mode you will be presented with two windows. The large 'Menu Editor' window and the Palette window.
Menu Editor
Interface

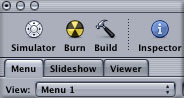
Across the very top of the Menu Editor is the Toolbar. Starting from the left is the Simulator. This opens a special preview window with an on screen remote control to view and test your project. The Burn tool provides a direct link to a built in SuperDrive. If you are using an external DVD burner, not to worry, there are several easy ways to burn a DVD to an external burner. The next item is Customize Toolbar which provides a dropdown palette with numerous tool icons that you can add to your tool bar. This palette is very similar to the tool palette found in the OS X system for customizing the Finder. To save your customized tool bar, Window menu > Save Configuration. Next is the Disc Meter which displays the current size of your project. The next two items open the Text palette and a Color palette. The last item in this row is the Palette button which will open or close the Palette window.

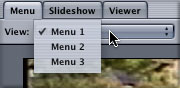
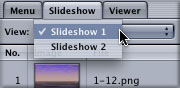
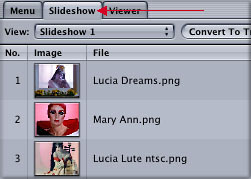
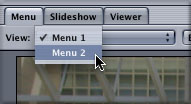
Below the first row of buttons on the left side are three tabs and a View dropdown menu. These tabs enable you to navigate between the different menus and slideshows that you are working on.
Selecting the Menu tab will place all menus (sub menus) in your project into the View dropdown menu. Selecting the Slideshow tab will display all slideshows. Selecting a menu or slideshow in the View dropdown will open that menu or slideshow in Menu Editor. The Viewer tab is for previewing slideshows and video tracks, however I prefer to use the Simulator mode for previewing.
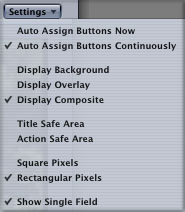
To the far right on this row is the Settings dropdown menu. These settings are aids we can employ while working on our projects. Select to 'Auto Assign Buttons Continuously' as this controls the button selection order when using a remote control. Select 'Display Composite' when working in the Menu Editor. Title and Action Safe will show the portion of your menu that will be cropped when the DVD is displayed on a TV. When preparing a DVD for use with TVs, make sure that all buttons are inside the Title Safe area. While building a DVD, we are working on computer monitors that use square pixels to display our images and video. While the images looks good on our computer screen, viewing using square pixels does not display video rectangular pixels in the proper proportions. For an accurate facsimile of how video will display on TVs, select Rectangular Pixels. For the best presentation of interlaced video while working in SP 2 select 'Show Single Field'.
Along the bottom of the Menu Editor are additional tool groups.

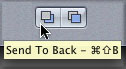
The first grouping on the left is Send to Back/Bring to Front. The second group is Backward one Layer/Forward one Layer. The Menu Editor in SP 2 is, in good part, a compositing tool. It works in layers with transparency much as FCP does by stacking clips on ascending Video tracks. In SP 2 we can start with a background layer, add a shape or tint bar over part of the background, overlay these with additional shapes, then place text and buttons on top of the shape. These two sets of buttons enable us to change our layer order, to move items backward or forward in the stack by selecting an item and then clicking on the appropriate button.

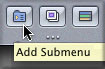
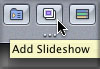
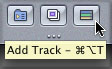
In the center are three buttons; Add Submenu, Add SlideShow and Add Track. These buttons represent a one click approach to adding to our menus, but there's a caveat, isn't there always. When building slideshows and tracks using these buttons, there will no menu return or 'jump back' when the track or show is over. When done it will just sit there on the last frame or still. There actually is a better way to create submenus, slideshows and tracks and these do return to the main menu when done, which we will see later.
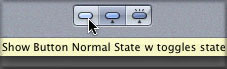
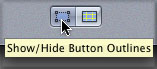
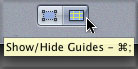
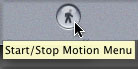
Bottom right of the Menu Editor are the remaining set of tools. The first group of three tools; Normal, Selected, and Activated, will preview how menu buttons will appear to the viewer when using a remote control with the finished DVD. The next tool Show/Hide Button Outlines is probably one of the more important tools. When creating buttons and when using templates that come with a number of buttons it is not hard to lose sight of the buttons. In the early stages of building buttons, when no shapes or assets have yet been applied to the button, clicking away from the button makes it disappear from the screen. This is also true for drop zones and other elements placed into the menu. Turning this feature on will place outlines around all buttons and drop zones with additional information about each element. These button Outlines also show the amount of space that the button requires and will help prevent you from placing one button too close to another. The next tool is Show/Hide Guides. Guides are thin vertical and horizontal yellow lines that run through the menu enabling you to to align your buttons and objects in the menu. You can click on these yellow Guides and drag them into position. The last tool Start/Stop Motion menu is for turning on/off motion menus and background audio while you work.
The Palette Window
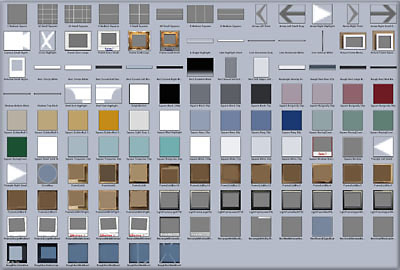
The Palette Window in SP 2 is much like the Browser in FCP, it's where all the material used to build DVDs is kept. Templates, buttons, shapes, text objects, drop zones, video audio, stills. Some of these assets are supplied by Apple, others are the unique elements to be used in the DVD like video clips, still images, background art and audio. There are six tabs in the Palette window. The first three tabs contain elements supplied by Apple; Templates, Styles, (which contains four additional sub tabs; Buttons, Text, Drop Zones and Layouts), and Shapes. The remaining three tabs; Audio, Stills and Video display the Libraries for iTunes, iPhoto and iMovie. If you do not use these iApps, it's a simple matter to add any media files and folders to these tabs. To add any elements to your project from the Palette window, simply drag the item into the SP 2 interface. It is not necessary that your assets be in the Palette window as you can drag from the Desktop or Finder directly into the SP 2 interface. In addition, if you have created custom menus you can save these as 'Custom' templates which will be available to you for any future projects, or you can save to the 'Project' that you are working on.

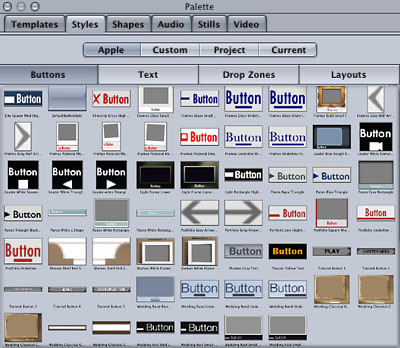
The first section, Buttons, is probably the most important. Buttons are our means of moving through the different menus of a DVD. All buttons in this section will display the three button highlight states; Normal, Selected, and Activated, which are essential to navigating the menu on a TV using the remote control. Many of the buttons shown below are taken from the provided templates though you can mix and match as you wish. Each button has a very different look and a different way of displaying its highlight states. Some will display a white line under the button when the remote control is positioned on them. Others have yellow highlight boxes surrounding the button, some will display a red X, box or dash in front of the button.
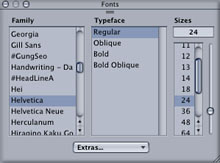
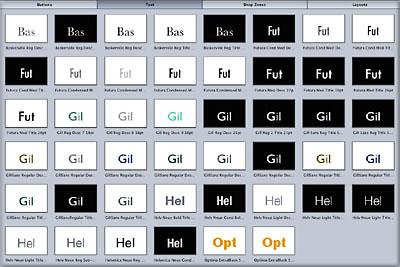
The Text section offers different font styles, sizes and colors for building text objects, which are simply blocks of text that we may wish to place on a menu page. Clicking on a Text object in the Menu Editor will select the text which can be changed at any time to a different font, size or color. Text objects are static and can not be used for linking purposes. Considering the ease with which we can change the text you might wonder why Apple placed all these variations of just a few font styles. The reason is that all of the items that you see in the Text section are used in the stock Apple templates and as such, Apple had to put them somewhere.
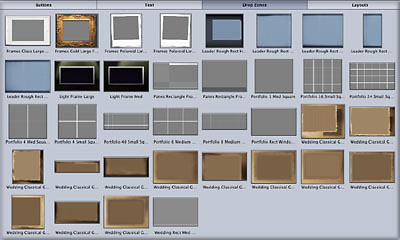
The third section contains Drop Zones which add excitement and uniqueness to our menus. Aside from the ability to have full motion menus we also have drop zones which are smaller areas in the menu into which we can drop moving video or still images. So it is possible to have a full menu in motion and then have smaller windows insets that play video clips as well. The video clip or still placed into a drop zone fills the zone, different zones styles provide different style borders around the video or still. Some of these drop zones also change the video or still by applying a color tint or softness to the media, and some even add animation. All drop zones can be resized and repositioned. Apple templates have drop zones and the items found in this section match in style the drop zones found in the Apple templates. This would be for adding additional drop zones to an existing Apple template or for use in designing a custom menu or template.
The fourth section in the Styles tab is Layouts. The Layouts section contains the same templates that are found in the Templates tab, the difference being that templates brought in from the Layout sections contain no background art but do contain all the elements found in the corresponding template in the template tab; buttons, drop zones, text and shapes. The Layout template called 'Leader Index' shown below, shows six lite blue squares that are drop zones, drop zones in SP 2 are indicated by large thick arrows. You will notice that there is no background art with this menu. The layout shown here has the yellow 'guide' lines showing as well as button outlines.
Did you think that we would never get here? (grin). The templates provided by Apple are cool and fun to play with and can be customized to a high degree but when I build DVDs for my customers they want menus that are totally unique. It is also easier to demonstrate the building process by starting off with a blank project and building from the ground up. The methods used here can be applied to stock templates as well, it's all the same thing. We will look at the supplied templates later on.
SP 2 uses a contextual Overlay menu, Apple calls it a "Drop Palette", which will provide an easy means of placing assets in the menu. These Drop Palettes are not unlike the Overlay menu found in the Canvas window of FCP. Using the Drop Palette is an easy affair. Select your asset and drag into the Menu Editor window, then choose from the Drop Palette the action you want to apply. It's that easy.
Open a new Project in SP 2, you will be greated by an empty dark gray menu. You can change the color of existing menus in, Menu Prefs > Video Background Color, hit the "Apply" button. Nothing like starting from scratch. All that is required is to drag your assets into the Menu Editor. You will be presented with a contextual Drop Palette. It is contextual in that it knows what it is that you are dragging into the Menu Editor and will offer menu options appropriate for that asset.
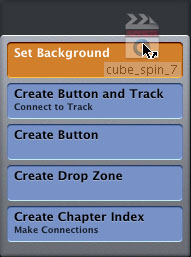
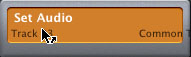
Below left I have dragged a FCP QT reference movie into the Menu Editor and am presented with an Drop Palette with options for what to do with this asset. As I want to use it as a background I have selected "Set Background". The FCP QT reference movie has audio tracks and when the video is applied to the background the audio will be included. Remember that as we are working with a new project with no Apple templates applied, we can control the duration of the looped background movie and audio in the Menu preference pane. Below center I have dragged in a Photoshop file. Below right I have dragged an audio file into the interface for use as background music. If there is audio in place from a video clip you can replace the existing audio with new audio by simple dragging the new in and selecting "Set Audio".
This is the processs and workflow that we will use to build our DVD. The Drop Palette combined with the 'control click' contextual menu is all we need to do everything. So now we have the background set.
There are several ways to create buttons depending on what you want them to do, the completed button often consists of several parts. The easiest way to create a button is to drag an asset, video or still into the Menu Editor and select Create Button or Create Button and Track from the Drop Palette. You can also create a button by simply clicking and dragging in the Menu Editor. You can give the button a shape and apply moving video or a still to the face of the button. Lastly you can assign a 'Target' to the button which is how the button knows where to go when it is selected, by control clicking and selecting your target from the dropdown menu, though targeting is often done automatically through the Drop Palette. When you have created your button you can control click on the button and select "Set as Default button style". You can have up to 36 buttons on a 4:3 menu page and 18 buttons for a 16:9 menu.
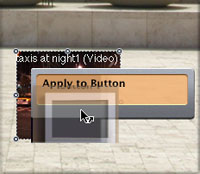
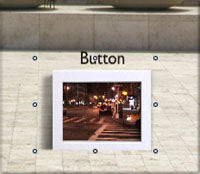
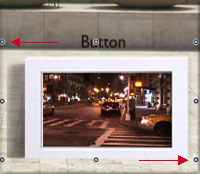
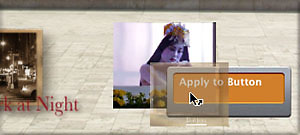
Next we want to apply a button from the Button section in the Styles tab of the Palette. Only buttons from Styles Tab - Buttons Section will show highlight 'states' on a TV with a remote. Drag the button Style onto the button in the Menu Editor and select "Apply to Button". The button I chose comes with a Text Object that says 'Button'.
Surrounding the button are eight small circles, sizing handles. Click and drag on any one of the handles to resize the button, Shift click to constrain proportions. Clicking on the Text object will select the text which you can then change or delete. You can also change the font, its size or color.
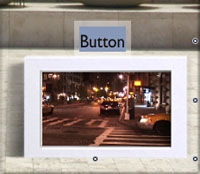
We have built a motion button that when selected will play full screen video and return to the menu when done. You can change the Style/Button at any time by dragging a new choice on top of the old and selecting "Apply to Button". This is what I have done in the continuing examples below.
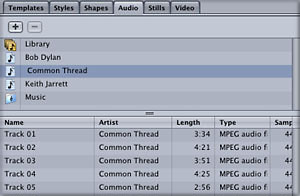
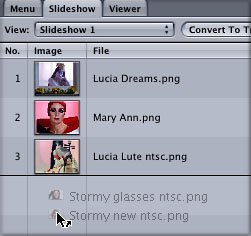
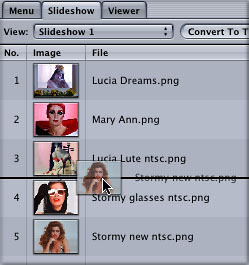
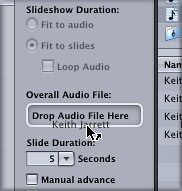
Open the slideshow Menu Editor by clicking on the Slideshow tab, 'Slideshow 1' will appear in the View menu and the slideshow Menu Editor will open. You will see the photos that you dragged to the Menu Editor. To add additional photos, drag them into the Slideshow where they will be added to the list. You can delete any photo by selecting it and hitting the delete key.
You can change the order of the photos by clicking and dragging a photo to a new location in the list. On the right hand side of the slideshow editor is the "Overall Audio File" section for adding background audio to the slideshow. Select an audio file and drag it onto "Drop Audio File Here". You can change the slide duration for all slides or you can set a different duration for each and every slide. Select each slide in turn and change the duration. You can also have different audio for each slide as well, just drag an audio file into the audio column for that slide. But if you already assigned an Overall Audio File you will need to control click the bin and choose Remove.
Return to the Main menu by clicking on the Menu tab. We need to finish the slideshow button by adding a Style/Button to it. Select a button style in the Palette window and drag it to the slideshow button in the Menu Editor. Select "Apply to Button" from the Overlay window. Shown below right, are two yellow Guide lines to help with resizing and positioning the button. For exact positioning of the button you can use the up/down/left/right arrows on your keyboard.
Apply a Style/Button to this new button. The Style/Button that I am using comes from an Apple Wedding template, notice that both video and photos are now Sepia toned.
To access the new menu in the Menu Editor select the Menu tab and click on View, select menu 2, which is the name of this new submenu. Menu 2 will open in the Menu Editor using the same image as a background that is used for the face of the button. You can change the background art for this new page by dragging in a new photo or video and selecting "Set Background" from the Drop Palette. You can also add background audio to this menu.
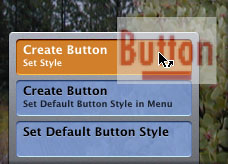
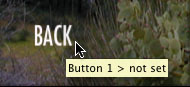
Now you can add new buttons to this submenu, but wait, something is missing. How do you get back to the main menu from this submenu. We'll need to create a "BACK" button and link it back to the main menu. From the Palette window, Styles/Buttons I have selected a simple text button and dragged it to the new menu. From the Drop Palette, "Create Button - set style". When the button appears I change the text to read "BACK" and change the color to white. Now we have a "BACK" button, but placing the cursor on the button provides us with a yellow tool tip that tells us that the button has not yet been linked back to the main menu by displaying 'not set'.
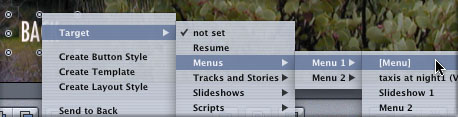
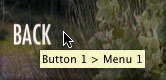
While almost everything in SP 2 Basic Mode is controlled by the Drop Palette one additional tool is the Contextual menu. Control click on the BACK button and place the cursor over 'Target'. Slide over to menus > menu 1 > [menu] and release the mouse button. This will target the BACK button to the main menu. Placing the cursor on the BACK button, the yellow tool tip now reads "Button 1 > Menu 1", showing that this button links back to the Main menu. Tool tips are a great quick way to find out where a button is pointed, or if it is.
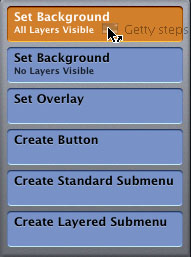
Immediately after selecting "Create Chapter Index" from the Drop Palette, SP 2 will ask you what template you want to use for the new scene selection menu it needs to create. It does this by opening a second Template palette, displaying the Apple supplied templates. Each set of Apple templates contains one menu entitled "Index". In order for SP 2 to create a scene selection Index page with scene titles and buttons, there must be buttons already in place on the page so that SP 2 has buttons to assign the chapters to. This is why there are so many buttons built into the Apple Index templates.
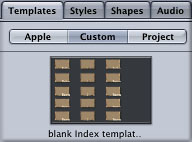
Since, at the moment, we are not working with the stock templates but building our own menus, we may not wish to use a stock Index template. Looking around the special template window that SP 2 has opened you will see that there are no options other than the stock templates. Guess we'll have to build our 'Index' template. This is a one time chore as when we have build a Index template we can save it so that from this point on it will be available for any new projects.
Open a new Project with a blank menu. Click and drag with the cursor, this will create a new button. If you click away from the button it will deselect and disappear. Turn on Show Button Outline from the bottom of the Menu Editor to see the button. Select a Style/Button from the Palette and drag to the button - "Apply to Button.
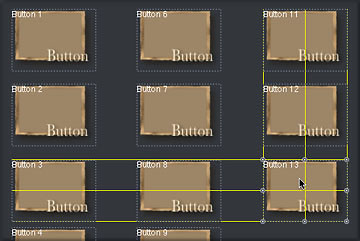
Now that we have created one button 'Option drag' this button down to make a copy. Continue doing this until you have a large number of buttons on the page. Below is the Index template with Button Outlines turned on and with the yellow 'Dynamic Guides' guides for proper positioning of the buttons. Make sure that all your buttons are within the Title Safe zone.
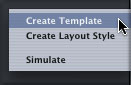
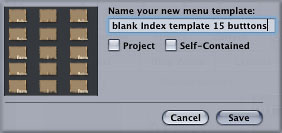
Once you have built your Index template, Control click on the template and select Create Template from the contextual menu. When the Save Template box opens name your index palette, uncheck both Project and Self-Contained, this will save your template to the Custom tab in the Template palette. This template will now be available for all future projects. You can make as many templates, with different Style/Buttons as you like. When you have 'Saved' your custom Index template, you can Select All from the Edit menu and then Delete, this will clear off your menu.
Now that we have our Index template let's build a Scene Selection menu. Drag a video clip that has Chapter Markers into the Menu Editor, from the Drop Palette select "Create Button and Chapter Index - make connections". As soon as you do this SP 2 will open a second Template palette. Click on the Custom tab and select the Index template you just made, click OK. You have set the template for the Chapter Index menu. Apply a Style/Button to the Index button just created.
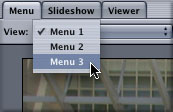
Now let's move to the new Index menu. Select the Menu tab, click on the View drop down menu and select 'Menu 3' which is our Index menu. When the page opens you will notice that there are only buttons for the number of Chapter Markers in the video clip, plus one extra, SP 2 always adds a chapter marker to the very start of the video calling it 'Start'. All of the extra buttons on the custom Index template disappear. I have repositioned the buttons, changed the size and color of the font. When the chapters have finished playing SP 2 will return you to the Main menu. I have also created a back button by adding a Style/Button to the page. I then shrunk the size of the button down using the handles so that only the word 'Back' shows. Then, control clicked on the button and targeted the button back to the main menu, Menu 1. The Back button below is shown in its highlighted state (white bar).
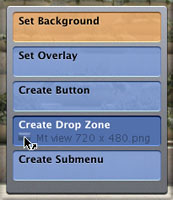
We have been working by creating our own menus as opposed to use the Apple templates. We can add drop zones to our custom templates as well. Drag a QT movie or photo into the Menu Editor and select "Create Drop Zone" from the Drop Palette. For some strange reason, when creating a drop zones using a still, only PNG and JPEG formats will produce the "Create Drop Zone" option in the Drop Palette. If you try to use a PS or TIFF file, the "Create Drop Zone" option will not be available. To use a PS or TIFF format file as a drop zone, choose Create Button then control click on the button and select "Convert Button to Drop Zone" from the Drop Palette, now PS or TIFF images will be accepted. This is only true when creating brand new drop zones, with existing drop zones PSD and TIFF files will work properly.
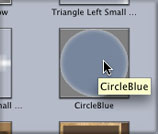
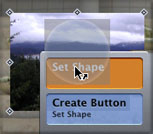
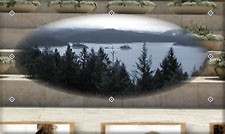
Open the Shape tab in the Palette, select and drag "Circle Blue" to the drop zone and from the Drop Palette "Set Shape". Using the re size handles customize the shape of your drop zone. Unlike the buttons that we have been making, Drop Zones can not be linked to a menu. If you control click on a drop zone you will see that "Target" is grayed out.
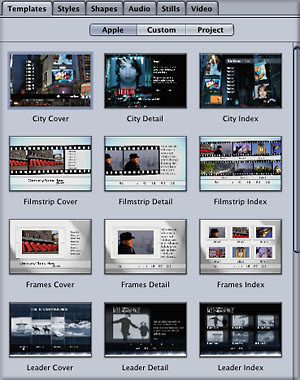
SP 2 comes with 12 template sets or Themes, three of which are full motion menus with audio. These template sets offer three or more different menu pages that are a variation on a theme.
The first template in each set is called 'Cover' and would be used as the main menu page. The second template in the set is called 'Detail'. This template has buttons, drop zones, and text objects and would be used for any type of text information or links to other parts of your DVD. It is a general purpose template that you can fashion to suit your needs. The third template in the set is called 'Index' and is used when you build a Scene Section menu for video that has Chapters. To load a template into the Menu Editor you can drag the template from the palette window into the Menu Editor or you can select a template in the palette and click on the 'Apply' button found at the bottom of the palette window. When an Apple template is applied you will see that it is pre-built. There can be up to nine buttons, each one with text, navigational buttons (forward and back), a text title and sub title, blocks of text, often with shapes, tint blocks, guides and the ubiquitous drop zones.
These stock Apple templates are completely malleable and customizable. You can delete, change or replace any buttons, button styles, text, shapes, background art and background audio. If you do not like the choice you made you can apply a different template at any time. You will notice that when you change templates, often the buttons from the previous template will remain, you will need to delete these extra buttons.
If you have a SuperDrive burning a DVD in SP 2 is very simple, just click the Burn button, SP 2 will do the rest. If you are using an external FW burner it's still easy and you can take advantage of several options along the way.
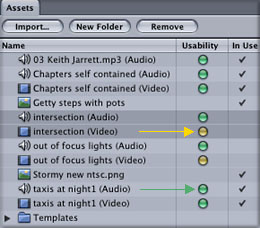
Let's take a look at what is going on with this entire process. Go to the Window menu and select Assets, which will open a browser like window. Inside will be all the assets that you are using in your project, video, audio and stills. There is a Usability column. In this column are colored buttons, red, amber and green. These three colors show the state of the encoding process, which is the conversion to MPEG 2. Red shows that the encoding process has not yet started, Amber shows that encoding is still in progress and Green denotes that encoding is done. If you have Background Encoding turned on in Encoding Prefs, the encoding process will start as soon as you place an asset into the menu. There is another way to use the Asset window. Depending on your encoding settings, the encoding process can take a great deal of time, even overnight. If you drag all your assets into the Asset window even before you start laying out your menus, the encoding will go on as you work. To use the assets just drag from the Asset window into the Menu Editor.
Encoding or converting to MPEG 2 is the first step. Once all the assets have been encoded the next step is Build. I used Customize Toolbar to add a Build icon on my tool bar, or File menu > Advanced Burn > Build.
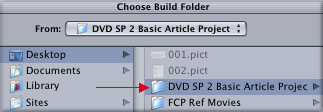
Selecting Build you will be asked to 'Choose a Build Folder', where to put completed files. Choose your Project Folder.
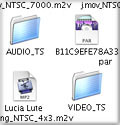
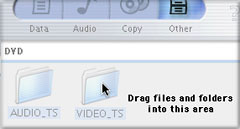
SP 2 will keep you informed as to its progress as it performs different tasks and will announce when it is done. Open your Project folder and look for two folders. AUDIO_TS and VIDEO _TS. These two folders are your DVD. If you check the AUDIO_TS folder you will discover that it is empty, you still need it though.
When we tested the DVD it was in Simulator but it had not yet been converted to DVD format. Now we have an opportunity to test the finished project as a DVD. Open your Mac DVD Player. From the File Menu, Open > VIDEO_TS Folder.
Now navigate to the VIDEO_TS folder, select and choose, This will load your project into the DVD Player. Using the on screen remote control, click on the Play button and again, test all aspects of your DVD. As you are now testing with the actual DVD files, this test will be the most accurate and complete.
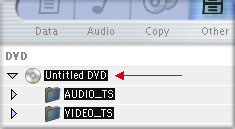
Once you are satisfied that everything is working properly you can do your burn. Using Roxio Toast Titanium 5.2.1, control click on the 'Other' button and from the drop down menu select "DVD".
Return to your Project folder and select both the VIDEO_TS and AUDIO_TS folders and drag them into the Toast window. Give your DVD a Title and click on the Toast Record button.
Caution. When SP builds your project it creates two files found inside the VIDIO_TS folder; 'title.layout' and 'VOB_DATA.LAY'. These two files are specific to DVD Studio Pro, not the DVD-Spec. When you use SP to burn your projects, SP will not include these two files. When you use Toast to burn your project you must manually remove these two files from the VIDEO_TS folder from inside the Toast window. Only the .IFO, .BUP, and .VOB files are what should be in the VIDEO_TS folder on a formatted DVD-R. Including these two files on the DVD may cause playback compatibility problems.
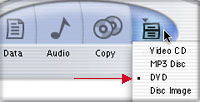
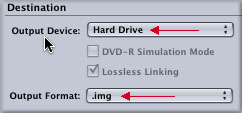
Okay, there is yet another way to burn your DVD. We will use SP 2 to create a Disc Image. From the File Menu > Advanced Burn > Build and Format. A dialog box will open. In the 'Destination' section click on 'Output Device' and select Hard Drive. When you do this the 'Output Format' will change to read ".img".
This will produce a disc image which you can select and burn from the Finder (File menu > Burn Disc ) or in Toast you can control click on the Other button and choose 'Disc Image', drag your disc image into Toast. Once you have burned your disc, if you need to clear off your hard drive, you can keep the VIDEO_TS and AUDIO_TS folders or the disc image and delete everything else in your project. Having either the VIDEO_TS and AUDIO_TS folders or the disc image will enable you to burn additional discs in the future though you will not be able to modify the project any further.
I have been on the Mac for 11 years now, starting with Photoshop, which is why I bought a Mac in the first place. Over the years I have purchased my fair share of applications, but I must say that I have never been as impressed as I am with SP 2. I have been hammering away at SP 2 day and night for a month now and considering that this application has been completely re-written, it is amazingly stable. I have opened and closed projects hundreds of times, made countless changes and have burnt several test DVDs. Aside from one morning when SP 2 was a little grumpy and quit a few times, I have experienced absolutely no problems.
There are a few minor issues like no 'jump back' to the menu upon completion of a slideshow when the slideshow is built using the Slideshow button at the bottom of the Menu Editor. But, there is a simple and as easy way to build a slideshow that does jump back so this is not much of a problem. The only short coming that I see is that you can have only one project open at a time. On the plus side, SP 2 offers 99 levels of undo.
$499 dollars is a lot of money (but version 1.5 was $1,000) and if you only do the occasional, very simple DVD then iDVD 3 will suffice. Given the ascension of DVDs today and the fact that DVDs are an excellent way to deliver video content, I think that you are going to want to add DVD Studio Pro 2 to your collection of video tools.
Special thanks go to Jeff Warmouth and his upcoming book "Authoring with DVD Studio Pro 2" published by Focal Press. Not only was Jeff invaluable in helping me with this article but I was able to persuade him and Focal Press to let me run an excerpt from his book, a section on one of my favorite features of SP 2, the Inspector window.
Enjoy, I know you will, this one is a winner.
--ken
copyright © Ken Stone 2003
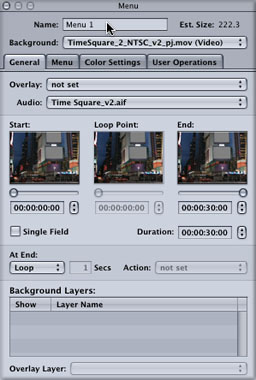
To display the Inspector, choose View > Show Inspector. The Inspector is a constantly updating window that will allow you to view or change information about virtually any aspect of your DVD Studio Pro project. Notice that the top of the window reads "Menu 1." This means that the Inspector is displaying properties of the active menu, Menu 1. If you were to select a button, the Inspector would update to display information about that particular button. Since we are sneaking into this Advanced feature, you only need to know about features that are relevant to editing menus. I cover the Inspector much more thoroughly in the Advanced section of this book.
Click on your menu background to make sure that no buttons are selected, and take a peek at the Inspector. At the top is the Name bar, which should read "Menu 1." To rename your menu, simply click in this bar and type a new name. Choose the name "Main Menu" or another descriptive title. If you click back onto the Menu Editor, you will see that the new name appears in the View pop-up menu in the upper left corner. This is one of the most useful menu properties to change in the Inspector, especially when your project fills up with menus.
Click on your menu background to make sure that no buttons are selected, and take a peek at the Inspector. At the top is the Name bar, which should read "Menu 1." To rename your menu, simply click in this bar and type a new name. Choose the name "Main Menu" or another descriptive title. If you click back onto the Menu Editor, you will see that the new name appears in the View pop-up menu in the upper left corner. This is one of the most useful menu properties to change in the Inspector, especially when your project fills up with menus.
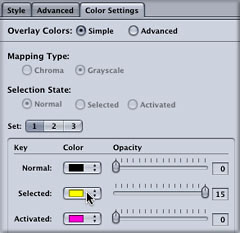
To change the highlight color of the buttons in your menu, choose the Color Settings tab in the Menu Inspector. In the middle of the tab are the properties of the three button states: Normal, Selected, and Activated. Each state has a Color and Opacity value assigned. To change the Selected highlight color, simply choose a new color from the Selected Color pop-up menu. The colors you choose here will affect all the buttons on your menu.
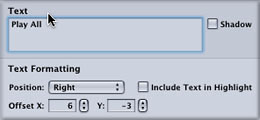
The Inspector can also be used to change characteristics of individual buttons. Select one of the buttons in your menu. Note that the Inspector updates to display properties of your button - the title bar changes to "Button" and the tabs are all different. Near the bottom of the Style tab is a Text box. Here you can directly edit your button's text, which is often easier than trying to select the text in the Menu Editor. The button text on your menu will update in real-time as you type. However, to change the Font you must still select the text in the Menu Editor. Clicking the Drop Shadow checkbox will automatically create a soft drop shadow.
Below this is is a section called Text Formatting. You can use the Position pop-up menu to change the position of the text on the button: Bottom, Top, Right, Left, or Center. You can also fine-tune this position by changing the Offset coordinates.
To the right is a checkbox labeled "Include Text in Highlight." Selecting this option will effectively tint the text with the highlight color when selected or activated, and will also include the text within the Button Outline box in the Menu Editor. Deselecting will keep the text out of the Outline box and will not tint the text when selected or activated. Some of the Apple Template buttons & button styles have this feature selected, and others do not. There is no "right" way to set this feature, it simply gives you another option for customizing your buttons.
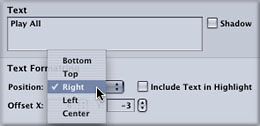
Since you're in the Inspector anyway, I'll show you a couple really cool features. You can use the Inspector to change the duration of your menu loop. To do this, click on your menu background and choose the General tab in the Inspector. Near the top are three frames with sliders: Start, Loop Point, and End. By manipulating these sliders you can essentially set new In and Out points for your menu loop.
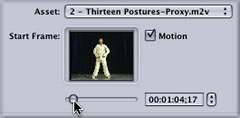
You can also set the In point of video assets assigned to individual Buttons or Drop Zones. Simply select the button or drop zone and change the Start Frame by dragging the slider or entering a new timecode value. The video asset will begin at the Start Frame, and loop for the duration of the entire motion menu.
When you are finished with the Inspector window, you can close it. If you find that you use the Inspector window on a regular basis, you can create a button for it on the Toolbar, just like the Palette button. To do this, click the Customize Toolbar button in the center of the toolbar. This will open a palette of buttons that you can drag in to the Toolbar. Find the Inspector button and drag it next to the Palette button, and click Done.
To make sure that this button is visible on your Toolbar the next time you open DVD Studio Pro, you will want to save your window configuration. To do this, choose Window > Save Configuration. In the resulting dialog box, choose a name for your configuration, such as "My Custom Layout." Now, when you choose Window > Configurations, your custom configuration will appear in the menu, complete with its own F5 shortcut key!
copyright © Jeff Warmouth 2003
Authoring with SP 2 Basic
We can have two types of backgrounds. Motion, using video clips from FCP, FCE or iMovie and Stills, which can be photos or art work from graphic applications like Photoshop. SP 2 will accept image sizes for NTSC of 720 x 480, 720 x 534 or 640 x 480 - PAL 720x576, 768x576 or 640 x 480 and process them properly.
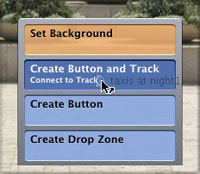
We want to create a button that when selected, will play a full screen video clip and when done, return to the main menu. In addition we want the video from that clip to play on the face of the button and give the button a shape. To do this, select a video clip and drag into the Menu Editor, continue to hold the mouse button down. From the Drop Palette select "Create Button and Track, connect to track". This action accomplishes several tasks. It creates a button and places the motion video on the face of the button and at the same time it creates the link or path to your video clip or in SP 2 parlance 'Track'. In SP 2 there is a Timeline with video and audio tracks but this is hidden from us in Basic Mode.
Select "Create Button and Track"

Button with video and Button Outlines
Styles/Button is dragged onto the button
Button face with Text object
Resizing handles
Text object selected
New Text
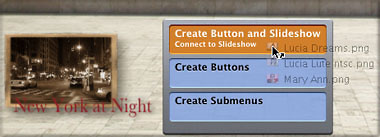
As I mentioned, there is a Slideshow button at the bottom of the Menu Editor which will build a show for you, however, using this button will result in a slideshow that does not return to the main menu. We have another, equally easy way, to build a slideshow and it uses the Drop Palette. Select two or more photos and drag into the Menu Editor. From the Drop Palette select "Create Button and Slideshow - connect to Slideshow". This will create a button with the first image of your selection on the face of the button and will link the button to the slideshow. You can change this button photo by dragging a different photo to the face of the button and choosing "Apply to Button" from the Drop Palette. While there is an image on the face of the new slideshow button, a Style/Button has not yet been applied, below right.
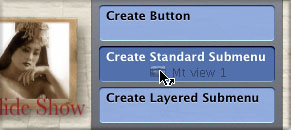
We can have up to 36 buttons on a menu page (18 for a 16:9 menu), but really! There will be times when you want a specialized menu(s) for other areas of interest. These new menus are called Submenus. To create a new submenu pick a video or photo from your new submenu and drag it to the Menu Editor. From the Drop Palette select "Create Standard Submenu". This will create a submenu button, place the video or still on the button and create the link to the new submenu page.

This is one SP 2's more important features, it allows the viewer of the DVD to select different scenes from your video from a Scene Selection menu. In order for Scene Selection to work Chapter Markers must be applied to the video in FCP, FCE or iMovie before being brought into SP 2. You can have up to 99 chapter markers. Drag your video with chapter markers into the Menu Editor and select "Create Chapter Index - make connections" from the Drop Palette, SP 2 will create a Scene Selection menu and place a button on the new menu for each scene with the name you gave it when you set your Chapter Markers in FCP.
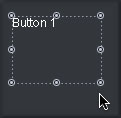
Click and drag to create button outline

Deselected button disappears
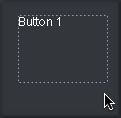
Show Button Outline turned on

Style/Button "Apply to Button"

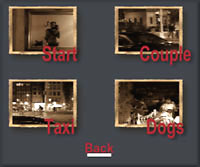
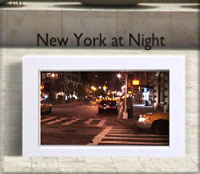
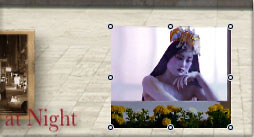
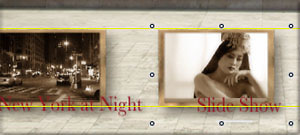
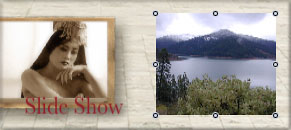
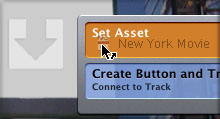
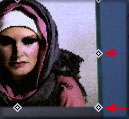
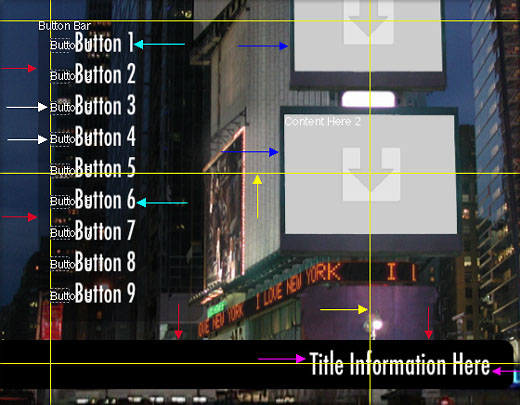
All of the provided Apple templates contain Drop Zones. A drop zone is an area into which we can drop either a QT movie, which will play on the screen, or a photo. In the case of Apple templates, these drop zones are designed and sized to fit into the background art like the two drop zones in the 'City' template, found in the two electronic billboards on the face of the building. Shown in the art at top of this article, two photos have been added to the drop zones in the template. Drop zones in templates are noted by large arrows. To add a QT movie or photo simply drag the asset to the drop zone and select "Set Asset" from the Drop Palette. The re-sizing handles of drop zones are diamond shaped as opposed to the circle shaped re-sizing handles for buttons.


Before we begin the burn process it would probably be a good idea to test our DVD. Click on Simulator and use the remote control to run every link, play every slideshow, and test every button. In addition use all the navigation buttons on the remote to insure that everything works properly.
![]()

Conclusion
The Inspector - Excerpt from 'Authoring with DVD Studio Pro 2' by Jeff Warmouth.


copyright © Focal Press 2003