
DVD Studio Pro 3 May 24, 2004
DVD SP 3 - New Features
DVD Studio Pro 3 May 24, 2004
DVD SP 3 - New Features
Review By Ken Stone
Graphical View
"It's back," I keep hearing everyone say ...... well, for those of us who started with DVD Studio Pro at version 2, we didn't even know it was missing. I am referring, of course, to Graphical View, a feature present in SP 1 but gone in SP 2. Graphical View is back in SP 3 and has been updated with new powerful features.
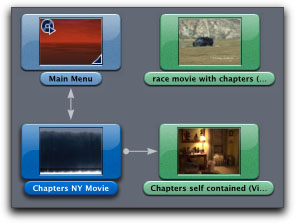
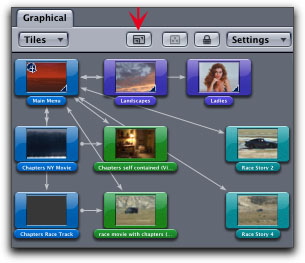
Graphical View does just what it's name implies, it offers a graphical representation of the navigation of our DVD, it reflects the project's organization and is like a 'flow chart'. Each time we add an element to our DVD, a new menu, track, script, slideshow, chapter index or even stories, SP 3 will generate an icon, what Apple calls a 'Tile', in Graphical View to represent that new item. Clicking on any tile will display arrows from that item to all other items that are linked to it. With the Main Menu selected, shown below left, all links (buttons) from the main menu are displayed by arrows that point to the linked items. If the items have back buttons or 'jump backs' set, then the graphical line will have an arrowhead pointing back to the Main Menu. With the 'Chapters NY Movie' menu tile selected, shown below right, the linkage between the Main menu and the chapters is displayed. Being able to quickly see the linkage between the different elements in the DVD is extremely helpful, but there is much more to the Graphical View. When you click on any tile, the Inspector will update to reflect that item and that item will become selected in the Outline tab as well. Double clicking on an tile will open that item in the Viewer window, additionally the appropriate window tab will open as well. Double clicking on a slideshow tile will play the slideshow in the Viewer and the slideshow editor tab will open as well, allowing you to make changes if you wish.
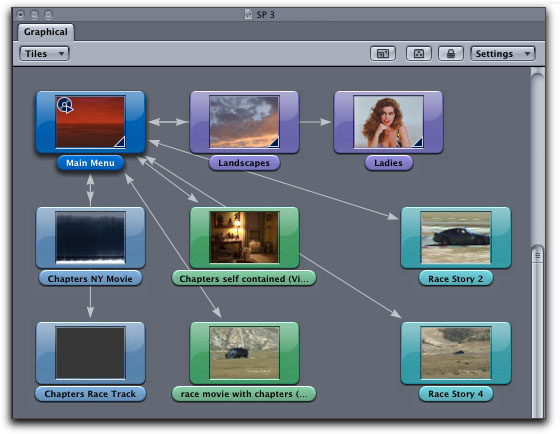
If you will look above you will see that my Main Menu has a DVD tile with a small triangle which denotes 'first play'. 'First play' is the first menu that you see on the screen when the DVD starts to play. SP 3 automatically sets 'first play' to menu 1, which, in my examples, I have renamed 'main menu'. You will also notice that the Main Menu, as well as my two slideshows, have small triangles lower right in their tiles, these triangles denote the fact that Transitions have been applied to the Main menu and that the slideshows have transitions as well, (more on transitions later). So how do we know the difference between a chapter index and a slideshow? Graphical View color codes the different elements with the same color scheme found in the Outline tab:
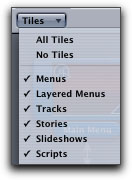
The Graphical View allows full control over how the tiles are displayed. Top left and right of the window are drop-down menus that offer display options. Snap to Grid is particularly useful.

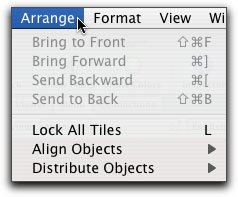
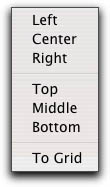
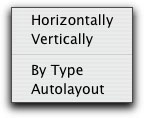
From the SP 3 menu bar > Arrange, provides options for aligning and distributing the tiles.
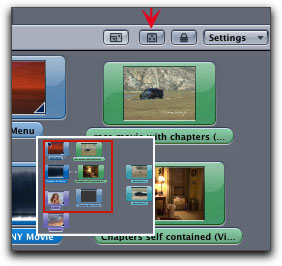
The 'Zoom to Fit' button, shown below left, will resize the tiles so that all tiles will be visible within the window. Enlarge the window and click on Zoom to Fit and the tiles will enlarge to fill the new size. Reduce the size of the window and Zoom to Fit will shrink the tiles. Just like FCP, 'shift z' and 'command + or -', will change the size of the tiles in the Graphical View window. Control click on an tile and select 'Zoom to Selection' and the tile will enlarge. If you have a large number of tiles in the Graphical window, with many out of view and you do not want to use the Zoom to Fit control as the elements would be too small to view properly, you can click on the Macro View button, shown below right. Doing this will add a red outline box inside the Graphical window and by clicking and dragging this Macro box you will be able to move around the larger Graphical window to bring tiles into view. There is a third button, a padlock, which will lock the tiles in place so that they can not be moved accidently.
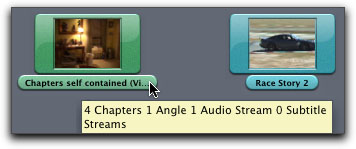
If you place your cursor on top of an tile title you will get a Tool Tip that displays information about that element.

There's more:
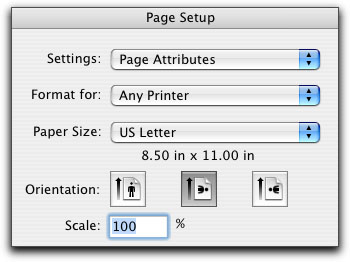
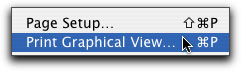
But you can take it with you when you go. (g) The Graphical View window can be printed by using the Print Graphical View command found in the File menu. If your Graphical View is in Landscape format, use Page Setup for proper page orientation. A PDF file can also be created which can be e mailed to your customer.
Transitions
While it is true that most people editing their movies in FCP would use transitions very sparingly, to show the passage of time between scenes, the use of transitions in DVDs is a different matter. Hollywood has set the standard and people now expect DVDs to have cool transitions as they navigate through a DVD. We have also become accustomed to having transitions in slideshows as opposed to straight cuts from one picture to the next.
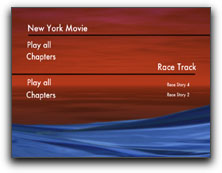
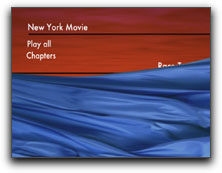
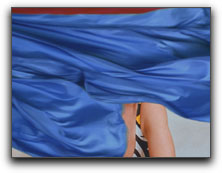
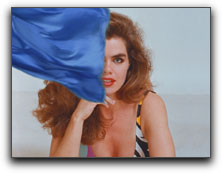
Before the release of SP 3, if you wanted transitions in your slideshows, you had to create a movie of your stills in FCP, add transitions and then export or alternately, in SP 2, you had to create a transitional track and create links etc, a laborious process. With SP 3 all that has changed and the process of adding transitions has become an easy affair. We now have the ability to add transitions, not only to photos in slideshows, but also to menus, buttons and tracks. There are two types of transitions to choose from, 19 'Standard Transitions', like, Dissolve, Flip, Fade Through Color, Wipe, Reveal, etc. and 11 'Alpha Transitions'. Alpha Transitions are a new type of transition and are truly amazing. This new transition is built using a QT movie with included alpha channel, the QT movie is used as the transitional element. Exampled below, is the Satin Blue Alpha Transition. As the transition plays, the first menu becomes covered as the blue satin fabric flows over it, then the second menu is revealed, as the fabric pulls away. Alpha transitions display excellent motion and look great. Lens Flare is cool and yes, you can build your own Alpha transitions. Creating Alpha Transitions.
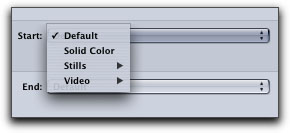
There is yet another layer of complexity that we can add to transitions for menus found in the 'Start' and 'End' drop-down menus, shown below. In addition to the actual transition we can add an element between the first menu and the transition and then again between the transition and the incoming menu. With the Flip transition selected for a menu and a still image selected as the 'Start', when a button is selected the first menu will change to the selected still, the still will be flipped, revealing the second menu. You can use a still image, a solid color, or even a video clip. This process can be applied to Start, End or both.
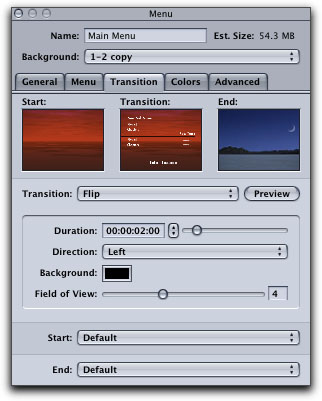
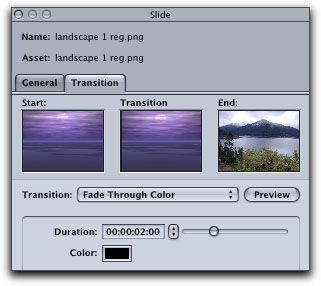
Transitions are set in the Inspector. Click on the Transitions tab and then select your choice from the Transition drop-down menu, which you can then test by clicking on the Preview button.

Standard and Alpha transitions are shown below. You will notice the item 'Video Transition' at the very bottom of the list. You can select a video clip and use that as your transition. There are a number of parameters that can be set to customize a transition, depending on the transition selected, some samples are shown below right. Flip and Cube transitions have a 'Field of View' slider. This is a perspective control that runs from 0 to 10. If this control is set to 10, the image will maintain it's shape as it is being flipped. As you move this slider back towards 0 the shape of the menu will elongate (letterbox) as the menu flips. A nice effect. All transitions have a duration slider that spans from one to ten seconds though many transitions are much shorter than 10 seconds. If you use a video clip as a transition that is shorter than 10 seconds, then the length of the video clip will be used.
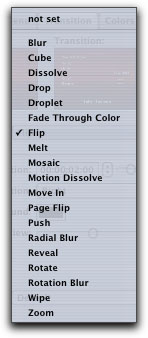
19 Standard Transitions |
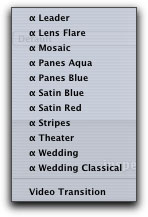
11 Alpha Transitions |
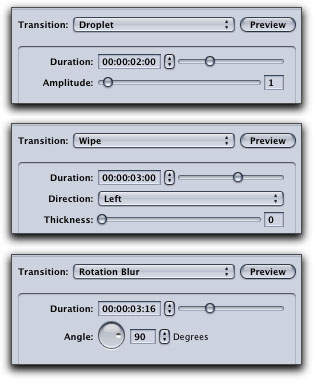
specialized transition settings |
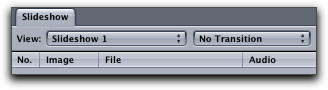
To apply transitions to the stills in a slideshow, open the Slideshow Editor. Selecting a transition in the Transition drop-down menu, at the top of the editor will set a global transition for all the images in the slideshow. If you want to set your transitions on a one by one basis, leave this set to 'No Transition'.
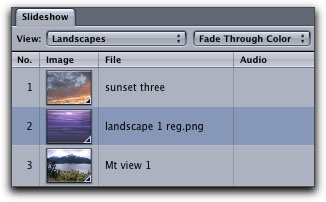
To set transitions one by one, select the image in the slideshow editor, then, in the Slide Inspector, select your transition. When a transition has been applied, there will be a small triangle in the lower right hand corner of the photo thumbnail, shown below left. In the slide Inspector, shown below right, adjust your parameters and Preview your transition. You can set the same transition for every photo, have a different transition for each photo, or have some photos with transitions and others without. You can use the same transition for every photo but each photo's transition can have it's own unique parameter settings.
Other New Features
DTS Audio
DVD SP 3 now supports DVD-Video compliant DTS (Digital Theatre Systems) multichannel
audio. DTS audio only supports audio with an audio sample rate of 48 kHz. If you have a G5, you can run the audio out from the S/PDIF port to a DTS decoder and surround system. This will allow you to audition a disk without having to burn a DVD.
Copy and Paste
Copy and Paste abilities have been added in SP 3. It is now possible to copy buttons and text elements and paste them into new menus. Copy and paste also works in the Script editor and the subtitle editor for copying buttons over video. People that do scripting are going to be excited about this.
Open in Editor with Photoshop files
Control-click on a .psd in the Asset window and choose Open in Editor. Make changes in Photoshop, Save and come back to DVD Studio Pro to see the file update throughout the project.
Open in Editor with Motion, open Motion projects
The Open in Editor works the same for Motion projects as it does with Photoshop files. There is one important distinction, however. DVD Studio Pro will instantly preview unrendered Motion projects. This means you can open a Motion project from DVD Studio Pro, make a change, come back and see it update.
MPEG format compatibility
Adds compatibility for additional formats and sizes.
Jacket Pictures
(From the DVD SP 3 Help document)
To add a jacket picture to your project:
Support for Additional DVD Drives
Import iDVD 4 projects
Resizing windows
The two most obvious new features, Graphical View and Transitions are important upgrades for SP 3. Graphical View is not just 'eye candy' as it might first appear. As I worked with Graphical View I found that I was using it more and more and the window sits open on my second monitor all the time. This feature is so well integrated, that for many people, it will supplant the use of 'Outline View'. I use it not only to check the link relationships between items but now use it as a navigational tool, selecting an item in Graphical View to open it in the Viewer and open the appropriate tabbed window. The ability to print out the Graphical View is an important feature and it works well.
Studio Pro 3's transitions are great, can be applied to slides in a slideshow, menus, buttons and tracks. There is good control over the numerous transition attributes which are very well developed and Alpha Transitions are pretty amazing. In addition, the DVD SP 3 upgrade offers a number of often requested features which add to Studio Pro's abilities. While the $199 upgrade price may seem a bit steep, this is an important and valuable upgrade with a number of new features, both large and small, that make this impressive application even more powerful than ever.
--ken
"Jacket pictures are an optional part of the DVD-Video specification, and are intended to
allow a DVD player to display a graphic representing a DVD. Jacket pictures are most
commonly displayed on multi-disc players.
Based on the DVD specification, Jacket Picture graphics should be supplied in three
different resolutions (small, medium, and large) for display on different platforms and
display devices. DVD Studio Pro automatically generates the required graphics and the
folder that holds them, JACKET_P, when you build your project."
The jacket picture will appear in the Simulator when you stop playback.
"In addition to the DVD-R drives previously supported, DVD Studio Pro now supports
writing to DVD-RW, DVD+R, and DVD+RW drives.
When using DVD-RW and DVD+RW media, DVD Studio Pro first checks to see if the disc
contains any files. If it is empty, the format proceeds. If there are files on the disc, an
alert appears warning you that the disc will be erased if the format continues-you can
then continue or cancel the format process."
A lot of people, like myself, started off with iDVD and have since migrated to Studio Pro. If you are ready to make the switch you can bring your iDVD projects with you.
New in DVD Studio Pro 3, the interface automatically scales to the resolution of the monitor, taking full advantage of the monitor screen.
Conclusion
Enjoy,
© 2000 -2004 Apple
Computer, Inc. All rights reserved. Apple, the Apple logo, Final
Cut Pro, Macintosh and Power Mac
are either registered trademarks or trademarks of Apple. Other
company and product names may be trademarks of their respective
owners.
All screen captures, images, and textual references are the property and trademark of their creators/owners/publishers.