March 1, 2010
In Final Cut Pro
By Eric Cosh
A Brief History of 3D
For many younger moviegoers, Avatar might have been their very first experience viewing a feature film in 3D. After having that experience for the first time, you might think that 3D is a totally new way of making movies, but in reality, 3D in film has been around for almost a century.
The very first 3D film experience took place in New York City at the Astor Theatre on June 10th, 1915. The first feature film took place at the Ambassador Hotel Theater in Los Angeles on September 27, 1922. There were several other 3D movies that followed but it wasn't until 1952 that it really caught on. The first 3D movie that I remember seeing was called "Bwana Devil" in 1952 and then after that, the most famous 3D movie until Avatar was called "House of Wax" released in 1953. Later that year there were 26 more 3D feature films, followed in 1954 by 16 and dropping down to just 1 in 1955.
The reason for the very brief history lesson on 3D is merely to show everyone that not only has 3D been around for a long time, but also to show that in the past, it was more a fad or a "gimmick" than something long lived. All that changed with James Camerons production of Avatar where he reportedly spent close to a half billion dollars.
The biggest question for most of us film makers and professional videographers is "How will 3D effect us"? Not having a crystal ball, one can only look at the past and realize that it just might be safer to take the attitude of wait and see. As many of you might know, several TV manufactures and at least one video company, Panasonic Professional 3D Production Systems, seems to be willing to do more than sit on the sidelines.
Several months ago, I decided to check out the 3D situation and was surprised to find that there were several indie filmmakers who had dappled into the 3D test arena. Most of what I've seen is pretty amateurish, but at least it did show it could be done on at least the "consumer level". After contacting my friend Ken Stone, we decided it just might be cool to put together an article and some video 3D as an experiment. Here is the real funny part. After going to all the work of shooting and editing in 3D, neither Ken (Los Angeles) nor myself (Phoenix) could find even one pair of 3D glasses that would work using the Red & Blue (Cyan) gels. I finally had to order some out of Las Vegas at www.3dstereo.com.
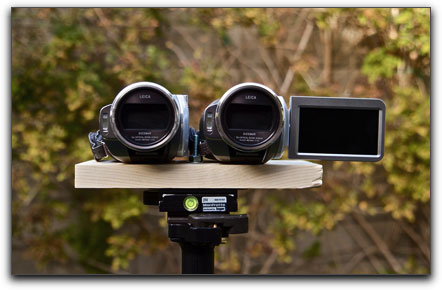
After getting the glasses one week later, I now had an opportunity to view the results and it completely blew Ken and I away. It really was 3D. It took much experimenting to realize that the distance between the 2 lenses was critical to getting the 3D effect. My first experiment was using 2 of my Panasonic SD1 HD cameras. The biggest problem with these cameras was that the closest I could get the 2 lenses together was approximately 3 inches. This was just too far apart to view the objects that I was videotaping.
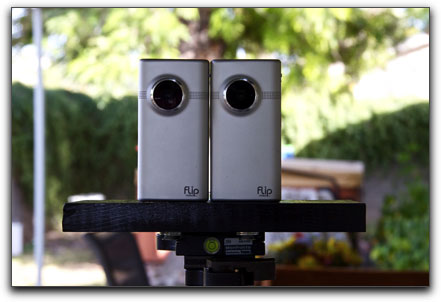
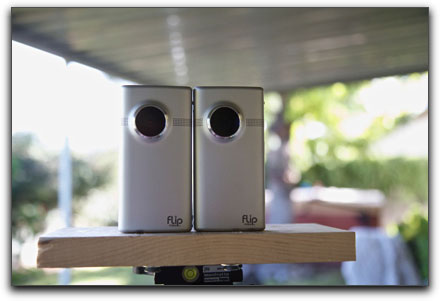
I next purchased 2 Flip Mino HD cameras because of their size and these 2 cameras really did the trick since I could get them as close as just 2 inches apart. I'm pretty sure that there is a formula for determining the ratio of distance versus the separation of the lenses, but so far haven't pursued that. I have found that for very close objects, say 3 feet away, you may have to move your cameras as close as 2 inches apart from each other. Most research and experimenting that I've done favor the 2-1/2 inch approach. One reason for this could be that the human eyes are approximately 2 1/2 inches apart.
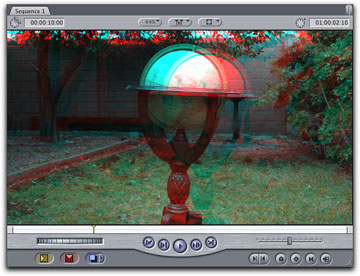
For those of you who do not have two cameras to work with and would still like to experiment with 3D in FCP, I have supplied you with video clips that you can use. At the end of this article are two sets of 3D videos that you can download and work with, called Globe and Bird Bath. For each of these you are supplied with two source clips, shot with left and right cameras. These clips have been trimmed up so that they are in sync and have been transcoded to ProRes (LT). You can drop these two clips into a FCP timeline and then follow the instructions that are included later on in this article. You are also furnished with two completed 3D QuickTime movies that you can view with your red-blue 3D glasses.
Building a 3D camera rig
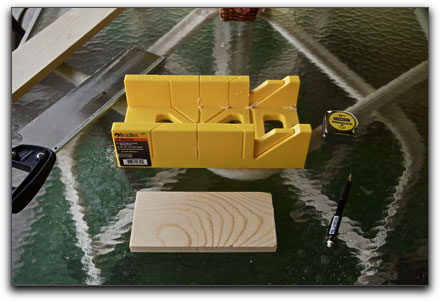
The first things we're going to show is how to make a very simple plate to attach the cameras to. I found that the cheapest and easiest solution was to go to your favorite hardware store and pick up a 1x4" piece of lumber, at least two 1/4" x 1-1/4 machine screws (to attach to your camera) some washers, a 1/4" bolt and washer to attach your tripod plate and you should be in business. I use the Manfrotto 394 quick release plates for all my cameras and tripods.
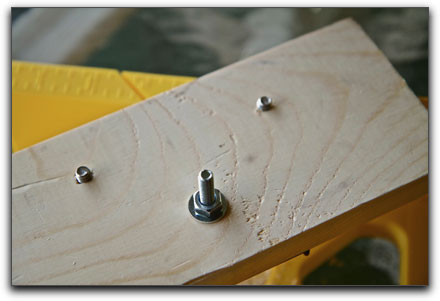
What I did was to saw a 1x4" approximately 8" in length. I then drew out lines where I wanted to drill the 1/4" holes.
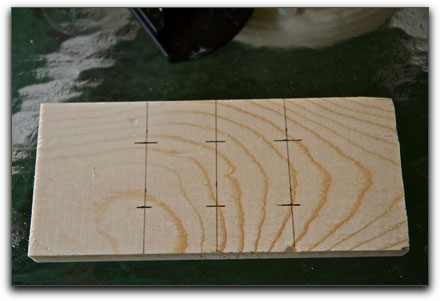
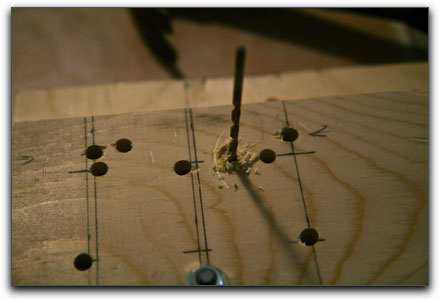
It's very important that these holes be perfectly straight with regards distance to the end of the plate. You don't want your cameras offset. After drilling your required holes for spacing, insert the 2 1/4" machine screws through the wood.
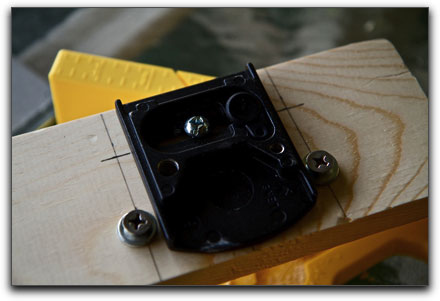
Mount the quick release plate to the wood and then attach your tripod plate to the quick release plate.
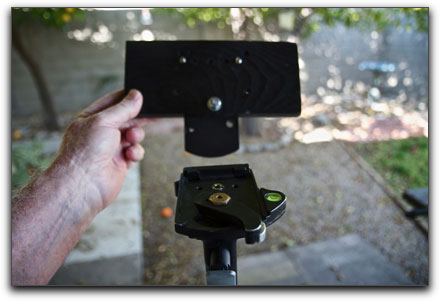
Attach the rig to your tripod via the quick release plate and then attach your cameras, and now you're ready to shoot your first 3D movie; almost! The next part is the most critical! Mark your LEFT camera so you'll always know which file is which.
As for shooting in 3D, I've found it very useful to place something in the foreground that is visually definitive. By this I mean your eyes won't have any trouble separating the foreground from the background. Color is also very important, at least for your first test. Stay away from Red for sure. We'll go into this next when we talk about how to bring your 3D footage into Final Cut. In order to sync your two cameras, I just clap my hands together in front of the lenses after hitting the record button on both cameras. Now just shoot away. Try different distances for your test, but try not to get closer than say 3' or 4' away and not further away than say 20', at least in the beginning. While I would suggest clips not be too long in the beginning, make sure you shoot at least 20 to 30 seconds.
Video Formats
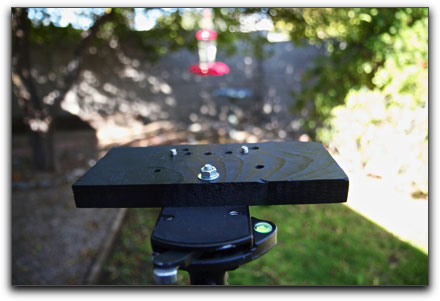
Most of todays video cameras are too large to be mounted close enough to each other to achieve good 3D video. As shown below, the lenses of my two Panasonic SD-1 video cameras, side by side, are just over 3" apart, a bit too far. So I used two Flip cameras which can be mounted so that the lenses are just 2" apart.
Flip cameras shoot 720P AVC HD (H.264) at 30.00 frames per second, not a FCP file friendly format. It will be necessary to convert these files to a format and frame rate that works in FCP. You can convert the video by dropping the Flip footage into a sequence that is set to a proper format for FCP, or you can use Compressor to do the transcoding. Ken has made two Compressor Droplets which you can download and use if you are running the current version of Compressor. These droplets will convert to ProRes 422, both (LT) and (SQ - standard quality), 29.97 fps and audio as stereo at 48k. ProRes 422 (LT) ProRes 422 (SQ)
The Editing Process
Since the 3D editing process will virtually be the same regardless of your cameras or video formats, I'll show you what I do using the Flip Mino HD, which I have already converted to ProRes 422.
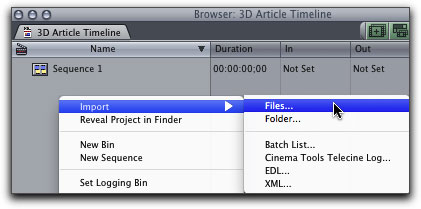
Import the Left and the the Right clips into the FCP browser.
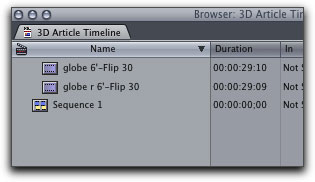
Next, select the left clip first in the browser and then drop that clip onto V1 in your timeline.
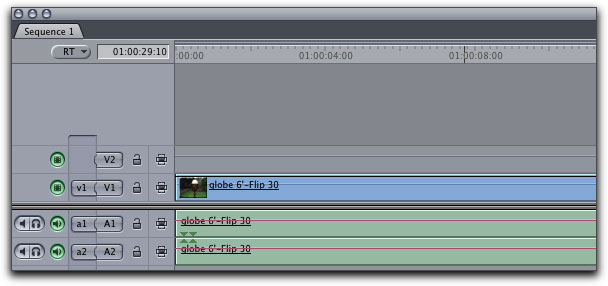
Do the same with your right clip, placing this clip on V2. Now you'll want to sync up the two clips on the timeline. This is really easy with Final Cut Pro. Remember we had you clap your hands together just as you started shooting? What you're going to do now is expand the audio tracks.
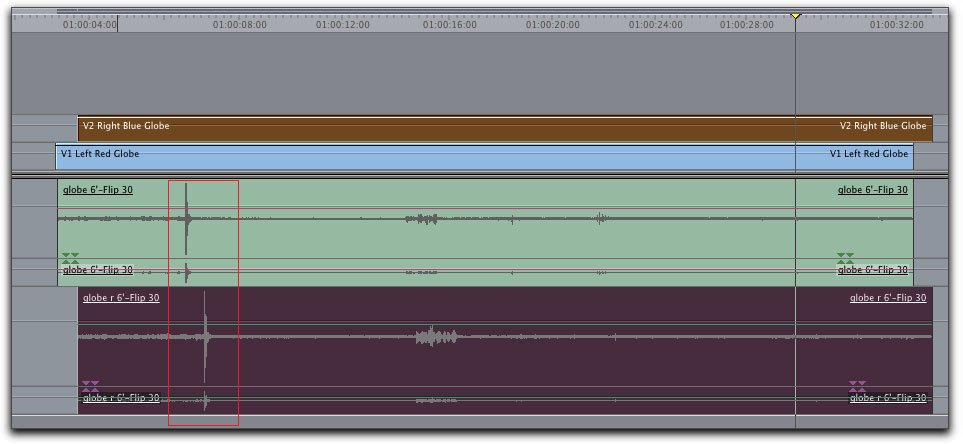
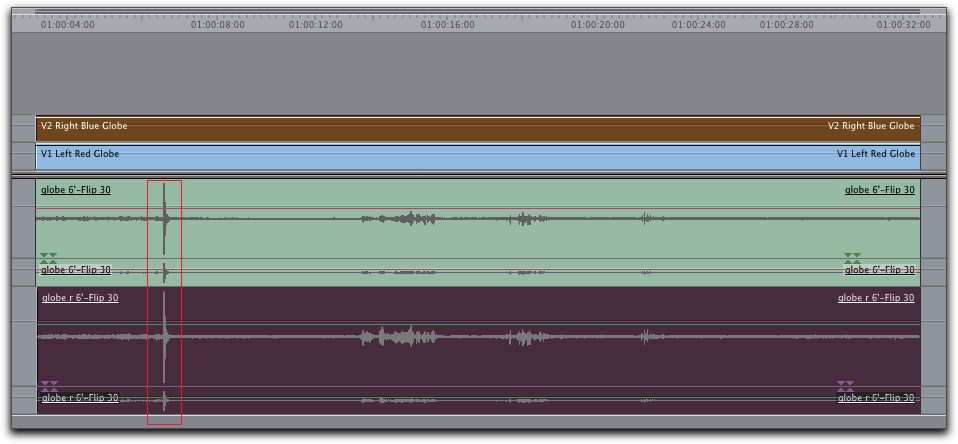
Look for the audio spike from the hand clap in the audio tracks, select the clip on V2 and using the 'left' or 'right' arrows on the keyboard, move the two clips into sync. You can use the Blade tool to trim up the clips if you like.
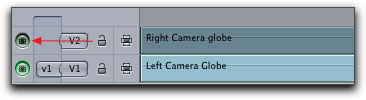
As we have two video tracks in the FCP timeline, the right channel video, on V2, will block our view of the left channel video on V1 in the Canvas window. In order to see and be able to work with the video on V1, we need to turn off 'track visibility' on V2, to expose the video on V1 just beneath. To turn off track visibility, click on the green icon, far left in the timeline. When done, remember to turn visibility back on.
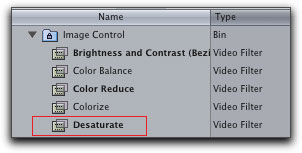
Once the 2 clips are in sync, apply the Desaturate filter found in the Image Control bin to the 'Left' clip on V1.
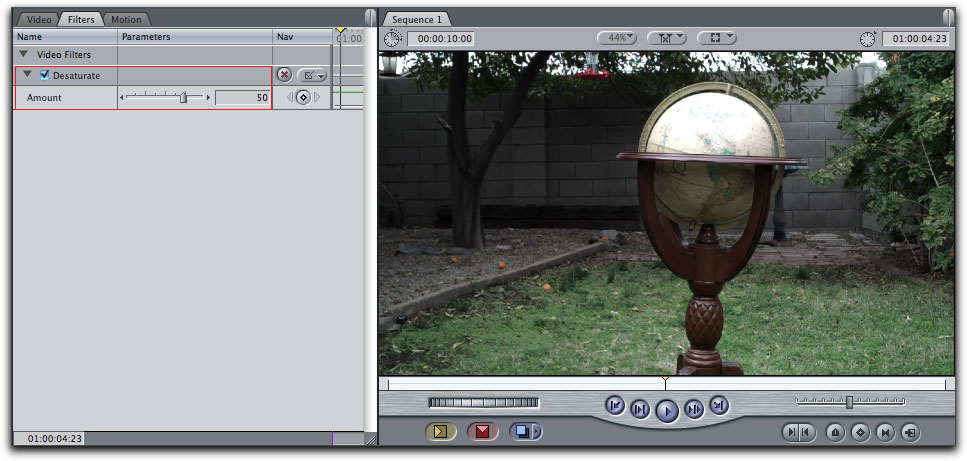
Double click on the 'Left' V1 clip to load it back into the Viewer and click on the Filters tab, change the 'Amount' from 100 to 50. I use 50 as a starting point for the color saturation. After you get the hang of this, I would encourage you to experiment using either more or less color saturation to get the effect you're looking for.
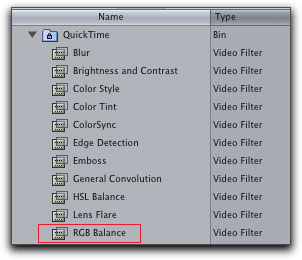
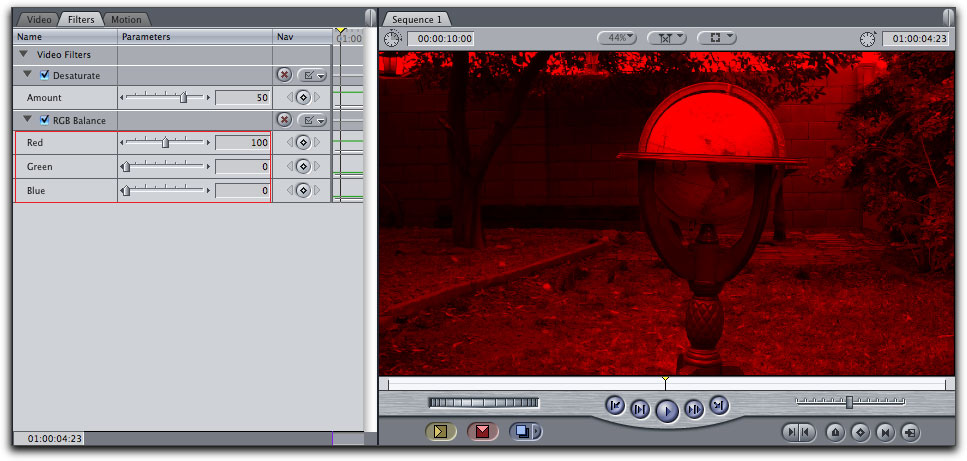
While still on the Left clip (V1), we are going to apply the 'RGB Balance' filter found in the QuickTime bin.
In the Viewer, filters tab, with the RGB Balance filter applied. Move the Green and the Blue sliders all the way to the left to 0. This will give you the red channel for the 3D video.
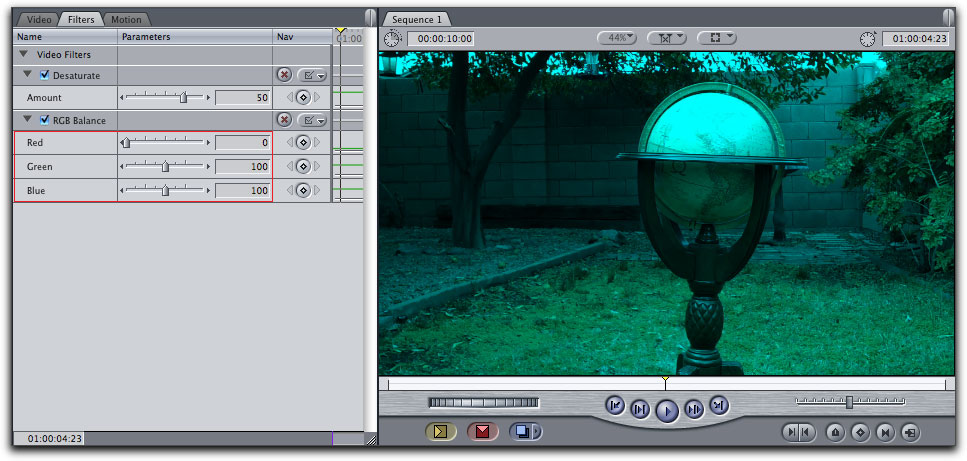
Now on to the Right clip on V2. We are going to do the same process. First add the 'Desaturate' filter on to the clip and set to 50. Then apply the RGB Balance filter, only this time you'll move the Red slider to the left, to 0. This will give you the blue channel for the 3D video.
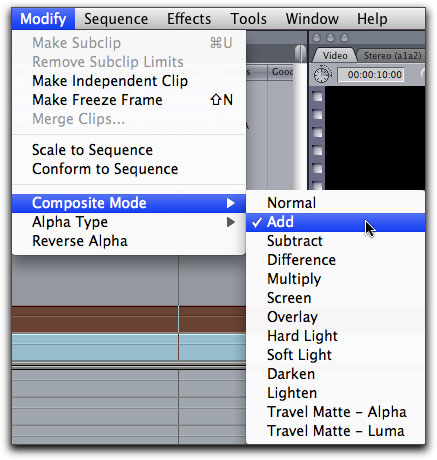
Only one more step and you'll see your first 3D. Right now you're only seeing the top clip. That's the way Final Cut works. The top clip has priority. What we want to see is both clips composited together. To do this, select the Right clip (V2) , and from the Modify menu > Composite Mode > ADD. Bingo! You now have 3D. You will probably be required to render the timeline before you can play the effect in Real Time. Of course you'll need to be wearing your Red & Blue glasses.
If the 3D effect is not working properly, it could be that the red and blue channels are not separated by the correct distance. You can adjust for this by changing the separation distance between the red and blue channels. In the Canvas window, turn on 'Image + Wireframe'. Select V1 in the timeline to display it in the Canvas window and move it in slightly towards the center. Then select the V2 clip and move it in to the center by the same distance that you moved V1. You can always tell which video track you are working with in the Canvas as the video track number will be displayed just above where the white overlay box forms an "X" in the middle of the Canvas window.
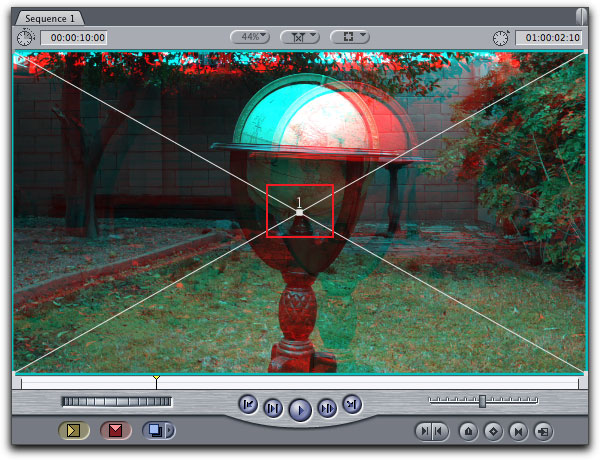
You can actually wear your 'red-blue' 3D glasses while you move the position of the two channels to see the results. Again, in the beginning, you're going to have to experiment in order to get the best quality 3D. Both Ken and I have noticed that sometimes it takes a few moments to realize the 3D effect. This is natural because in essence, the eyes are being tricked into seeing something that isn't normal.
One more caveat. Not all people are able to ever see 3D. In fact, that number is surprisingly high. I have 2 nieces that can't see 3D. My brother who is a doctor tried to explain it to me, but it's way above my pay grade.
Remember to just have fun with this. Don't expect to be making any professional movies using this process. Ken and I call this whole thing "Mock 3D".
3D Globe video: ProRes 422 (LT), 1280 x 720, 29.97.
3D Source Clips Globe - 126 Megs
Completed 3D Globe QuickTime movie - 65 Megs.
3D Bird Bath video: ProRes 422 (LT), 1280 x 720, 29.97.
3D Source Clips Bird Bath - 126 Megs
Completed 3D Bird Bath QuickTime movie - 68 Megs.
[Top]
copyright © Eric Cosh 2010
are either registered trademarks or trademarks of Apple. Other company and product names may be trademarks of their respective owners.
All screen captures, images, and textual references are the property and trademark of their creators/owners/publishers.