May 18, 2005
A Ripple Review
By Steve Martin
As is customary whenever a major release of Final Cut Pro is announced, my good friend Ken Stone begins his earnest lobbying efforts to secure an article from me covering the new features. My challenge is always the same; covering the features that will have the biggest impact on our workflow, though not necessarily the features that are getting the most press.
That said, I should probably begin with the "big" features in this release then work my way down through the list.
Do I really need multicam editing?
Ok, you've finally got what you asked for - the big Kahuna, the Holy Grail - the missing 18 minutes of the Watergate tape...yes, you now have (drum roll please) true multicam editing in Final Cut Pro 5. Whip out that credit card now. But wait, I hear some of you saying: "I don't shoot with more than one camera! Why do I need this feature?" Ah, I'm glad you asked. As you will soon see, Final Cut Pro's Multicam editor is not just for event videographers.
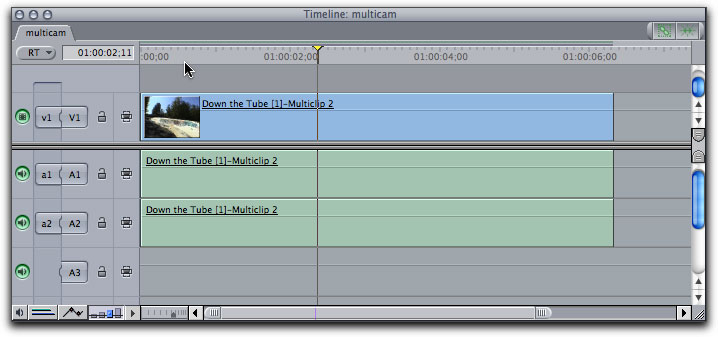
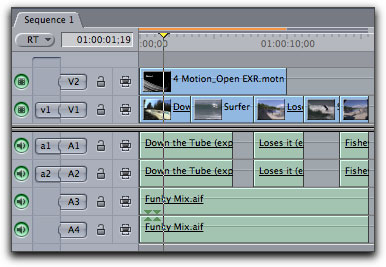
Below is a screen shot of a multiclip in the FCP timeline. A multiclip is a "container" for holding up to 128 source clips. Multiclips behave like any other clip when you are working with them in the Viewer and Timeline. (To learn more about multiclips and how to create them, watch the QuickTour movie I created over at Apple.com
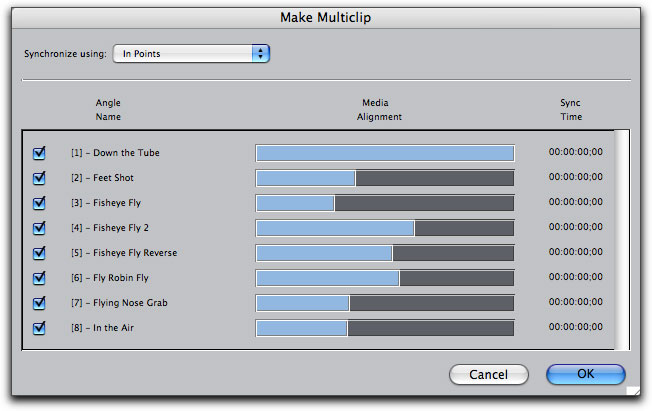
Notice, that I said 128 source clips not 128 camera angles, although this is how Apple refers to them in their documentation. This is an important distinction. There is nothing anywhere that says you must use clips originating from more than one camera in your multiclip or that each clip in the multiclip must be the same length. The Make Multiclip window below reveals 8 "angles" in the multiclip container all with varying durations (indicated by the light blue bars).
The fact is, you can create multiclips from any source clip. This opens up a whole world of possiblilties. For example, you may want to use the "multicam" feature to do a live cut (or montage) to music or narration using just still photos. Rough cuts can now be cut in the time it takes you to watch your clips play back! And let's not forget about live switching. While your program is being "fed" to a live audience (or tape) you can switch seamlessly from one clip to the other just as if Final Cut was a real switcher. (A switcher is a big expensive piece of hardware used in studio environments that require live cuts for broadcast).
Bar Fly
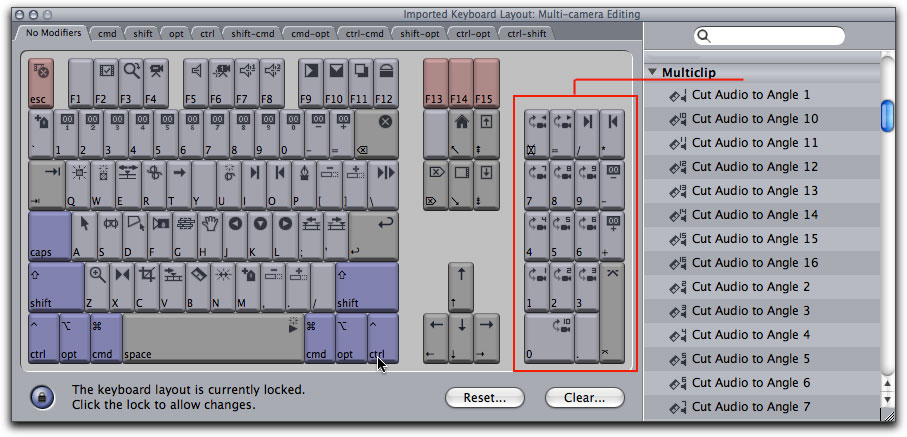
Since editing on the fly generally requires quick reflexes Apple has provided a dedicated multicam keyboard layout and button bar so you don't have to guess what keys or buttons to push when making your edit decisions. Both the button bars and the keyboard layouts are found in the Tools menu.

Going Native
Apple has been touting HD editing for the masses ever since version 4.5 released last year. However the "masses" had to shoot with a $60K plus camera then purchase or rent a $25K deck if they wanted to bring that footage into FCP "natively" through firewire. Since then, we have heard much about this new HDV consumer format. And regardless of what your personal feelings are concerning the quality of this format, you cannot escape the fact that many people will enter the HD space for the simple reason that the cameras are under $5K and don't require expensive decks.
That said, there are a few things you need to keep in mind when working with this format. First, unlike it's cousin mini DV, working natively in HDV requires additional processing whenever you output to tape or export a Quicktime movie. Notice I said processing, not rendering. The data in an HDV clip is essentially a string of MPEG GOPs (group of pictures) containing a pattern of "real" frames (called I frames), and reference frames (called P and B frames). Editing systems like Final Cut Pro can only edit on I frames.
Whenever you make an edit in Final Cut Pro, the I frame position is temporarily stored and the GOP pattern is changed on the fly to accommodate the change in the data structure. As a user, this process is totally transparent making HDV editing as straight forward as editing any other format. The beauty of this method is that you are always editing in the camera-original format with no transcoding into an intermediate codec before you can work with it.
When you are ready to output your movie using Print to Video, Final Cut Pro will render any effects you have applied to your clips, then conform your movie to the HDV-compliant GOP structure. The more edits you have, the longer this process will take. And because the heavy lifting is being performed by your CPU for this conforming process, I recommend the fastest machine you can afford if you plan on doing a lot of long-form HDV editing.
Sound Thinking
One constant refrain we have heard over the past few years is how wanting Final Cut Pro's audio tools are. Yes, we could bump our files over to the bundled copy of Bias Peak to normalize our audio and do simple audio processing tasks, but that was tater tots compared to the glorious audio feast Apple has now served us.
There is a new item in the File menu called "Send To" which gives you three options for moving your audio media into Soundtrack Pro.
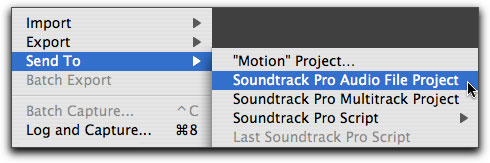
The first option, "Send to Soundtrack Pro Audio File Project" is the option you would choose if you wanted to send your audio file over to Soundtrack Pro and edit your audio non-destructively in Soundtrack Pro's waveform editor (shown below).
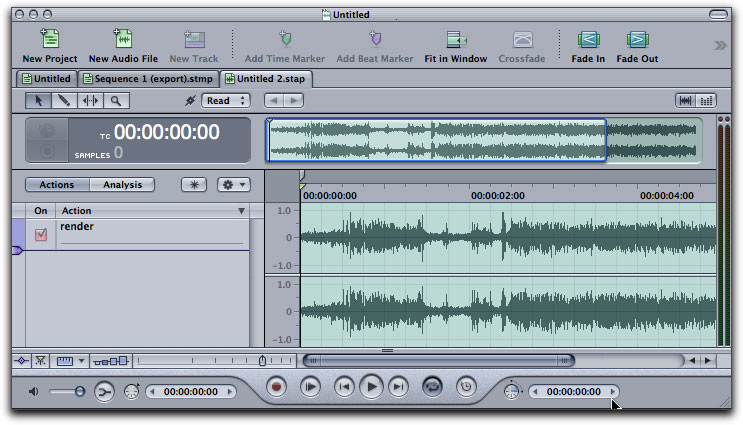
Once you've made your changes in Soundtrack Pro, you will need to save your work. (For a complete look at what STP is capable of, again I refer you to Apple's QuickTours)
When you toggle back into Final Cut Pro, your audio will be updated automatically in your sequence without altering your original audio file. This is possible because Soundtrack Pro creates an audio render file and saves it with your project then connects this render file to the audio clip in your Final Cut Pro sequence. Pretty ingenious.
There is also an option called , "Send to Soundtrack Pro Script" which is a timesaver of epic proportions. Let's say you had a number of clips you needed to remove hum from. You would select the clips in the Timeline then choose this option from the menu. The clips are automatically opened into STP's waveform editor, the actions in the script are run (in this case the hum removed) then the files are saved and updated in the Final Cut Pro sequence. The downside of this method is, your audio files are actually changed. This is called destructive editing. I guess that's a small price for speed and convenience.
The final item, "Send to Soundtrack Pro Multitrack Project" is the option you would choose if you were going to send more than one audio file into STP for processing, sound design or soundtrack creation. Once you've named and saved your project in Final Cut Pro, STP will open and place all your tracks into its multitrack editor along with the video.
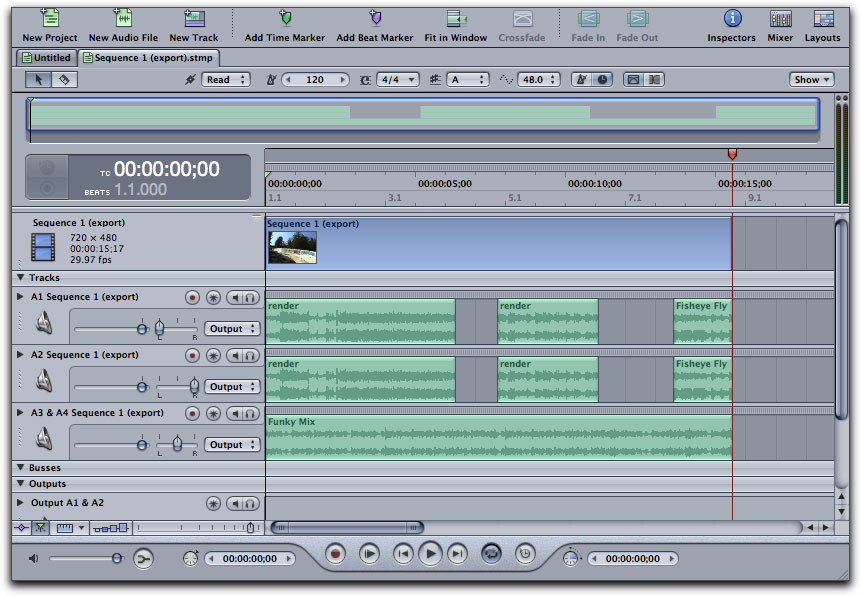
Once in STP, simply perform your audio magic by adding sound effects, filters, audio loops and signal processing, then mix it all down using STP's audio mixer. When you are satisfied with your results you simply export your mix as stereo or individual mono files. This is non-destructive because your original audio files are not being touched.

The finished mix can then be imported back into FCP and placed into your sequence.
Control Freaks Unite
And if that weren't enough, Apple has indeed listened to its user base and given us tactile control over the track faders and pan sliders in Final Cut Pro's audio mixer using what is known in the audio post industry as a "control surface".
Control surfaces are manufactured by Mackie, Tascam, and Yamaha.
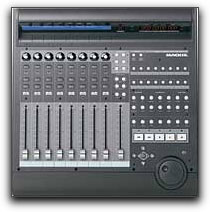
A control surface is not a mixer. Like the name implies, it is an outboard piece of hardware that controls Final Cut Pro's audio mixer through a MIDI interface.
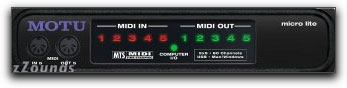
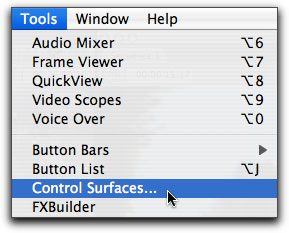
MIDI is an acronym for Musical Instrument Digital Interface and is an industry standard protocol that allows Final Cut Pro to "talk" to the control surface and vice versa. To work with the control surface, you simply plug the control surface into the MIDI interface using a MIDI cable, then plug the MIDI interface into your Mac using a USB cable. That's all there is to it. To see your active control surface in Final Cut Pro, choose "control surfaces" from the Tools menu.
A window will pop up displaying an image of your chosen control surface.
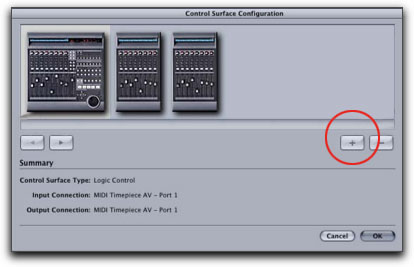
You can add control surfaces by clicking the "plus" button. Keep in mind, that you will need a separate MIDI port for each surface you plan on adding. You also need to know that your control surface will only work when the audio mixer is open.
Dynamic RT
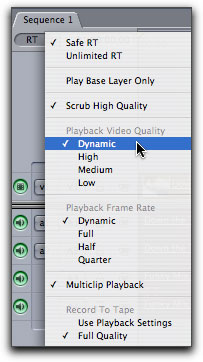
Effects processing has taken on a whole new dimension in this release of Final Cut Pro. A new feature has been added called "Dynamic RT" that allows intelligent scaling during playback of the image quality and/or frame rate, when the sequence playhead runs into a clip (or clips) with heavy effects applied or a section of the timeline that has multiple layers. To select this option just select it from the RT drop down menu on the timeline.
Real-Time Motion and LiveType
If you work with Motion and LiveType, you'll love the fact that Motion and LiveType project files you embed in your sequences now play back in real-time as long as unlimited RT is enabled in the RT menu. Notice the orange bar above the Motion clip.
Media Management Enhancements
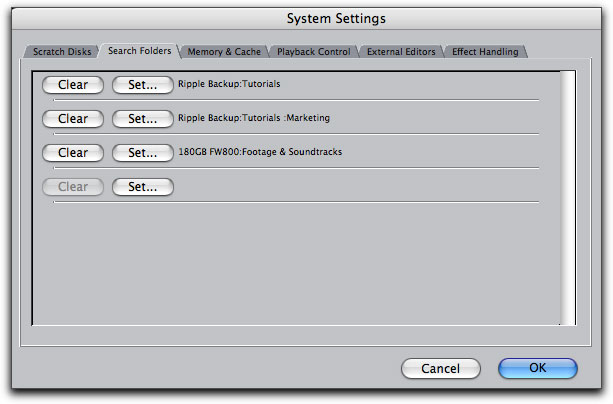
There have been some changes under the hood with regard to locating and managing media. One of the more helpful features is the Search Folders Tab in the System Settings window. In this window you can specify specific folders on your drives for Final Cut Pro to search first when reconnecting media. This will save Final Cut from having to scour every platter in your system before it locates what you know to be there anyway.
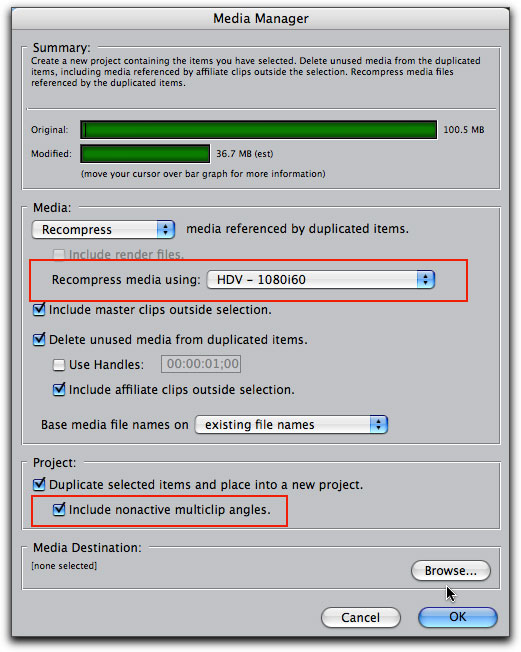
If you look real close, you'll also notice a few new options in the Media Manager. For one, you can now media manage HDV and DVCPRO HD media. There is also an option that allows you to media manage all the angles contained in your multiclips.
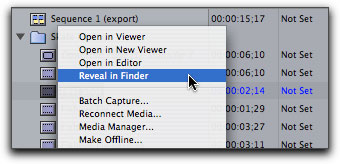
You can now control or right-click on a clip in the Browser and choose "Reveal in Finder". I hear the Hallelujah chorus being sung somewhere...
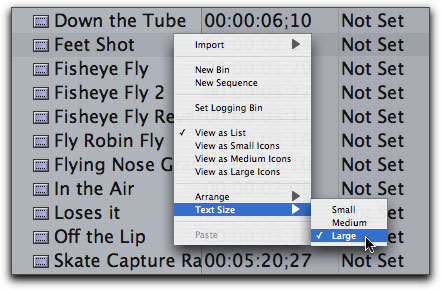
Oh, I almost forgot. As our monitors get bigger, the text in seems to get smaller. You can now give your clip text a rapid growth hormone by control-clicking next to a clip in the browser and choosing a size from a list.
Let's not forget the film
If you haven't noticed, Final Cut Pro has basked in the limelight of more than a few high profile movies and tv shows. In the past few years Final Cut Pro has gained a substantial foothold in the area of professional film editing by providing low cost tools that rival systems costing nearly 3 times as much. With this release, it is clear that Apple has every intention of expanding their foothold into this market by providing film professionals with greater tools to make the process of editing and conforming to film even more integrated and fluid.
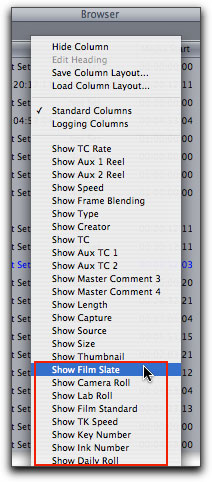
Starting with the Browser, you can now control-click on a column header and choose to display information like camera rolls and key and ink numbers.
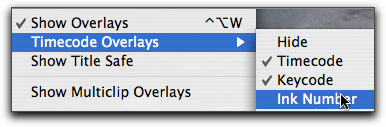
Key and ink numbers can also be displayed as a graphic overlay in the Viewer and Canvas windows so you can see exactly what frame you are cutting on. This option is found in the View menu
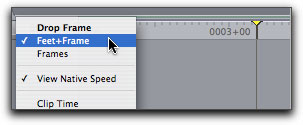
If you are working with film, there are times when you want to see your timeline display feet and frames rather than timecode. Just control or right-click inside the timecode field and choose "feet and frames".
Telecine logs can also be imported directly into Final Cut Pro 5 and you can now link your clips directly to a Cinema Tools data base. So whenever you make changes to any clips in Cinema Tools data base, you can update them directly in Final Cut Pro.
That's a Wrap
So there you have it, my take on the new FCP 5 features that I believe will have the greatest impact on your workflow. You can now whip out than credit card. I hope you've enjoyed this "first look". While you're reading this I'm working on two new DVD tutorials on Final Cut Pro and Compressor. If you want to be notified when these discs are finished, just send me an email.
Steve runs a really cool site called www.rippletraining.com where you can download QuickTime tutorials on Final Cut Pro, DVD Studio Pro, and Motion. He is also a lead instructor for Apple's certified training program and has taught workshops at NAB, Macworld, DV Expo, and the American Film Institute.

copyright © www.kenstone.net 2005
are either registered trademarks or trademarks of Apple. Other company and product names may be trademarks of their respective owners.
All screen captures, images, and textual references are the property and trademark of their creators/owners/publishers.