September 28, 2009
By Ken Stone
Well, it's happened to all of us. A clip, that we want to use in an edit, was shot hand-held, and of course, there is unwanted camera movement. In the past we could either not use the clip or trim it as short as possible and hope that no one would notice.
When Apple released FCP 6, they introduced 'SmoothCam' a new filter, whose technology comes from the Shake application. SmoothCam uses a two step process to corrected for camera movement. The first step of the SmoothCam process is to analyze the direction of the camera movement by tracking the movement of the pixels in each video frame. SmoothCam creates a file containing the tracking information about the camera movement and, by default, places the 'analyzed' file into the folder that contains the source video of the clip. If you are working on a network where you don't have permission to write back to the folder that contains the source video, then FCP will place the 'analyzed' file in either; User > Library/Caches/com.apple.fxmd/ or Library/Caches/com.apple.fxmd/. Once the clip has been analyzed, FCP will use the information during RT playback or render, to compensate for and correct the unwanted camera motion.
There are several things that we need to know about the analysis file that SmoothCam creates. First, it does take time for the filter to go through each and every frame and note the positions and movement of the pixels, however, this analysis goes on as a background process, which means that you can return to FCP and continue working while the analysis process continues. Second, the analysis files tend to be large in size, but this process only needs to be performed once. If you move the clip or change the In and Out points of the clip, the analyzed file will still work.
This is probably the most important thing to know about the SmoothCam filter. When SmoothCam analyzes a clip, it analyses the entire clip. If you have a clip that is six minutes long but you only need 6 seconds from the clip, and even if you sent In and Outs around that 6 seconds in either the Viewer or Timeline, SmoothCam will still analyses the entire clip. Analyzing all of that extra video is going to take a long time and also create a large analyzed file. This is the way that SmoothCam works. In order to avoid long analysis times and very large files, we need to trim the clip before analysis.
Prepping a clip for SmoothCam
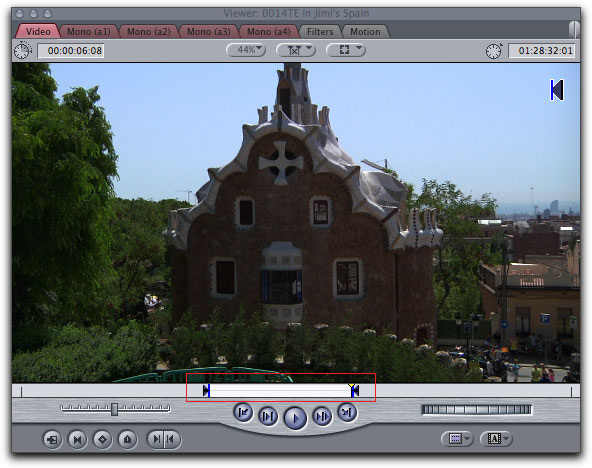
To trim the clip for SmoothCam, we are going to set In and Out points around the video that we intend to use, in either the Viewer or Timeline. It might be a good idea to include handles.
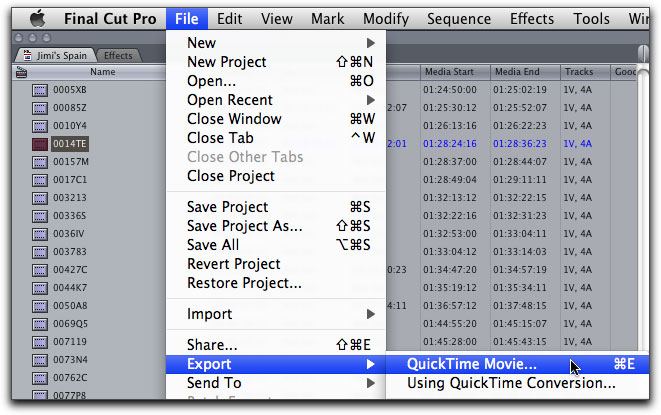
Then, with In and Out points, export from FCP as a QuickTime movie (not with Conversion).
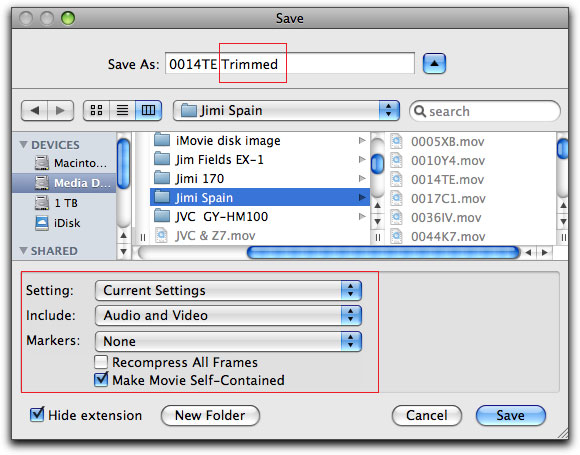
This will open the Save dialog box. I have added the word 'Trimmed' to the 'Save As' file name and navigated to my Capture Scratch folder on my media drive as the location to save my new trimmed clip. Below that I have selected 'Current Settings', include 'Audio and Video', Markers 'None', 'Make Movie Self-Contained'. Note that I have left the 'Recompress All Frames' option unchecked.
Once the clip has been trimmed and Saved to our Capture Scratch folder we need to Import it back into FCP. From the File Menu > Import > Files. If you have exported the clip from the FCP timeline, then, after importing the QuickTime self-contained file back into the Browser, you would use 'Replace' to switch out the original clip in the timeline with the newly trimmed clip.
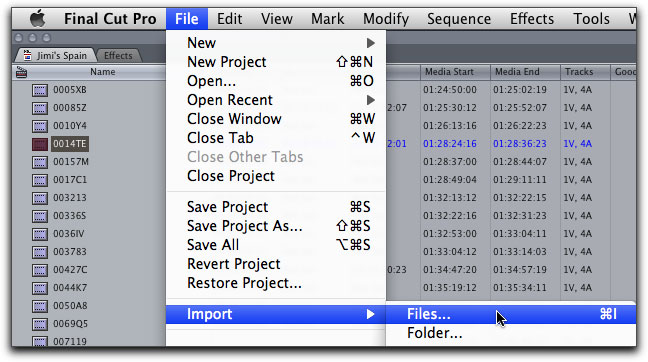
Navigate to the Trimmed file, select it and click on the Choose button.
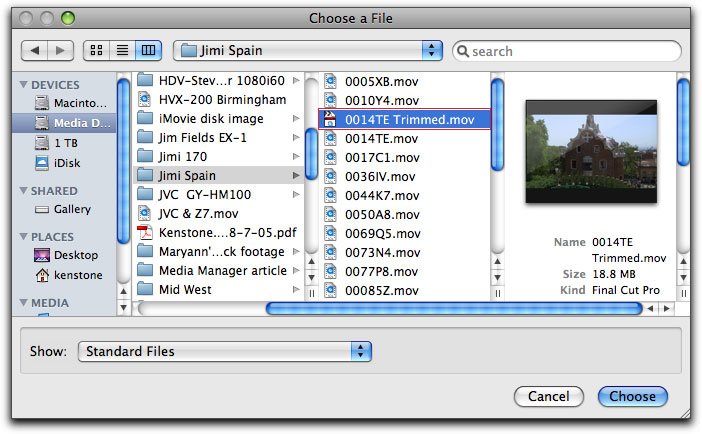
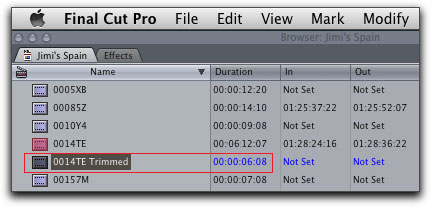
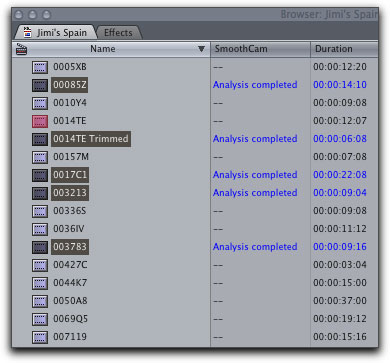
The Trimmed clip has been Imported into the Browser, notice that the entire duration for the clip is now 6 seconds and 8 frames.
There is one last point to be made about preparing a clip for SmoothCam analysis. Lets say that you have a clip and that you intend to use almost all of the clip, enough of it that going through the QuickTime export process might not be warranted. However, at either the start or end there is a big camera movement (maybe the camera was bumped before the action started or after it ended). Remembering that SmoothCam analyzes the entire clip, then that big camera movement will be taken into account in the analysis of the clip and will effect the way that the entire clip is processed. Best to Set In and Out points, cutting out the camera bump, and then export as a QuickTime self-contained. You would also not want to analyze a clip that has several different takes in it or includes several different scenes.
Applying the SmoothCam Filter
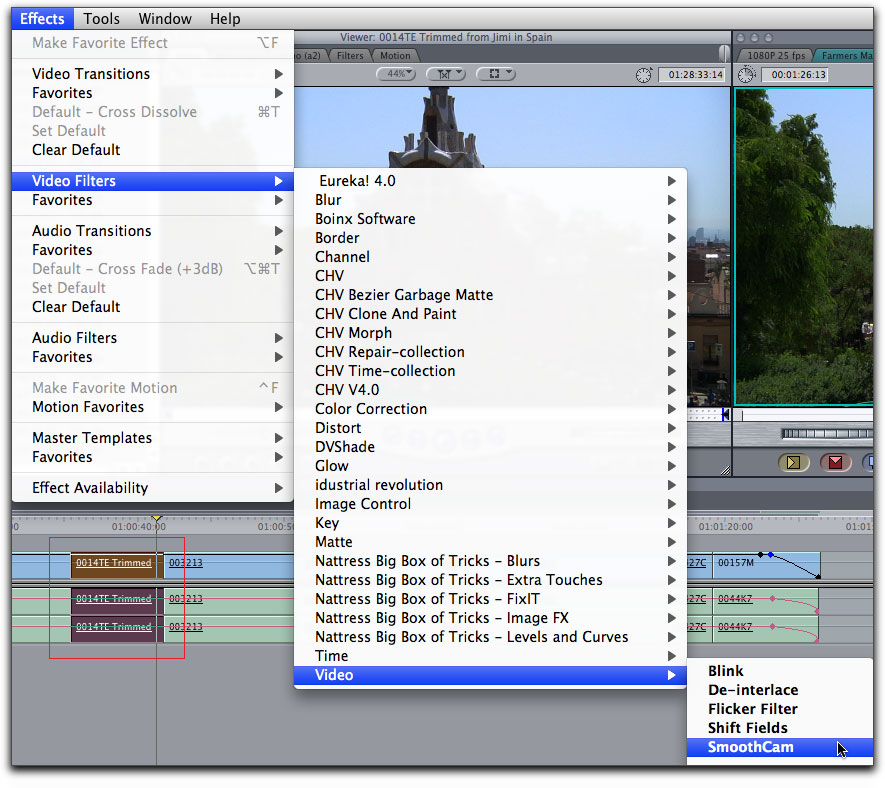
There are several different ways to apply the SmoothCam filter. You can set In and out points for the clip in the Viewer and then place it on the timeline. Select the clip on the timeline and from the Effects menu > Video Filters > Video > SmoothCam.
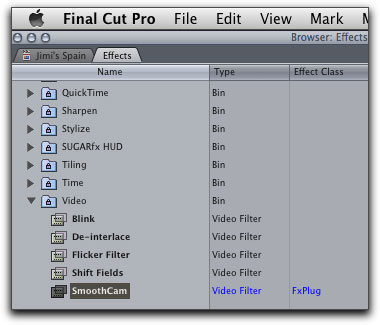
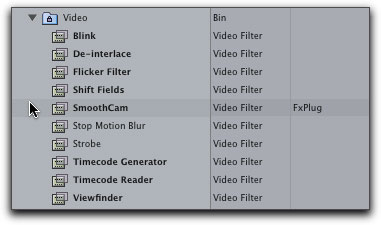
The SmoothCam filter is also available from the Effects tab in the Browser.
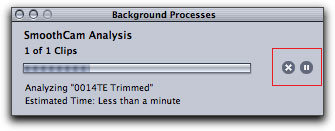
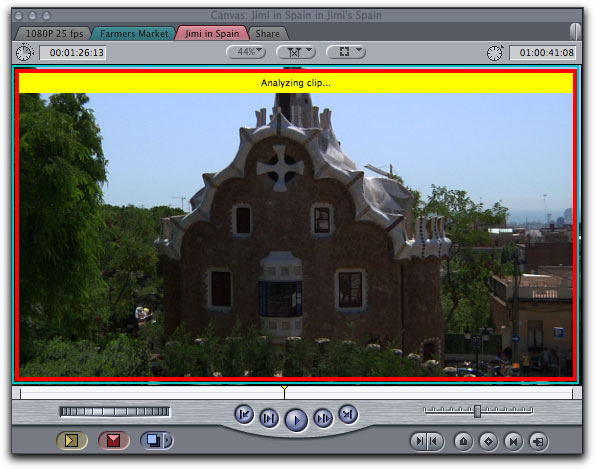
When you have applied the SmoothCam filter to a clip, two things happen. First a 'Background Processes' window will appear on screen, on the right side of the window are Stop and Pause buttons. Second, an 'Analyzing clip' overlay will appear in the Canvas window. Even during the analysis process, you can return to work in FCP as this is a 'background' process.
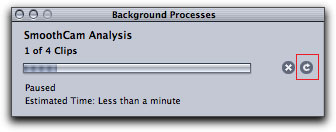
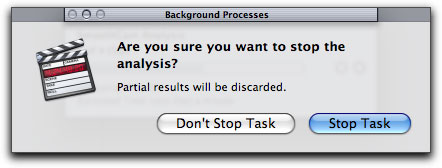
If you clicked on the Pause button, it changes to a resume button, clicking on it again will continue the process. Click on the Stop button you will be asked if you are sure.
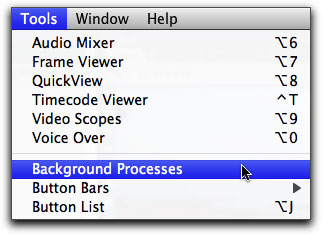
Should you close the Background Processes window and then need to get it back, it can be reopened from the Tools Menu > Background Processes. When SmoothCam has finished its analysis, you will find the analyzed file(s) in the folder that the source video clip is stored in, in this case, in my Capture Scratch folder. The file has a .mtdf extension.
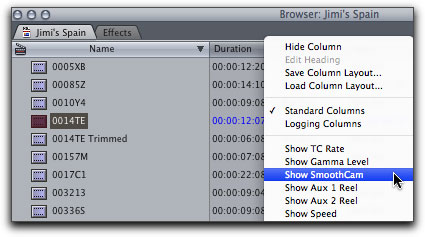
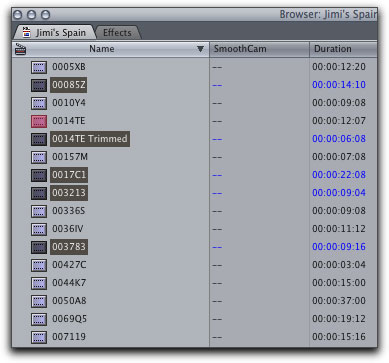
We can also apply the SmoothCam to a clip or any number of clips in the Browser. In order to do this, your Browser must be in List view. Control (right click) on the 'Duration' column header in the Browser and choose Show SmoothCam from the menu. A SmoothCam column will be added.
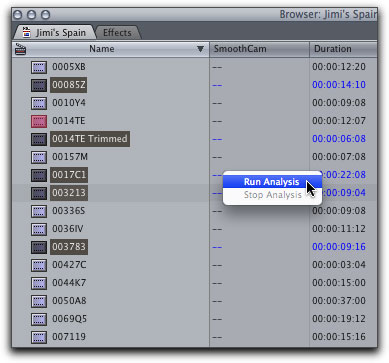
Select any clips that you want to have analyzed. Then Control (right click) on anyone of the selected clips in the SmoothCam column and choose 'Run Analysis".
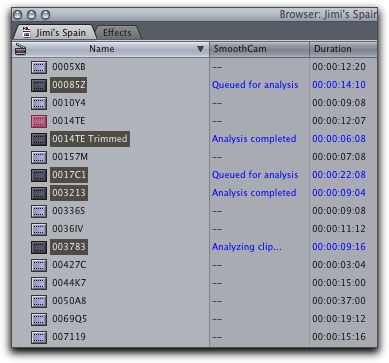
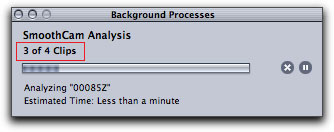
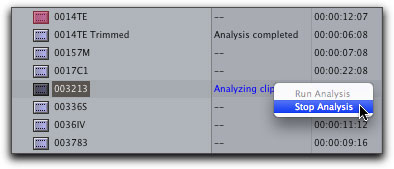
As the process continues you will see the status for each of the clips in the Browser; 'Queued for analysis', 'Analyzing clip', and 'Analysis completed'. The Background Progress window shows that it is working on clip number 3. You can continue to add additional clips to the queue for analysis, at any time, even while the analysis process is running.
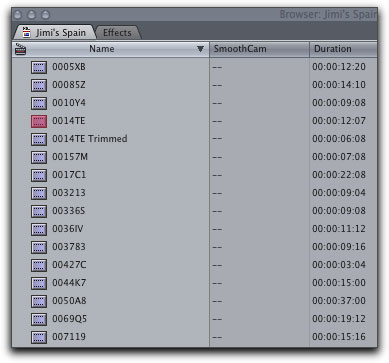
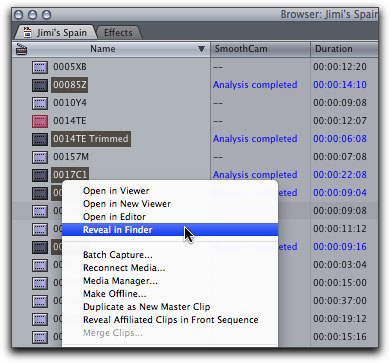
The Browser window after SmoothCam has finished its analysis. Control (right click) on any SmoothCam clip in the Browser, or timeline and choose 'Reveal in Finder'.
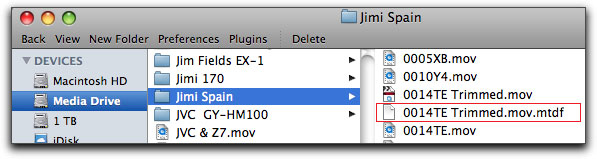
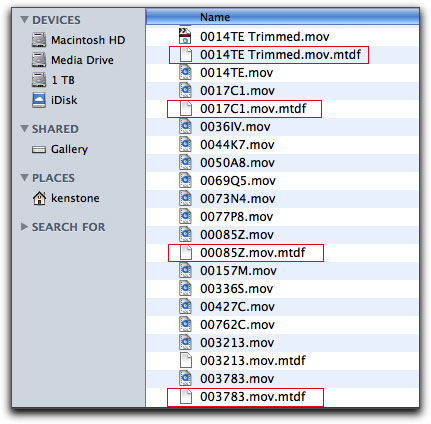
The analyzed clips in my Capture Scratch folder in the Finder. Note that the analyzed clips have a .mtdf extension.
Adjusting the SmoothCam filter
When you select the SmoothCam filter you will see that its name in the Effects tab is in bold, showing that it is a RT filter.
The SmoothCam filter works in the same way as all FCP filters. Once the SmoothCam filter as been applied to the video, and the analysis process has been completed, double click on the clip in the timeline to load it back into the Viewer and click on the Filter tab. The SmoothCam filter settings are shown below at their default settings.
First lets look at the 'Camera Motion Smoothness' section which controls the amount of compensating movement that the SmoothCam filter applies to the clip. 'Translation Smooth' controls both vertical and horizontal motion (along the X-Y axis), to correct for when the camera was moved up or down, or from side to side. This is probably the most common type of camera motion error. The second adjustment is "Rotation Smooth" which controls any camera rotation around the center point, not unlike an 'Anchor' point that is off center. The last setting is "Scale Smooth", which will correct for forward and backward movement of the camera (Z axis). The sliders for these three settings run from 0, which turns the effect off, to 5 which applies the maximum strength effect to the clip.
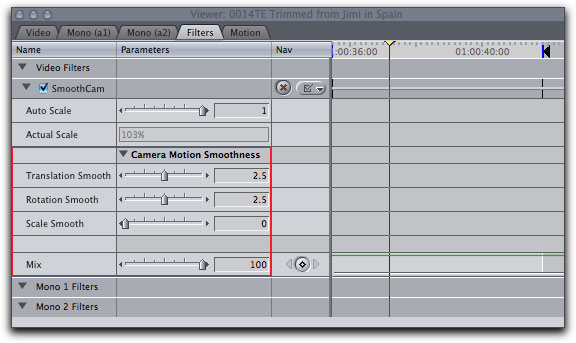
The final setting is "Mix" which defaults to 100%, which means that the SmoothCam filter is applied to full effect. Moving this slider to zero turns the SmoothCam filter off. Positioning the slider somewhere between 0% and 100% creates a blend of both corrected and non corrected video. Changing the mix almost always creates a 'double vision' look, shown below with 'Mix' at 50%. I can not, for the life of me, figure out what this would be used for.
How SmoothCam works
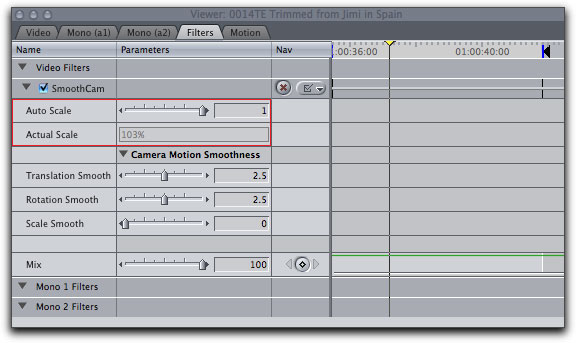
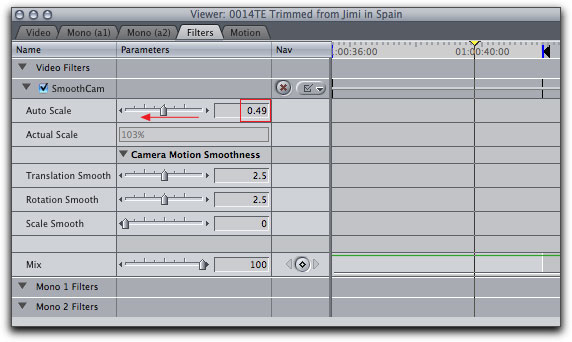
The remaining setting in the SmoothCam filter is 'Auto Scale' with the 'Actual Scale' size box which displays the percentage of enlargement. The scaling function is at the heart of the SmoothCam filter's ability to correct unwanted camera movement. Shown below, the SmoothCam filter has scaled up or enlarged this video clip, based on the information in the analysis file, to 103%.
So here is what is going on with the SmoothCam filter. During the 'analysis' process, SmoothCam tracks the motion of all the pixels in every frame and it calculates the distance from the starting point that the pixels have moved, due to the unwanted movement of the camera. So the analyzed file becomes 'instructions' for FCP, which uses them for RT playback or rendering. If the SmoothCam filter detected that in frame number 2, that the scene has shifted to the right by 4 pixels and up by 1 pixel, during render or RT playback, FCP moves the entire frame in the opposite direction; left by 4 pixels and down by 1. This compensating movement by FCP goes on for every frame of the clip. FCP will move the frame, up, down, left, right, forward back and even rotate, to counteract the unwanted movement of the camera. As the clip plays and the frame is being moved about, uneven black borders show up around the four edges of the clip.
To demonstrate this, I have moved the Scaling back down to 100%, by moving the 'Auto Scale' slider all the way to the left.
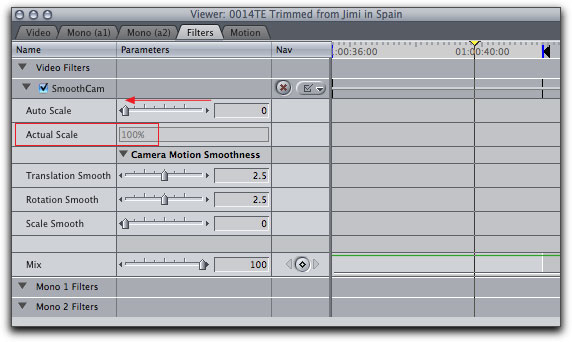
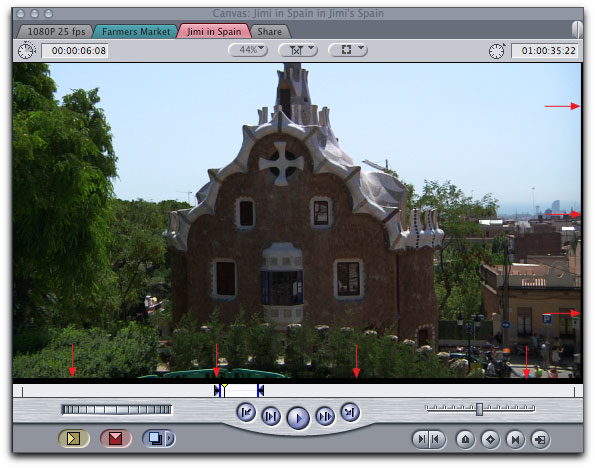
With Scaling at 100%, the video frame will now will show the black borders that are produced when the SmoothCam filter moves the video frame to compensate for the unwanted camera motion. As you can see below, the frame has been shifted up leaving a black border across the bottom of the frame. The frame has also been shifted to the left, leaving a smaller black border along the right edge of the frame.
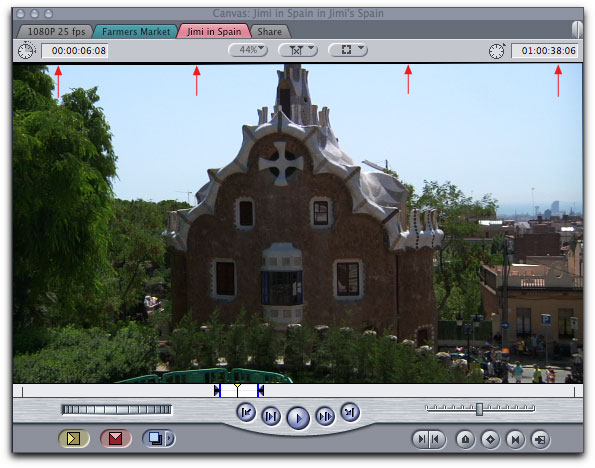
In the shot below, you can see that some 'Rotational Smooth' work is going on, as the black border top left, is thicker than the black border, top right.
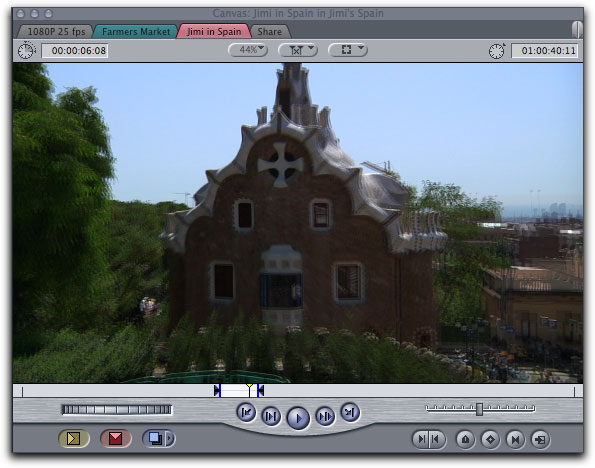
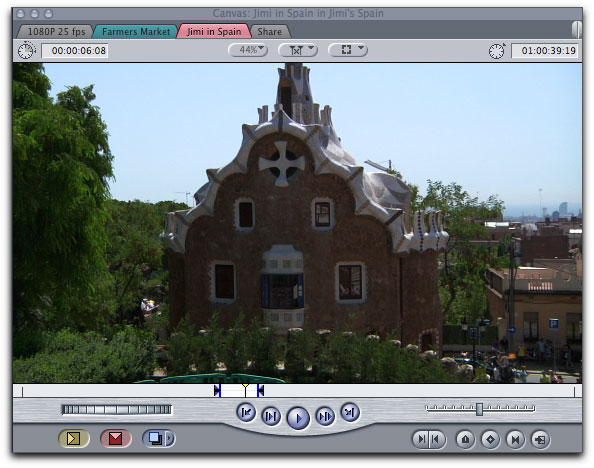
Correcting unwanted camera movement is not going to do us much good, if while the video plays, we have dancing black borders around the image. So what the SmoothCam filter does, is enlarge the video frame, so that the black borders are pushed out beyond the viewable area of the video. I have returned the Scale setting back to 103%, which is the amount of enlargement that SmoothCam has calculated is required for this clip, to move the black borders off screen.
So why, if the SmoothCam filter calculates the percentage of enlargement required to remove the black borders, do we need a slider to control the percentage of enlargement? The larger the unwanted camera movement, the larger the black borders, because of the greater required movement of the video frame. The larger the black borders, the higher the enlargement settings need to be to hide the boarders. Well, there is a price to be paid for this miraculous filter. As soon as we start to enlarge the video, we start to soften and degrade the image. A small percentage increase, like 101%-102%, will hardily be perceptible, but as you start to go above these amounts, the video image starts to soften rapidly. If you have a video clip that requires a high level of enlargement, the image may be just too soft to be usable. In this case you can move the 'Auto Scale' to the left, decreasing the amount of enlargement, making the clip more acceptable, by reducing the softness. Of course, this will start to expose some of the black borders. This would be okay if your project will be shown on 'overscan monitors' or monitors with a bezel, the SmoothCam clip is cropped for use, maybe in compositing, or some other use where the borders of the video don't show.
The Auto Scale slider can only be used to reduce the amount of enlargement, it can not increase the amount of enlargement above its initial setting.
Notes
- The SmoothCam filter must be applied before you add any other filters to the clip.
- If the camera movement is too great the SmoothCam filter will not run and the 'Actual Scale' setting will be turned off.
- To improve RT playback performance, set RT playback to Unlimited RT mode.
- If the black borders are too large you can reduce the Translation Smooth, Rotation Smooth, and Scale Smooth parameters, which will in turn, reduce the amount of motion correction applied to the clip thus reducing the size of the black borders. It's a trade off between the softness caused by scaling and the amount of unwanted motion that you find to be acceptable.
- If you use the Media Manager and trim your media when you Copy or Move, then the SmoothCam analyzed files will no longer work. This is because SmoothCam always analyses the entire clip, so when Media Manager trims the clip, SmoothCam no longer recognize the clip, you will have to re analyze it.
- If you send clips that have been analyzed in FCP to Motion, Motion will recognize and work with the analyzed files. No need for re analysis.
- If you need to stop the ongoing analysis of a clip, in the SmoothCam column, control (right click)
on 'Analyzing clip' or on 'Queued for analysis' and select 'Stop Analysis. Once a clip has been analyzed, if you want to remove the analyzed file, you'll need to delete it in the Finder, in my case, in the Capture Scratch folder.
- If you place an analyzed clip in the timeline, and use the razor blade tool, (through edit), this can produce what looks like a 'Jump Cut' at the edit point.
- Using Digital Cinema Desktop Preview may cause your render bar to turn red, requiring a render before playback.
- If you return to editing in FCP while the SmoothCam filter is analyzing clips and then perform a processor intensive operation, like playback video, performing a capture or writing to tape, the analysis process will be paused while the processor is heavily involved.
- Make no mistake about FCP's SmoothCam filter, it really works.
Enjoy,
--ken
copyright © www.kenstone.net 2009
are either registered trademarks or trademarks of Apple. Other company and product names may be trademarks of their respective owners.
All screen captures, images, and textual references are the property and trademark of their creators/owners/publishers.