
August 1, 2011
Download the ePub iPad/iPhone version of this article.
By Ken Stone
Chroma Key (greens screen) effects are becoming more popular everyday. Place a person or an object in front of a green screen background and record to video. In FCP, place some background video into the Primary Storyline and add your green screen video. Connect it to the Primary Storyline, over the background video. The 'Keyer' effects filter in FCP looks at the green screen video and turns everything that is colored green transparent allowing the background video to show through. Everything that is not green is left alone. Marrying the two video clips together in this way is called 'Compositing'. What I want to do in this article is cover the basics of keying and how to fix imperfections in your green screen video for a better end result.
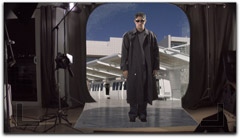
My background video was shot at the Getty Museum in Los Angeles.
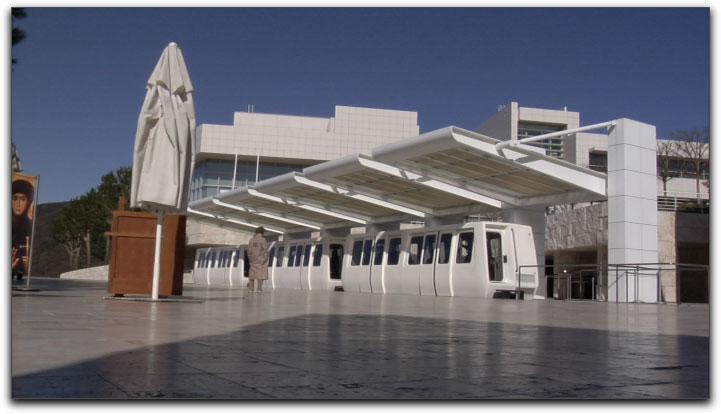
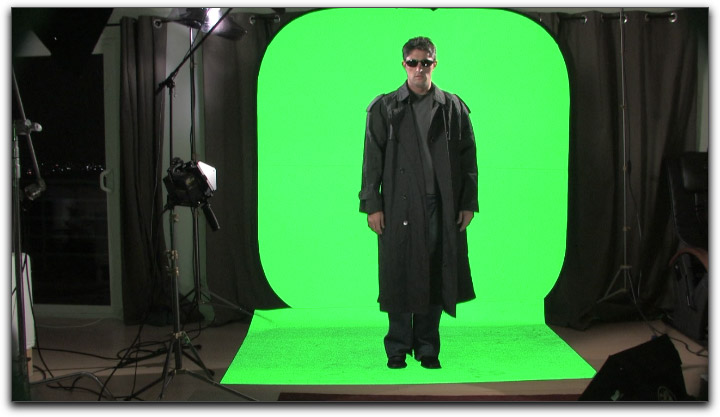
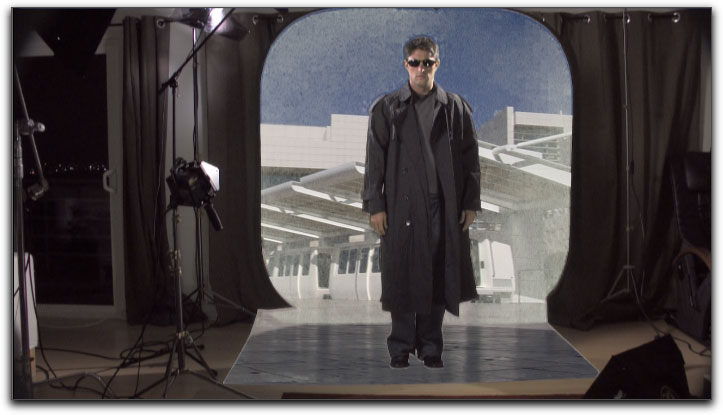
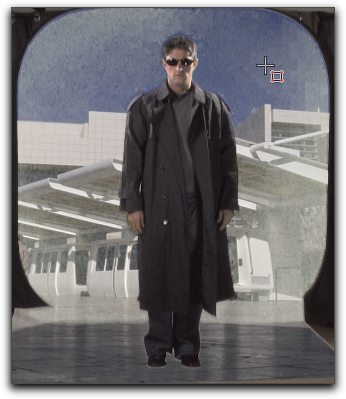
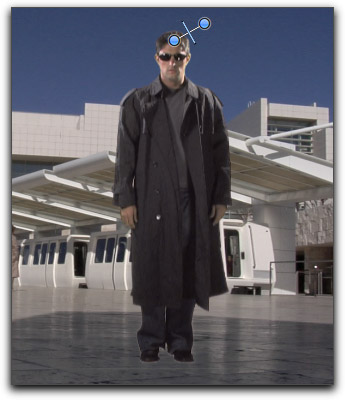
I wish to add the talent in the green screen video to the background Getty shot. Looking at the green screen video we can see a problem. The green screen background does not fill the camera frame leaving unwanted elements from the set in the shot. After we Key the shot we'll apply a Mask to crop out the unwanted parts of the set.
First let's put the Getty Museum footage (background) on the timeline.
Next I'm going to select my screen screen video (foreground) in the Even Browser.
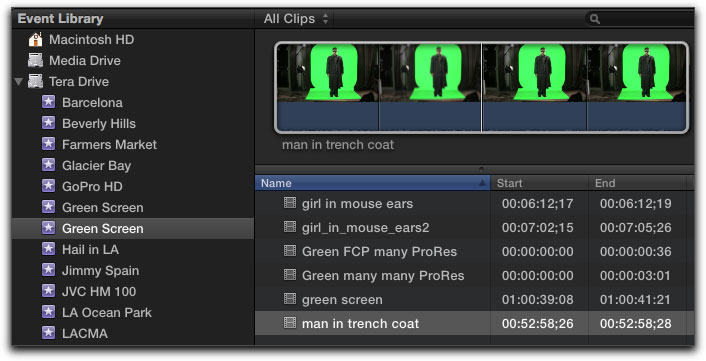
With my playhead set to the start of the Getty Museum footage and the green screen video selected in the Event Browser, 'Q' from the keyboard, 'Connect to Primary Storyline', will place the green screen video over the Getty footage.
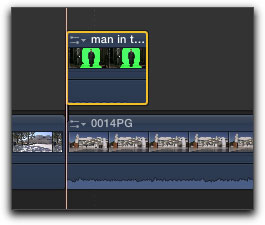
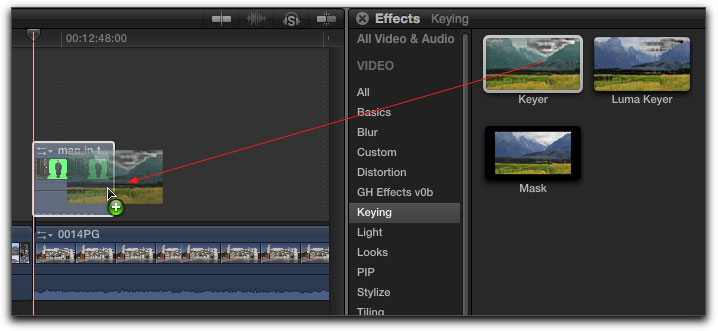
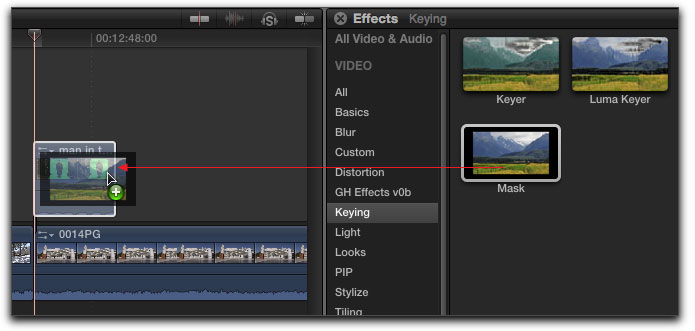
Locate the Keyer filter in the 'Keying' section of the Effects browser and drag it onto the green screen video in the timeline.
With the Keyer filter applied to the green screen (foreground) footage you will see the results in the Viewer. Here is what is happening. The Keyer looks at the green screen video and anything in the image that the Keyer sees as being green, will be turned transparent by the Keyer. When the green is turned transparent, the background video on the Primary Storyline shows through. Sometimes, when first using the Keyer, the results show some parts of the green area in the video as completely transparent and other parts still show as green. This would be caused by an unevenly lit green background, the Keyer recognizes some of the green background and turns it transparent. However, if other areas of the green background look different to the Keyer, because of uneven lighting, the Keyer may not see this part of the background as green, and therefore not make these parts of the image transparent. As you'll see, we are now able to select additional areas of the green background. This will tell the Keyer to include the added areas in the key making those areas transparent as well.
While the green screen background I'm working with in this article is evenly lit, the green color is very bright, has excessive luminance, and more lime in color. When the Keyer is first applied, the green background is only semi-transparent, but by resampling the green background, the Keyer will accept the lime green as green and turn the area transparent.
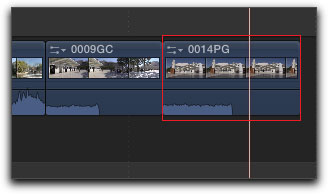
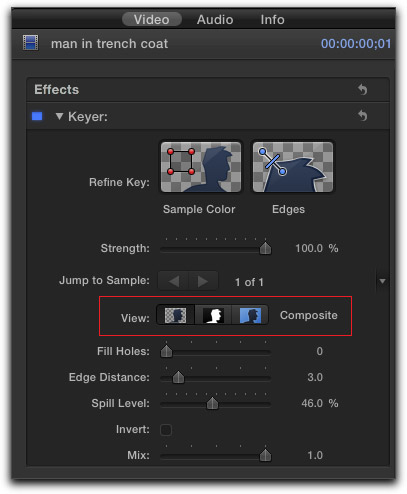
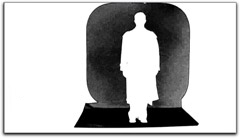
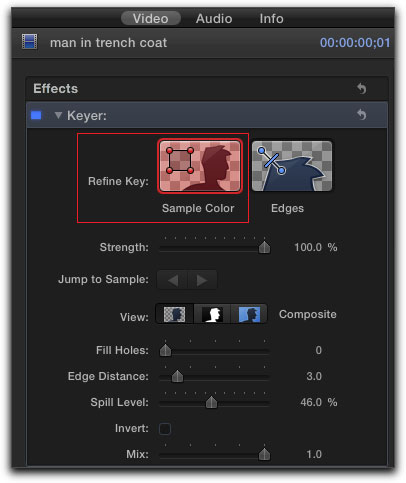
Select the green screen clip in the timeline and in the Inspector, then click on the Video tab. Before we begin to adjust the Key it is important to know that we can see our video and keyer in three different states in the Viewer window. This can help when we go to adjust our key. The View section in the Inspector offers us three different views, red box below. On the left, the silhouette with the checkerboard background is the 'Composite' view; this view shows us the final output. In the middle is a white silhouette on a black background; this shows the chroma key matte that has been applied. The third silhouette with the blue background shows the unaffected original green screen clip. We can use these three different views to help us pull a clean key.
The three different views are shown below.
|
|

|
| Composite | Matte | Original |
Taking a good look at the Composite or final mode below, we can see that the brightness of the green screen is causing poor quality in our key as we are not getting a complete transparency in the green screen area.
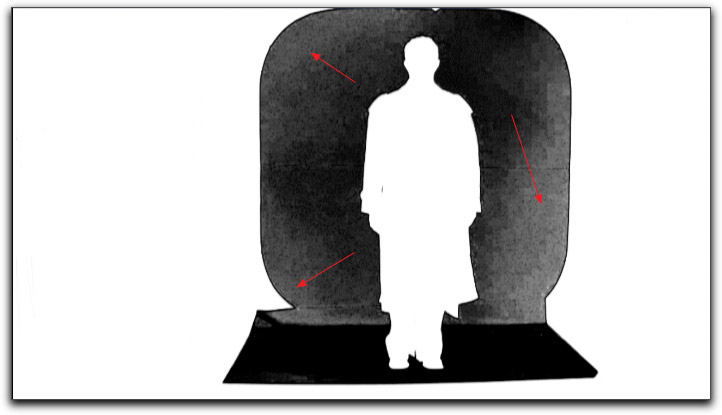
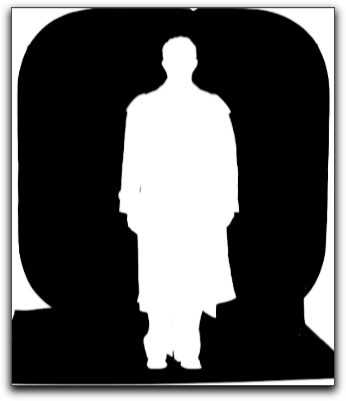
The Matte view demonstrates the problem. The matte around the white silhouette should be completely black. Black represents transparency, but you can see that it runs from black to light gray. Those areas that are not black will not be completely transparent.
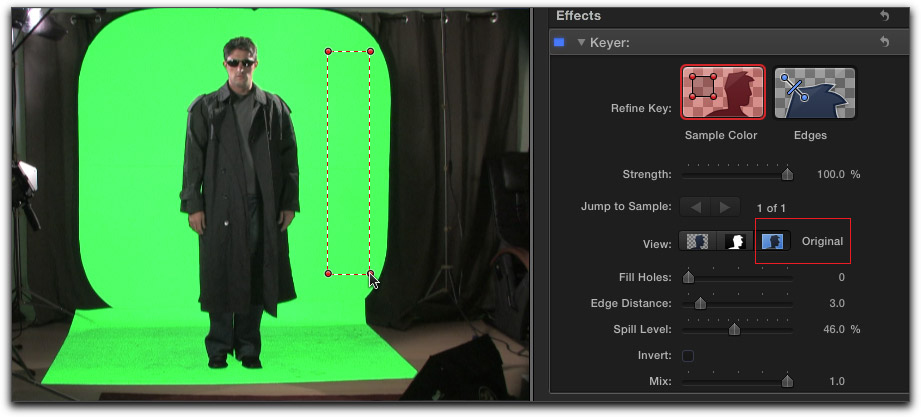
We are going to fix this problem by selecting the problem areas and adding them to our matte, using the 'Refine Key' to resample the color. With the green screen clip selected in the timeline, look to the Inspector where you'll see the Keyer controls. Click on the 'Refine Key - Sample Color' button.
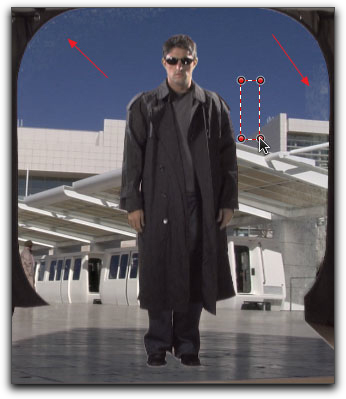
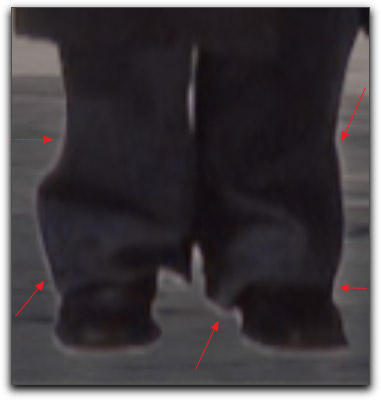
With 'Refine Key' selected, move your cursor into the Viewer window. The cursor will change to a small red box and + sign (below left). Move the red box to the section of the matte that you want to add to your sample, then click and drag out the red box. As soon as you start to drag out the box you will see the matte change in real time. Selecting an area next to the talent helped to improve the over all key, but there are still a few problem areas, red arrows below.
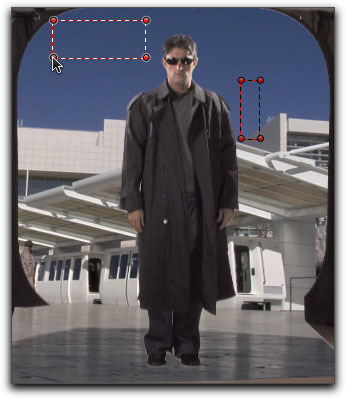
Select 'Refine Key' again and this time click and drag into the space that needs work, to include it in the key. After doing this, the key looks much better. If you are unhappy with your 'Refine Key' in the Viewer, click on one of the red corner circles to select and hit the delete key. You can now reapply the Refine Key. If you switch back to Matte view you can see that the black area around the silhouette is now a solid black and solid black means complete transparency.
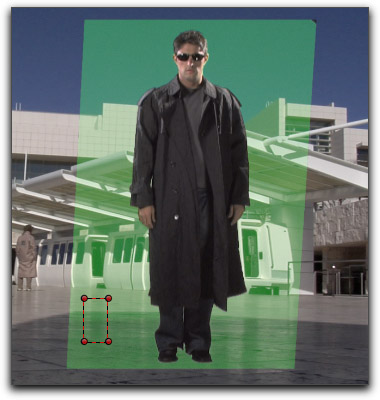
There is yet another way to sample our colored background and this second method can be used in a situation where the color of the background is not green, but possibly blue, black or white (any color really). Start as we did above. Place the background clip into the Primary Storyline, connect the foreground (talent) clip to the background clip. Then apply the Keyer to the the foreground clip. But now, before we sample our colored background change the View in the Keyer to 'Original'.
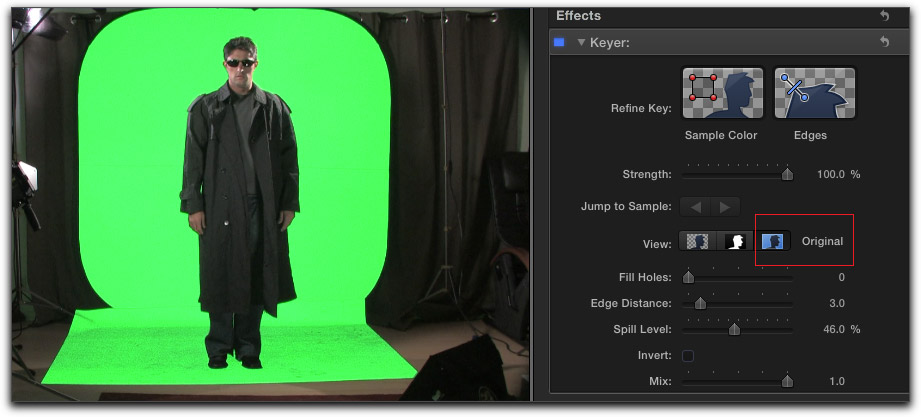
In 'Original' view, select 'Refine Key - Sample Color' and select a section of the colored background as shown below. However, after you sample the colored background you'll notice that noting has changed, it's still green.
In order to see the results you'll need to switch the View setting back to 'Composite' (final) view. Now you can see the results of the Sample Color work. You can sample additional areas if need be.

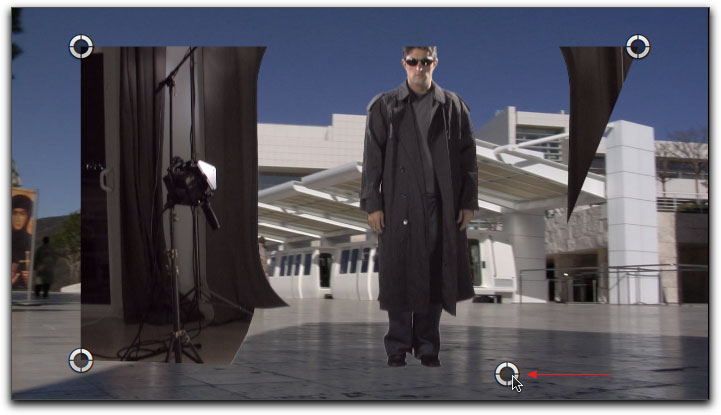
Now that we have keyed our background it's time to fix the problem of unwanted imagery in the video. In the foreground (talent) video we need to crop out (make transparent) the left and right hand side of the set to complete the effect. There are several ways that we can do this and we'll start off by using a Mask. The Mask filter has controls that enable us to make parts of the green screen video transparent allowing the Getty Museum video to show through while leaving other parts in the Mask as they are (the talent). Select the Mask filter in the Effects browser, also found in the Keying section, and drag it onto the green screen video.
When you first apply the Mask to the video it looks a little strange. As this filter is actually a four point garbage matte, we'll adjust the mask by dragging on each of the four round white 'handles'.
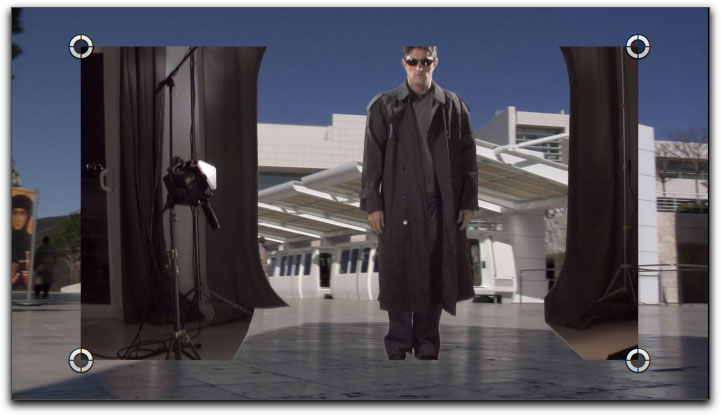
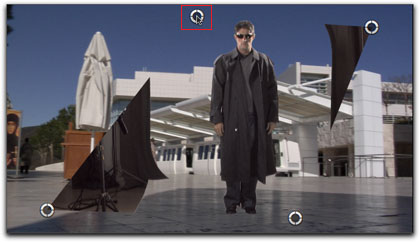
Starting with the lower right handle, click and drag in and down to mask out more of the unwanted image.
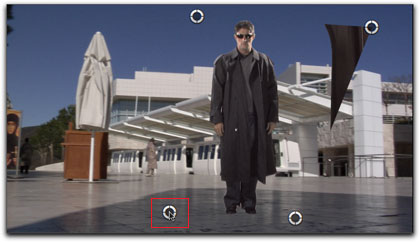
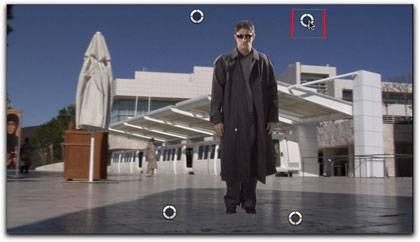
Continue on adjusting the remaining three handles.
There is a second way to crop out the unwanted areas in the image and, in some cases, this way can be easier than using a Mask and you can do this before you 'Refine Key - Sample Color'. In the Inspector, with the View mode set to Composite (finished) scroll down to the 'Crop' section. You can crop into the video from all four sides using the; Left, Right, Top and Bottom sliders. As you move a crop into the image you'll see that the area of the crop has become transparent revealing the background video beneath. As I mentioned, this can be a quick and easy way to crop out unwanted imagery in the video. However, sometimes items that need to be cropped out are irregular in shape. In this case, because we can adjust and position the corners of a Mask, using a Mask might be the better choice.
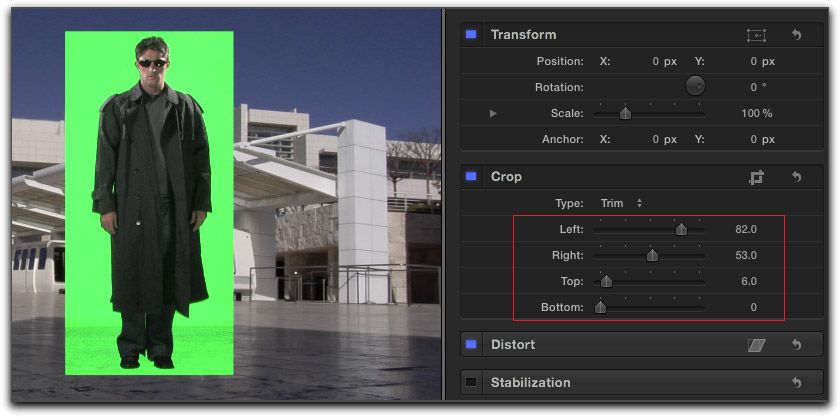
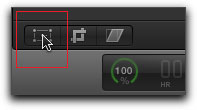
The talent standing in front of the tram looks to be floating. To reposition him, select the green screen clip in the timeline and from the bottom left of the Viewer window, click on Transform.
Click in the Viewer window and drag the talent down. When positioned, click 'Done' upper right of the Viewer window.

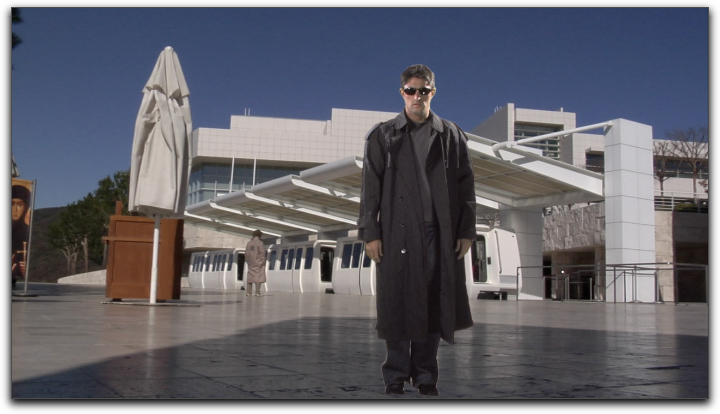
The finished image.
There are additional controls in the Inspector that we can use to improve our key, but it is important to know that this Keyer tries to do everything by itself. The controls that we have to adjust our key are limited and the effectiveness of some of these controls is questionable. To the right of 'Refine Key- Sample Color' is 'Edges'. Edges is used for difficult edge areas in the image like hair or edges between the talent (foreground) and the background shot. Select Edges in the Inspector and move the cursor into the Viewer window where it will turn into the Edges icon. Click and drag across the problem edge. On the line, between the two circles, is a blue handle, click on the handle and drag in one direction or the other, this will soften the edge. Just beneath 'Edges' is the 'Strength' slider which controls how closely the color selected by the 'Refine Key - Sample Color' tries to match the actual color of the green screen in the foreground shot.
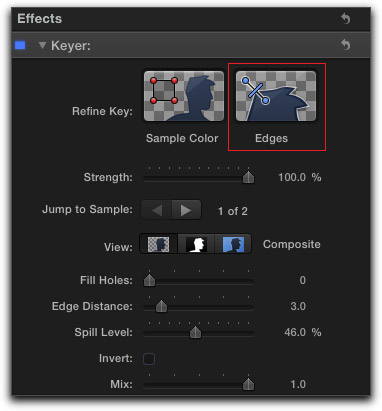
In the lower section of the Inspector are some additional controls. 'Fill Holes' is used when there are spots in foreground video (talent) that are not completely opaque. With poorly shot green screen video, 'Fill Holes' can have a positive effect. To best see what 'Fill Holes' is doing, change your view to 'Matte' view as you adjust the 'Fill Holes' slider. 'Edge Distance' is used to control the width of the gap between the foreground video (talent) and the background video, but according to the manual, 'Edge Distance' works only in conjunction with 'Fill Holes'. Gone is the 'Edge Thin' control found in Legacy versions of FCP that was used to either expand or contract the green screen matte to close the edge gap (thin white or colored border) between the background and foreground images.
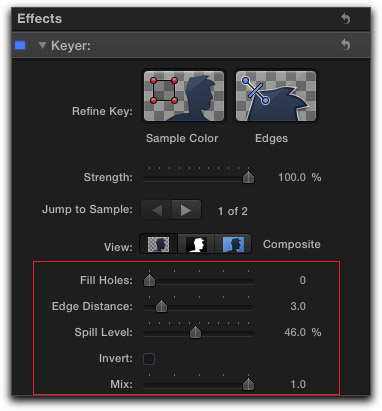
'Spill Level' is used to remove any colored light from the background that might 'spill' onto the subject in front of the green screen. For example, green color light coming from the green screen showing in the talent's hair. There is an 'Invert' control that will reverse what is keyed out and what remains visible. Lastly, is 'Mix', where you can vary the amount of transparency applied to the green screen. Set at 1.0 (default), the green screen is completely transparent. As you move the slider to the left, towards 0, the green screen becomes less transparent retaining more of it's green color. I have no idea how this feature might be useful.
How successful we are in pulling a Key depends on a number of things. The proper lighting of the green screen, distance from the green screen to the back of the talent, colored spill light from the green screen onto the back edges of the talent, the lighting on the front of the talent, and of course the abilities of the Keyer itself. In legacy versions of FCP we had a number of excellent keyers from third parties and one can hope that these keyers will be updated for FCP X in the near future.
Enjoy,
--ken
[Top]
copyright © www.kenstone.net 2011
are either registered trademarks or trademarks of Apple. Other company and product names may be trademarks of their respective owners.
All screen captures, images, and textual references are the property and trademark of their creators/owners/publishers.