July 25, 2011
Download the ePub iPad/iPhone version of this article.
By Ken Stone
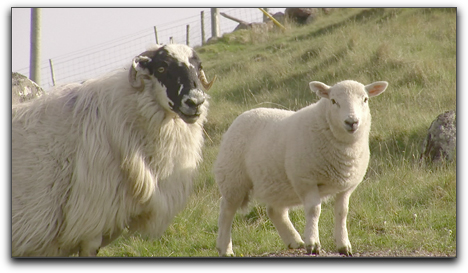
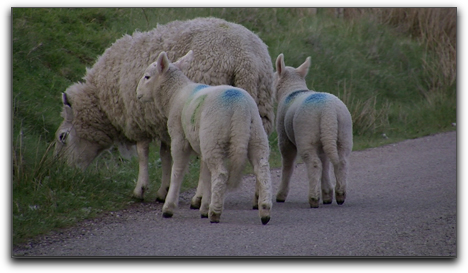
I was given some video shot in the Highlands of Scotland that I needed to edit. A problem that I encountered, which is not uncommon, is that some of the footage was shot in the warm sunlight of the early afternoon, but some of the shots were done much later in day and are decidedly cooler (blue color cast) than the shots done earlier. These clips need to be intercut so it is necessary to adjust the color of the clips to match each other. Fortunately, Final Cut Pro X has a very powerful and easy to use 'Match Color' feature in which the playhead and the skimmer work in tandem. The playhead is positioned on the clip to be color corrected and the skimmer positioned on the clip that will be the source of the Match Color.
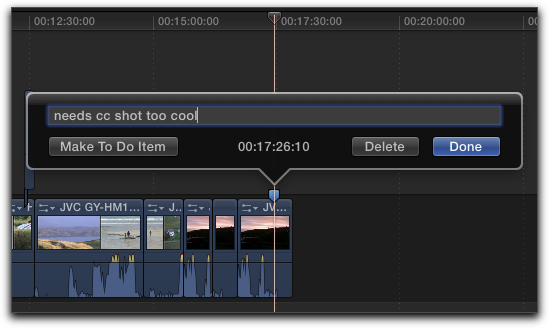
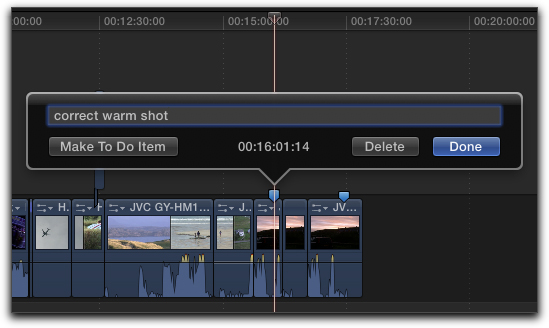
In the timeline navigate to a frame in the clip that needs to be corrected, a frame that is representational of the entire clip and place a marker on the clip (m from the keyboard). Tap the m key a second time and the Marker box will open where you can name the marker and add comments.

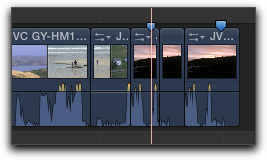
I now move the playhead to a clip that was shot in the warm afternoon sunlight and find a representational frame. While it is not necessary to add a marker here, I do so because I may need to return to this marker later to correct other clips.
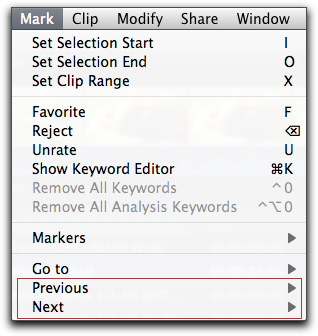
You can move from marker to marker up and down the timeline by using 'control apostrophe' and 'control semi-colon' from the keyboard. You can also go to Previous and Next markers from the Mark menu.
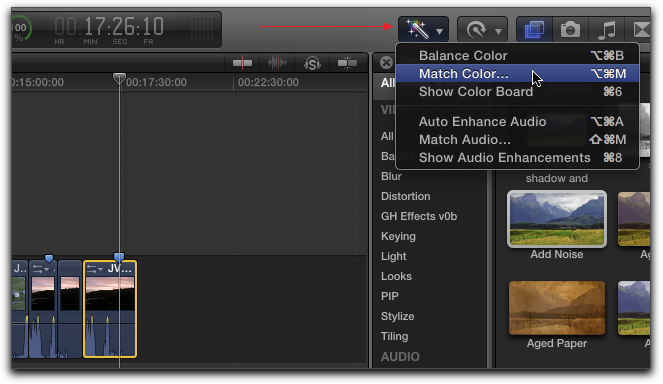
In the timeline, select the clip that needs correcting and move the playhead so that it is on top of the clip. Then go to the Enhancements Menu (red arrow below) and select 'Match Color'.
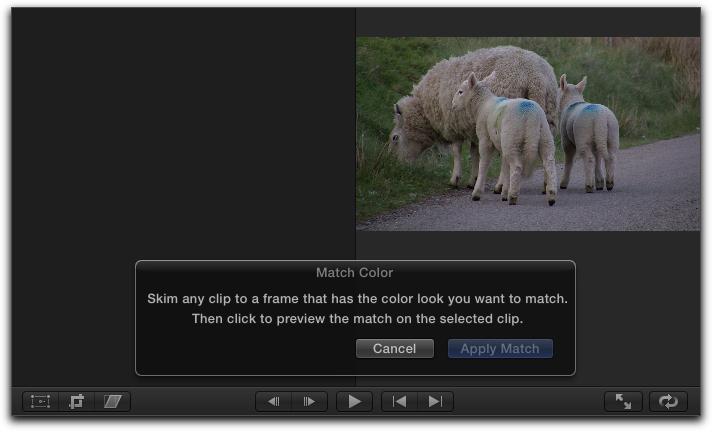
When you select 'Match Color' the Viewer window will change to display the clip that needs to be corrected on the right hand side with an instruction box, the clip that the playhead is positioned on. When you are in Match Color mode, you will not be able to move the playhead by dragging it, you will, however, be able to move the playhead from marker to marker using the keyboard shortcuts mentioned above. While it is not necessary to set markers, I find that having markers can be very helpful.
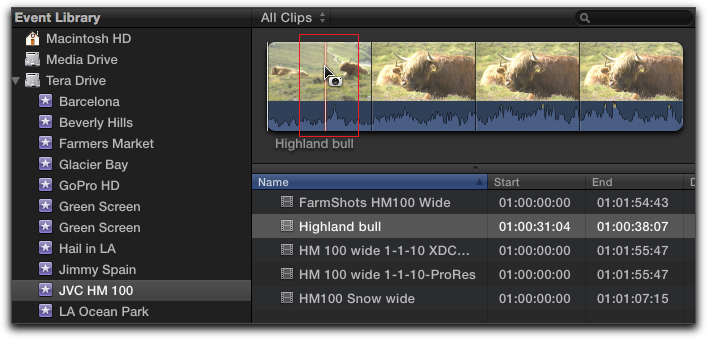
For the next step we'll use the 'Skimming' tool, but even if it's turned off (s from the keyboard toggles it on and off), when you enable the Match Color function, the skimmer will come on automatically. As you move the skimmer through the clips on the timeline you'll see a small camera icon that is attached to the skimmer line.
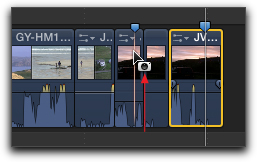
Moving the skimmer across the clips in the timeline will display the clips in the Viewer window, left hand side.
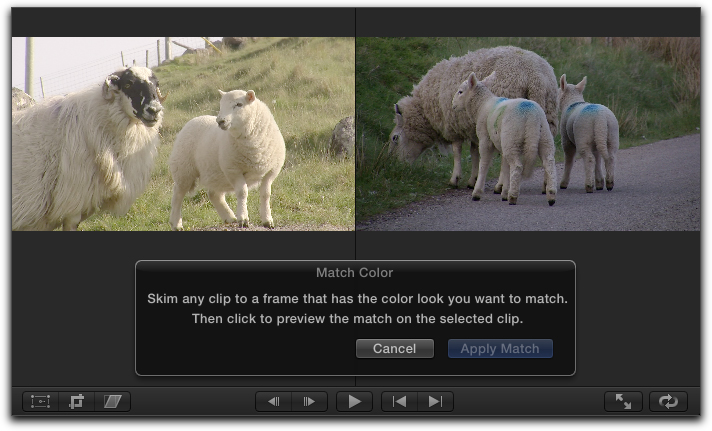
When you have skimmed to the frame that you want to use, click the mouse button (with camera icon), in the Viewer window two-up display, the frame on the right, the one that needs correcting, will change to reflect the color values and luminance of the frame that you have selected with the skimmer.

If you are not happy with the clip that you selected, simply move the skimmer to a different clip and click again. You can continue to do this until you find the clip that you are happy with. When it's as you want, click on the 'Apply Match' button in the Viewer window.
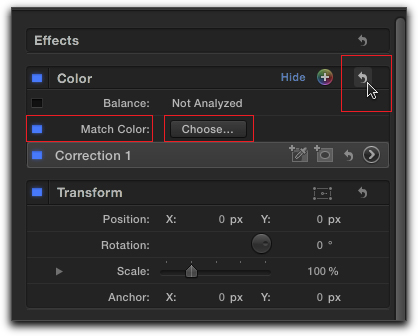
Okay, but what happens if you later decide that you do not like your choice and you need to return the clip you wanted to color correct to its natural state? Select the clip in the timeline and look to the Inspector. There are several things that you can do. First you can toggle the Match Color effect on and off by clicking the small blue square next to the words Match Color. If you want to select a different clip for your color correction, click on the 'Choose' button which will return your Viewer window to the two-up Match Color state and you can skim to the new clip and choose it. You can also click the hooked arrow 'reset' button to remove the Match Color effect.
For this article I used a clip on the timeline to Match Color, but you can skim (Match Color) from any clip in the Event Browser as well.
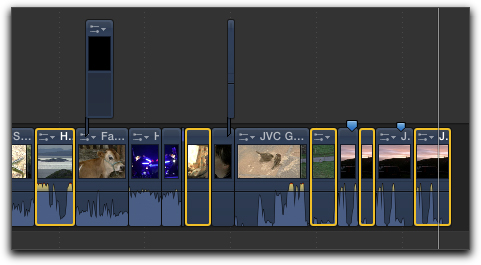
Match Color is a very powerful tool but it would not be of much help if you had to match each clip, one at a time. Well, you don't have to. Select all of the clips on the timeline that need color correcting. Be sure to have your playhead parked on one of the selected clips so that when you select Match Color in the Enhancements Menu, you'll be able to see the clip on the right hand side of the Match Color two-up display. Then skim to the clip that you want to use for your match color and click on 'Apply Match'. All of the clips that you have selected will be matched to the clip of your choice.
While it is not necessary to set markers to do Match Color I have found that it's very helpful. If you need to Match Color quickly, in the timeline, place your playhead on the clip that you need to adjust and select the clip. Select Match Color from the Enhancements Menu, move the skimmer to the clip that you want to use for Match Color, click to set, click to Apply, done. It doesn't get any easier then this.
Enjoy,
--ken
copyright © www.kenstone.net 2011
are either registered trademarks or trademarks of Apple. Other company and product names may be trademarks of their respective owners.
All screen captures, images, and textual references are the property and trademark of their creators/owners/publishers.