July 18, 2011
The Basics of Managing your Events and Projects
Download the ePub iPad/iPhone version of this article.
By Ken Stone
Final Cut Pro X manages media in a different manner than legacy versions of FCP. You will need to understand that there are some fundamental differences in media management between the two versions of FCP. With legacy versions of FCP your media and render files are always included in and associated with a particular project. Each project contains its own set of bins (folders) which holds your video clips and other media, such as stills, audio, etc. Open a different project and you'll have a different set of bins with different media.
With FCP X everything has changed, media is no longer associated with projects but is now housed in an independent media data base called the Event Library. The most important thing to understand is that all of the media that you have imported into the FCP Event Library, is always available to all of your projects, all of the time!
As the Event Library and the Projects are completely separate entities I'll look at each individually. Media management starts when you first import your media, we'll start off by looking at Importing media.
Importing Media
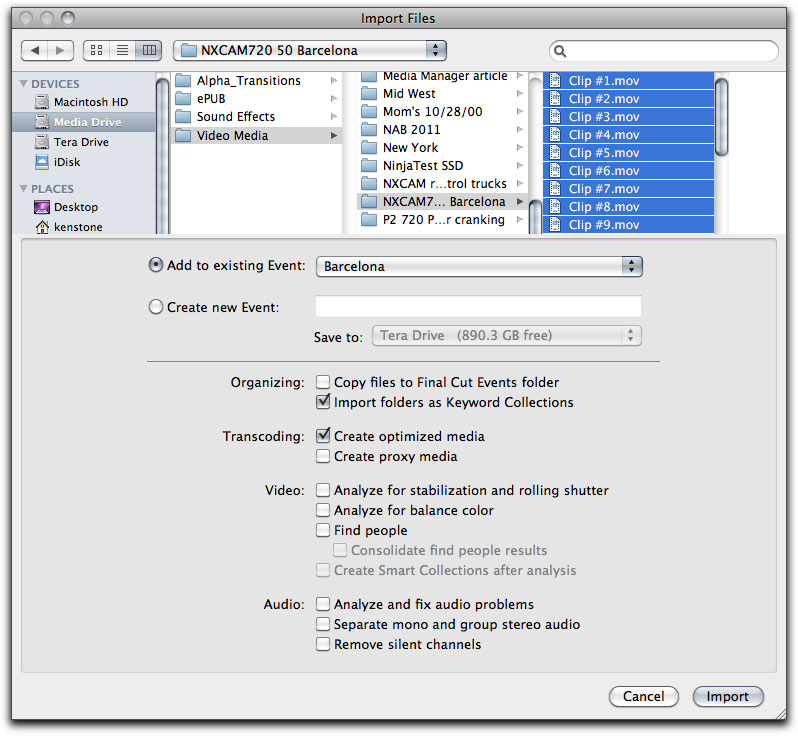
Before you begin the import process there are some settings that we need to look at. FCP Preferences will act as your default import settings. From the FCP menu, choose Preferences. At the top of the Preferences Import window, click on the Import tab. There are four sections in the Import Preferences window but we are only going to look at the first two as the remaining two sections have to do with analyzing audio and video. The first section in the Import Preference window is 'Organizing'. The first item is 'Copy files to Final Cut Event folder'. If you already have media on your media drive, if the media is already stored in your Mac or attached hard drives, then you would want to leave this item UN-checked, there is no need to duplicate your media. The newly imported clips in the Event Library will simply point to the actual location of your media. If you are importing media from memory cards, DSLR camera, camcorder (tape or memory card) and the media does not yet exist on your Mac, then you would want to check this box. This will copy your original Media into an Event s folder on your hard drive. The next option is 'Import folders as Keyword Collections', with this checked, clips within any folder that you import will gain that folders name, as a searchable keyword.

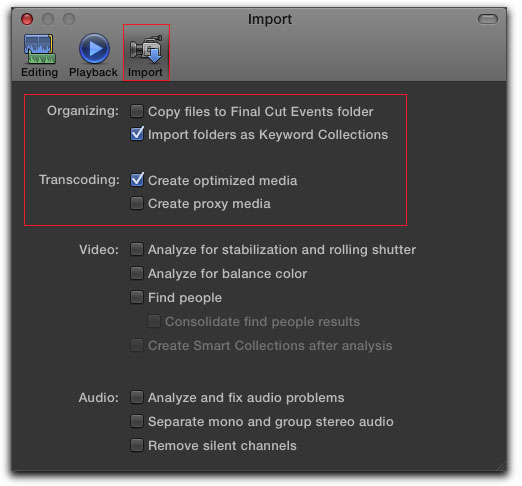
The 'Transcoding' section is next and I always keep 'Create optimized media' checked. While it sounds like every time you import media it will be Optimized to the ProRes 422 codec, this is not the case. Even though Optimized is checked, on import, FCP will look at the format and codec of the media and decide if it can run the media natively in the timeline. If FCP determines that it can run the media natively, then it will NOT optimize the media on import but rather import the media in its native format. I have imported HDV, XDCAM EX, AVCPRO HD, DVCPRO HD media and FCP determined that on my Mac there is no need to optimize. When I imported H.264 video, FCP optimized the media to ProRes 422. If FCP Optimizes your video on import, then when a clip of optimized media is placed into the timeline, FCP will playback from the optimized files.
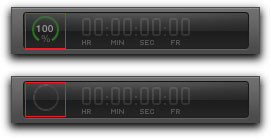
During the import process you can discern how FCP is handeling your media. In the center of the FCP interface is the Dashboard which holds the 'Background Tasks' button, below red boxes. When Background tasks are idle, the circle is green, when Background Tasks are being performed the green circle becomes animated and turns gray in color. Clicking on the button opens the Background Tasks Window, below right. In this case I am importing XDCAM EX footage and you can see that the 'Transcoding and Analysis' is showing as "Idle". This is because FCP has determined that it can run XDCAM EX natively in the timeline. You will note that a Rendering process is going on, FCP is generating thumbnails of the imported video for use in the Event Library and on the timeline. Generating thumbnails is done quickly.
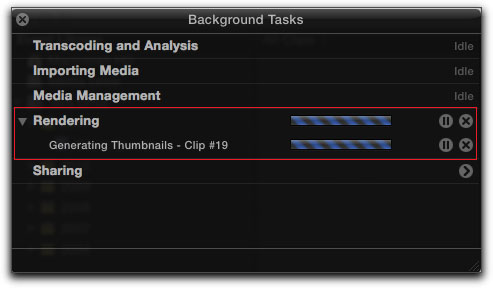
When I import H.264 video, FCP has determined that it needs to optimize the footage (ProRes 422). Opening the Background Task window during import shows that in this case the video is actually being 'optimized' (transcoded) shown below, red box. You can also see that thumbnails are also being generated.

Creating Events and Importing Media
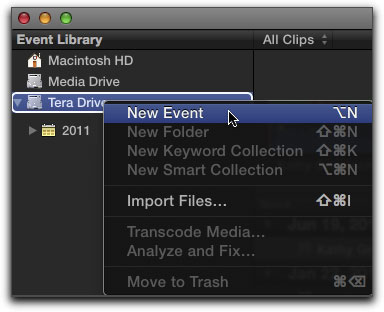
All of our imported media is housed in the Events Library. FCP X uses the term 'Events', because in X, all imported media is organized by the date that the file was created, and these files are sorted by date in the Library. FCP legacy users can think of an Event as being a Bin or folder. Now this is very important, we can set which drive our Events will live on and while it's possible to move Events from one drive to another (more on this later), it's a good idea to set the desired drive before you do anything else. In the Event Library, select the drive that you want to use. As shown below left, I have chosen my Tera Drive as the location for my Event. With the drive selected, right click in the Event Library and choose 'New Event'.

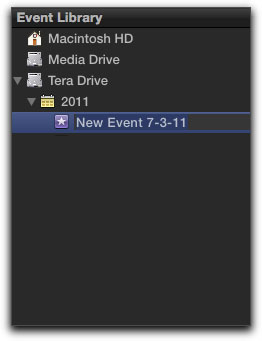
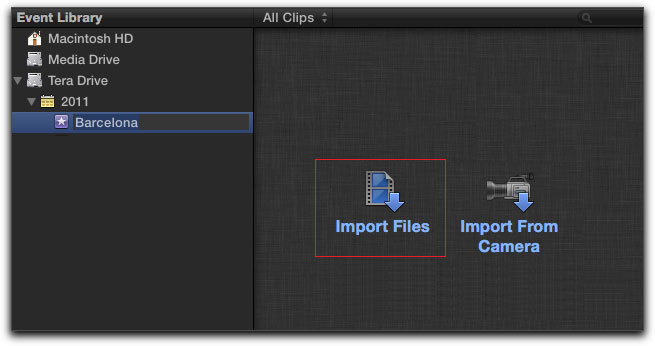
A new Event will appear in the Event Library, give it a name. In the window to the right you are given the choice of importing files or importing from a camera. In this case we'll select Import Files.
This will open up a two part 'Import Files' window. In the top section you will navigate to and select the files that you want to import. If you have attached a file based camera to your Mac or if you are using a card reader to read from a memory card, it will show up in the Devices section along with all of your mounted drives. You can select it just as you would a drive. Just remember that if you are bringing in media from an outside source, like a memory card, you will want to check the 'Copy files to Final Cut Events folder'. If you look at the bottom section of the Import Files window you'll see that it is exactly the same as the Import window found in FCP Preference. Every time you import into the Event Library by selecting 'New Event' or 'Import' from the Contextual menu, you are given a chance to customize the import settings depending on your needs at that time.
If the settings options found in the Import section in the FCP Preference window are exactly the same as the window that you get each time you import into the Event Library using 'New Event' or 'Import' from the Contextual menu, this begs the question, "Why even bother with the Import window found in FCP Import Preferences?" The answer is simple, there is another way to import into the Event Library and this second way of importing works a bit differently than the process described above. You can import into the Event Library from the Finder. Open any hard drive (or card) and simply drag the clips from the Finder right into an Event and release the mouse. When you import using the Finder, no import window opens up. As FCP needs to know how you want this new media imported, it looks to your settings in the FCP Preference window.
Hard Drive Media Storage
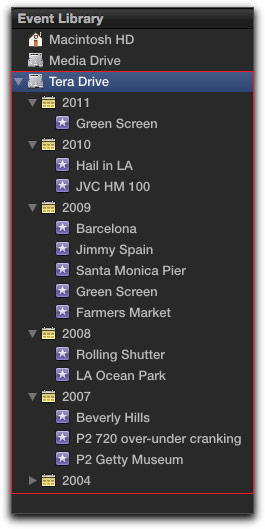
I have added a number of Events to my Event Library directing all Events to my 'Tera' drive.
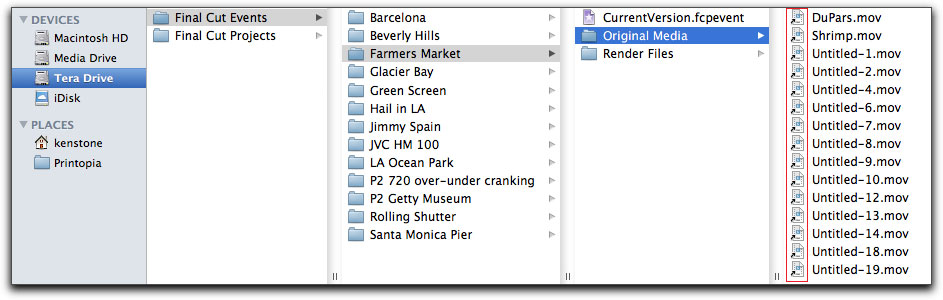
We can choose which drives are used to store our media (or change drives mid-course), and this is true for Projects as well as Events, but it needs to be pointed out that Final Cut Events and Final Cut Projects folders must exist at the root level of the drive. Looking at my Farmers Market Event, shown below, which holds HDV video, you can see that it contains a 'CurrentVersion.fcpevent', this file keeps track of all of the media inside your Event and handles all of the meta data associated with those clips. There are two additional folders; Original Media and Render files. If you look at the media inside the Original Media folder you will notice that each of the QT icons for the clips contains a small alias arrow (red box below). These arrows tell us that this is not the actual media but rather just pointers to the media that exists on a different drive. This is because I did not check 'Copy files to Final Cut Events folder'. So rather than copy the media into this folder, it simply created pointers back to the actual media.
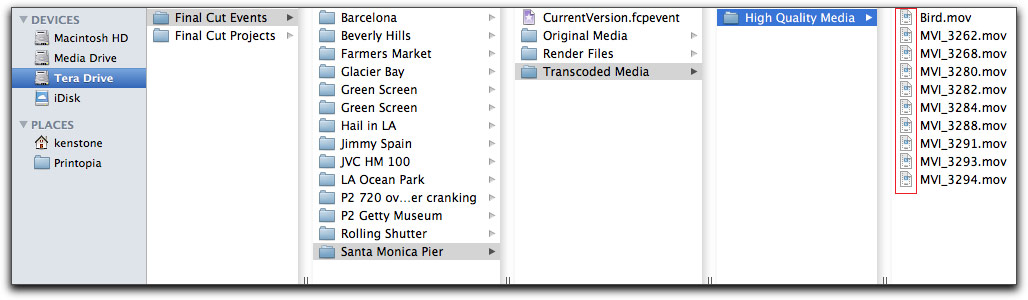
My Santa Monica Event media was shot with a 5D Canon Mark 2 using the H.264 codec. As I mention earlier on, FCP X decided that H.264 needs to be Optimized, so when we look in the Santa Monica Events folder we see that an additional folder has been added, 'Transcoded Media' (Optimized). Follow the path from this folder we see another folder 'High Quality Media' which contains the Optimized media (ProRes 422). Note that the QT icons for the different clips, do not have alias arrows. These are the actual media clips. When playing these clips back in the timeline, the 'High Quality Media' clips will be used by FCP for playback.
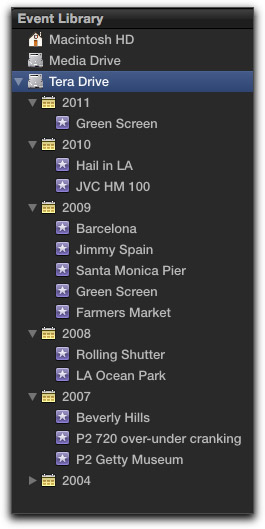
While I want to keep this article very basic, I want to point out that you can organize the Event Library in a number of different ways. At the bottom of the Event Library is a Gear icon, clicking on it reveals a number of different organizational options.
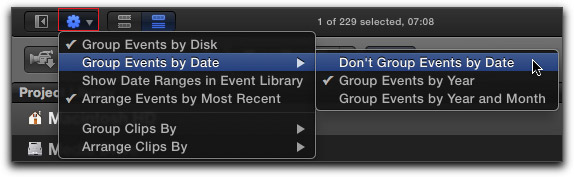
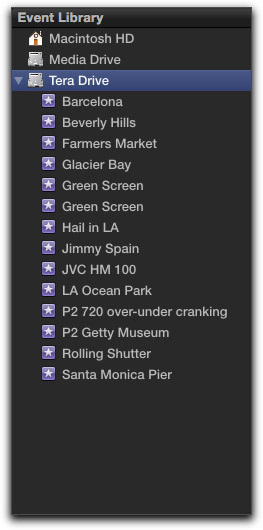
For example, on the left we have the Event Library shown at its default setting, 'Group Events by Date'. On the right, the Event Library where 'Group Events by Date' is turned off. Looks a lot like the legacy FCP 7 Browser window.
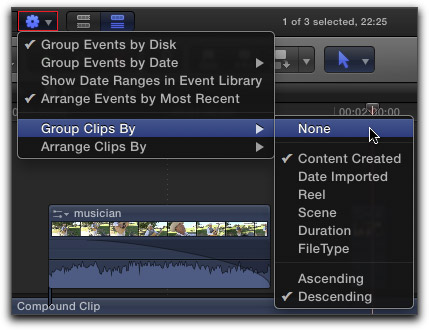
From the same Gear icon you can choose 'Group Clips By' and select 'None'. Now even the clips look like they do in legacy versions of FCP. And they say that you can't go home again.
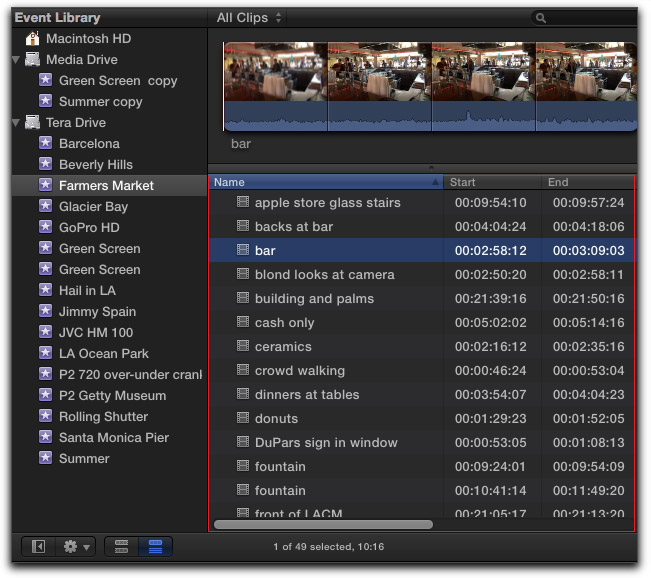
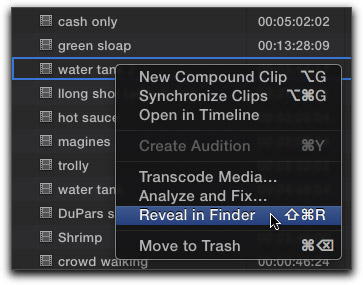
Select a clip in the Event Library and right click on it, you can select 'Reveal in Finder', to find a specific clip on your hard drive.
Managing Events
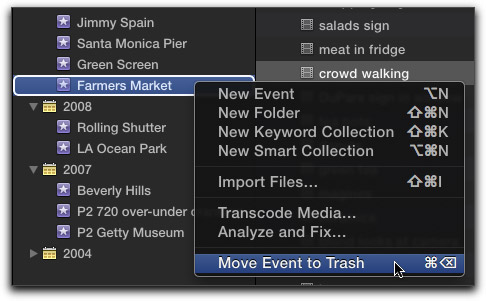
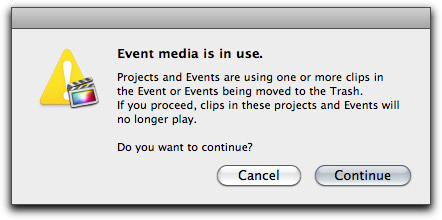
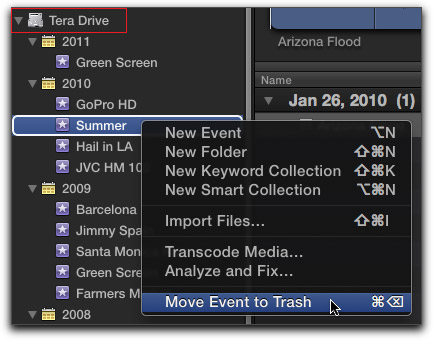
You can remove an Event from your Event Library by right clicking on the Event and choosing 'Move Event to Trash'. Should the Event that you are trying to delete be in use with a project, you will get a warning box with the chance to cancel the operation.
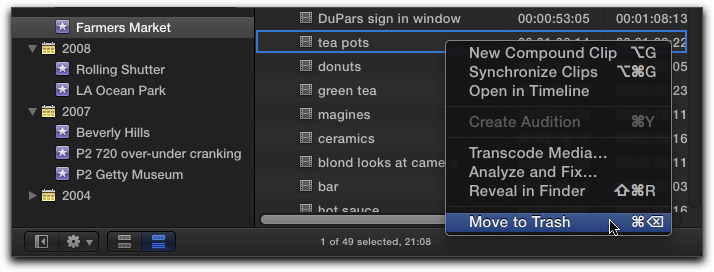
You can remove clips from inside an Event in the same manner. Right click on a clip and choose 'Move to Trash'. Just as with removing an Event, you'll get a warning before you trash the clip(s) and the chance to Cancel the operation.
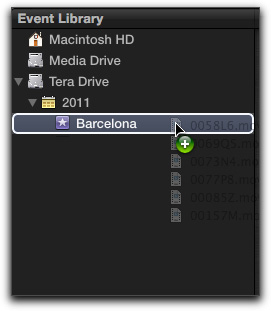
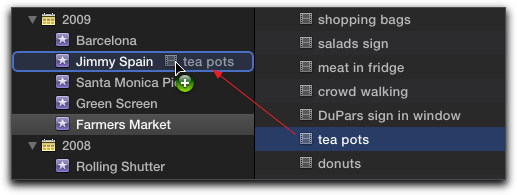
You can drag a clip(s) from one Event to another. As shown below, I am dragging the 'tea pots' clip from the Framers Market Event into the Jimmy Spain Event.
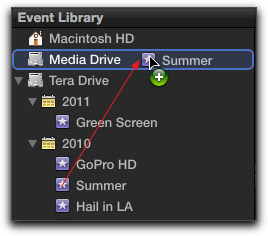
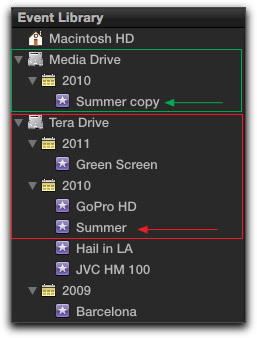
I did mention that you can move an Event and all of the media contained in that Event, from one hard drive to another. Click and drag the Event onto the hard drive that you want to move it to. As shown below, I have dragged the 'Summer' Event from my Tera drive up onto my Media drive. When you release the mouse button you will get a 'Duplicate Event' dialog box. You get the chance to rename the Event and also change the destination hard drive.
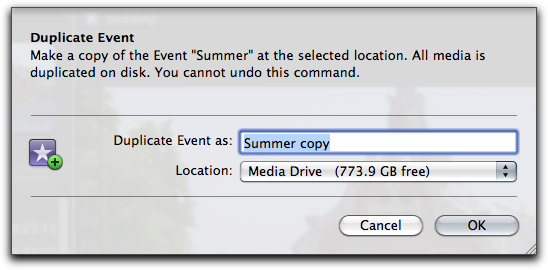
After you click OK, the Event will be duplicated to the new hard drive, below left. There is an important distinction to be made here. The Event is being duplicated to the new location (hard drive), not moved to the new location. The point is that you still have the Event residing on the original hard drive as well as the new drive that you have selected. If something goes wrong or if you change your mind, your original Event is untouched by the duplication process. When satisfied that transfer went properly, you can control click on the old Event in the Tera drive and select 'Move Event to the Trash'.
Shown below is the Media drive where the Event was duplicated to. You can see that when FCP duplicated the Event, it create the Final Cut Events folder at the root level of the Media drive and placed the Event into the folder. If you look at the path you'll see that this clip was optimized.

Creating Projects
The Event Library is a data base containing all of our media, the Project file is like a blueprint that contains all of the information about our project's timeline. While all of the clips in the timeline are pointers back to the media in the Event Library, all of the specific information about the timeline is contained in the Project file. The range of the clips, filters and transitions settings, generators, color correcting, audio filters, text and titles, time remapping, keys, compound clips, transforms, etc., well, you get the idea.
At the bottom of the FCP interface is a long horizontal window, this window presents two different views, the Project Library and a Projects' timeline. Bottom left in the window is a 'film reel' icon. If you are in timeline mode, this icon will be gray in color, click on it and the Project Library will open up and the icon will turn blue. If the 'film icon' is already blue, then you are in the Project Library mode as noted at the top of this window. The very first thing that we need to do before we create a new project is to select which hard drive we want the project file to reside on (just like Events). Shown below left, I have selected my 'Tera' drive to house my project.

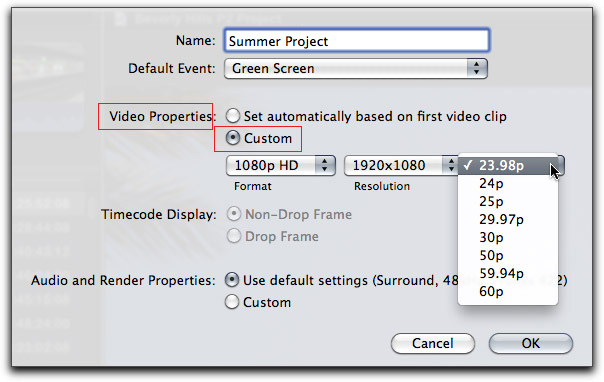
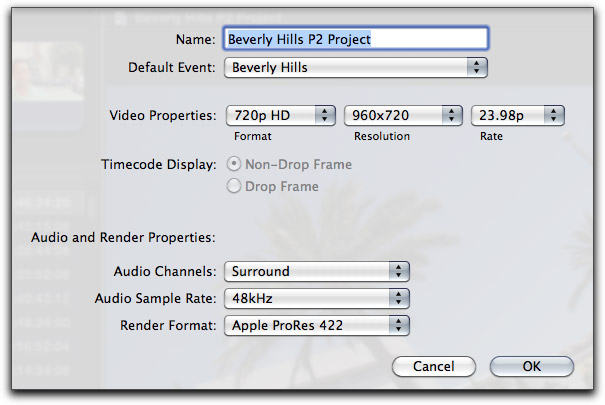
With a drive selected, look to the bottom left of the window where you'll see a '+' icon (create a new project), click on it. This will open up a new project settings window, where you can name your project. We'll give it the name 'Summer Project'. There are two main setting sections; Video Properties and Audio and Render Properties. The Video Properties default setting, 'Set automatically based on first video clip', should be familiar to anyone coming from legacy versions of FCP where when working with a new sequence or project, after dragging the first clip into the timeline we got the message 'Do you want the sequence settings to match the clip settings, yes-no'? This is the same thing only handled a little differently.

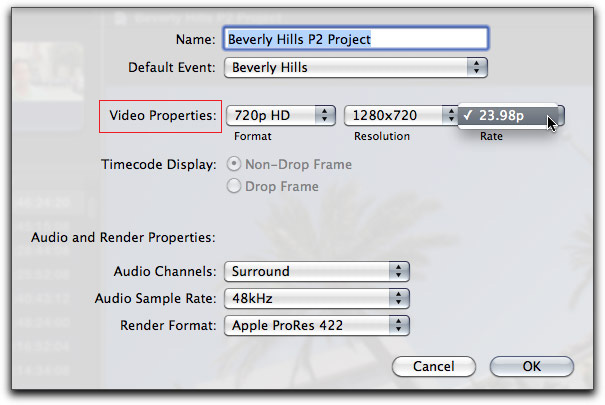
We also have the option of setting Custom settings for 'Video Properties' for our new project. This gives us the chance to set the Format, Resolution and Frame rate.
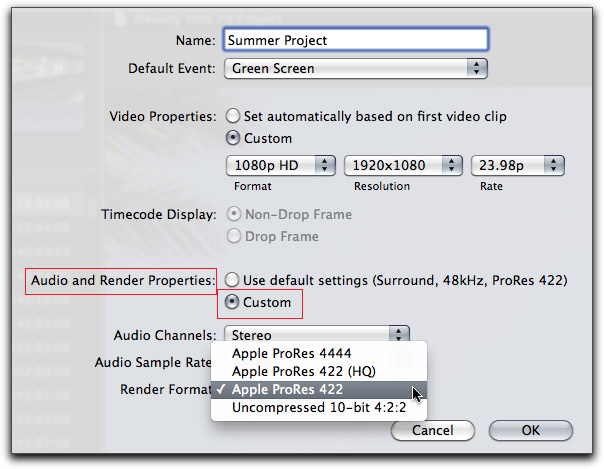
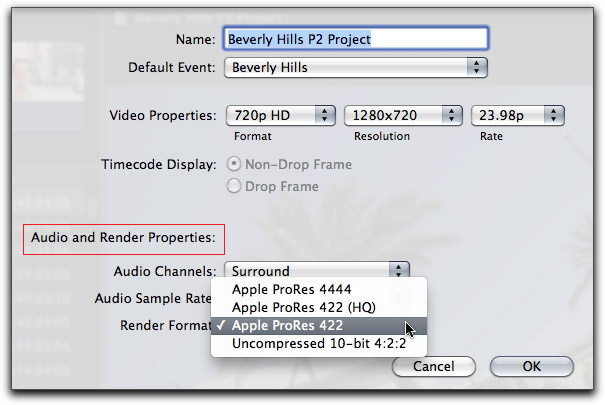
We also have the option of setting the 'Audio and Render Properties' for our project.
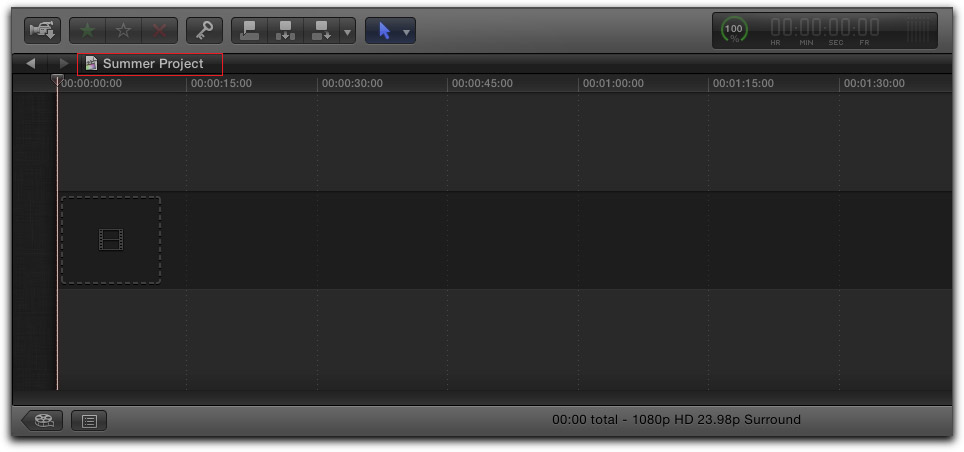
When you have finished with your settings and click 'OK', the Project Library will change to the Timeline View with your new Project open, ready for you to start assembling your movie.
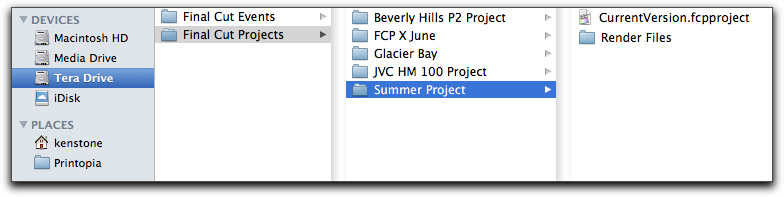
After you have created your new Project, you can open the hard drive that you saved the Project to and find the Project at the root level of the drive. Just like Events.
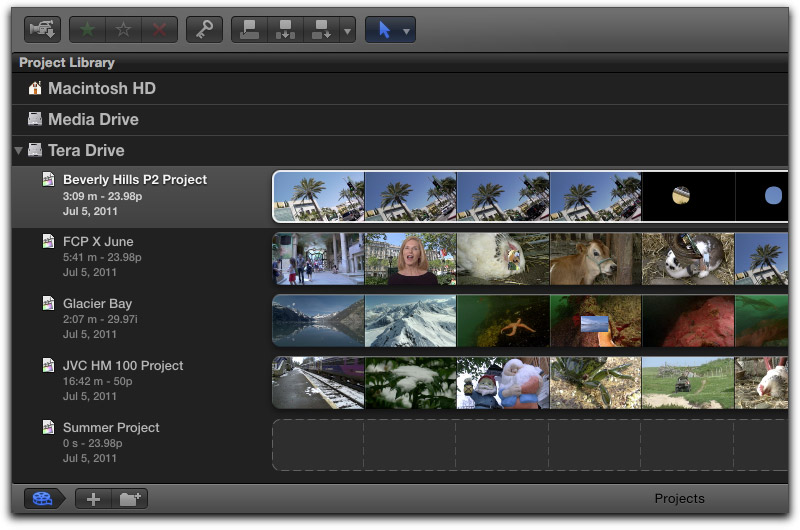
My Project Library with several projects, is shown below.
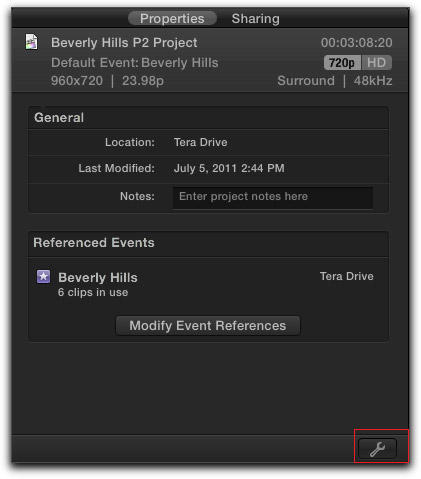
Select a project in the Project Library, in this case 'Beverly Hills P2', and the Inspector window will display the properties for that project. Aside from showing us information about that project, we also have the chance, at any time, to change the Project Properties. In the lower right hand corner of the Inspector window is a wrench icon.
Clicking on the wrench icon opens a Project Properties window. In this window you can change the name of the project, Video Properties and Audio and Render Properties.
While you can change the Format and Resolution of the Video Properties, the one thing that you can not change is the 'Editing Time Base' (Frame Rate). A project will always maintain the frame rate that you gave the project when you first created it.
You do have the ability to change the Audio and Render Properties.
With a project open in the timeline, we can access a searchable list view of all the clips in the timeline. Click on the 'List' icon, bottom left of the timeline. Click on it again to close the 'List' view.
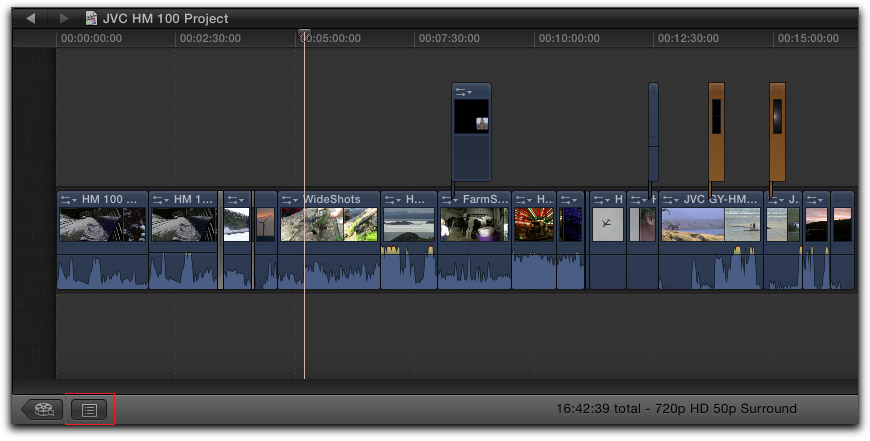
The clips in the List view are in sequencial order. Click on a clip in the List view and the Playhead will jump to the clip and it will be selected in the timeline. Click on a clip in the timeline and it will become selected in the List View. There is a Search box at the top of the List window to search by Name or by Tags. At the bottom of the window are options to sort the clips by; All, Video, Audio and Titles.
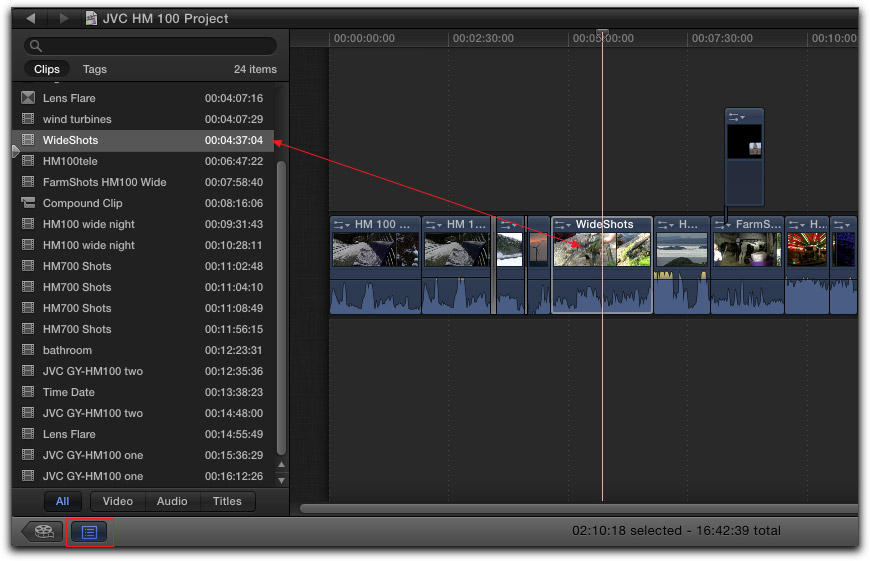
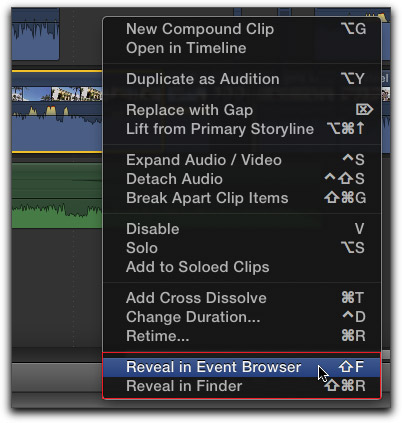
In the timeline, right clicking on a clip offers the options, 'Reveal in Event Browser' or 'Reveal in Finder'.
Managing Projects
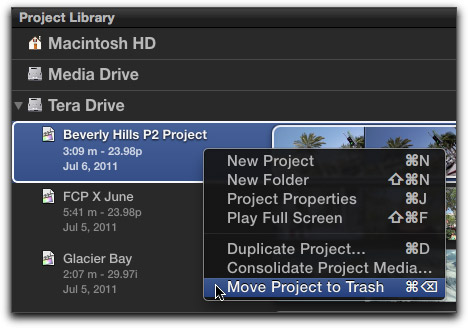
If you want to delete a project, open the Project Library and select the project that you want to remove, then right click on the project. From the contextual menu choose, 'Move Project to Trash'.
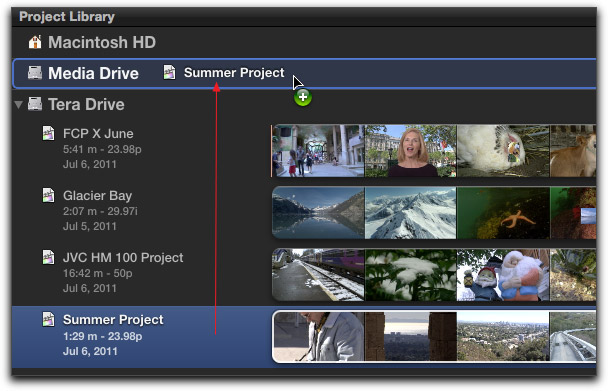
Moving a project from one hard drive to another is as easy as drag and drop. Open the Project Library, click on the project and drag it onto the drive you want to move it to. It's important to note that while FCP uses the word 'Move', you are actually duplicating the project to another drive. The original project remains in place until you decide to delete it. You may want to move the project to an external hard drive so that the work can be moved to another Mac, clear space off the original hard drive, or create an archive or different version of your project.
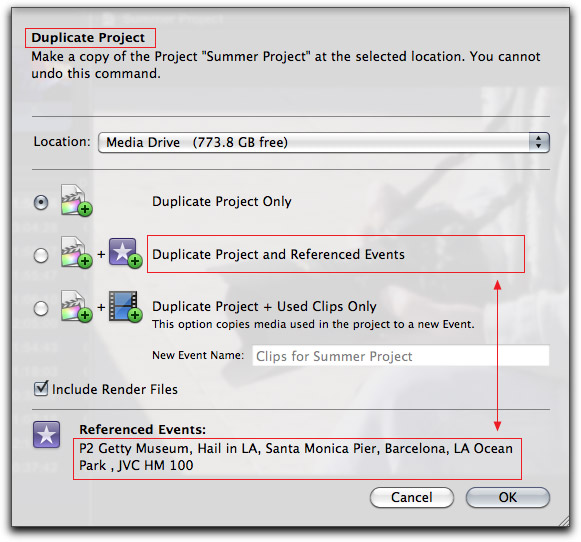
When you drop the project onto the new drive a 'Duplicate Project' dialog box opens up asking how you want the project handled. Even though we dropped the project onto a different hard drive in the Project Library, you still have the chance to change the hard drive you want the project copied to. We are given three different options for moving the project. These options are very straight forward and self-explanatory. The first option, 'Duplicate Project Only' does just that, no Events or media are moved. The second option, ' Duplicate Project and Referenced Events' moves all of the Events that are referenced in your Project. That is to say that if you have clips in a project from a number of different Events, all of those Events will be moved along with the Project. In the 'Duplicate Project' window it is easy to see which Events FCP is referring to as the Events are listed at the bottom of the window (red boxes below).
Either of these first two options are useful if you want to create different versions of your project (with or without duplicating your media). The last option 'Duplicate Project + Used Clips Only' is a way to trim the size and number of Events used in your project. Rather than duplicate all of the Events associated with your project, which may contain much unused media, just the used media is transfered and placed into a new Event, which you can name. Unfortunately there is no way to added handles (extra media) to the clips that are being moved.
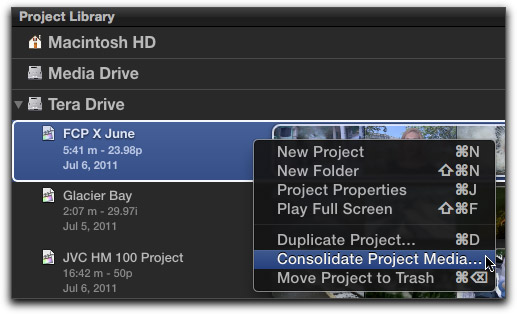
There may come a time when after working on your project for awhile that you find that you have media all over the place, on different hard drives, even on external hard drives. It is possible to gather up and consolidate all of the clips (media) used in your project to a new location. Open the Project Library, select the project that you want to Consolidate and right click to get the contextual menu.
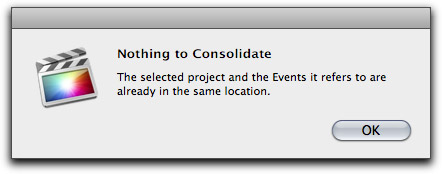
If all of your media is on one drive, then you will get the following message.
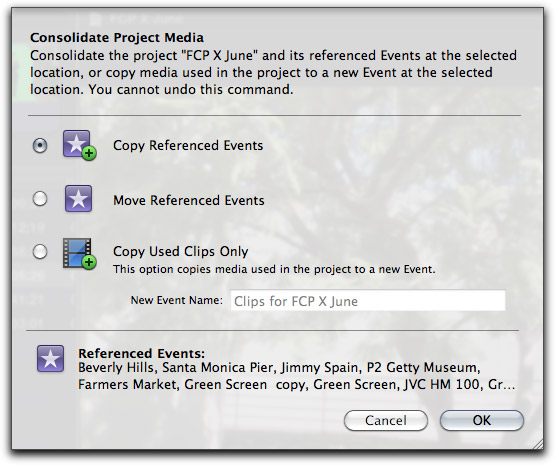
If you do have media spread across different drives then you will get the following 'Consolidate Project Media' dialog box. There are three options but the most important thing to understand is that all three options will consolidate to the drive that the project lives on. There is no process to consolidate to a drive other than the one that holds your project. The first option 'Copy Referenced Events' will copy the Event and its content (media) to the project drive. The Event will be left on the original drive which is important if you have other projects that reference media in that same Event. The second option is 'Move Referenced Events', you might use this option if your media is referenced by just the one project (the source Event will be deleted during the Move process). If you have other projects referencing this Event and it gets moved, then those other projects will lose access to the media. The third option, 'Copy Used Clips Only', only moves those clips that are used by the project. Clips in the Event that are not used in the project will be left behind. This would be an option to save on disk space.
The Timeline
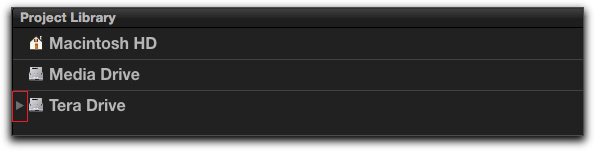
After you work in FCP for awhile you may discover that your Project Library is filling up with projects. There are several things that you can do to help manage the Project Library. If you have projects on multiple drives you can 'twirl' the 'Disclosure' triangle (red box below) to collapse the drive project view. My Project Library, shown below, has four projects on my 'Tera' drive.

Twirling the Disclosure triangle closes the drive project view, shown below.
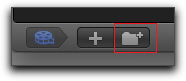
Another way to organize your Projects is to create a new folder in the Project Library and then drag projects into the folder. This not only reduces the number of items in the Project Library but hides projects away, 'out of sight'. Bottom left of the timeline window is a 'New Folder' icon. Select the drive that you want the folder to reside on and then click the New Folder button. A folder will be created on the drive.
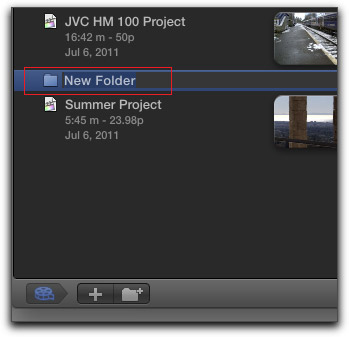
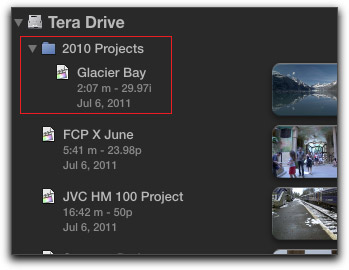
Name the folder i.e. '2010 Projects' and then drag a project(s) into the folder.

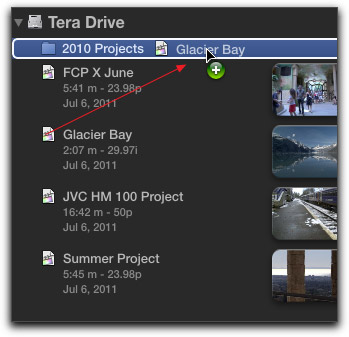
Shown below, the Glacier Bay project is now inside the folder, below left. Below right the folder has been closed. Should you want to remove a project from the folder, click on the project inside the folder and drag it out and drop it onto the hard drive icon.

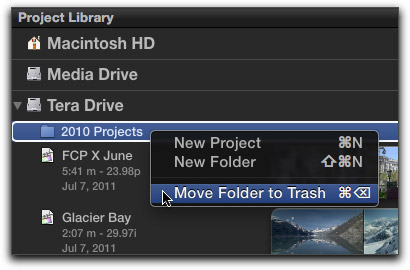
Should you want to delete a folder, control click on it and 'Move Folder to Trash'.
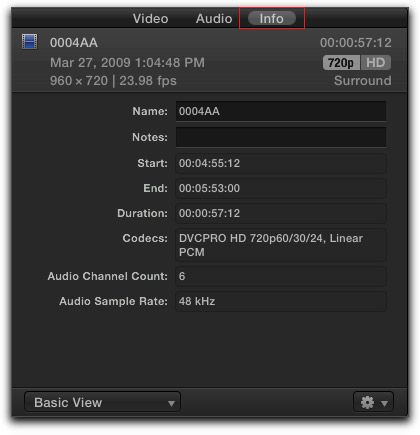
While working in the timeline, should you need to 'get info' on a clip, select it and then in the Inspector, Info tab you will be provided with the clip information. Bottom left in the Inspector window is a drop down menu, that defaults to 'Basic View'. Click on this menu and you are offered a number of different way to view your meta data.

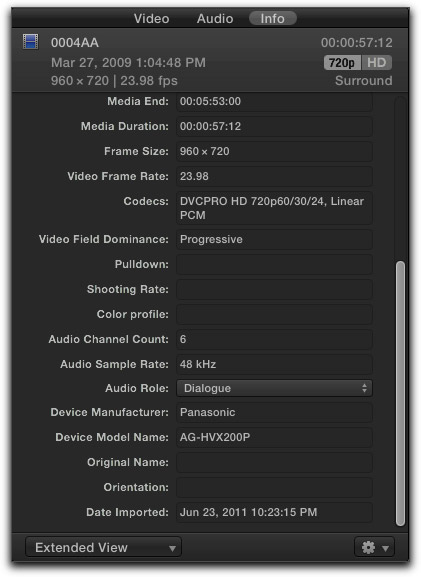
'Extended View' is shown below.
Thoughts
The way that we manage our media & projects in FCP X is very different than in legacy versions of FCP. Gone is the 'Media Manager', 'Render Manager', 'Reconnect Media', Scratch Disk settings, etc. In legacy FCP if we wanted to move, trim or transcode media or projects we used the 'Media Manager', a tool that was sometimes called the 'Media Mangler'. For many, this tool was problematic, so FCP X's very new methods of managing media is a welcome. I like the idea that we can set our destination drive while creating a new Event or Project, I also like that you can change the destination drive for Events and Projects at any time. These features will help keep us organized. The fact that when we change the location of our Events and Projects, we 'Copy' or 'Duplicate', is an important safety feature as you still have the original in place if needed (you can always delete the original after the move). There is also the 'Consolidate Project Media' feature which gives us options to consolidate media, which media to include and which to exclude.
What I wanted to do with this article is present some of the basics of managing Events and Projects. I hope that it's been of help.
Enjoy,
--ken
copyright © www.kenstone.net 2011
are either registered trademarks or trademarks of Apple. Other company and product names may be trademarks of their respective owners.
All screen captures, images, and textual references are the property and trademark of their creators/owners/publishers.