
May 16, 2011
Final Cut Pro X Rundown
Deconstructing the Las Vegas Supermeet Sneak Peek video
By Richard Taylor
First off Final Cut Pro X is a new application. It is not an update to FCP 7.
I think that many, including me, will continue to use FCP 7 along with FCP X after
FCP X arrives. I hope that there is a workflow between FCP 7 and FCP X.
The Sneak Peek that Apple gave at the Las Vegas Supermeet, I believe, was just
the tip of the FCP X iceberg. I think that the FCP X team has much more to show. I
specifically want to thank Michael Horton and Dan Berube for
all of their work involved in hosting Apple's Sneak Peek preview of FCP X.
In this article I've assembled the key points gathered from the various Apple
FCP X demo videos available on the web. Where appropriate, I've compared the
new features of FCP X to former Final Cut Pro features.
Any text in this article in quotation marks are direct quotes from the FCP X Sneak
Peek videos. All images are screen grabs from these videos or from the high
quality FCP X images that Apple released.
Let's jump right in to see what we know about FCP X from the Sneak Peak.

FCP X is a brand new 64 bit application built from the ground up with modern
technologies and a modern foundation. This means that FCP X can take full
advantage of as much memory as you can throw at it. And it will scale from
MacBook Pros to high end MacPros.
"What this means in practical terms is larger more complex projects, larger
formats, more frames in memory, deeper and richer effects stacks". Final Cut Pro Architect Peter Steinauer
FCP X is focusing on the three primary tasks that everybody needs to do:
Image Quality - Organization - Editing
Image Quality
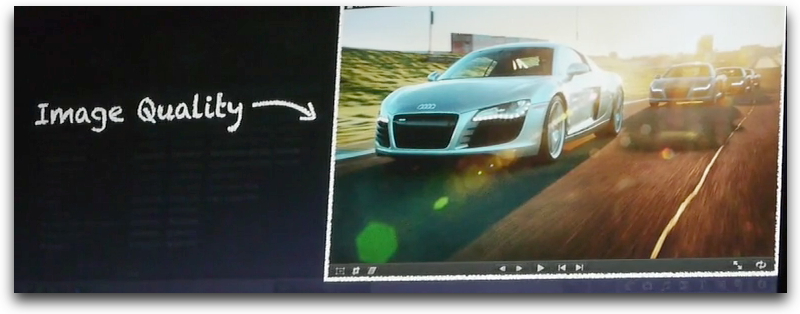
The Key points of Image Quality are color management based on Color Sync
and a "fully floating point, linear light based rendering system". FCP X has a
resolution independent playback system that goes from traditional SD formats up
to 4K HD.
This will be accomplished by leveraging Grand Central Dispatch to
take advantage of all of the processor cores on your machine and use every
spare CPU cycle to render very quickly.
"So you can create content from a variety of different sources, lay it back to a
variety of different sources without having to worry about the origin of media
you're working with." Final Cut Pro Architect Peter Steinauer
Organization
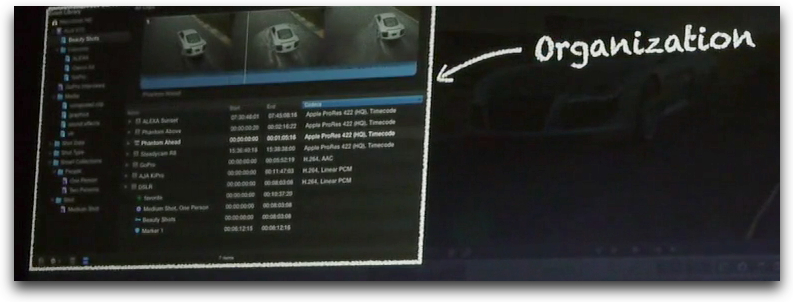
"Dynamically handle massive volumes of media" in the new Event Library.
"During the organization process you spend a whole bunch of time doing things
to figure out what kinds of media you want to use in the process. Some of those
things you're uniquely qualified to do and some of those things the machine can
help you out with." Final Cut Pro Architect Peter Steinauer
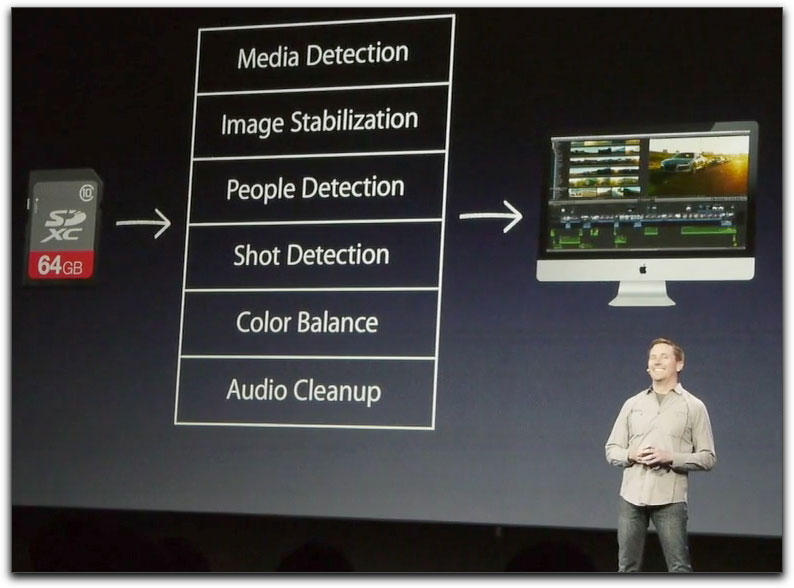
Peter Steinauer showing Content Auto-Analysis on ingest.
When ingesting your media you can start editing before ingest is complete. FCP X
copies the media off of the camera in the background, prepares it for
the editorial process and then "when done, we silently sub it out for
you in the background". With Content Auto-Analysis during ingest, other
background processes can be applied:
Media Detection
Image Stabilization (optional, shaky cam, rolling shutter analyzation)
People Detection (automatic, one person, two persons)
Shot Detection (automatic, medium shots, close up shots, wide shots)
Color Balance (automatic, non-destructive)
Audio Cleanup (stereo mono, silent channels, hum, excessive noise) to find problems and optionally fix them "should you choose to".

Range-Based Keywording is the new FCP X combo method to add keywords
and make subclips.
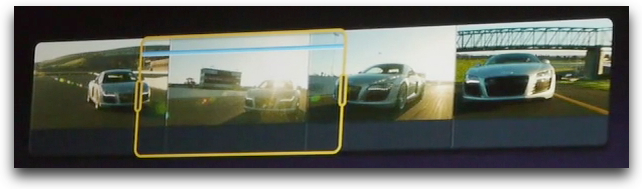
Range selection in an Event Library Filmstrip
You click-hold and drag across a filmstrip to select a range in a clip to apply a keyword and make a
subclip. The new Viewer updates live as you drag so you can see your selection.
Once your selection has a keyword applied, you can search and find that clip
based on the keywords. Keyword ranges can overlap.
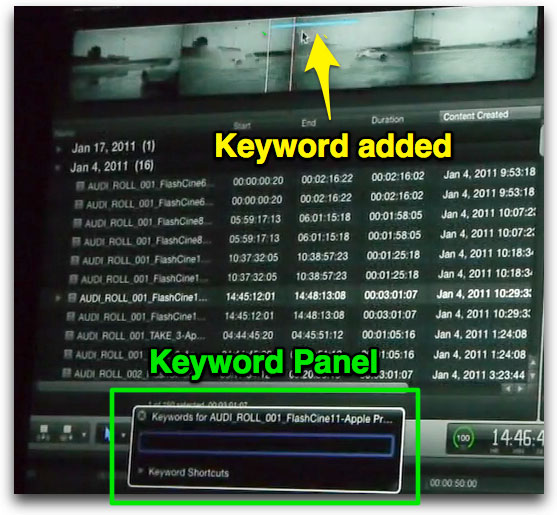
In the Event Library, notice the Keyword Panel (opened by a button or keyboard
shortcut) to add a Keyword and a blue bar above the portion of the filmstrip that
designates a Keyword has been added. You can also make a selection a
Favorite.
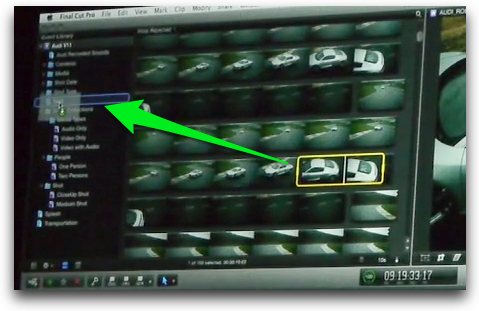
You can also drag a selection to a Keyword collection to add the Keyword to the
selection.

FCP X auto-sorts the media/subclips into Smart Collections (think smart
Browser Bins). Smart Collections are a dynamic way of organizing your media
based on multiple different criteria. Smart Collections can include multiple
references to the same clip but do not include multiple copies of the clip. You can
also make your own organizational folders in the Event Library.
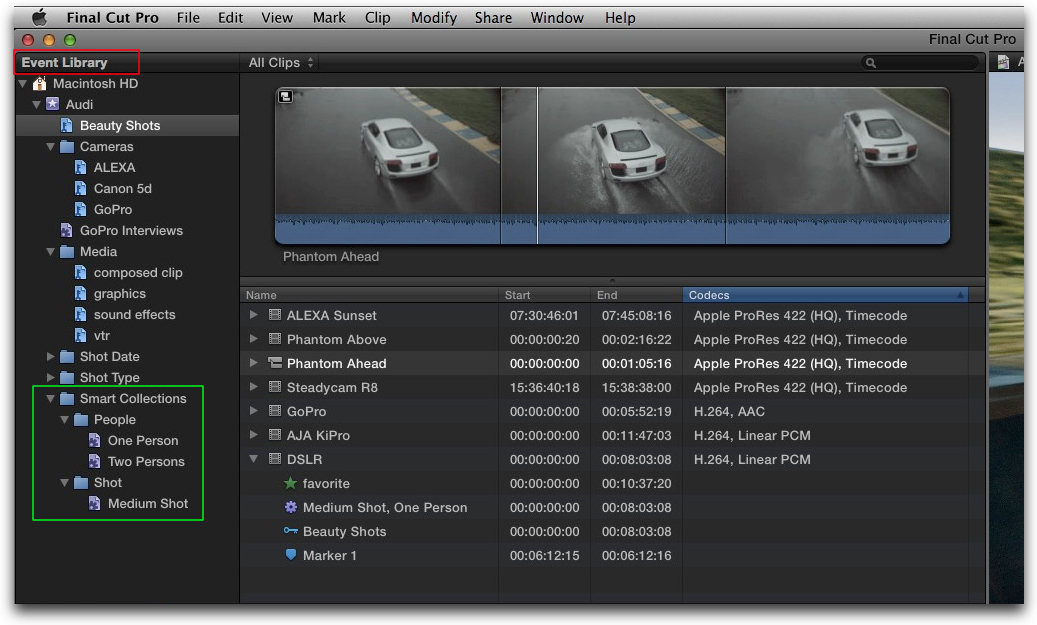
The new Event Library replaces the FCP Browser. It includes scrubbable clips in
a large filmstrip in List View and Smart Collections. When you select a clip in the
list, it immediately appears at the top in a filmstrip. With Skimming you wave the
cursor across the filmstrip and the video plays in the Viewer.
Filmstrip View in the Event Library has a filmstrip view of all of your content with
live Skimming. You don't select a clip to see it in the Viewer, the Viewer shows
what ever is under your cursor.
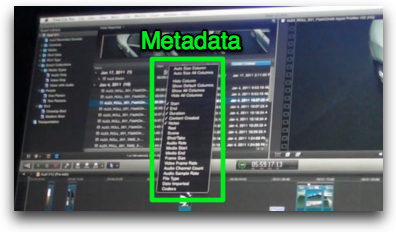
Metadata drop down menu for a clip in the Event Library
Editing (Timeline)
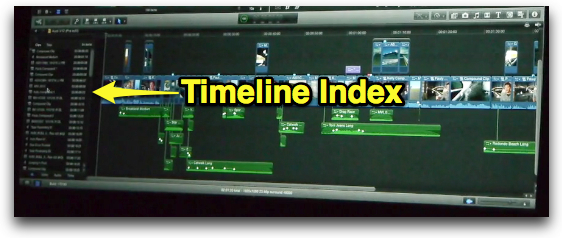
The multi-level Timeline now has it's own index that chronologically lists
everything in your Timeline. The index also has a Tags section with Markers and
"To Do" Markers that can be checked off when finished. You can select a Marker
and jump to that Marker in your Timeline.
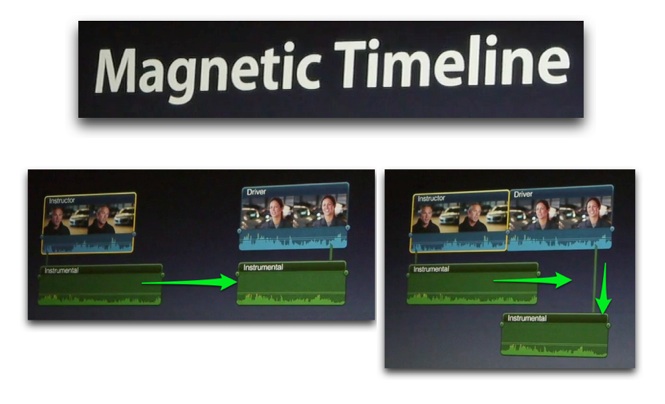
Magnetic Timeline in action. No more clip collisions in the Timeline as clips
move out of the way to avoid each other. There are no hard Tracks. Tracks come
and go as needed. Hopefully the Magnetic feature of the new Timeline can be
turned on and off.
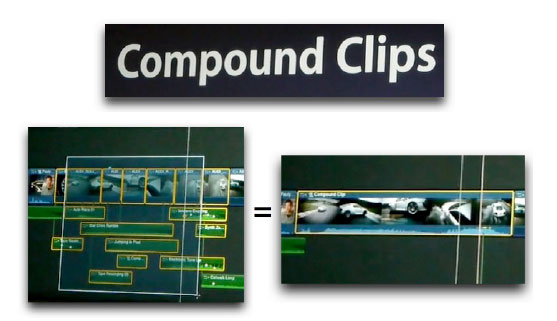
Compound Clips, formerly known as Nesting, changes a group of clips into a
single clip in place in the Timeline via a single keystroke.
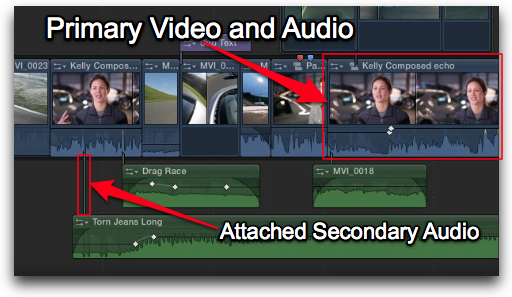
Primary Video and Audio are now in a single block, not in separate tracks as
before. You can modify their sync relationship by double clicking the video and
adjusting but they are lock-synced on ingest and cannot go out of sync during
normal editing.
Secondary Audio can now be synced to Primary Audio via timecode or via
waveforms with Clip Connections. Audio can now be adjusted to "sample accurate resolution" according to Randy Ubillos. Since the sample rate of DV
audio is typically at least 48K, that would mean audio adjustments were possible
as small as 1/48,000 of a second if that statement were accurate.
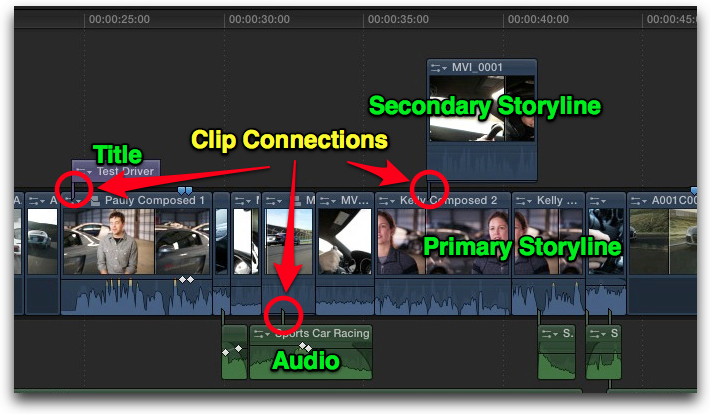
You can also attach Titles and Secondary Storyline clips to clips in the Primary
Storyline with Clip Connections. Once two items are attached they will move
together when dragged in the Timeline. The new Magnetic Timeline rearranges
itself automatically like a Swap edit did in earlier versions of the FCP Timeline
when you drag a clip to a new location.
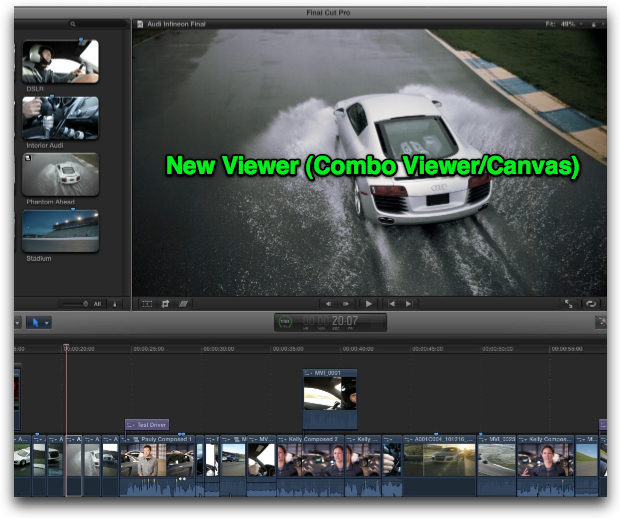
FCP X has a single viewing window called the Viewer instead of the two window
layout of former FCP versions. It's like a combo Viewer/Canvas window that
displays whatever is under your mouse pointer in any window.
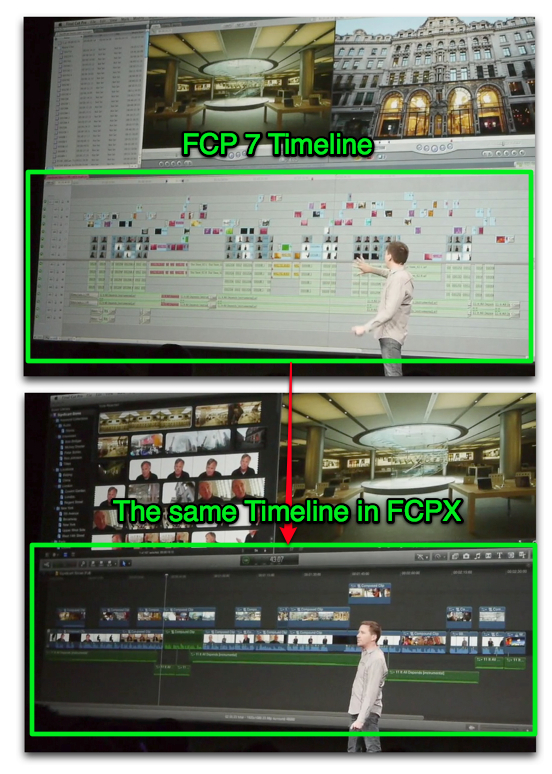
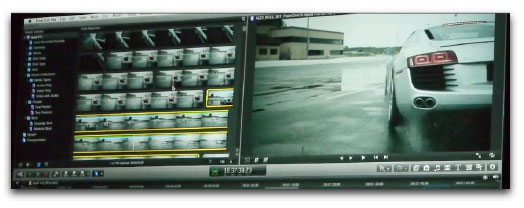
A Timeline in FCP 7 converted to a FCP X Timeline.
There was no mention of how getting an FCP 7 project into FCP X was accomplished.
"We wanted to test the Magnetic Timeline, Clip Connections and
Compound Clips and see how it played out in the real world"
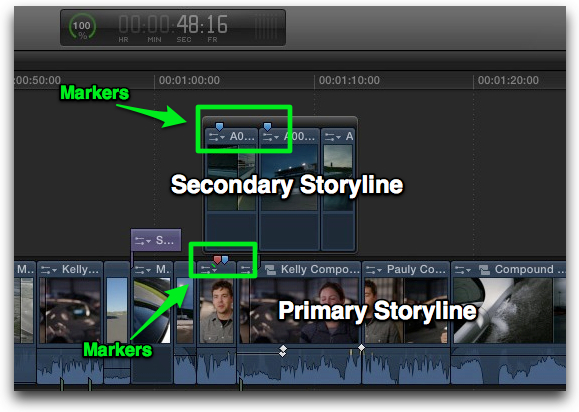
Secondary Storyline/Timeline. Notice each Storyline/Timeline has their own
markers. A Secondary Storyline can be moved as a group but it is edited just like
the Primary Storyline.
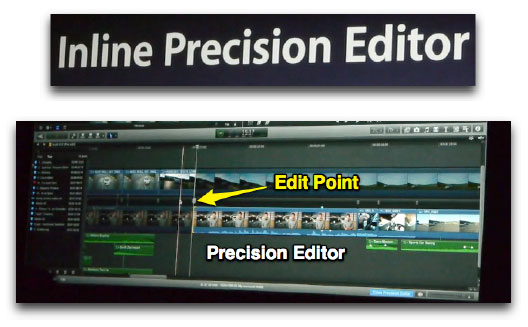
Double click an edit point to open the Inline Precision Editor. It's like an updated Trim
Edit window right in the Timeline. You can view content after the top clip edit point
and before the bottom clip edit point. All editing in the Inline Precision Editor can be
driven from the keyboard as well as the mouse.
You Ripple by dragging either the top edit or bottom edit earlier or later in the
Timeline and you Roll by dragging the edit point between the top and bottom
earlier or later. Pitch Corrected Audio skimming, which is available, can be turned
on or off.
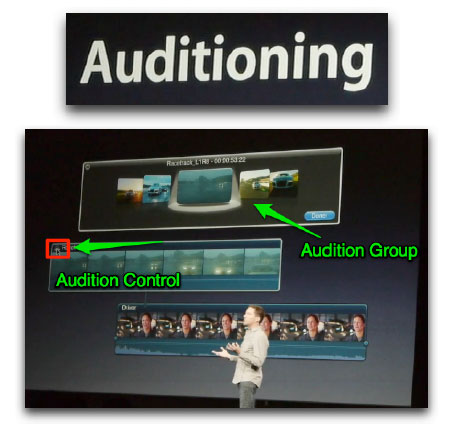
An Audition Group lets you select from multiple clips, Cover Flow style, to
preview in place in the Timeline. The Timeline length adjusts to your Audition
Group length and everything stays in sync. To preview, select a clip to Audition
and press the spacebar to begin playback.
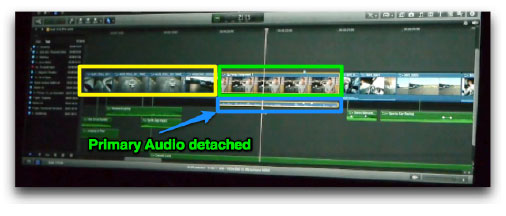
Double click on the Primary Audio to detach the Audio and bring it down to a separate element.
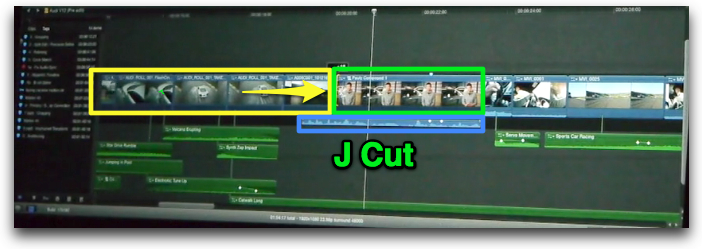
You can then adjust the ends of Audio and Video tracks independently to perform
J-cuts and L-cuts. The Magnetic Timeline adjusts accordingly.
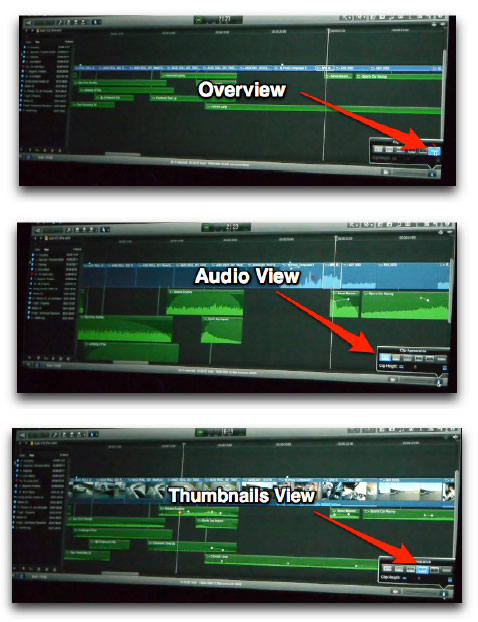
Different Timeline Views available from the
Clip Appearance button in the Timeline.
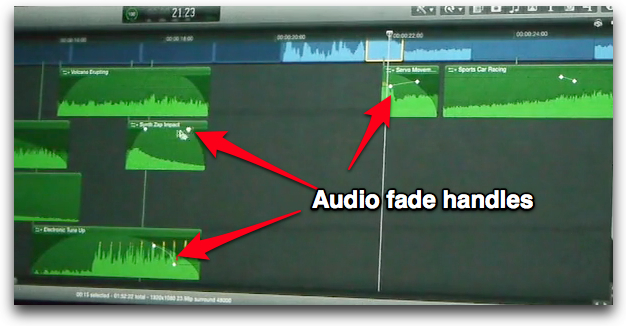
Audio fade handles in the Timeline.
This replaces setting Audio fade Keyframes manually....

...and you can right click to show selectable fade curves like SoundTrack Pro.
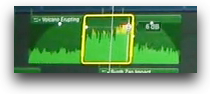
Use the Range Select tool to adjust a section of Audio with
realtime peak waveform visual feedback.
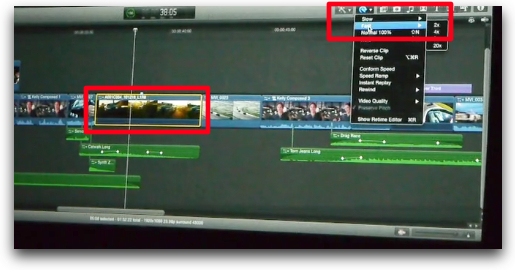
Changing the speed of a clip directly in the Timeline via the Retime menu.
Once selected, you can also change its speed by dragging its edges.

The Speed change orange bar means slower than 100%...
....the green bar means 100% (no speed change) and...

....the blue bar means faster than 100%.
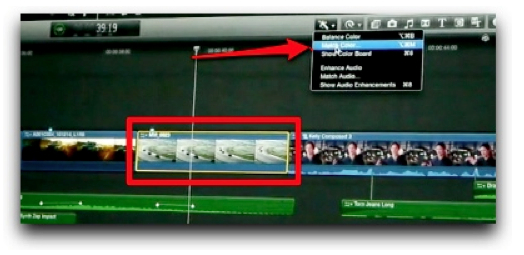
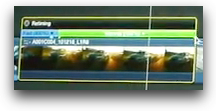
To use Match Color, select a clip in the Timeline and choose Match Color from
the Timeline Color menu.
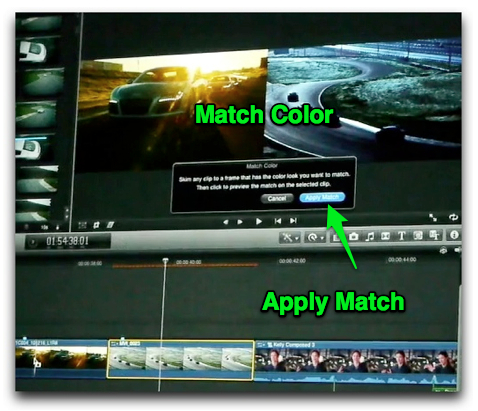
With the clip selected, skim any other Timeline clip with a frame that has a color
that you want to match. Then click Apply Match button to preview the match on
the selected clip.
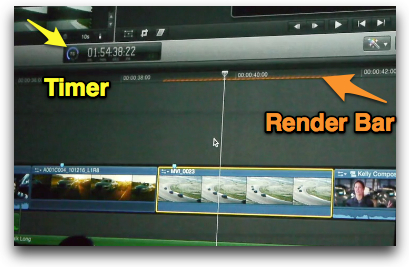
Background Rendering automatically uses every spare core available on your
machine. Also notice the new Timer that counts down the render time.
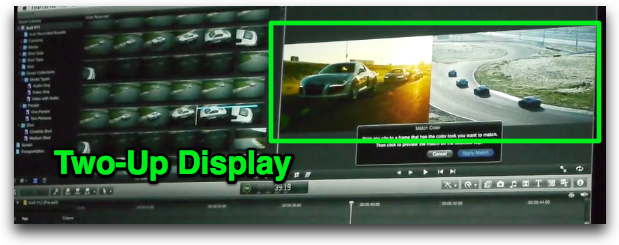
Notice the Two-Up Display when working in Match Color
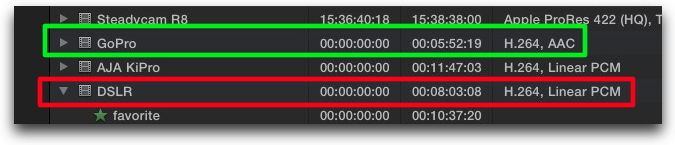
FCP X works with AVCHD, GoPro and DSLR footage natively. No
transcoding required. Mix and match frame sizes as well.
"Final Cut Pro X allows you to mix and match content without having to do any
sort of transcoding. You can take in the footage from your DSLRs, you can take
in AVCHD, you can take in stuff from the GoPro and you can just edit it natively"
Randy Ubillos - Chief Architect Video Applications
One oddity here. The AJA KiPro's video format is listed as H.264 but presently
the KiPro only records to Apple ProRes.
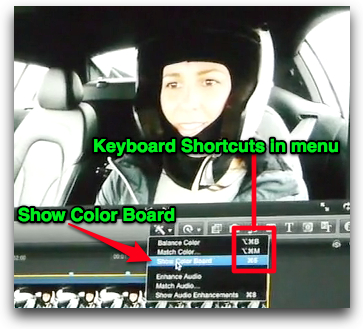
Show Color Board menu with Keyboard Shortcuts
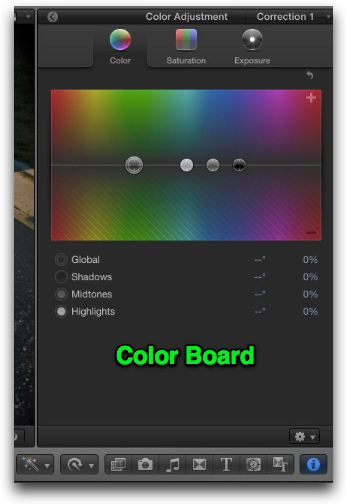
Color, Saturation and Exposure adjustments are done in the Color Board.
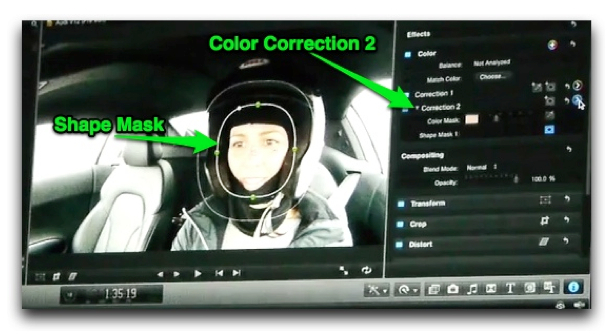
Secondary Color Correction based on a color range can be limited to a Shape
Mask with falloff. The Shape Mask can be animated over time to follow things
around.
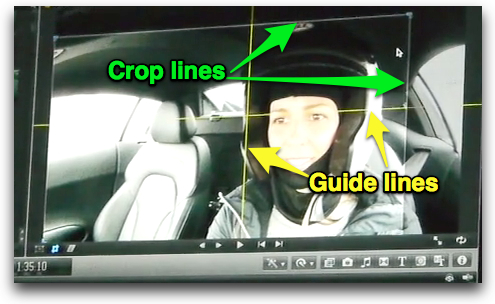
Cropping in the new Viewer with new center Guide lines.
This is where you can do the Ken Burns effect.
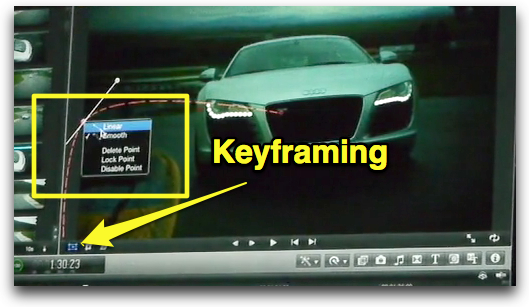
Keyframing in the new Viewer

Adjustable Keyframe Animation graph in Timeline
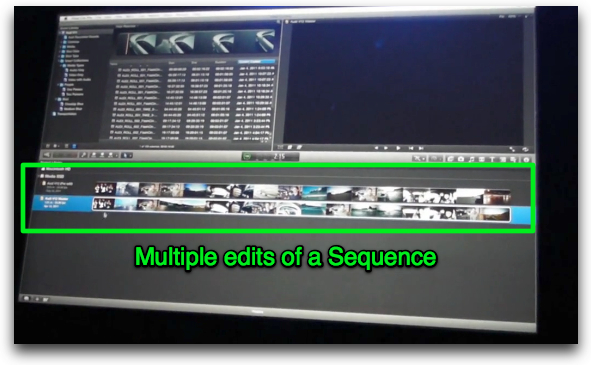
Multiple edits of your Sequences available in a Timeline History.
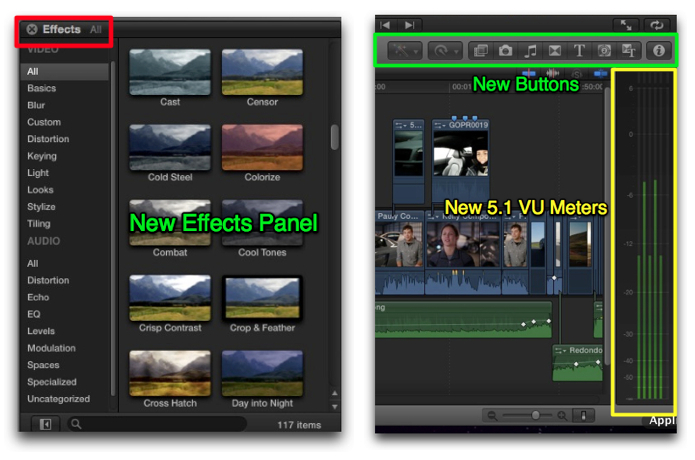
A few more of the sights in FCP X.
"In the past we've had a number of different flavors, we've had upgrade pricing,
we've had Final Cut Express, we've had Final Cut Studio. So we decided that we
are going to really do away with all of that". Randy Ubillos - Chief Architect
Video Applications
Ships in June, available in the App Store for $299.
Richard Taylor is a Level 2 Apple Certified Trainer for
Final Cut Pro 5, 6 & 7.
He is the Video Post
Production Supervisor and Editor/Producer for the
National Archives in Washington, DC.
He also does
FCP training and consulting in the DC/Baltimore area.
He can be reached via email at Richard@FCPro.TV or on Twitter @RichardTaylorTV
[Top]
copyright © Richard Taylor 2011
© 2000 -2011 Ken Stone. All rights reserved. Apple, the Apple logo, Final
Cut Pro, Macintosh and Power Mac
are either registered trademarks or trademarks of Apple. Other
company and product names may be trademarks of their respective
owners.
All screen captures, images, and textual references are the property and trademark of their creators/owners/publishers.


