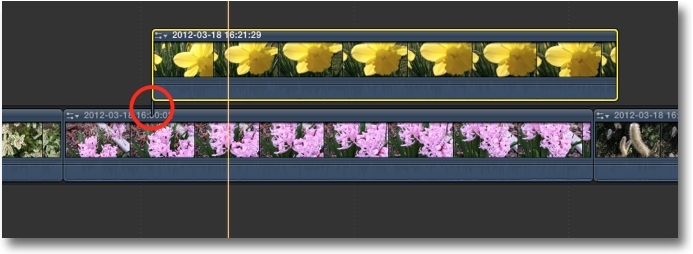
5-1) Through Edit
Until the Final Cut Pro X team gives us a Through Edit command for regular edits (like they have in the Multiclip Editor) here is a way to do a pseudo Through Edit.
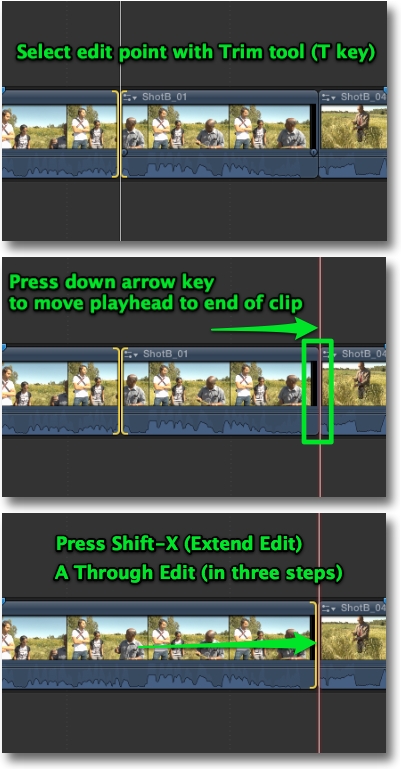
Extend Edit rolls the selected edit to the playhead location.
5-2) Change the in or out point of a clip under a transition.
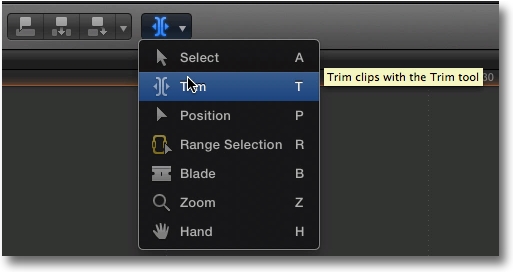
Select the Trim tool (T key).
Then click and hold your mouse on the clip and slide left or right to choose a new in point (if to the right of the transition) or out point (if to the left of the transition) under a transition.
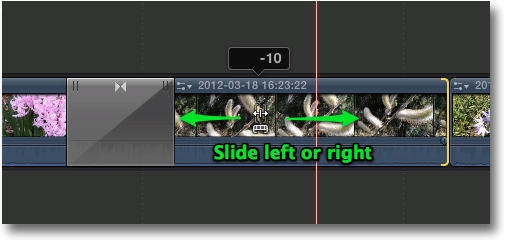
This is actually slipping the clip under the transition
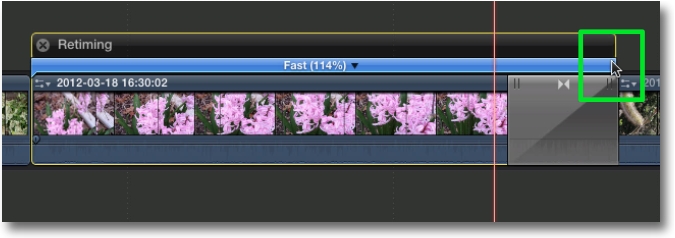
5-3) Retime a clip in the Timeline under a transition.
Select the Timeline clip that you'd like to retime.
Then choose Show Retime Editor from the Retime menu (CMD - R).

The Retiming bar will pop above the transition. Click and hold the right hand side of the Retiming bar and drag right to make it slower or left to make it faster. Choose CMD - R to close the Retime Editor when you are finished.
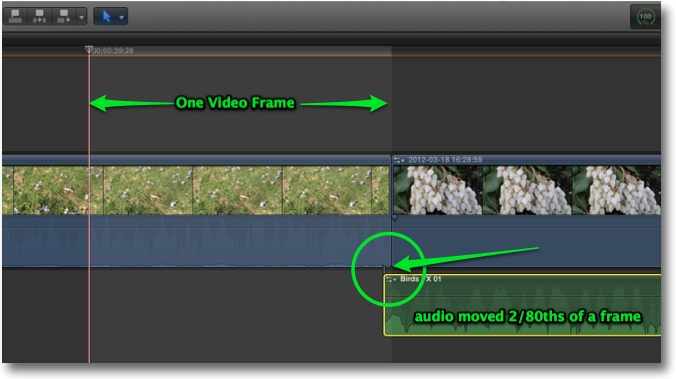
5-4) Move a connected audio clip in the Timeline 1/80 of a frame (subframe) at a time.
First from the View menu choose "View To Samples". Then select the clip in the Timeline and press the Option and Period (>) key to move right and Option and Comma (<) key to move left. Use the Shift and Option key to move 10 subframes at a time.
You can select multiple clips to move at the same time. Video is limited to a single frame movement but you can fine tune connected audio clips to a very precise Timeline placement.
5-5) Replace a clip in the Timeline using keyboard shortcuts.
In the Event Browser, select the whole clip or clip range.
In the Timeline, select the whole clip that you want to replace.

With both clips selected, for a standard Replace edit - Press Shift-R (think R for Replace). The Timeline clip is replaced with the Event Browser clip selection using the Event Browser clip length. The Timeline will ripple if both clip lengths are not the same.
For a Replace from Start edit, which maintains the Timeline clip length, Press Option-R.
The Timeline clip is replaced with the Event Browser clip selection. The Timeline does not ripple. If the Event Browser selection is shorter than the Timeline clip, Final Cut Pro X will extend the Event Browser clip length to match the Timeline clip length, if the Event Browser clip has the extra media available.
5-6) Before making a copy of your Final Cut Event to take to another edit station, use the "Organize Events Files" command from the File menu. This command checks and makes sure that any media referencing external sources are copied to the Final Cut Event > Original Media folder. Select the Event in the Event Browser and choose File > "Organize Event Files...".
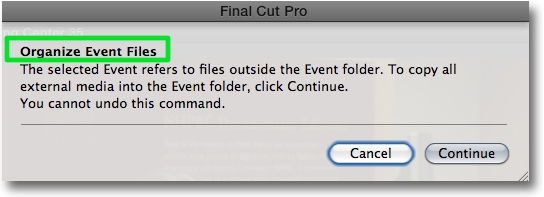
There is nothing more aggravating than to copy an Event to another drive to edit elsewhere and once you are there you find aliases in place of the actual media. Also bring a copy of your Motion Projects folder (user > Movies > Motion Projects) for any modified Titles
5-7) To paste a Copied clip to the main Timeline as a Connected clip use the keyboard shortcut Option-V.
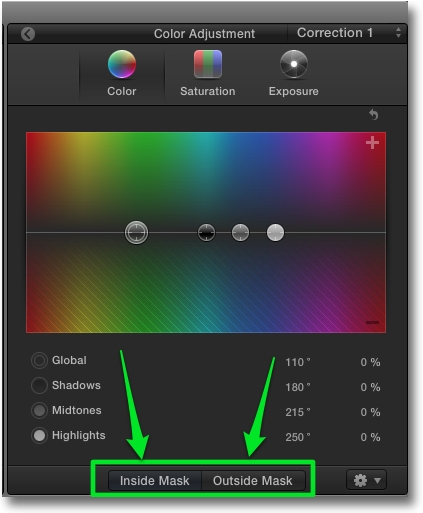
5-8) When using a Shape Mask in the Color Correction, there are actually two color corrections in one. You can apply Color, Saturation and Exposure adjustments to the inside of the Shape Mask area and the outside of the Shape Mask area in a single Color Correction. Simply select Inside Mask or Outside Mask and then make individual Color adjustments for each.
Richard Taylor is a Level 2 Apple Certified Trainer for Final Cut Pro X and a Video Producer/Editor in the Baltimore/Washington DC area. He can be reached via his Final Cut Pro X website FCPX.TV or via Twitter @RichardTaylorTV
Copyright © 2012 Richard Taylor. All rights reserved.
© 2000 -2012 Ken Stone. All rights reserved. Apple, the Apple logo, Final
Cut Pro, Macintosh and Power Mac
are either registered trademarks or trademarks of Apple. Other
company and product names may be trademarks of their respective
owners.
All screen captures, images, and textual references are the property and trademark of their creators/owners/publishers.