

March 21, 2011
GoPro HD HERO LCD BACPAC
http://gopro.com - $79.99
Review by Steve Douglas
The GoPRO HERO HD POV cam has caused a minor revolution in the industry reaching thousands who ordinarily might not have ever purchased a camcorder. Since its arrival there have been many companies who have come out with their own low priced, high performing camcorders, several with similar recording abilities being able to shoot in 1080p at 30fps, at 960p/30fps, 720p/60fps, 720p/30fps widescreen and WVGA/60fps in a video format of H.264 compression/MPEG4.
The only problem with every one that I have seen is that creating a true composition when shooting with them was impossible in that you could only aim and hope that the composition was good. There wasn't any sort of viewfinder or monitor that would allow for that. While most come supplied with various mounts for cars, motorcycles, helmets and, some, with underwater housings, the problem remained the same in that without a viewfinder or monitor, composition was still a hit and miss operation.
My review of the GoPro HERO HD cam
in September, 2010 pointed out the finer points of the GoPRO's usage and surprisingly good footage. However, since that time I found that scrolling through the menu, especially if I hadn't used it for a period of time, was often confusing and a bother to do.
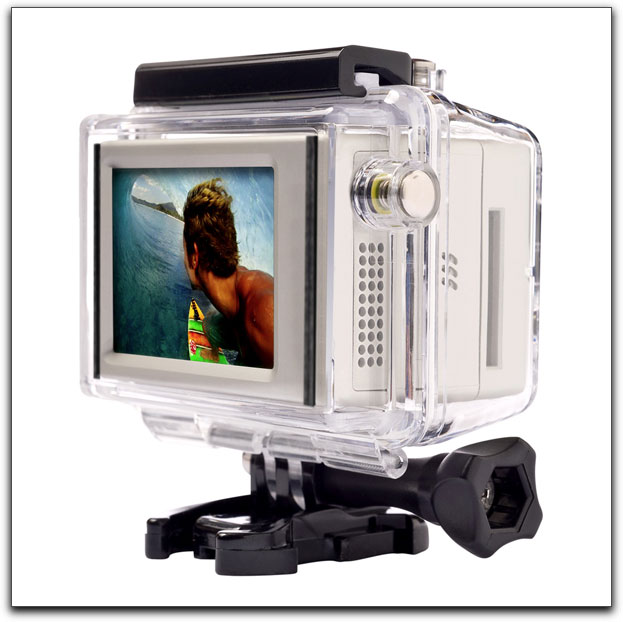
GoPRO has listened to its widely growing audience and has now produced a very serviceable monitor which provides both decent quality viewing and enables you to quickly set up your shots and create a composition to your liking. In turn, the new monitor makes going through the menu settings much easier and more logical. Keep in mind that the monitor now draws more power from the GoPRO HERO HD's battery which can be recharged by simply connecting the supplied USB cable to your desktop or laptop.
The GoPRO HERO HD came, depending upon your choice of set-up with a standard clear housing or a waterproof housing for those who wanted to use it while snorkeling or scuba diving. The new monitor is roughly 1/3 the thickness of the camcorder itself and my first thought was, "Oh no, now people will have to buy a whole new housing in order to fit the camcorder with the new LCD BacPac monitor attached". I was wrong, along with the purchase of the new monitor, you get several different housing backs which replace the one you were using. They are easy to switch out and reattach to the front portion of the housing, whether it be a topside housing or one to be used in wet environments. In all, you get 4 different housing doors, a waterproof door for shooting in Standard Definition, a waterproof door for filming in High Definition and two non-waterproof doors for using with the wrist housing since the latch is on the opposite side from the standard housing.
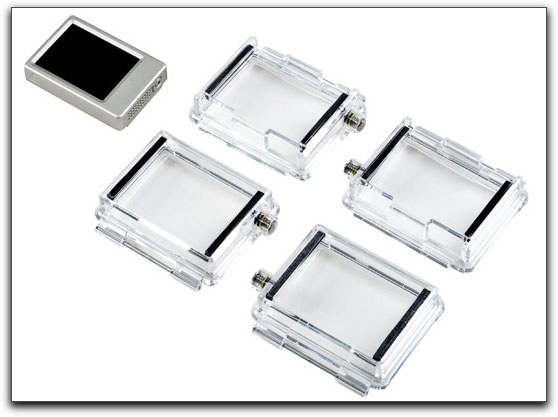
Several different monitor backs are supplied for both topside and water environments.
Before you begin, be sure that your GoPRO HERO battery is fully charged and that you have a blank SD card. Once downloaded, you will find a firmware zip file. Unzipping the file presents you with a new file named 'Firmware.bin' .This should then be transferred to the GoPRO connected to your computer via the USB cable. You are warned not to rename this file. You can then eject the mounted GoPRO from your desktop.
Now, with the GoPRO in hand press the top shutter button and hold it there while you press the front power button once. This will cause the camera to turn on and beep 6 times. Keeping your finger pressed down on the shutter button, press the front power button again 3 times. This will cause the the front LCD display to say 'UP' and the light to flash on and off between 5 and 10 seconds before shutting itself off.
Your firmware is now fully installed and you can erase the Firmware.bin file from your SD card.
Attachment of the monitor is a no brainer. It simple fits into the side hinge and rear port present on the GoPRO HERO HD cam. It took two seconds to do, that's all.
Just power the GoPRO HERO HD on and go to the set menu by pressing the shutter button.
Once in the settings menu press the power button to scroll through until you get to the LCD Auto Power Setting. Here you can set the LCD screen to stay on (LCO) continually which, naturally, will drain your battery faster or you can set the LCD screen to go off 60 seconds (LCF) after the last button press.
The GoPRO HERO HD and new LCD BacPac monitor provides settings for an Upside Down Mode, a Live Feed Out direct to your monitor or TV for instant viewing, and a Live Feed On-Screen Status display of your recording status and battery life. Very sweet. Furthermore, there are several video tutorials covering the firmware update and the different set up modes on the GoPRO website.
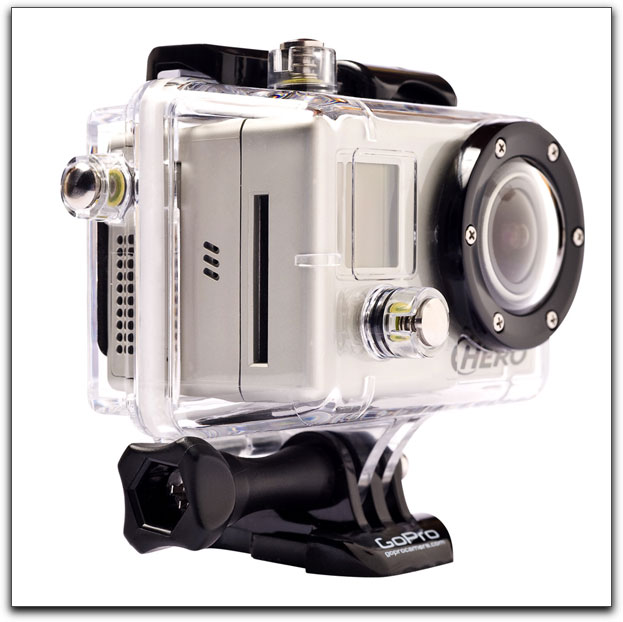
The new back door allowing for the new LCD BacPak easily fit onto the hinge of the front portion of the housing.
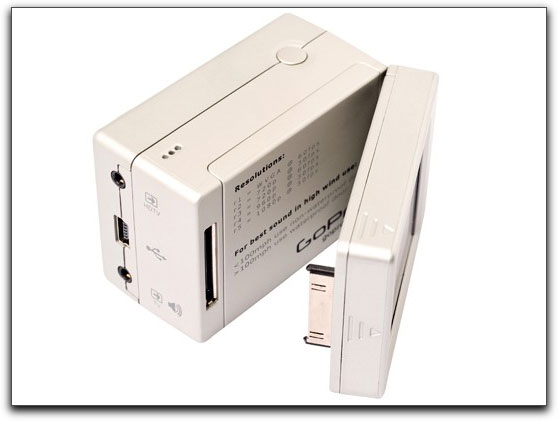
Additionally, the GoPRO HERO HD now offers PAL 25/50fps support shooting at:
- r1 WVGA 50fps
- r2 1280 x 720 25fps
- r3 1280 x 720 60fps
- r4 1280 x 960 25fps
- r5 1920 x 1080 25fps
When I first saw the GoPRO Standard being used by a divemaster on a shoot in N. Carolina last year, I was stunned by its size and, even though it was a standard definition model, by its quality. A few months later when I actually had one in had, I knew that the GoPRO company was on to something good. I was hoping to be able to buy stock but they weren't on the market. The only thing missing was a monitor. Now that issue has been put to bed, as the monitor is an easy and inexpensive install. Sure, you can pay thousands of dollars more for a higher end cam that will allow you to manually focus, have XLR inputs, manual white balance and a plethora of great features and higher end formats, but when it comes to having fun, having a quick and easy set up for shots that you might miss simply because a battery is in one pouch and your cam is in another, you can't beat the GoPRO HERO HD. With their new LCD BakPac, GoPRO has succeeded in fulfilling GoPRO owners wishes and married them to a low cost solution. This is a company enjoying an amazing growth spurt and you can be sure there will be something else just as exciting coming around the corner.
Steve Douglas is a certified Apple Pro for Final Cut Pro 7 and underwater videographer. A winner of the 1999 Pacific Coast Underwater Film Competition, 2003 IVIE competition, 2004 Los Angeles Underwater Photographic competition, and the prestigious 2005 International Beneath the Sea Film Competition, where he also won the Stan Waterman Award for Excellence in Underwater Videography and 'Diver of the Year', Steve was a safety diver on the feature film "The Deep Blue Sea", contributed footage to the Seaworld Park's Atlantis production, and productions for National Geographic and the History channels. Steve was a feature writer for Asian Diver Magazine and is one of the founding organizers of the San Diego UnderSea Film Exhibition. He is available for both private and group seminars for Final Cut Pro and leads underwater filming expeditions and African safaris with upcoming excursions to the Cocos Islands, Costa Rica, Lembeh Straits, Indonesia, and Wakatobi. Feel free to contact him if you are interested in joining Steve on any of these exciting trips. www.worldfilmsandtravel.com
[Top]
copyright © Steve Douglas 2011
© 2000 -2011 Ken Stone. All rights reserved. Apple, the Apple logo, Final
Cut Pro, Macintosh and Power Mac
are either registered trademarks or trademarks of Apple. Other
company and product names may be trademarks of their respective
owners.
All screen captures, images, and textual references are the property and trademark of their creators/owners/publishers.


