
June 14, 2010
Holophone's PortaMic PRO Surround Microphone
http://www.holophone.com - $999.00
SurCode for Dolby Pro Logic II software
http://www.minnetonkaaudio.com/ - $725.00 through Holophone
Reviews by Steve Douglas
On top the tremendous growth and wave of high-end home theaters systems that have pervaded our domiciles for several years, it is only a reasonable expectation that capturing and editing in full 5.1 surround sound should be part of the tsunami surge of 3D camcorders and televisions headed our way.
In the past, in order to achieve true 6 discreet channel audio, one would need to have at least six separate mics, stands or booms, their mixer and probably another couple of microphones to 'walk the audio' from one channel to another like you would pan a camcorder when following an actor.
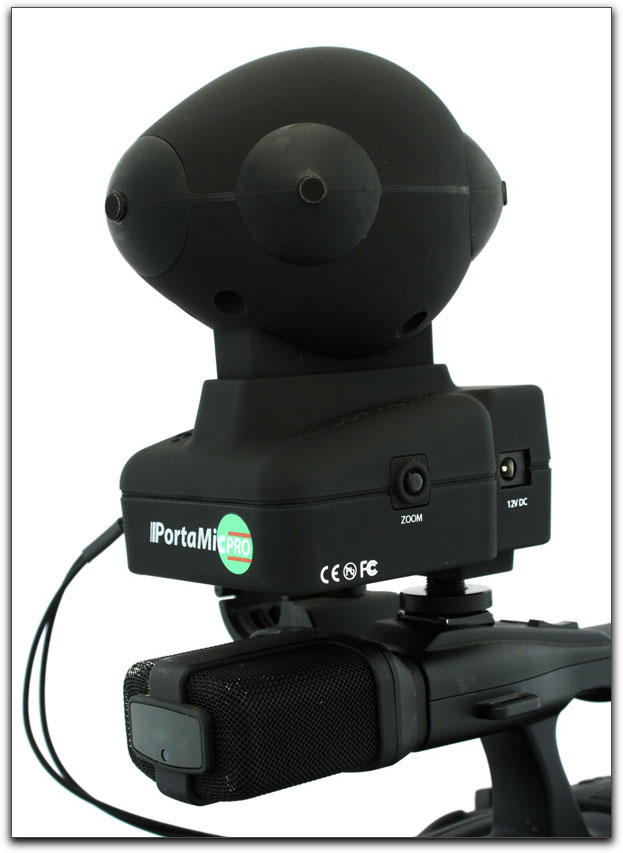
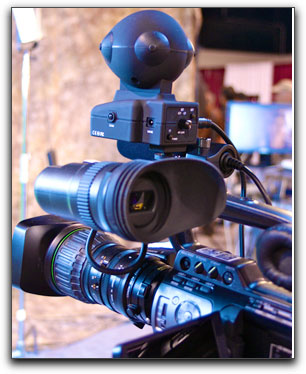
Holophone's PortaMic PRO Surround Microphone makes that fantasy a reality by incorporating 5.1 discreet microphones within one egg-shaped sturdy plastic container mounted on its own control box.
A single 9-volt battery provides about 3 hours of burn time,
so having extra batteries with you on an extended shoot would be the smart thing to do.
Beneath the control module is a metal shoe mount, which fit smoothly on my camcorder's hot shoe. In addition, the bottom of the shoe also includes a standard 1/4" threaded socket should you want to mount the PortaMic PRO on another stand or tripod. The set-up is really quite easy. The bottom of the PortaMic PRO holds the 9v battery that goes in, as you would put batteries in any remote. You then slide the PortaMic PRO into the hot shoe or on the stand. My PortaMic PRO came with 3 different cables, a double male XLR to 1/8th" unbalanced stereo cable, a 1/8th to 1/8th inch cable which would go from the control box's stereo out to your camcorders input, and a double male XLR to a 6 pin line level balanced stereo out cable which connects into the side of the PortaMic control box. I tested using both types of XLR cables.
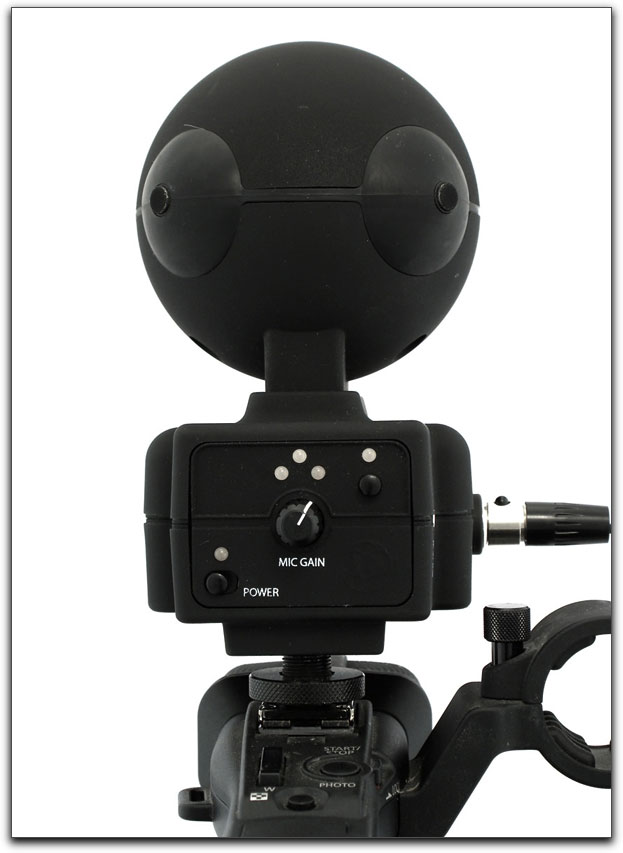
On the back of the control box, (if it were on mounted on your hotshoe) facing the shooter, is a LED power light and a mic gain control. Helping you adjust the mic gain are 3 LEDs, which display clipping for the left and right channels.
With all the controls except the audio zoom function facing the shooter, adjustments to audio levels are easily made on the fly.
The microphones within the capsule are very sensitive and always using headphones to monitor the signal is both common sense as well as a necessity for recording audio no matter what microphone you may be using. The two left and right LEDs will periodically blink green as recording proceeds. A third LED will blink Red if the levels are too high. There is a variable gain control knob directly underneath these LEDS and, depending upon whether I was testing the Porta MicPRO indoors or outdoors, use of the gain control was absolutely imperative. Too high and you will distort your audio. I usually found that a gain setting of about 10 o'clock was sufficient with the headphones I was using and produced excellent results. On my very first test, I brought the PortaMic PRO into a club, attached it to a camcorder and just let it sit there and record for 10 minutes without any monitoring. My error. I had the gain up to the 12 o'clock mid point and it proved to be up way too high and resulted in some nasty distortion.
Two additional features add to the PortaMic's professional approach are the -12dB pad activated by pressing the -12dB button also easily located on the back of the control console. Pressing and holding the button until the LED above it turns green activates it and doing so again will turn it off.
The second feature increases the forward pickup pattern while decreasing the rear pick up. This Auto Zoom feature is found on the left side of the console and is also activated by holding the Auto Zoom button down until the top LED turns green. If the LEDs turn red it indicates that your audio is clipping and to adjust the gain control down. In several tests from filming individual speakers, people speaking in crowds, and a death-defying stand on the highway with trucks and cars zipping by and the wife yelling that I was going to get killed, the PortaMic Pro proved to be a truly professional piece of hardware.
With a frequency response of 5x 20Hz-20khz and the sub frequency being 20Hz-100Hz, and a signal to noise ratio of more than 64db, you have the entire frequency range covered. Even in the finest of home theater setups a 20Hz-20khz flat response is the ultimate goal, not often achieved, and is reserved for only the hi end of audio speakers and surround processors. While hi end audio components will certainly not be found in your local Best Buy stereo store, components available for playback can be found at most electronics 'big box' outlets. The point being, that for most, this 5.1 surround microphone is capable of producing an even higher quality audio than most home systems can or will produce. The difference being that, more extensive systems will be capable of the playback of higher frequency ranges. However, be assured that the Holophone experience can definitely be produced and experienced on any Home Theatre System or Set-Top System with Dolby ProLogic II or Dolby Digital capabilities available world wide. My own home theater system is fairly high end composing of Aerial Acoustic 10t speakers for the front left and right channels, Aerial Acoustics' CC3 Center channel, and their Model 5B speakers for the left and right surrounds accompanied by a Velodyne Digital Drive subwoofer. Two separate Aragon Amplifiers and a new Rotel RSP-1570 Processor, which recently replaced my old Lexicon DC-1 processor, power these. Once I move the 6-channel workflow from initial capture to the creation of a DVD, this system will prove to be an excellent testing ground.

The Holophone unit itself is quite compact taking up little room and weighs only 1/2 pound. Most important to capturing true 5.1 discreet channels is the Holophone PortaMic PRO's own built-in Dolby PLII encoder. Once captured into Final Cut Pro, even the simple stereo signal it provides before you decode it into 6 channels produced a stereo separation considerably superior to audio I have captured in the past.
The workflow utilizing Final Cut Studio was not very difficult though, since I am not an audio engineer, initially I did need to consult with the Holophone support just to get my mind wrapped around it properly.
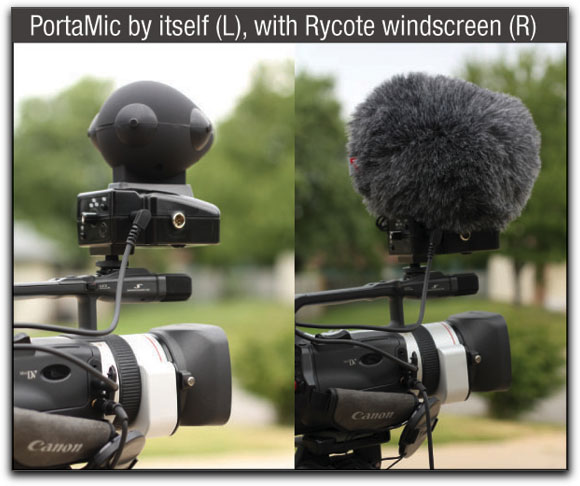
With the Holophone PortaMic Pro attached to the hotshoe of your camcorder you film as you normally would. Once again, you must be aware of the sounds around you, as the microphones within the Porta Mic are, to their credit, very sensitive. The Holophone PortaMic Pro does come with a foam windscreen but I highly recommend the Rycote Windjammer made specifically for using the Holophone PortaMic PRO outdoors to dampen wind noise.
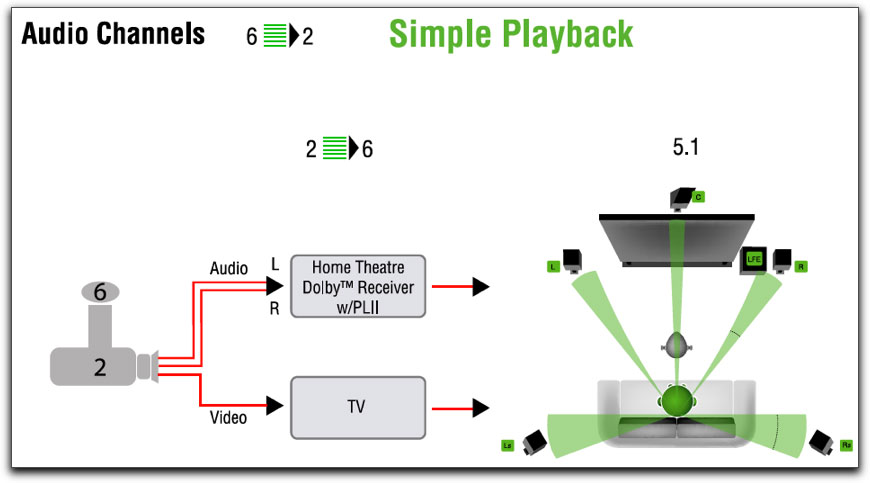
Next you log and capture/transfer your footage with or without the video, again, as you normally would. The Holophone PortaMic PRO has its own encoder built in and muxes the 6 channels into a single 2 channel stereo layer. If, at this point, you play the layer as a stereo pair you will be surprised at the audio separation between the two channels, it made a heck of a difference.
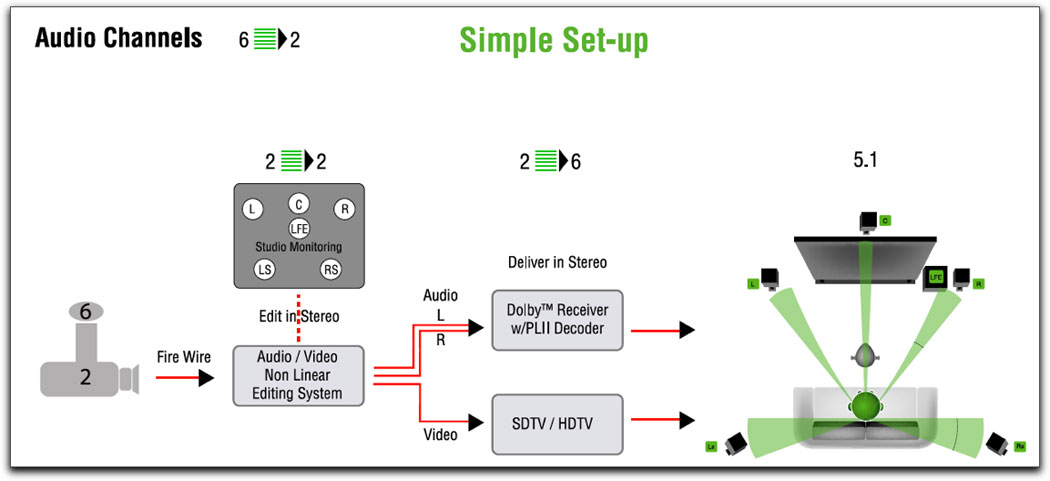
A simple set-up to channel the muxed audio directly to your home theater.
In Final Cut Pro the steps are fairly simple. After you place an in and out point for your audio channels from the Holophone you go to export and export your audio as an AIFF export. (I always export to my desktop and then move it if necessary.)
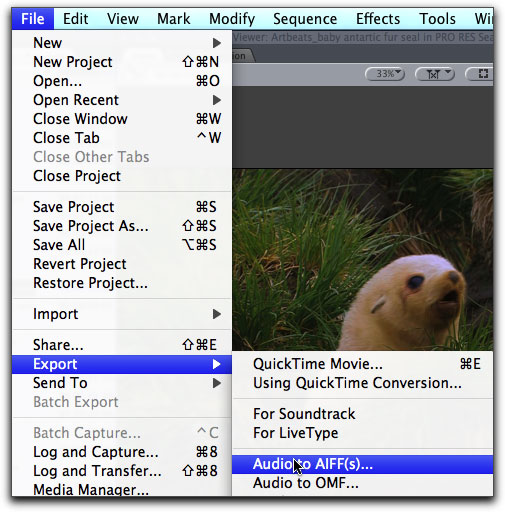
Exporting the muxed stereo channel from the Final Cut sequence.
Interestingly enough, when this is done, your export does not show up with the AIFF icon but displays itself as an AIFC.
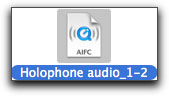
No problem. I just open the AIFC file in QuickTime and export again as an AIFF file, again to my desktop.
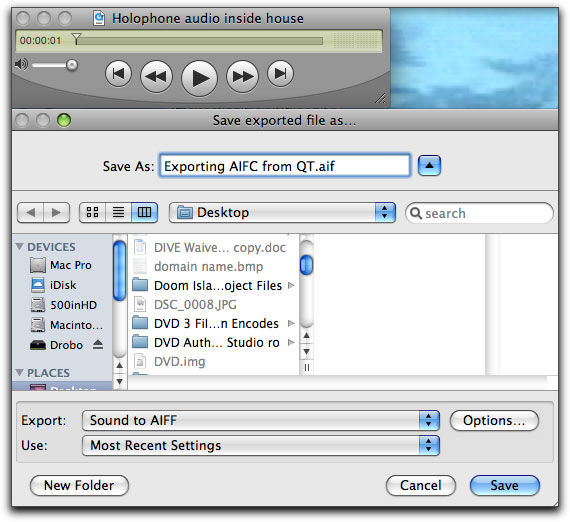
Exporting the AIFC files to AIFF from QuickTime
At this point I can trash the AIFC file. You can certainly keep it as two-channel audio, which will be considerably superior to the stereo files you've created before using the Holophone Porta Mic, but the goal here is to create 6 discreet channels.
In order to do this you can utilize a hardware decoder, but these can be quite costly and is more often found in broadcast studios.
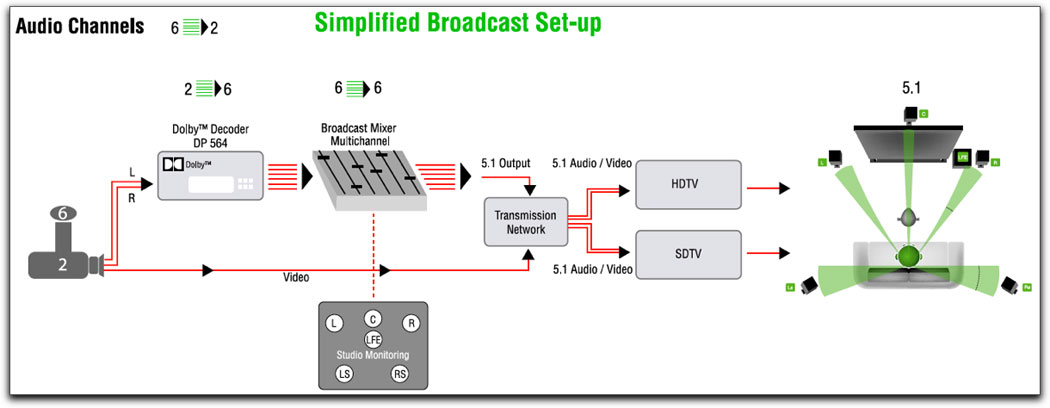
Set up for the professional broadcasting studio.

A simpler and far more cost effect method to decode the audio from the Holophone PortaMic Pro is to take advantage of the easy to use SurCode for Dolby Pro Logic II from Minnetonka Audio. SurCode for Dolby Pro Logic II converts your 5.1 surround soundfiles
to the Dolby Pro Logic II format by matrix-encoding the Center, Surround,
and LFE tracks into the Left and Right tracks. The L and R tracks
then become Lt/Rt, which stands for Left total/Right total - meaning that
Lt/Rt tracks contain the matrix-encoded Center, Surround and LFE
tracks. These Lt/Rt tracks can be distributed and played in stereo, and
also decoded by a Dolby Surround/Pro Logic/Pro Logic II decoder and
played back in surround.
The SurCode for Dolby Pro Logic II can encode or decode as well as a host of other abilities.
Keeping it simple, at this point with the audio from the Holophone already exported as an AIFF file, we are only concerned with using the SurCode's decoding ability.
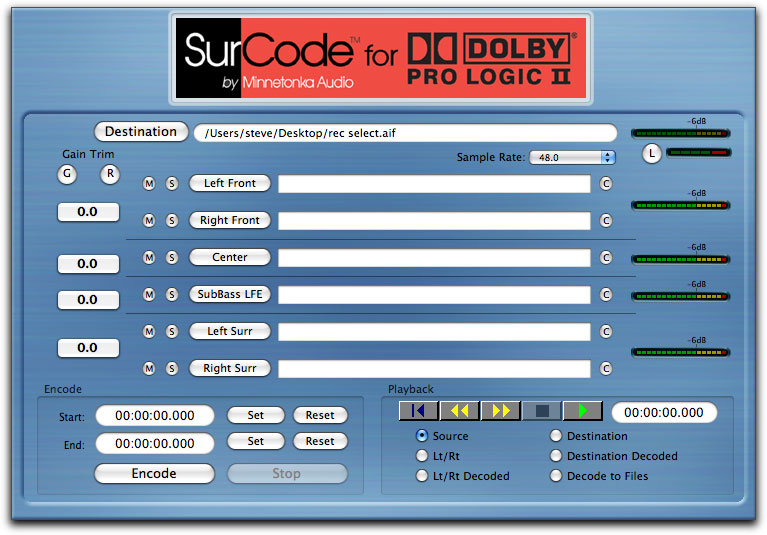
Now that we have opened the SurCode application, we just need to clear the destination window (if anything is already there from a previous project) and either drag our AIFF file into the destination window or click on the destination button and follow the path to where your audio files are stored. Just below the destination window you can set, via the dropdown menu, your audio sample rate, which offers rates of 48.0, 44.1 and 32. In the lower right of the interface are 6 buttons. In our case we want to decode our AIFF to 6 audio files so we click on the 'Decode to Files' button and then the Play button above it.
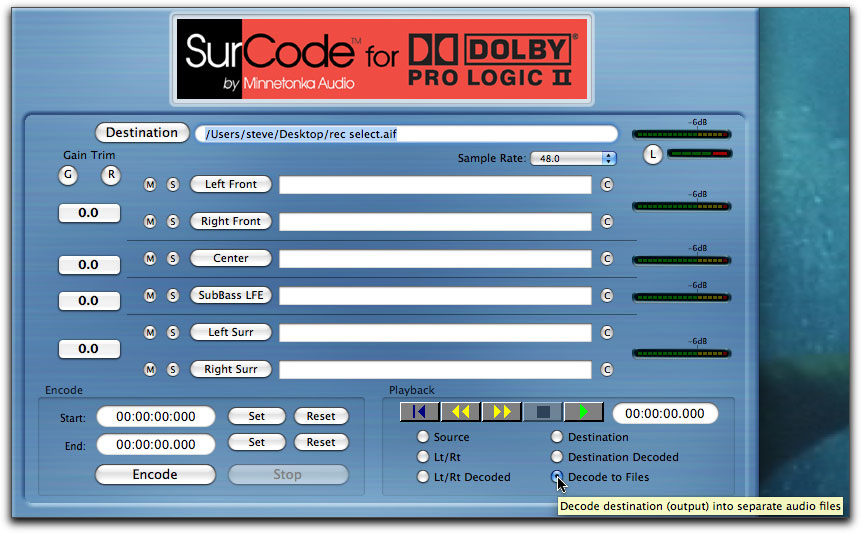
Right after clicking on the 'Decode to Files' button and hitting Play, the Decode starts. The six AIFF channels will immediately show up as separate files in your destination folder representing
the Left and Right front channels, the Center channel, the left and right surround channels and your subBass LFE channel. Since my audio samples for testing were never more than
a few minutes each, I was never the less surprised at how quickly the decoding went. A time passage window directly to the right of the video recorder controls displays the countdown.
Once the now 6 audio files are on your desktop or in your destination folder you can now import them back into Final Cut Pro and use your mixer or Final Cut's own Audio Mixer to set the levels for each channel. It is important to keep your individual audio channels in a specific order, as this is the general standard for surround mixing for broadcast. The left and right front channels go into the first two audio layers. The center channel should be in the 3rd layer and the LFE sub channel in the 4th layer. The left and right rear surround channels follow these.

With all six channels now decoded I can use the Final Cut Pro Audio Mixer to adjust the levels of any of the channels before exporting to Compressor.
Once you have mixed your surround channels to your specifications in Final Cut Pro, you export each of the audio channels separately to your destination folder or desktop. You can export them to Compressor or, as I prefer to do, export them as self contained movies using QuickTime.
Open Compressor and in the top menu you click on the Add Surround Sound icon.

A dropdown window with wells for placing your individual audio tracks will open where you can then drag over your exported audio tracks and place them in the appropriate audio well. As you can see, they are clearly marked.
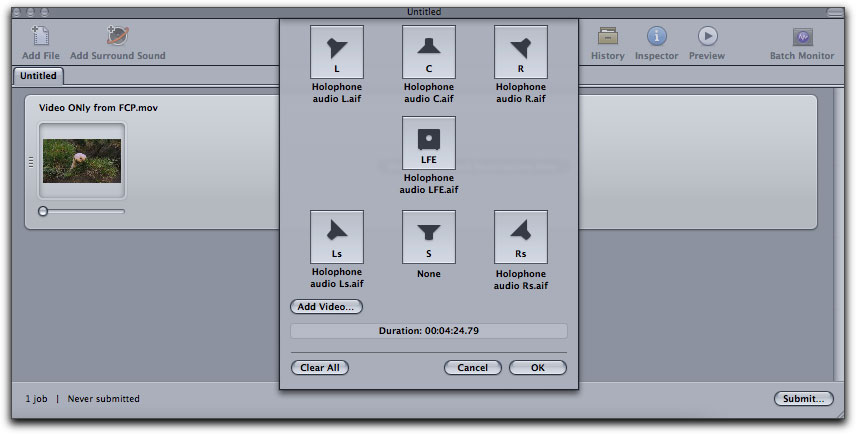
Having dragged and dropped my separate surround audio tracks into the well, you now have the option to add your video exported sequence as well. Click OK.
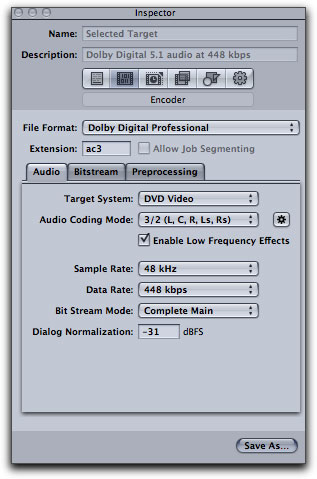
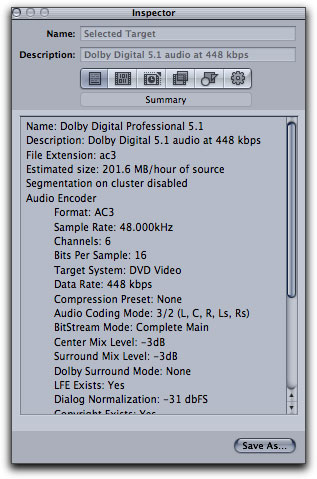
In Compressor's settings window scroll down to the Format's folder and locate the Dolby Digital Professional 5.1 setting.
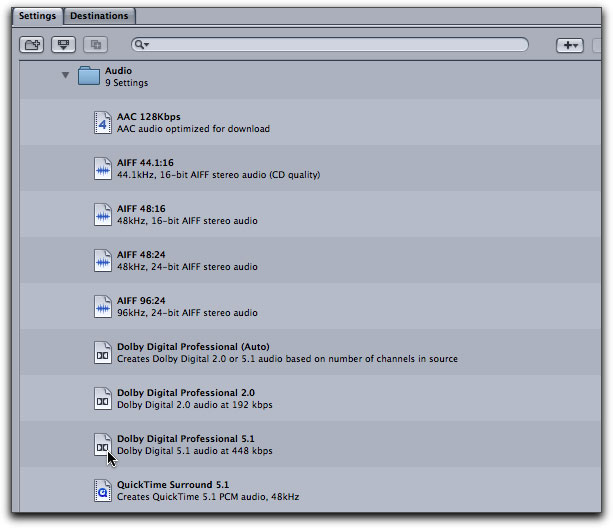
Drag this up to the settings and Destinations window. We're almost home but there are a few settings in Compressor that we will want to adjust in the Inspector window before we submit.
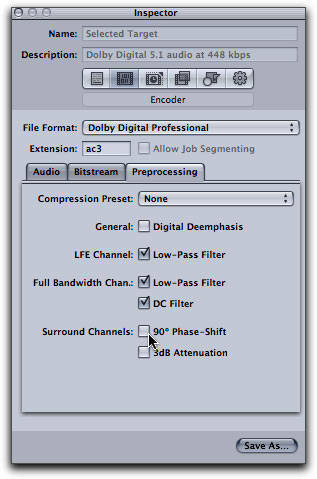
Moving to the Encoder tab in the Inspector window
(2nd tab from the left) change the Dialog Normalization setting from the default -27 to -31. Moving over to the Preprocessing tab, uncheck the 90� Phase-Shift. The 90 degree phase shift happens naturally through HRTF (Head Related Transfer Function) due to the Holophone's patented egg shaped head. Next change the Compression Preset to 'None'.
Now all there is left to do is to submit the project and wait for Compressor to do its job before you head over to DVD Studio Pro. In DVD Studio Pro you will drag the AC-3 file, which will appear to you on only 1 audio layer. Don't be concerned, as I initially was, all 6 discreet layers are there. Precede with your DVD production and burn as you normally would. You are now good to go.
A writer for Rolling Stone magazine many years ago said, after hearing Bruce Springsteen in concert, that in Springsteen he could hear the future of rock and roll. With the surge of ever higher capable camcorders and DSLRs, the increasing presence of home theater systems and theatrical expectations, in the Holophone PortaMic PRO along with the simple to use SurCode software from Minnetonka Audio Software, I can see the future of audio editing coming down from the mountains of the biggest and richest studios to the every day shooter who, by using both the PortaMic PRO and the SurCode software will immediately improve the highly important audio end of their productions and exceed both their own expectations as well as their clients.
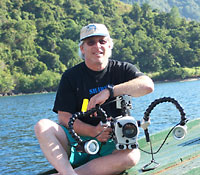
Steve Douglas is a certified Apple Pro for Final Cut Pro 7 and underwater videographer. A winner of the 1999 Pacific Coast Underwater Film Competition, 2003 IVIE competition, 2004 Los Angeles Underwater Photographic competition, and the prestigious 2005 International Beneath the Sea Film Competition, where he also won the Stan Waterman Award for Excellence in Underwater Videography and 'Diver of the Year', Steve was a safety diver on the feature film "The Deep Blue Sea", contributed footage to the Seaworld Park's Atlantis production, and productions for National Geographic and the History channels. Steve was a feature writer for Asian Diver Magazine and is one of the founding organizers of the San Diego UnderSea Film Exhibition. He is available for both private and group seminars for Final Cut Pro and leads underwater filming expeditions and African safaris with upcoming excursions to the Cocos Islands, Costa Rica, Lembeh Straits, Indonesia, and Wakatobi. Feel free to contact him if you are interested in joining Steve on any of these exciting trips. www.worldfilmsandtravel.com
[Top]
copyright © Steve Douglas 2010
© 2000 -2010 Ken Stone. All rights reserved. Apple, the Apple logo, Final
Cut Pro, Macintosh and Power Mac
are either registered trademarks or trademarks of Apple. Other
company and product names may be trademarks of their respective
owners.
All screen captures, images, and textual references are the property and trademark of their creators/owners/publishers.


