January 22, 2007
Importing media from the HVX 200 P2 cards directly from the camera
into FCP 5.1.2 via Firewire.
By Ken Stone
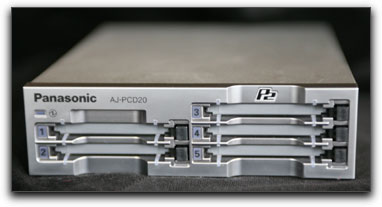
Panasonic offers several different ways to import media from a P2 card into Final Cut Pro. Two of the methods involve using expensive Panasonic peripherals. The first is the Memory Card Drive (approx. $1,900) which has five card slots and will mount up to five P2 cards on the desktop. This device requires AC power.
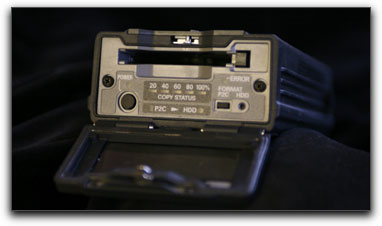
The second is the P2 Store (approx. $1,550), a portable hard disk unit with a P2 card slot, which can store store up to 15 P2 cards on its 60GB capacity hard disk drive. The P2 store can re-format the cards after the media has been downloaded to the internal hard drive. It runs on batteries as well as AC.
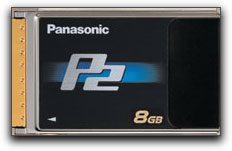
Older versions of Mac laptops sported a PCMCIA card slot which accepts the P2 card, insert the P2 card into the slot and the card becomes available for import. With the introduction of the MacBook Pro from Apple, the PCMCIA card slot as been replaced with the newer, more powerful ExpressCard 34 card slot. The problem is that the new ExpressCard slot does not accept P2 cards. At the time of this writing there are no ExpressCard adaptors that would enable us to use P2 cards with the MacBook Pro.

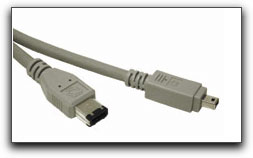
Fortunately, there is a device that has been around for sometime, that will enable us to attached the HVX 200 to any Mac and have the P2 cards mount on the desktop ready for import into FCP. It's the humble Firewire cable.
Mounting P2 cards on the desktop via Firewire.
There are several items in the HVX 200 menus that need to be set in order to mount the P2 cards (inside the HVX 200) to the desktop.
1. Attach the HVX 200 via Firewire to the Mac. On the top of the camera body are a number of controls. Press the menu button.
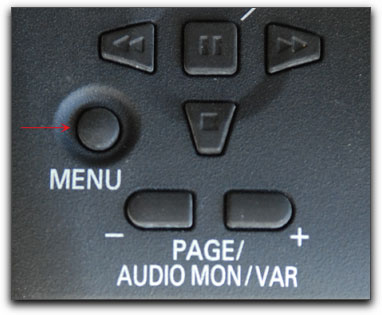
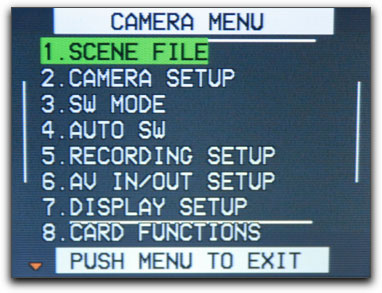
2. The default menu is shown below left. Scroll down to the second page of the menu to #9 'Other Functions'.

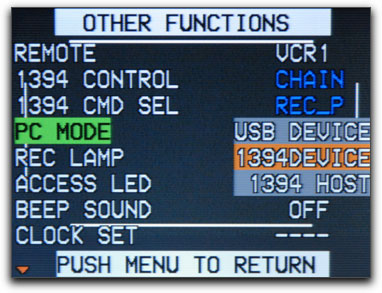
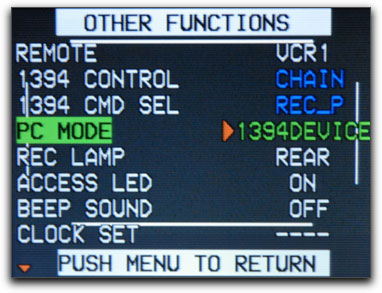
3. Enter 'Other Functions' and scroll down to 'PC Mode'. Move to the right and select '1394Device'. Press the Menu button to exit the menu.
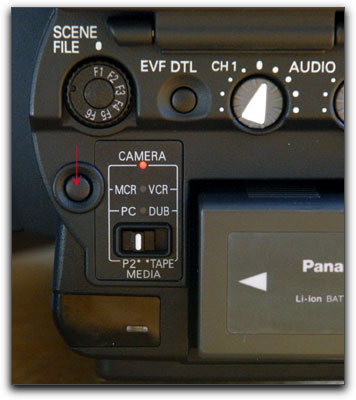
4. Turning to the back of the camera, the HVX 200 is in camera mode as shown by the orange light just below the word 'camera', below left. Press the 'Mode' button, red arrow, to change from camera mode to VCR mode. The orange camera mode light will turn off and a green light next to 'VCR' will be displayed.
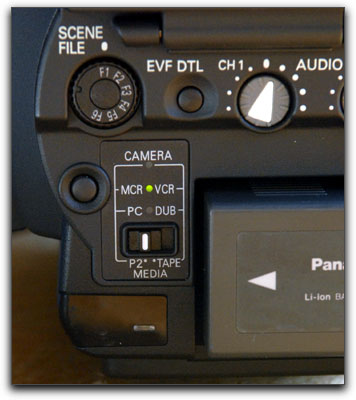
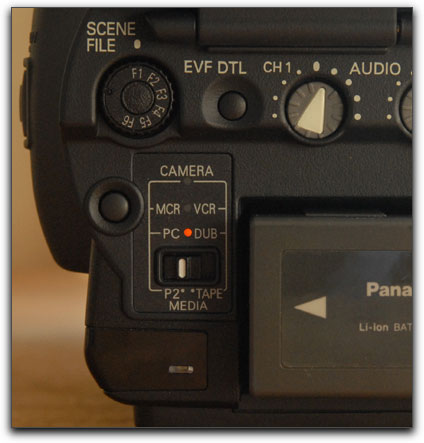
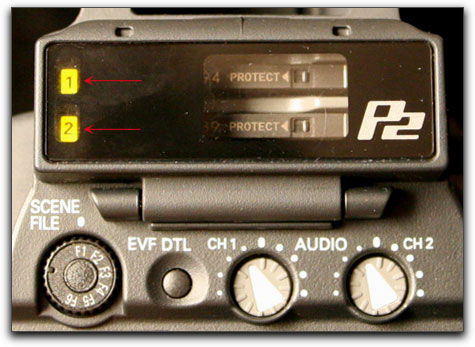
5. Now, press and hold the 'Mode' button for two seconds and release. The green light next to VCR will turn off and an orange light will come on next to 'Dub'. There will be a pause and then the lights next to the actual P2 cards, shown below right, will blink orange and the cards will mount on the desktop.
Importing media from P2 to FCP.
Final Cut Pro 5.1.2 is now equipped with proper P2 import software.
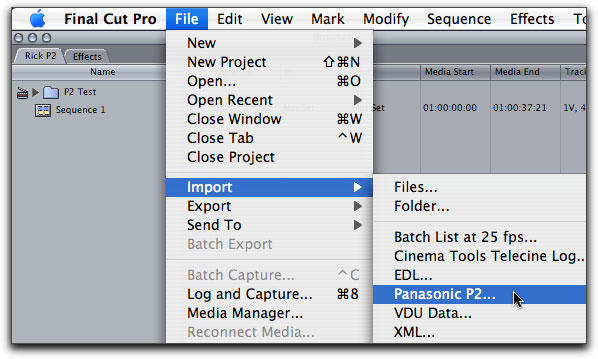
6. With FCP up and running, set your Scratch Disk and then set a logging bin in the Browser. From the menu bar > File > Import > Panasonic P2.
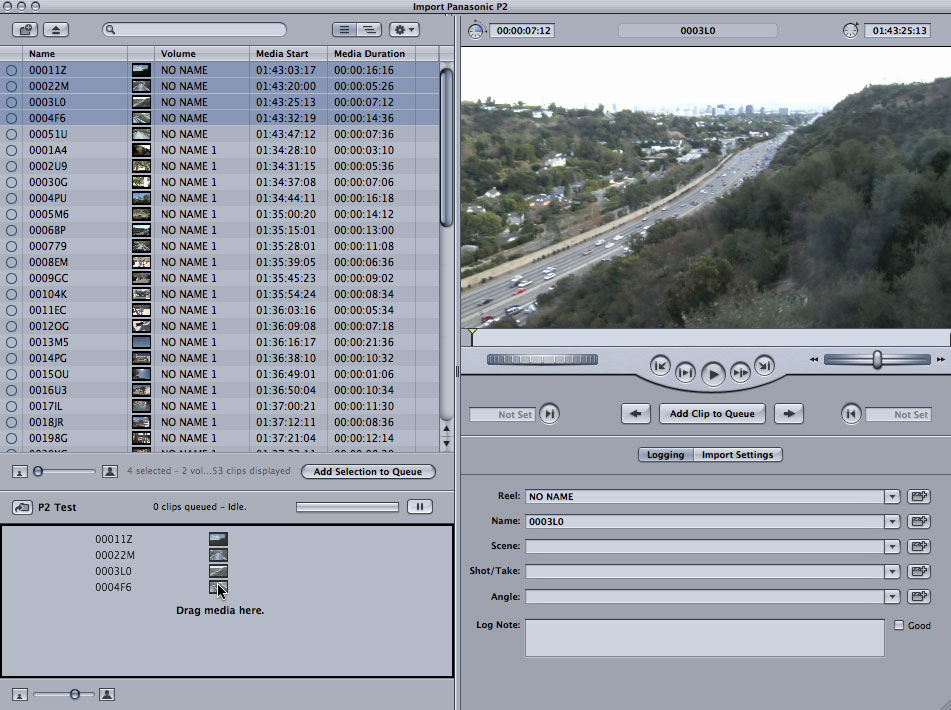
7. The 'Import Panasonic P2' window opens. The upper left section of the window is a clip Browser which will display all of the clips on the P2 cards. If you select a clip, you can audition the clip in the Preview window upper right, (previews run from the P2 card). The preview section also has 'mark in/out' buttons to trim up your clips before importing. In the lower right section you can rename your clip and add additional information. When you have viewed and named the clips and are ready to import, select the clips in the clip Browser and either drag the selection down into the 'Drag media here' window, lower left, or with the clips selected, click on the 'Add Selection to Queue'. The 'Drag media here' area turns into a clip queue, and the import process begins automatically. You can also import clips one at a time from the Preview window by clicking on the 'Add Clip to Queue'. If you click on the 'Import Settings' tab you can choose to import audio and video, audio only or video only.
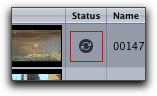
There is a spinning arrow that indicates import in progress. As each clip is imported into FCP it disappears from the clip queue.
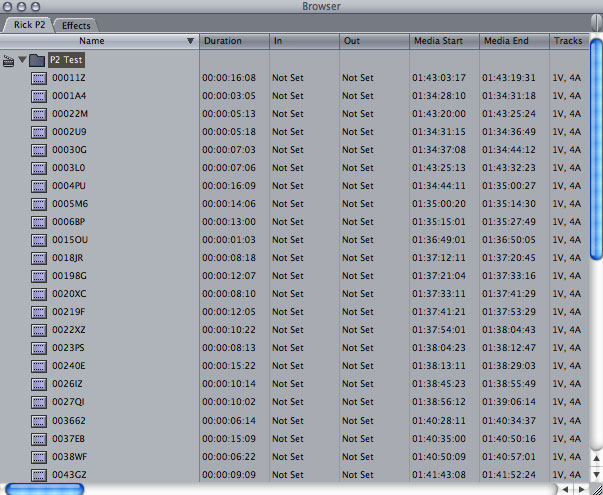
8. After Import, the FCP Browser is populated with the clips from the P2 cards and you are ready to start working. Once you have imported the footage from the P2 card, I would suggest that you back up your Capture Scratch folder to another hard drive before you erase/reformat the P2 cards for their next use. The P2 import process is very straightforward and is quite a joy to use. A tapeless workflow at last.
Special thanks. When I learned that Rick Young of MacVideo magazine, was flying from England to MacWorld and then on to Los Angeles, I asked him if he could procure an HVX 200 for us to shoot with while he was here in L.A. So thanks Rick for dragging all of that equipment across the pond and of course thanks to Panasonic for lending him a HVX 200 for us to work with.
Enjoy,
--ken
copyright © www.kenstone.net 2007
are either registered trademarks or trademarks of Apple. Other company and product names may be trademarks of their respective owners.
All screen captures, images, and textual references are the property and trademark of their creators/owners/publishers.