February 27, 2006
By Ken Stone
Apple just rolled out their new iLife 06 package with an updated version of iDVD. iDVD 6 has new abilities and major new features which include: Magic iDVD, new 'Widescreen' (16:9) templates, auto fill Drop Zones, changes to menu and button editing, Slideshows with text and comments, third party burner support and enhancements to Map view. A new 'dashboard' palette has been added and iDVDs interface has been changed. Gone is the Customize drawer; the new interface sports a permanent 'Inspector' like window called the 'iDVD window', which is now positioned on the right hand side of the interface. The change from the Customize drawer to the new 'iDVD window' is not purely cosmetic. It alters the workflow that we have grown accustomed to in past versions of iDVD. For those of you who have been using iDVD for years it will take awhile to get used to the new workflow. The best way to explore iDVD 6 is to build a project.
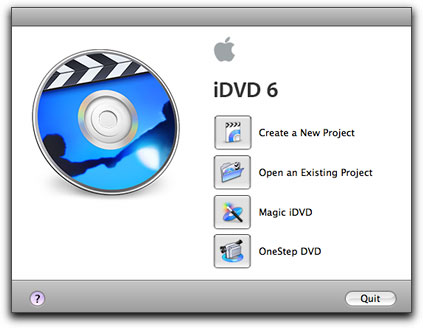
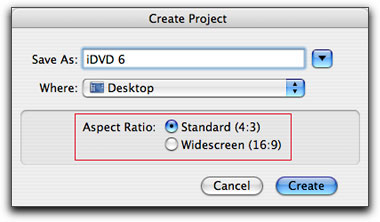
Launching iDVD offers the startup window, choose 'Create a New Project'. In the Create Project box we now see a new option for Aspect Ratio, the standard 4:3 aspect ratio and the new Widescreen (16:9) option. A DVD can be of only one format, you can not mix different aspect ratios in one DVD.
Widescreen(16:9)
iDVD 6 offers 10 new templates in both the Widescreen and Standard format, these new templates are gorgeous and in the Widescreen format exciting indeed.
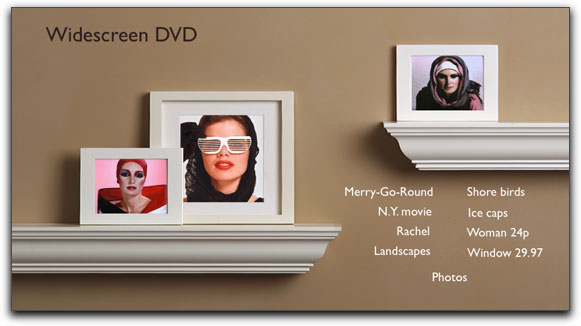
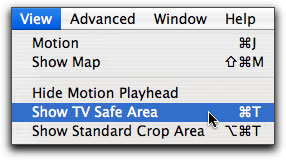
As exciting as they are, widescreen DVDs are not ready for prime time. In order to properly display widescreen DVDs, the DVD player and TV must be able to read the widescreen aspect ratio and properly display the full menu. Unless you are 100% certain that all of your viewers have this new gear, you'll have to wait to use widescreen. Widescreen DVDs suffer from significant cropping when displayed on regular 4:3 TV sets. To demonstrate the amount of hit that you'll take using a widescreen template with a regular TV, from the View menu, turn on 'Show TV Safe' and 'Show Standard Crop Area'.
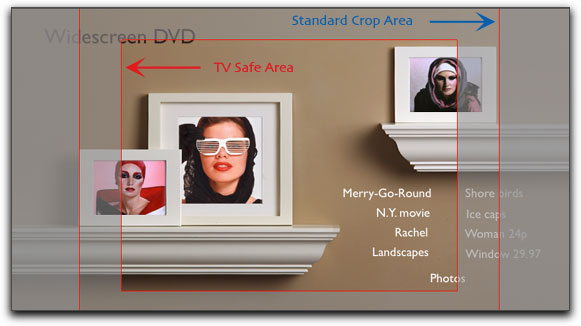
With these two overlays turned on, we can see just how much of the widescreen menu gets cropped out on a regular TV. Aside from the fact that we have lost some of the art, half of the buttons are gone as well. The actual amount of cropping will vary from TV to TV. It could also be that when buttons fall outside of the TV Safe area, problems could result during the encode or burning process. Widescreen DVDs do display properly when played on a Mac, but for now, I suggest selecting the 4:3 aspect ratio when starting a new iDVD project.
6.0 Themes (Templates)
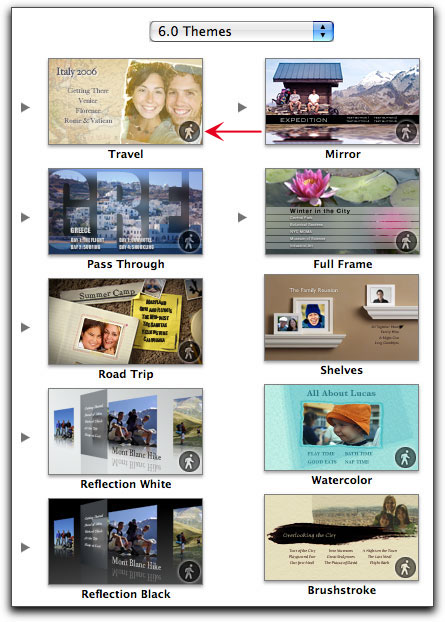
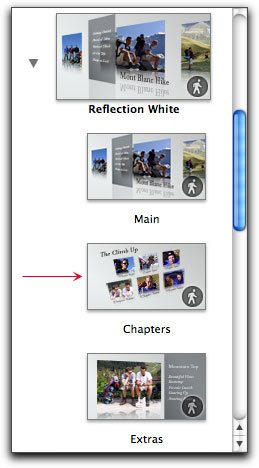
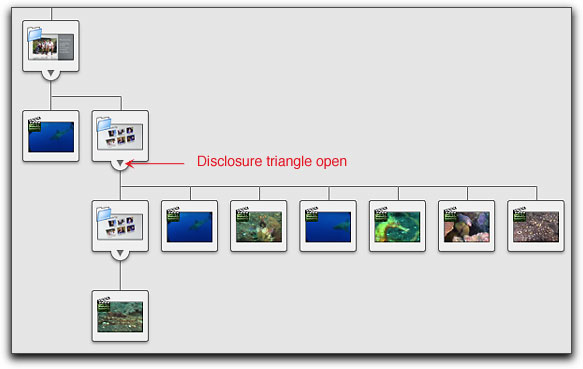
All of the new Themes in iDVD 6 will work as either widescreen 16:9 or standard 4:3. Most of these themes contain three coordinated templates. Click on the disclosure triangle to display the three templates, Main for the first menu, Chapters which support chapter Indexing and an Extra page. Most of these themes are animated, noted by the motion icon. (red arrow below).
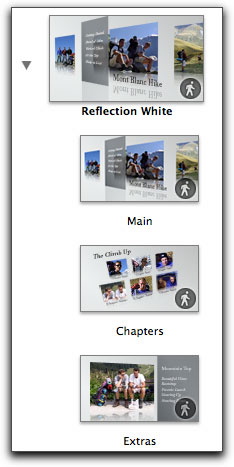
I really like the 'Reflection White' theme, the animated drop zones are excellent. When I click on 'Main' for my first menu the 'Change Project Aspect Ratio' box appears. When using the 06 Themes, iDVD wants to open them as widescreeen by default, but as I have selected Standard 4:3 when I create this project, this dialog box offers me a choice. I want to stay in the 4:3 realm, I'll need to click on 'Keep' (4:3). Thankfully there is a 'Do not ask me again' check box.
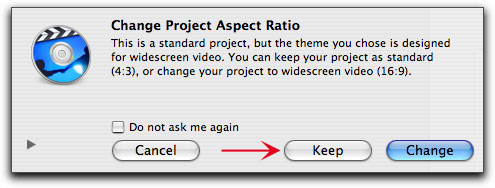
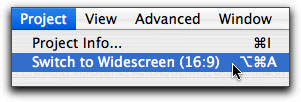
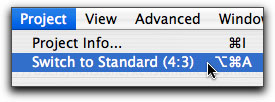
You can change your Projects' aspect ratio at any time, from the Project menu, select Switch to Widescreen or Standard. The aspect ratio is applied to the entire project. Switching from one aspect ratio to another will slightly change the position of text and buttons, which will need to be repositioned.
iDVD 6 Preferences
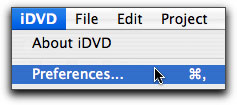
Before we start in to work, it is important that we set our Preferences for the project, some of the prefs have changed since iDVD 5. From the iDVD menu, select Preferences.
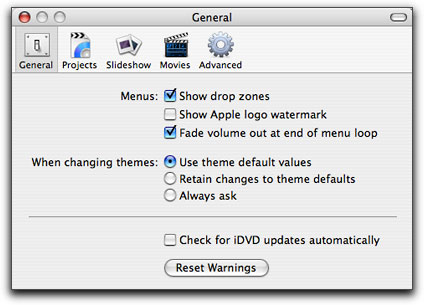
In the General tab 'Show Apple watermark is turned on by default, you may want to uncheck this setting. The 'Fade volume out at end of menu loop' is a great new feature and should be turned on.
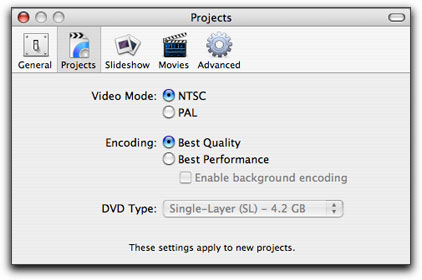
The Projects tab controls the encoding settings. Encoding is the process of converting video to the MPEG 2 format which can then be read by DVD players. These encoder settings control the quality of the encode, the speed of the encoding process and when the encoding will take place. The Best Performance setting is restricted to 60 minutes of video or less. When used, encoding will happen quickly and you have the option of selecting 'Enable background encoding'. With background encoding, iDVD will start encoding as soon as you place your video assets into the iDVD interface. You can continue to work on your project, add art work, background images and audio, create buttons, additional menus and build slideshows, all the while iDVD will be encoding your video. This is the fastest way to encode, but quality takes a bit of a hit. If you want higher quality, then you want the next encoding option.
If you choose 'Best Quality' you will notice that the 'Enable background encoding' is grayed out and you will not be able to encode as you work on your project. Encoding will have to wait until you have finished your project and click the Burn button. There is a reason for this. iDVD will automatically select the best quality possible for the total amount of video you have in your iDVD project. As quality will be determined by the length of your video, iDVD must wait until you have completed your project so it will know how much video it needs to encode and can make the appropriate choices. iDVD uses the same encoding engine found in Compressor, which ships with FC Studio and DVD Studio Pro.
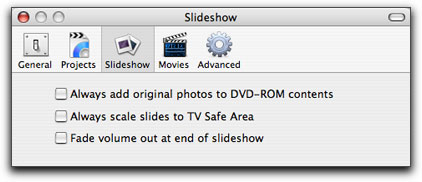
The Slideshow settings are next. When you build a slideshow, the photos that you use in the show will be encoded along with the video. There is the option to include these same photos on your DVD, as data files in their full resolution and can be opened on a computer and used for other purposes. When your finished DVD is viewed on a computer screen you will see the full photos (no cropping), however, when your DVD is viewed on a TV set, some cropping of the photos can occur. To avoid this cropping, select 'Always scale slides to TV Safe area'. Again there is the new 'Fade volume' option which should be turned on.
To fit an image to the DVD window exactly, use an image-editing application to resize the image to these dimensions:
- 720 x 540 pixels for standard video in NTSC format
- 854 x 480 pixels for widescreen in NTSC format
- 768 x 576 pixels for standard video in PAL format
- 1024 x 576 pixels for widescreen in PAL format
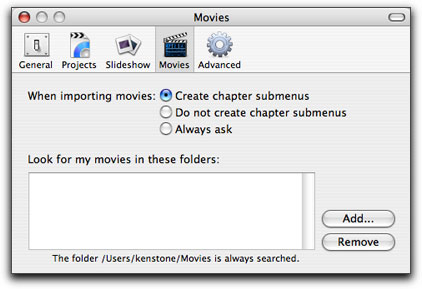
The Movies tab basically covers how iDVD will handle Chapter markers that have been set in FCP, FCE and iMovie. Chapters will be covered later but you should set this to 'Create chapter marker submenus'. If you have movies in folders other than iMovie, you can tell iDVD to 'Look for my movies in these folders', so that the movies will be available directly from inside the iDVD Media pane.
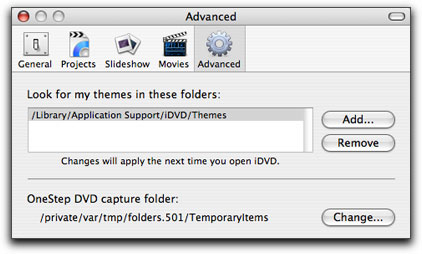
The Advanced section gives the option to select Themes that might be found in different locations so that they all will be displayed and available in the Themes window in iDVD.
Building a DVD
After launching iDVD choose 'Create a New Project'. In the Create Project box select 'Standard (4:3)'.
iDVD will open with the 'Travel' theme in the widescreen format. With the Menu tab active in the iDVD window I have selected the 'Reflection White' Theme, Main. The 'Change Project Aspect Ratio' box appears, select 'Keep'. The widescreen menu window will change to a Standard 4:3 window.
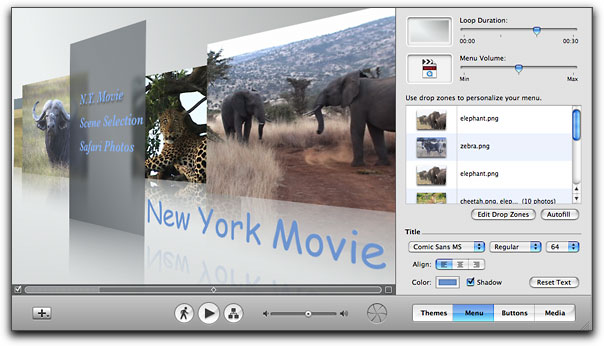
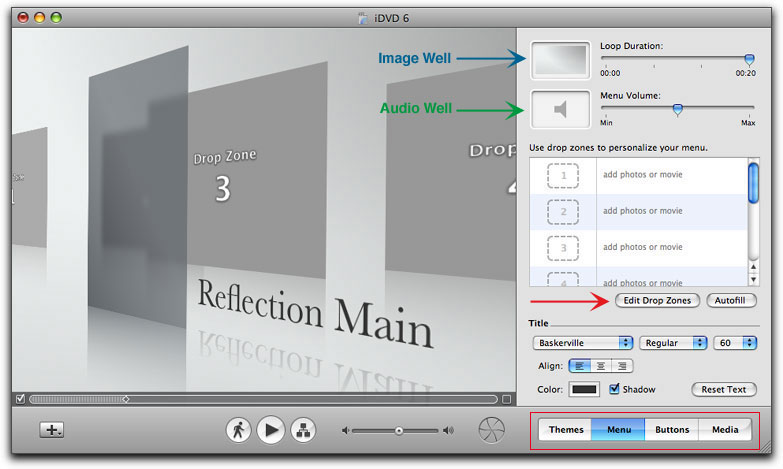
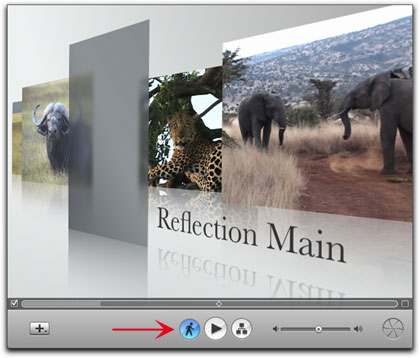
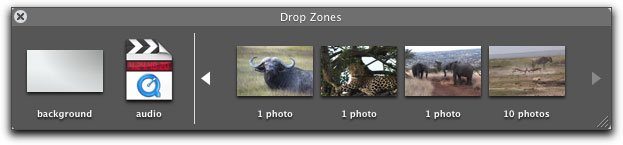
iDVD 6 sports a new interface, 'the iDVD window', on the right, now houses the controls necessary to customize the DVD. With the Menu pane selected (red box bottom right), at the top of the iDVD window is the 'image well', into which you can replace an existing background by dragging in a new background, which can be a photo, a QT movie that will play on screen or even multiple photos which will turn the background into a looping slideshow. Just below, is the 'audio well', drag audio into it to add audio or replace the existing audio. Next is the Drop Zone window for placing images into the provided drop zones in a chosen template and the 'Edit Drop Zones' button which will open the Drop Zone Editor, a new feature in iDVD 6. Next down is the 'Title' section for customizing the style of the Title of the DVD ('Reflection Main' default text). This title section is used only for the 'title' of the menu (not buttons). In the iDVD window, bottom, there are four panes, Themes, Menu, Buttons and Media. These panes allow us access to the settings that control the look and functionality of the DVD as well as providing access to our assets (media) that we need to build a DVD.
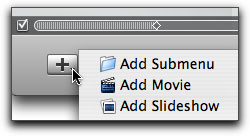
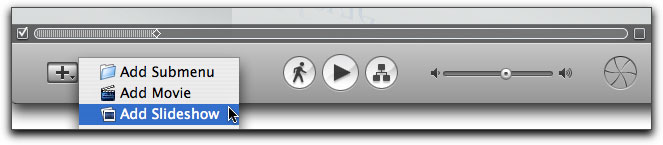
As shown below, the very bottom of the iDVD window contains the basic iDVD controls. At the far left is the 'Add' drop down menu (+), used to add Submenus, Movies and Slideshows (below left). First in the center is the menu motion control (motion man icon, red arrow shown below right). You can use this to play your motion menus and audio in the iDVD interface. Next is a button with a right facing arrow, this is the DVD preview button. Clicking on this will closed the iDVD work space and open the iDVD Preview window with on-screen remote control to preview and test your DVD project. When in Preview mode, clicking on the exit button in the remote control will return you to the iDVD work space. Right-center is the iDVD 'Map' view button (green arrow) which has been greatly enhanced in iDVD 6 and can be used for menu navigation, organization, adding, deleting and changing menus. You can build an entire DVD project in Map view by simple drag and drop. Map view will flag problem areas in your DVD projects through 'alerts' displayed in Map view. Next to the right is an audio volume slider. The slider is for audio volume playback as you work. Changing this slider will have no impact on your burnt DVD . Last on the right is the 'radioactive' DVD burn button (red circle).

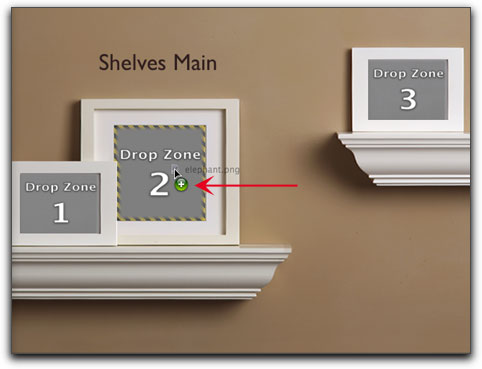
For those of you who are new to iDVD, there is a feature called 'Drop Zones'. Drop zones are special containers build into a menu where you can add photos, QT movies and even slideshows that become integrated with the menu art. Drop zones are art only and can not be used like buttons to link to other elements in a DVD. Often times there are multiple drop zones in a menu, each drop zone can hold different art. One zone can contain a single photo, another can hold a QT movie which will play in the zone and yet another can hold a slideshow where different photos will appear one after the other in a loop. Some of iDVDs themes have static drop zones, where the art stays in one place on the menu. Other themes have dynamic drop zones, where the drop zone containing your art, moves around the screen and then settles into place or crawls across the screen from right to left. iDVD drop zones are indicated with the words 'drop zone' as shown below.
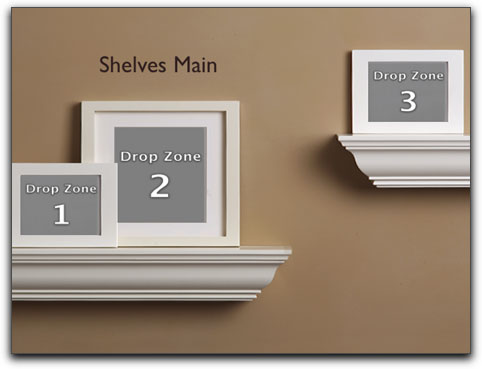
When you drag your art into a drop zone, the zone will be outlined by a yellow and black barber pole, showing that the zone is active and you can drop your art into it.
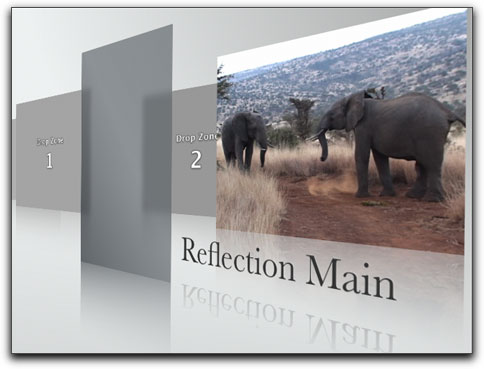
Below is a menu with static drop zones, after a photo has been added.

The menu below has crawling drop zones that play in a continuous loop.
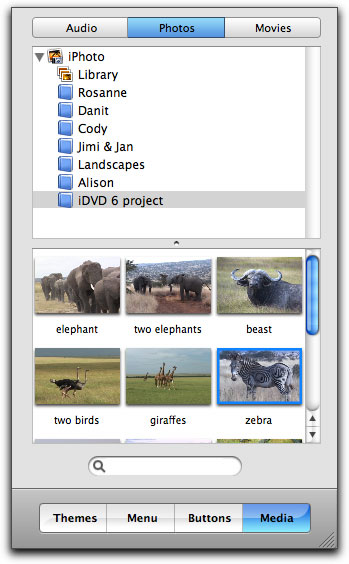
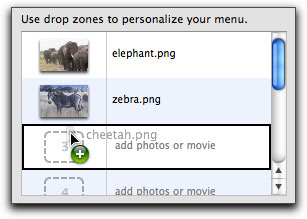
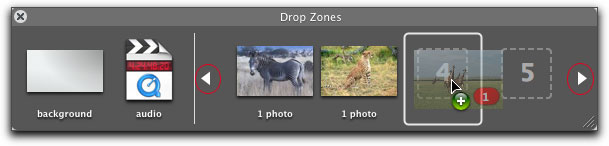
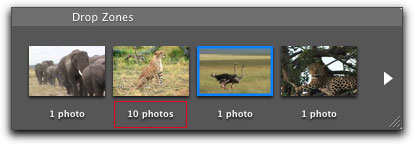
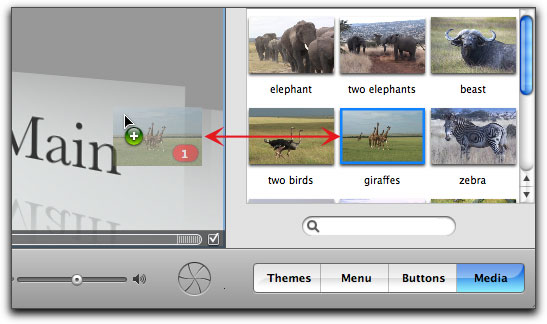
Lets start by adding photos to the drop zones in the menu. There are a number of different ways to do this. Click on the Media tab at the bottom of the iDVD window, then choose Photos. As I have already gathered my photos for this project into an Album called 'iDVD 6 project' in iPhoto, selecting this album open the photos into the browser window just below. Click on a photo and drag into a drop zone in the menu. When a photo is dragged into a drop zone several things happen. First, the drop zone will display a yellow and black barber pole boarder around the zone showing that this is a drop zone. The photo will have two small icons attached as you drag, the first is a plus sign showing that this item will be added, the second is a small icon with a number in a red circle. This number denotes the number of photos being added to the drop zone. Yes, you can add more than one photo to a single drop zone, turning it into a slideshow.

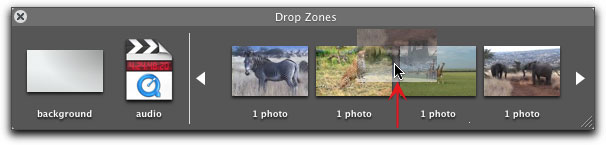
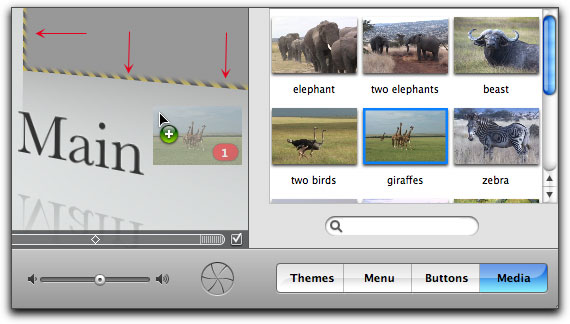
If you are dragging into the menu window and the next available drop zone is off screen, you can advance the menu by dragging the scrub bar at the bottom of the menu window, red arrow shown below.

You can drag a photo from the Finder into a drop zone in the Menu, or into the drop zone window in the Menu tab (below left). In iDVD 6 there is a new floating Dashboard type window, the Drop Zone editor, shown below right. At the left of the drop zone editor are background and audio wells, the same wells found at the top of the iDVD window. To the right are the numbered drop zones into which you can drop your photos, QT Movies and slideshows. When using the Drop Zone editor you can scroll left or right using the arrows at either end to access drop zones that are out of view.
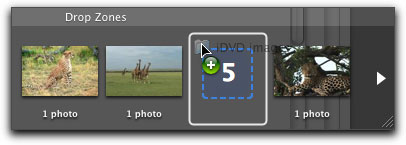
In the 'Reflection White' template there are 8 drop zones. After the drop zone have been filled, the iDVD 'Help' manual tells us that we can change the positions of the photos in the drop zones by clicking and dragging to rearrange the order. If we drag to reorder, as shown below, nothing happens. The only way to reorder the photos in the drop zones is to drag a different photo onto an existing one, or delete the photo (you can select the photo and hit the delete key or drag the photos out of the window), and then replace the the photo. This iDVD 'Help' instruction applies elsewhere as we will see.

'Reflection White' is an exciting animated template, the 8 drop zones crawl across the screen in a loop. I mentioned that it is possible to add more than one photo to a drop zone. When a drop zone has several photos, as the menu plays, different picture will be displayed in that drop zone. You can drag a folder of photos into a drop zone (or Drop Zone editor) or select a number of photos and drag them into the drop zone in one shot. You can add multiple photos to each of the drop zones to a total of 99 for the menu.


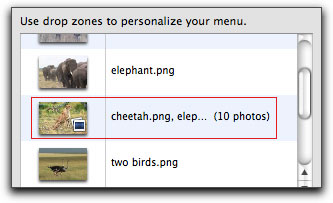
Drop zones that have multiple photos (slideshow) will display a small 'slides' icon and the number of photos will be noted.
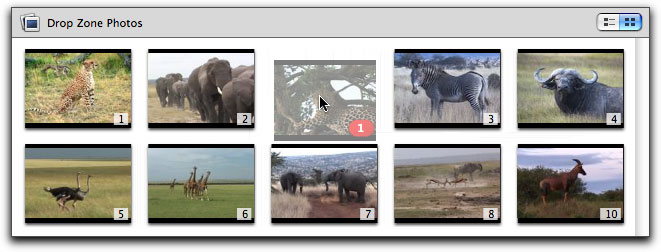
While you can not reorder the drop zones photos, you can reorder the photos within a single drop zone. Double clicking on a zone that contains multiple photos opens the 'Drop Zone Photo editor'. In here, you can rearrange the photos by clicking and dragging to a new position.
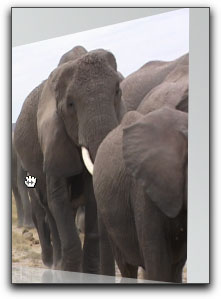
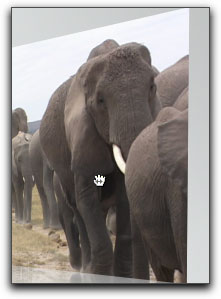
The drop zones found in the different templates are of varying sizes, so photos placed into drop zones get cropped accordingly. iDVD offers us a modicum of positioning of the photo within the drop zone. Place the cursor (a grab hand) over a picture in a drop zone in the menu and drag left or right to adjust the photo slightly. You can not adjust the photo up or down.
After you have added your images to the menu drop zones, you can preview the animation by clicking on the motion icon, below, red arrow.
Backgrounds
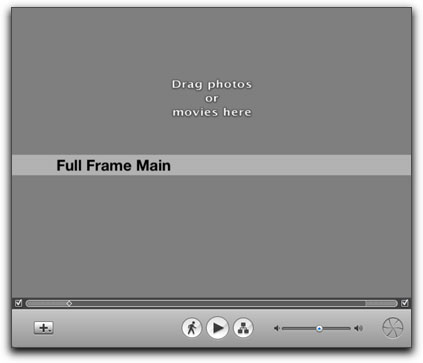
Most of the provided templates come with backgrounds. These can be art work, still photos and even gradients (as found in 'Reflection White'). Some templates, as in 'Full Frame' shown below, have no background requiring you to supply your own. When working with motion menus it is important to remember that an iDVD DVD has a 15 minute limit for all motion menus combined.
While the new Themes are excellent you may want to customize a theme for a more original look. One way to do this is to change out the stock background for your own photo (or movie). This process can be as simple as drag and drop but with one caveat. If the theme has drop zones and you wish to preserve them, care must be taken when dragging into the menu window to avoid landing on a drop zone. To add a photo drag from the Media tab, Photo or from the Finder.
Sometimes when dragging a photo into the menu, even though you are outside of the drop zones, you will still see the drop zone yellow and black barber pole. If you release the mouse your photo will become a drop zone and not a background. Continue to move the photo in the menu until no drop zones are active as noted by the barber pole.
If you do not want to preserve a themes drop zones you can drag a photo into the image well.
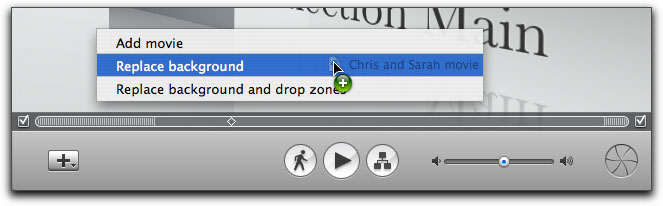
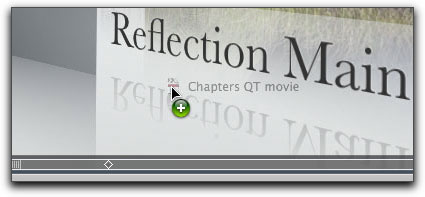
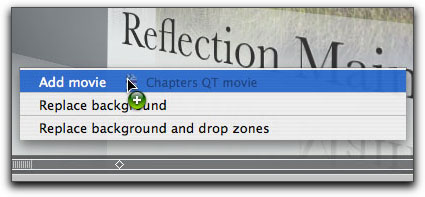
If you wish to replace the background with a QT movie that will play out on screen you can not drag the movie into the menu window. If you do this iDVD will think that you want to add the movie to your DVD project and will create a button to link to the movie; not what you are looking for. There is a way around this. After you have dragged your QT movie into the menu window, hold down the Option key, you will now be offered a choice.
You can also add a QT movie as a new background by dragging it into the image well in the Menu tab, this action will cost you your drop zones. If the QT movie that you have added has audio, the audio will be placed into the audio well at the same time. To remove either audio or video and return the menu to the default theme, simply drag out of the well. You can change the audio that came with the QT movie by dropping new audio into the audio well.
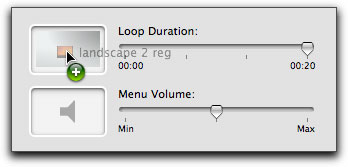
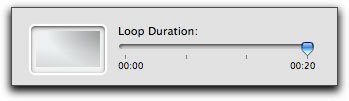
Working with the animated theme 'Reflection White', when the menu begins to play, drop zones move from off screen to on screen and fall into line. As this is happening a transparent gray panel rises up from the ground. The drops zones are now crawling across the screen and the menu buttons and other elements that we have added to the menu, start to appear. When the duration of the motion menu has been reached, the animation loop starts over again. But we would not want the menu to start at the very beginning the second time around. At the very start, the buttons and other elements, are not yet on screen. This would have the effect of the buttons disappearing for several seconds each time the menu looped. What we want is for the menu to start over again at that point when the buttons and elements are already on screen. This way the loop will appear seamless. Each motion theme has a loop function preset, for a smooth transition after each loop. The default loop function for the 'Reflection White' is shown below with a duration of 20 seconds.
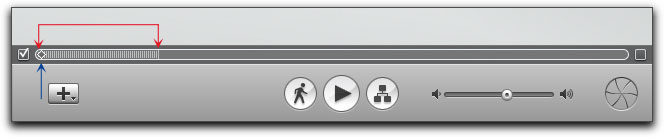
The loop function is also displayed at the bottom of the menu window, shown below. The blue arrow points to the playhead in the scrubber bar and when the menu is first played, the playhead starts at the very beginning. The red arrows below encompass that part of the animation, displayed as white hash marks (I call this the 'Loop Limiter') that represent the section of the animation where the elements first come on screen (no buttons yet), that will be skipped after the menu has played once.
After the first pass the playhead now returns, not to the very start, but at that point where the menu setup is complete and buttons are on screen, blue arrow below.
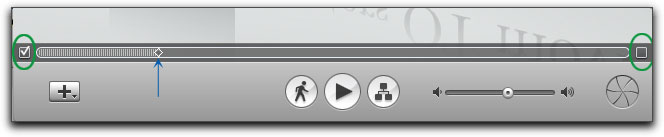
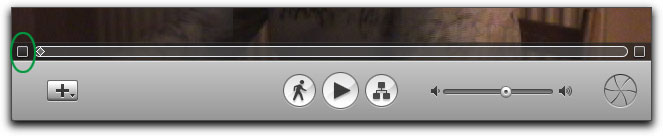
At either end of the scrub bar are check boxes (green circles), unchecking these boxes turns off the limiting effect and the menu will play from the very start with each repetition.
The animated themes that come with iDVD have been carefully created by their designers, duration and loop functions have been set to give a smooth and seamless look to the animated menus. Altering these settings will only detract from the intended design. So why even get into all of this in the first place?
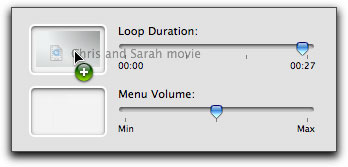
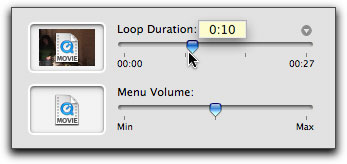
While these new iDVD themes are very exciting, it may be that we want a completely original look to our DVD menus and adding our own photos or QT movies as the background will individualize the DVD. When a QT movie is used as a background, the duration of the menu loop will be the same as the length of the QT movie. In many cases the QT movie will be too long for a motion menu. I have added a QT movie to the image well which runs 27 seconds. Using the duration slider, a tool tip will appear showing the duration, I have set the QT play time to 10 seconds.
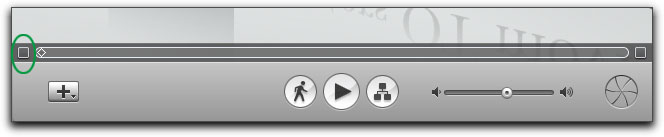
We still need to make another modification before the menu will play the way we want. The 'loop limiter', red box below, shows the starting section of the loop that will not play the second time around, 'loop limiter' is still enabled. As it is now, the QT will play from the start the first time, but each subsequent play will start from the 'loop limiter' point.
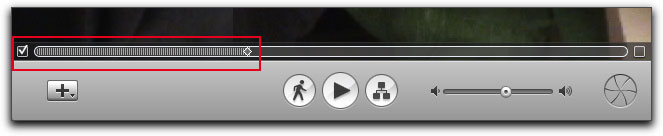
Removing the check from the loop function will allow the QT movie to play from the start, run for 10 seconds and then play from the start again.
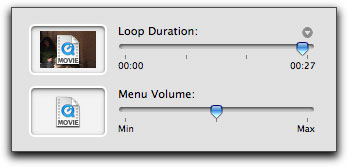
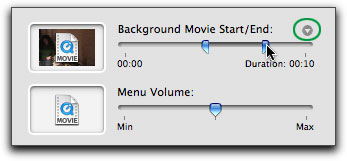
"But wait, there's more". Setting the duration is one thing but having the QT movie start and end where we want would be even better. We can do this in iDVD 6. Clicking on the disclosure triangle on the right hand side of the 'Loop Duration' changes this control to 'Background Movie Start/End'. Fantastic, we can now trim our QT movie by setting In and Out points. As you drag the In or Out point, the QT movie will update in the menu window, making it easy to select the exact position for your trim.
Another new feature in iDVD 6 is that there is now a 'Menu Volume' slider, shown above, for controlling the playback volume of audio. This is important, as in the past, there was no way to 'normalize' or have the audio volume of the different menus be at the same level. You should use this slider judiciously, as moving the slider all the way to 'Max', can cause audio distortion when played back.
Using the Option key as I dragged a photo into the menu window, I have a new menu background and have retained the drop zones.

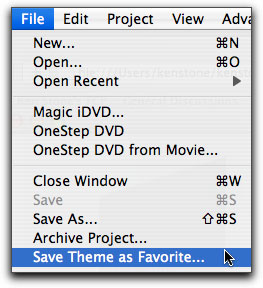
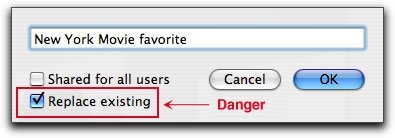
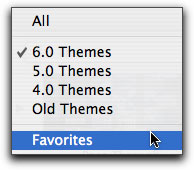
When you have finished building your iDVD menu, with custom background, buttons and text, you can save this setup as a 'Favorite' theme from the File menu > 'Save Theme as Favorite'. Caution, in the Save Favorite dialog box, 'Replace existing' is turned on by default, leaving this checked will cause the loss of the default theme that came with iDVD. After saving you will have access to your custom Favorite from the Themes menu.
Adding content to your DVD project
iDVD 6 will accept all QuickTime formatted material except for MPEG 2 files, QuickTime VR movies, Sprite movies or Flash tracks. You can use material from Final Cut Pro, Final Cut Express and iMovie. Photos from iPhoto and music from iTunes as well as AAC, MP3, and AIFF audio files. Images and photos from graphic applications like PhotoShop are supported.
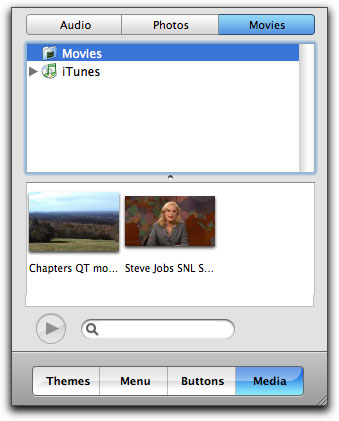
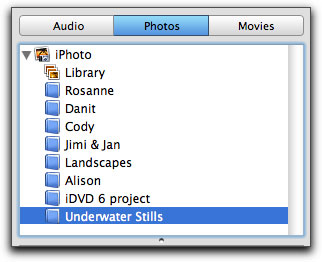
You can select your assets in the iDVD window, Media pane which has three tabs, Audio (iTunes), Photos (iPhoto) and Movies (iMovie) and drag into the iDVD menu window. In addition, you can import or drag asset from the Finder into iDVD.
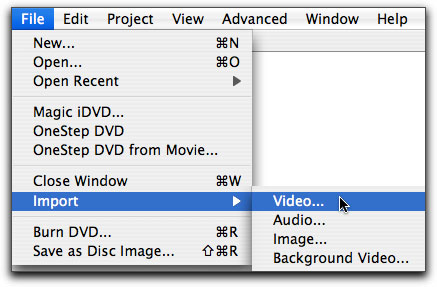
As you start to drag your movie, being careful not to hit any drop zones, hold down the Option key which will open a popup window, select 'Add movie'.
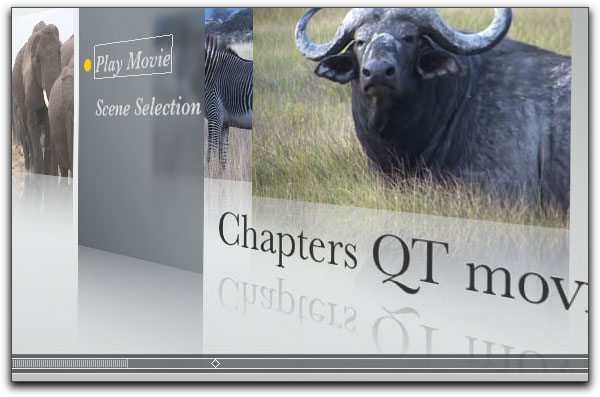
The QT movie that I am working with was exported from FCP with attending chapter markers. In the iDVD Prefs, Movies tab, I have "Create chapter submenus' turned on. After dropping the QT movie into iDVD three things happen. Two buttons are added to the dark gray panel in the template, Play Movie and Scene Selection and the default name of the template "Reflection Main" has changed to the name of the QT movie that I have brought in. Each menu in iDVD can hold up to 12 buttons.
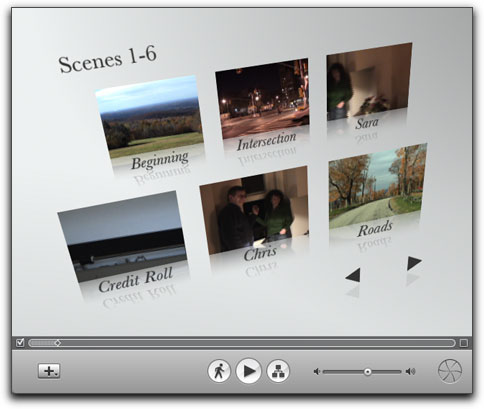
When a QT movie with chapters is added to your iDVD project, a button, Scene Selection, is added to the menu and iDVD will automatically create a new 'Chapters' menu using the Scene template taken from the Theme that you are working with (in this case 'Reflection White' below left). To move from the main menu to the Scene Selection menu, double click on the the Scene Selection link. The Chapter menu can hold up to 6 chapters (scenes). If your QT movies has more than 6 chapters, iDVD will create additional menus to display the extra chapters and will place advance and return arrows at the bottom of the menu. Just like any other menu in iDVD, you can fully customize this menu, change the template, background, button style and text attributes. You can even replace the menu audio by dragging new audio into the iDVD interface, do not use the Option key. Applied audio will assume the duration of the motion menu. The 'Fade volume out at end of menu loop' option in the iDVD Prefs > General tab, is a great new feature as it allows the menu music to fade out at the end of the loop rather than being abruptly cut off at full volume.
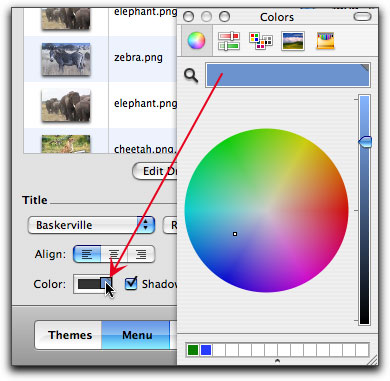
Before we add more content let's work on the main menu starting with the title. Open the Menu tab in the iDVD window. It is here in the 'Title' section that we can change the title, it's font, size, style, color and add a shadow. Double click on (or drag through) the title to select, then make your changes.
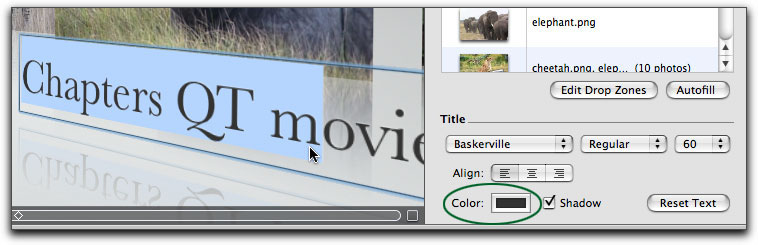
Click and drag the title to reposition it in the menu. You can change the color of the text font when selected by first clicking on the 'color' box (green circle above) to open the color wheel. Using either the color wheel or the magnifier tool in the color box, you can set your new color. I have noticed that sometimes, and not only in iDVD but other apps as well, choosing new color does not always update the color change in either the color box or in the selected text. If you click in the long thin color bar at the top of the color window and then drag the color into the color box, the color change will be made.
Next, I want to change the wording and color of the two new buttons, 'Play Movie and Scene Selection', in the menu, other changes can be made as well. Select the Buttons pane, found at the very bottom of the iDVD window.
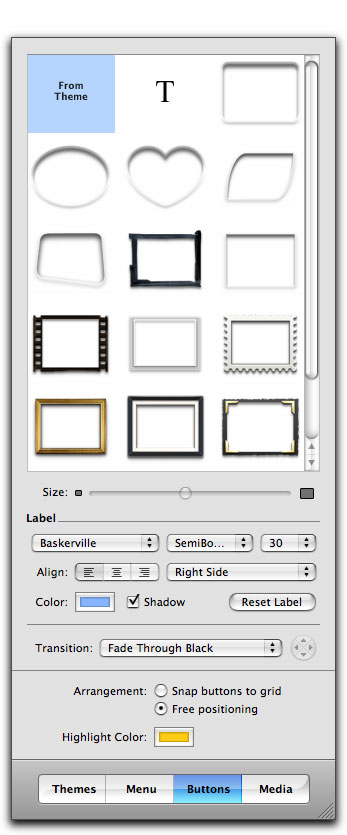
- At the top of the button pane is the 'Button Shape' section. The first item, 'From Theme', is the default setting and will be selected. Next to 'From Theme', is a large "T". Selecting this will turn the menu buttons to text only. The remaining items in this window will set different style buttons. You will notice that all of the button styles are hollow, empty in the center. When one of these button styles is used, the movie that the button links to will be displayed inside the button and will play on screen. Just below the button section is a 'Size' slider which will control the size of the button in the menu. The larger the button the easier it is to see the movie playing inside the button, if this is what you want.
- The next section down, Label is for changing the font, style, size, color and drop shadow for the text that accompanies the buttons. The 'Align' control will set the button and text flush left, center, and flush right. Just to the right is the position drop-down menu. This control is for positioning the text only (in relationship to the button): Right Side, Left Side, Above, Below and Center.
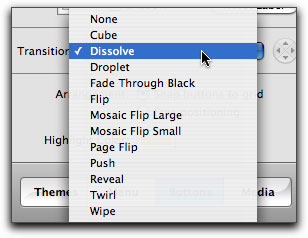
- Next is the 'Transition' menu. There are 12 different transitions to choose from and you can apply a different transition to each button, or leave it set to none. When the viewer clicks on a button, the menu will 'transition' to the button destination.
- The Arrangement sections offer two choices. 'Snap buttons to grid' will align the buttons and will keep all buttons inside the title safe zone by default. If you want to reposition your buttons in the menu, then you'll want to select 'Free positioning'. Be careful that your buttons are inside the TV safe area of the menu. You can turn on TV Safe from the View menu. If you reposition your buttons in the menu, they will still highlight in their default screen order before they were repositioned.
- The last item is 'Highlight Color'. You can change the button's highlight color which shows the viewer which button is selected in the menu.

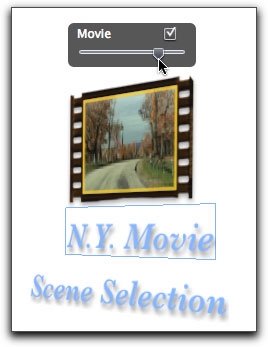
If you have chosen a button shape for your menu there are some additional controls for these buttons. When you select the button, a movie control box will appear. If you want the movie to play on the face of the button then keep the 'Movie' box checked. If you move the slider, you will be able to set an In point for the movie on the button. This would be helpful if you have a fade in from black at the start of the movie but don't want the button to be black when it starts playing. It could be that you just want a different starting point for the movie. If you uncheck the 'Movie' box the button will display a single poster frame on the button. Using the slider, you can choose which frame you want on the button. To fine tune your selection, movie or poster frame, you can use the left and right arrows on your keyboard to move a frame at a time. You can use a different button style for each button on the menu but I'm not sure why you would want to do this. Each menu in iDVD can hold up to 12 buttons, but you might be hard pressed to place 12 different buttons within the TV Safe area.
SlideShows
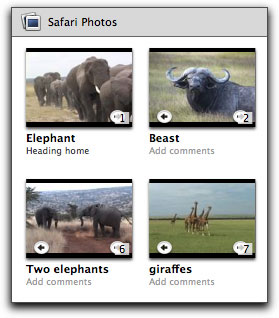
Several new features have been added to Slideshows in iDVD 6. The 99 photo limit per slideshow has been lifted, a slideshow can now hold up to 9,801 photos (don't ask). It is now possible to add both a title and comment to each photo in the slideshow. To create a new slideshow, click on the "+" button at the bottom of the menu window, choose 'add Slideshow'.
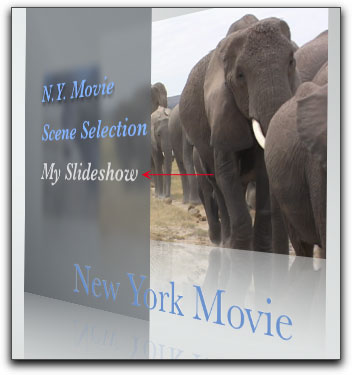
This will add a new 'My Slideshow' button to the menu. You can change the slideshow title, font, color, position, etc.
To open the Slideshow Editor, double click on the slideshow button. There is another way to navigate through your iDVD project called 'Map' view which I will cover later. To populate your slideshow you can drag photos or folders from the Media tab > Photos in the iDVD window, drag and drop from the Finder as well. To remove a photo from a slideshow, select the photo and hit the delete key.
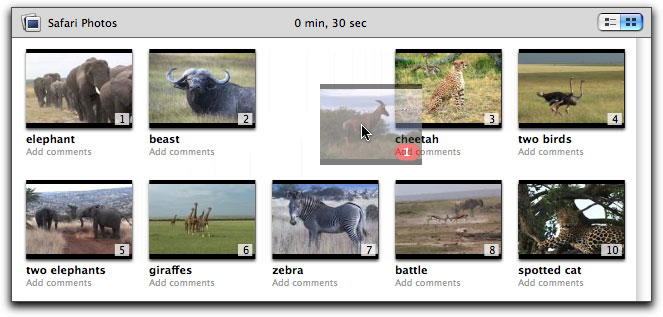
The Slideshow window is shown below. At the very top left of the Slideshow window, is the slideshow icon and slideshow name. Middle top is the slideshow counter showing the duration of the slideshow. Top right is the View icon which offers two different views of your photos in the slideshow editor. Bottom left is Slide Duration and Transitions. Both the duration and transitions settings are applied to the entire slideshow; you can not apply different durations or transitions to different photos in the show. Just to the right of Transitions is a circle with four directional arrows, which can be used to change the direction that the transition is applied. This direction icon will be grayed out for those transitions that are not applicable. BTW, when you add transitions to your slideshow you will notice that the duration of the slideshow is increased to account for the time that the transitions use.
Bottom center is the audio well, you can drag audio from the Audio (iTunes) section in Media pane or from the Finder. AAC, MP3, and AIFF audio files can be used. Just to the right is the 'Slideshow volume' slider which is used to 'normalize' or adjust the volume of the slideshow to match the volume levels of other elements in your DVD. Be careful not to crank this slider all the way up as it could cause audio distortion in the final DVD.
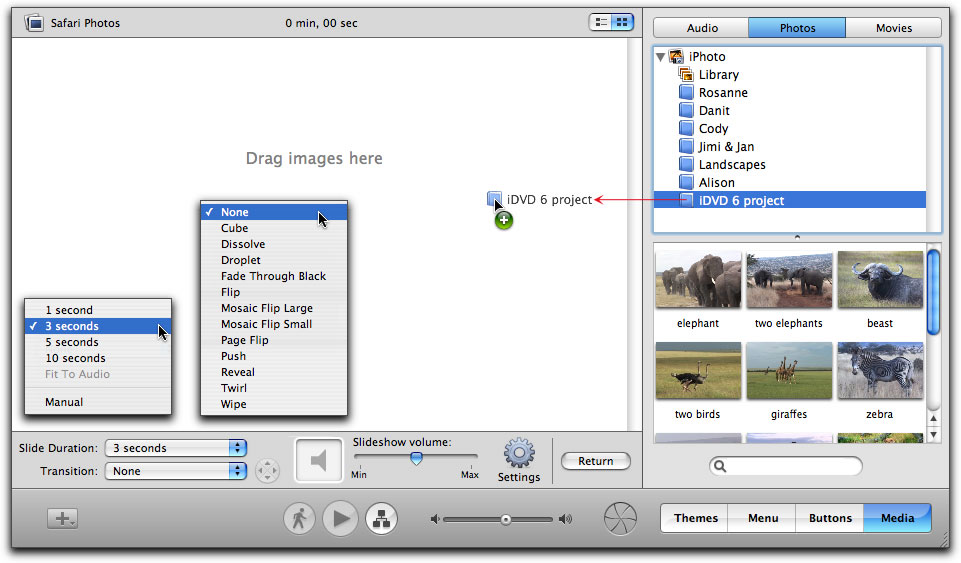
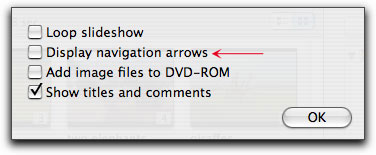
Next is a Settings button which offers additional controls of the slideshow (below left). If you want your viewer to be able to manually advance through the slideshow there are two settings. From the Slide Duration drop down (above left) choose 'Manual', from the Settings button check 'Display navigation arrows' (below left red arrow). Directional arrows will be displayed at the bottom of each photo that can be used in conjunction with the DVD remote control. Arrows will also be added to the photos in the Slideshow editor to note that the manual advance option has been set. The last item on the right is a 'Return' button, used to take you back to the menu that links to this slideshow.
After the photos have been added to the show, you can reorder the position of the photos by dragging the photos to change the order.
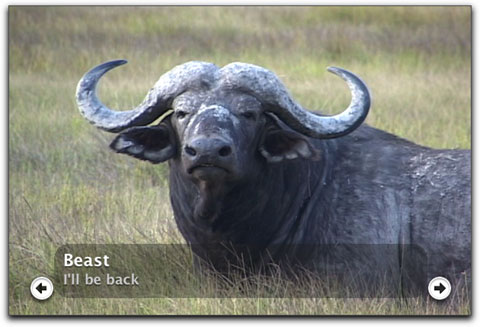
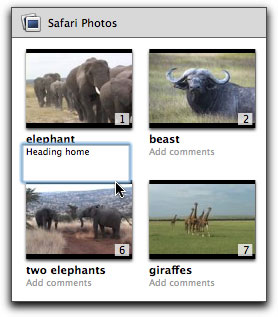
In the slideshow editor, click on the photo title or 'add comments' to change or add text. It should be noted that while you can change the text or add comments you can not change the style of the text even though these options appear to be active in the Menu tab of the iDVD window. Font, color and size, what you see is what you get. Titles and comments add a degree of sophistication to slideshows, nice touch.

Map View
Map View in iDVD 6 has been greatly enhanced and has become a very powerful tool in the DVD creation process. Map view is a flow chart that shows the relationship and connections between the different elements in the DVD. Not only can we see the organization and flow of our DVD, but in Map view we can modify the entire project. We can add or delete menus, submenus, movies and slideshows and move these elements to different positions in the DVD order. It is possible to make the DVD 'autoplay', add or change themes, transitions and even buttons, in short, it is possible to build an entire DVD in Map view. In addition, Map view will show an 'Alert' or warning if there is problem with the DVD. Placing your cursor on the alert icon will display a tool tip addressing the issue.
To open Map view, click on the Map icon, shown below blue arrow. When map view opens there are two display options (green circle below), horizontal and vertical. There is a size slider (green arrow below) used to adjust the size of the map icons, when the icons become large enough, additional information is displayed. New to iDVD 6 is the ability to enlarge the entire iDVD interface. Bottom right corner of the iDVD interface is a 'drag handle' which can used to expand the interface to full screen. This new feature is extremely helpful when in Map view and you have a complex project, as enlarging the interface also enlarges the Map view window, enabling you to see and work with the entire flow chart. To the far right is the return button to take you back to the main iDVD interface.
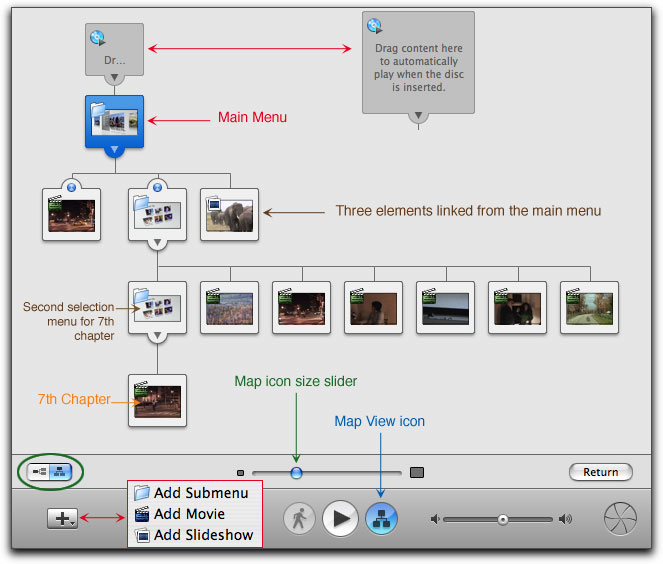
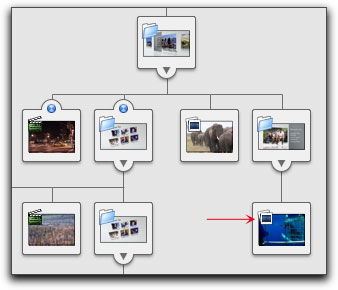
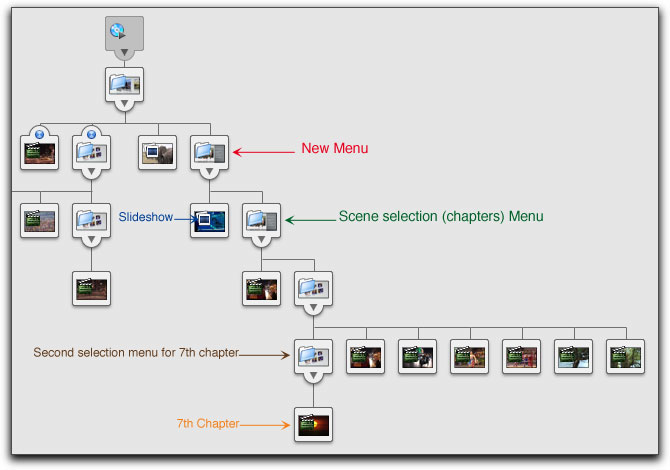
The Map view shown above is for the project that we have built so far. At the very top is the 'Autoplay' element which we are not using for this project. Next down is our main menu which at this time has three buttons. Map view shows us the destination of each of the three buttons flowing down from the main menu. On the left is play movie, in the center is the chapter (scene selection) menu and to the right is the slideshow. Flowing down from the chapter menu (center) are the first 6 chapters of the QT movie. Because this movie has 7 chapters and iDVD can only host 6 chapters per menu, there is an additional chapter menu which links to the 7th or last chapter.
The most powerful new feature of Map view is that it can be used to add, delete and change the structure (flow) of a DVD. At this point I have three buttons on my Main menu. Play movie, Scene selection (chapters) and Slideshow. I have decided that I want to add an additional movie, with chapters, as well as a second slideshow. However, I do not want to add these items to the main menu but rather want to create a new 'submenu' for these new items.
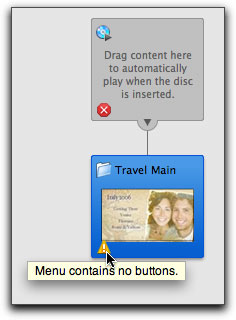
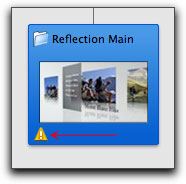
In Map view, click on the "+" drop down and select 'Add Submenu'. If you have just one menu in your project, iDVD will add the submenu button (link) to the existing menu. If you have more than one menu, first, select the menu that you want to link to the new submenu to, then click on 'Add Submenu'. It should be noted that when we add a submenu, iDVD will apply the third template called 'Extras' from our chosen Theme, Reflections White. Of course you can change this template in any way you want or even choose a different template (from any Theme). I have added a new submenu shown below right. Placing the cursor on the Alert in this new menu will show a tool tip saying, "Menu contains no buttons".
To add a new slideshow to the new menu, open the Media pane in the iDVD window and select the photo tab. Drag the slideshow from iPhoto on to the new menu, below left. Below right, the slideshow has been linked to our new menu. You will notice that as the new menu now has a button (link) to a slideshow, the alert icon has disappeared.
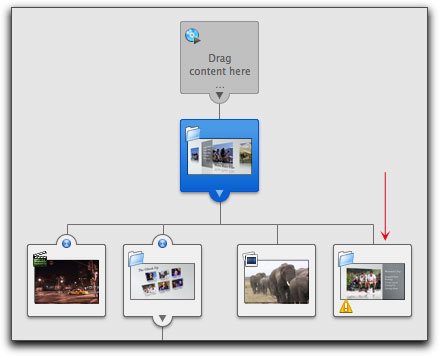
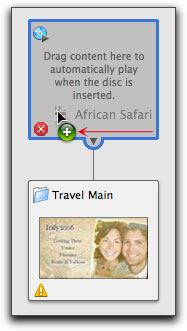
Next I want to add the 'African Safari' movie (with chapters) to the menu. In the iDVD window, change from the Photos tab to the Movie tab and drag the new movie into the menu.
Map view now shows the newly added elements. The new menu, red arrow below, with three links. Play Movie, Scene Selection (menu) and Slideshow. Again, because my movie has more than 6 chapters, iDVD will create a second chapter menu for the 7th chapter.
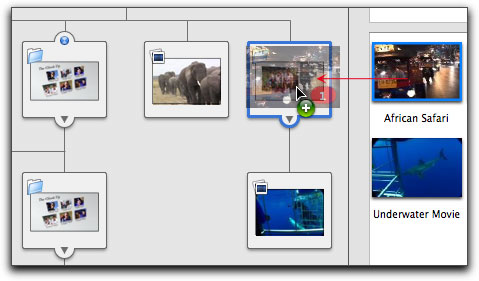
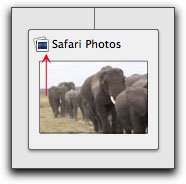
In Map view it's easy to add elements and you can remove any element(s) by selecting, then hitting the delete key. But Map view is more powerful than this. When I first started with this project I created a Safari slideshow linked from the Main menu, but now, I want to move the Safari slideshow to my newly created menu.
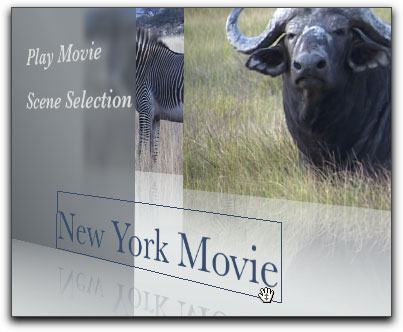
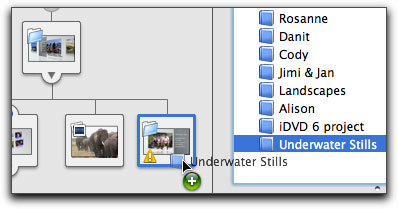
To move the Safari slideshow from the Main menu to the new submenu, click and drag from it's existing location onto the new menu. When the submenu displays a blue selection box, release the mouse button. It's as easy as that. iDVD 6 will make all the changes necessary and will re link the menus and buttons to their new locations.
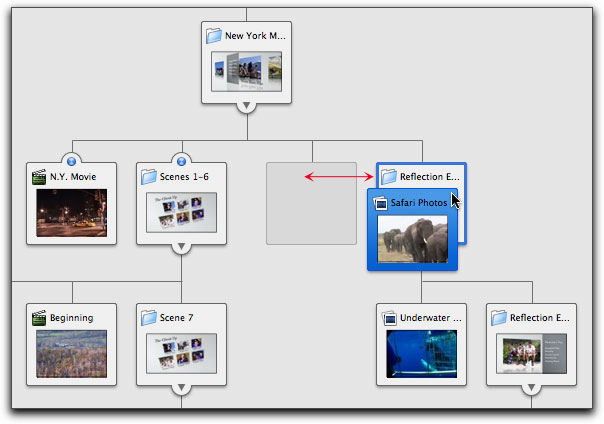
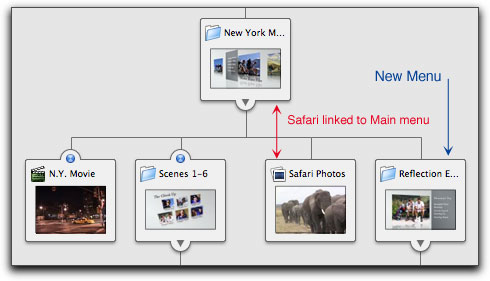
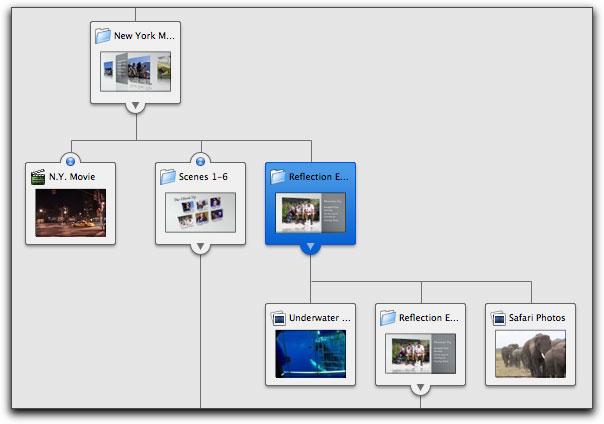
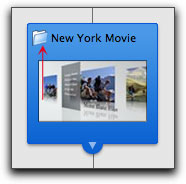
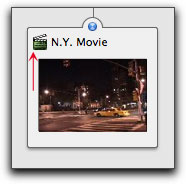
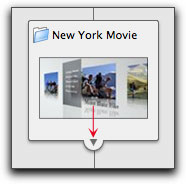
Above you can see that there were four elements attached to the Main menu (N.Y. Movie) and only two elements attached to the new menu (Reflections Extras). After dragging the Safari slideshow to its new location (shown below), there are now three elements attached to the Main menu and three attached to the new menu. Powerful stuff.
There is additional functionality in Map view. For example, you may want to apply, change, or remove a transition from the buttons on a menu. The buttons in the new menu, Reflection Extras, have no transitions. Note the absence of the transition Globe icon at the top of the three elements connected to the new menu.
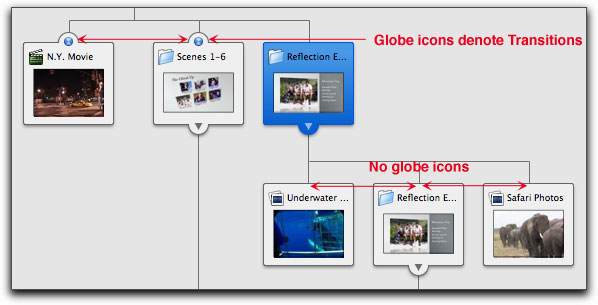
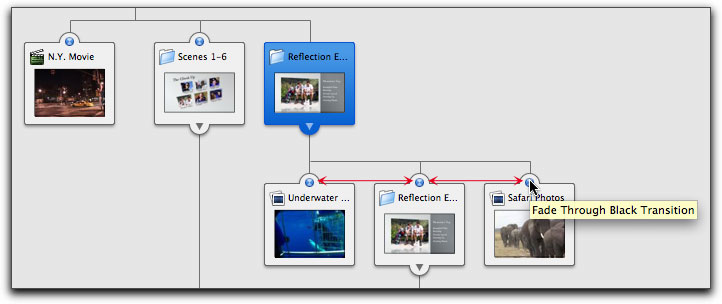
With the new menu selected, click on the Buttons pane at the bottom of the iDVD window. From the Transitions drop down, select Fade through Black. You can see below that the Transitions icon (Globe) has been added to the top of the three elements connected to the menu (red arrows below). Placing your cursor onto the Transitions icon will display a tool tip with the name of the transition. When you apply, change or remove a transition in Map view, the change is applied to all of the buttons on that menu. If you want to have different transitions for the different buttons, then you must return to the menu window and set each button transition separately.
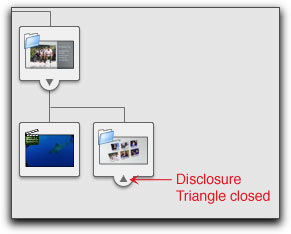
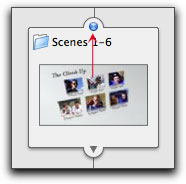
As your project grows in size with a number of menus and submenus, chapter menus, etc, Map view can become equally complex. At the bottom of each menu is a Disclosure triangle, clicking on this triangle will collapse the section for easier viewing. Clicking on the Disclosure triangle again will re open the section.
When in the standard iDVD interface, moving from one menu to another to work can be difficult with a complex project. Navigation is yet another function of Map view. Open Map view and double click on the menu you want to work with; this will open the menu in the iDVD interface.
Map view makes extensive use of icons which provide important information about the different elements in the DVD project. One icon is a little strange, the use of a 'folder' icon to denote a menu.
Autoplay icon |
Loop icon |
Menu icon shows as folder |

Menu icon |
Clap stick icon for movies |
Slides icon for slideshow |
Globe icon denotes a transition |
Disclosure triangle collapses sections of the map. |
Menu contains no buttons |
Current project contains no movies or slideshows |
Creating a 'Autoplay' DVD in Map view
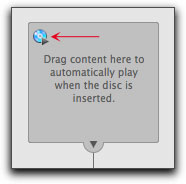
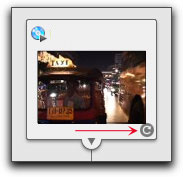
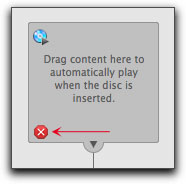
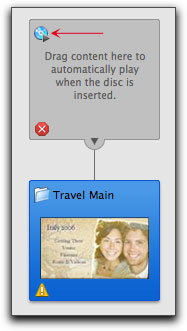
To create an autoplay DVD, open a new project and enter Map view. When Map view opens there will be two elements. At the top is the project element, 'autoplay' is denoted by the small DVD icon with pointer, red arrow below left, then just below is the first or main menu. Note that there are two 'caution' alerts, one on each element. Drag your QT movie into the autoplay element, below right red arrow. To remove the autoplay movie, simply drag the movie out of the project element.

Auto Fill
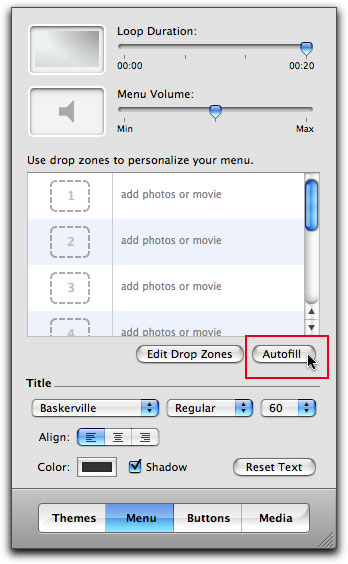
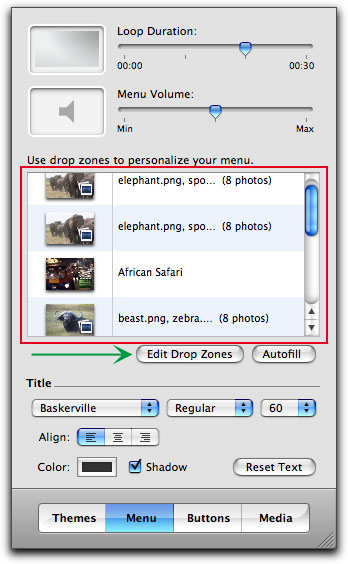
Many of the iDVD menus have drop zones and until now it has been necessary to place pictures or QT movies into the drop zones manually. Auto Fill is a new feature in iDVD 6 that will automatically fill all of the DVD projects drop zones for you. After you have built your iDVD project, added your QT movies and built your slideshows, clicking on the Auto Fill button will cause iDVD 6 to populate all of the drop zones by randomly taking freeze frames from QT movies and photos from the slideshows. As the drop zones will be filled with images taken in a random process, you may wish to change some of the images that iDVD has selected for you. Easy, you can edit, add, or delete images in the drop zone window, red box below right, or click on the 'Edit Drop Zone' button, green arrow below right, in the Menu pane which will open the Drop Zone editor dashboard.
Project Info
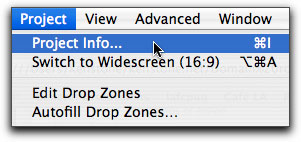
iDVD 6 is drag and drop, all of the complex DVD issues are hidden away from us, which is why iDVD is so easy to use. However, as the both the application and the application user have gotten more sophisticated, there is now more of a need to look under the hood, so to speak, and to have access to pertinent information regarding our iDVD projects. This information is now available to us. From the Project menu, select Project Info.
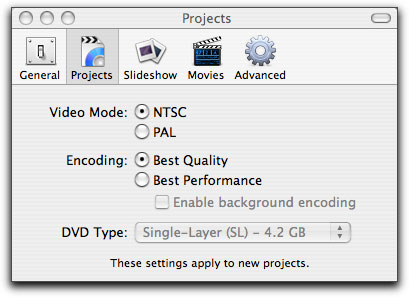
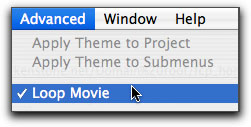
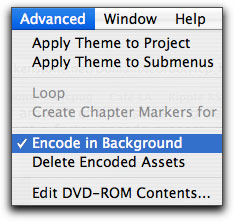
The Project Info window, shown below, is pretty much self-explanatory. The top section left hand side has the DVD project settings; Disk Name, Video Mode, Aspect Ratio, Encoding options and DVD Type. The Encoding section will be set based on the selection you made in the iDVD Prefs, Project tab. As it says in the Prefs settings box (shown to the right), "These settings apply to new projects". So, once you have opened a project, changing the Encode settings in the iDVD Projects Prefs will have no effect on your open project. You can change the Encode option here in the Project Info window. If you selected 'Best Performance' (60 minutes or less) with 'Enable background encoding' before you opened your new project, as you add assets to your project, iDVD will begin encoding in the background. The progress of the encoding will be displayed as a blue progress bar at the bottom of the Project Info window. If you selected Best Quality before opening the new project, iDVD will not begin the encode process until you have completed your iDVD project and have clicked on the Burn button. For Best Quality, iDVD needs to wait until you have finished and it knows the total amount of the assets in order to pick the highest encode settings for your DVD. If you had selected Best Quality in the Prefs and now want a faster encode process you can switch from Best Quality to Best Performance, however, background encoding must be enabled from the Advanced menu > 'Encode in Background'. When you change encode settings, iDVD will tell you that it will re encode the assets. Last on the left is the DVD Type drop down which is grayed out as I do not have a dual layer DVD burner, so this option is not available. In the top right section, Project info shows Project Duration in minutes. Next is the DVD Capacity total, if you click on the text to the right of the green bar, it will change from displaying gigabytes to displaying minutes, green box below. Usage of Motion menus, Tracks and Menus are shown next.
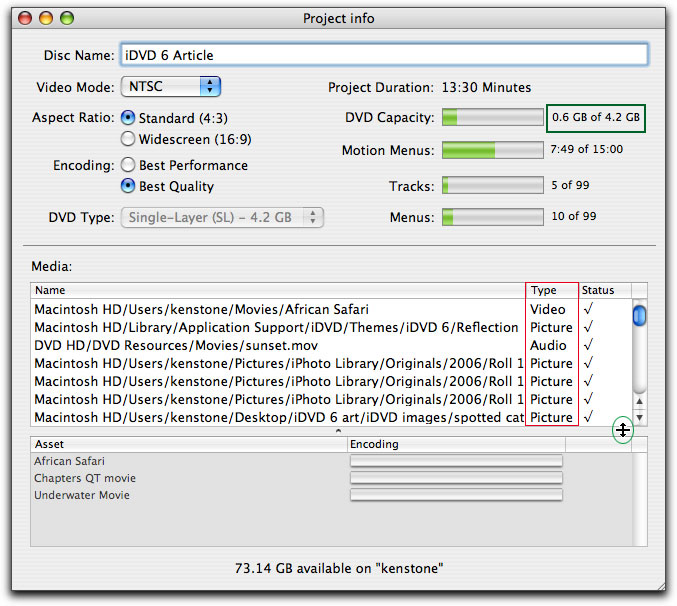

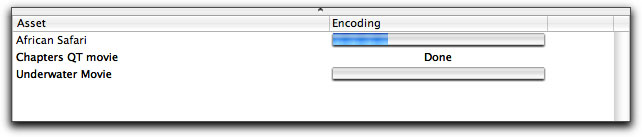
The Media section lists all of the assets used in your DVD. This is a list only and can not be modified. You can not delete or add assets in this window, it's informational only. The type of asset is shown, red box above. The status of each asset is also displayed, a check mark shows that the asset is accounted for. If you have moved an asset after bring it into iDVD, there will be no check mark telling you that the asset is missing. To see all of the assets in your project, you can enlarge the Media window with the up down arrow, green circle. At the very bottom of the Project Info window is the available space on the hard drive. This is important information, as large iDVD projects (90 - 120 minutes) can create huge files and you could need to have at least 10 gigs of open space for this work. If you do not have enough open space on your drive, the encode and build process will fail. These files are contained in your iDVD Project file and if you are short on drive space and have a second hard drive, when you first create your iDVD project, 'Save' your project to this second drive.
The information supplied in the Project Info window is invaluable. It is essential to know how much space your iDVD project has used and if you have exceeded any track or menu limits. If you are wondering why the two slideshows in this project are not shown along with menu and track info, this is because iDVD converts slideshows to video tracks, so they are included in the Track bar along with the video tracks.
Previewing your iDVD project
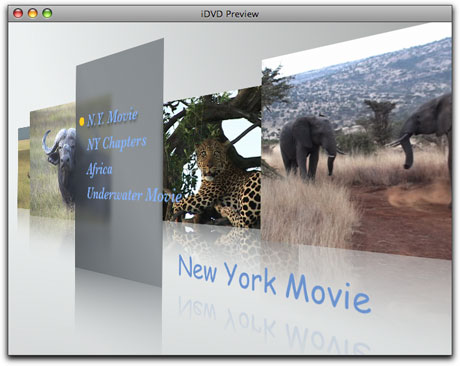
As you are working on your iDVD project and certainly when you have finished you will want to preview your project. To view and run your DVD click on the 'Preview' button, below red circle.

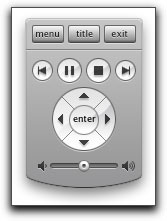
When you click on the Preview button, the iDVD interface window goes away and is replaced by a player window with on screen remote control. Use the remote control to navigate and test your DVD, when done, click on the Exit button to return to the iDVD interface. It is important to remember that previewing your DVD in this manner is only a simulation. None of the assets used in your project, QT movies, stills, audio, links, etc have yet been converted to the DVD format. Checking the functionality of your DVD using Preview is not 100% fool proof. iDVD can create a disc image, and because a disk image is a virtual version of a fully process and completed DVD, creating a disk image and testing before you commit to burning is the most reliable way to test your DVD. I will cover this process in the Burn section that follows.
Burning a DVD
iDVD 6 can burn to, DVD-R, DVD+R, DVD-RW, DVD+RW, and DVD+R DL (Double Layer) media. When you have finished your DVD project, burning it to disk is as easy as clicking on the Burn button.


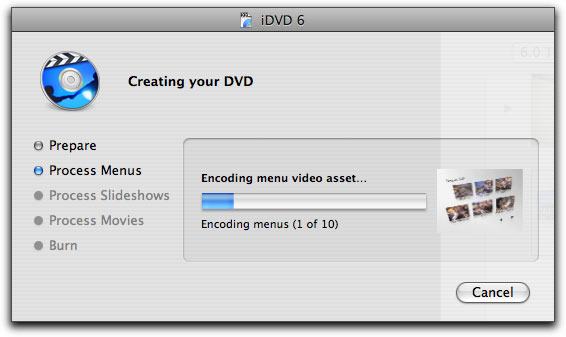
As iDVD builds and burns your disk it presents you with a progress window.
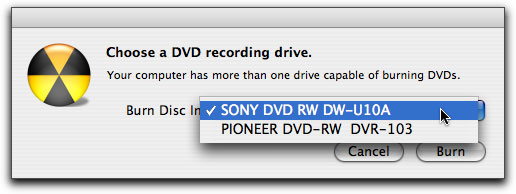
New in iDVD 6, third party DVD Burner support. You no longer are required to have a Superdrive installed to use iDVD, as it will now see and burn to other burners (excellent).
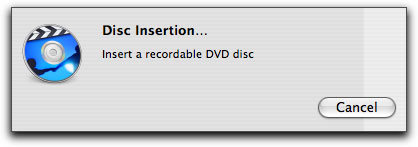
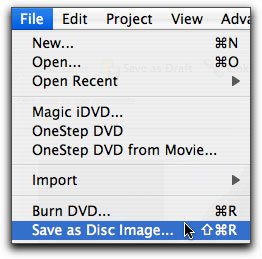
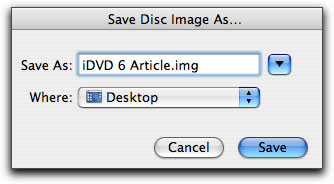
Previously I mention that there is another way to burn your DVD and have the ability to thoroughly test your project before committing to disk. We can do this using the 'Save as Disk Image' command from the File menu. When you 'Save a Disk Image', iDVD will go through the same process of building your DVD, with the same progress window displayed when you use the Burn button in the standard iDVD interface. Even though the last item in the list says 'Burn' and the radioactive burn button is spinning, don't worry, it won't, it will create a disk image.
The real advantage to creating a disk image is that a disk image is a finished product and is exactly the same as a burned DVD (minus the plastic), your Mac won't know the difference. Using a disk image is a much more reliable way to test your DVD project than using Preview in iDVD (or even Simulator in DVD SP). After you have completed building your disk image it will be placed on the desktop, below left. To test the disk image, first open the Mac DVD Player. Then double click on the disk image which will open the DVD project in the Player and will also mount the disk image on the desktop (below right), this may also open a DVD folder as well, just close the folder window. Test your DVD.
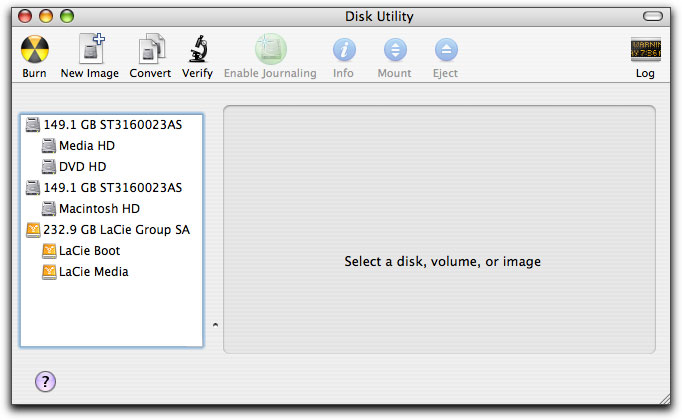
I have found using Disk Utility in Tiger to be an extremely reliable way to burn disks and I use it for both iDVD and DVD SP. Open Disk Utility.
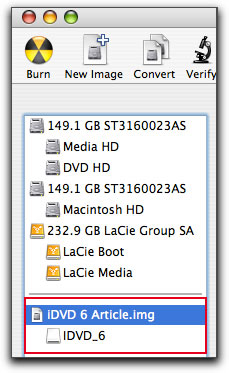
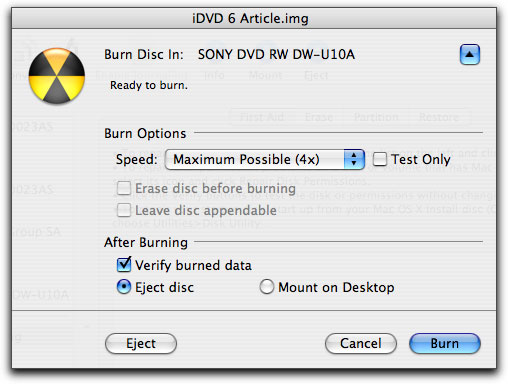
Double click on the Disk Image on your desktop, this will add the disk image to the left hand column in the Disk Utility window. Select the disk image (iDVD 6 Article.img) on the left. The Burn button in the Disk Utility tool bar will become active, click on it. You will be presented with burn options, choose your options and click Burn.
When you have successfully burnt your DVD you can delete the iDVD project and keep the Disk Image if you think that you might need to burn additional copies. It could be that you might need to move your iDVD project to another Mac for further editing or burning. From the File Menu > Archive Project, which will package up all of the elements and assets and prepare them for moving. This process can take awhile for larger projects.
Magic iDVD
Authoring a DVD in iDVD is pretty simple, but it just got even easier. New in iDVD 6 is 'Magic iDVD'. Magic has one super simple window, drag ... drop ... done. All you do is select your Theme, drag in your assets and click burn. Magic will assemble the DVD project, create a Main menu and all required submenus, and 'scene selection' menus . Additionally it will create your slideshows, fill all of the drop zones (selecting from your movies and photos) and create all the necessary buttons. Magic has it's own special window. For those of you who are fans of the Matrix movies, you might consider this window to be the 'Construct', it's where everything gets loaded.
First give your DVD a name and choose a Theme for your DVD. Below there are two sections into which you can drag your assets. The 'iDVD window', on the right, as been greatly simplified from the version found in the regular iDVD interface. With Magic iDVD, the iDVD window is actually the media pane from which you will drag your assets. As always, you can drag from the Finder into Magic iDVD as well. You can used up to 7 QT movies in Magic, if your movies have chapters, Magic will create 'scene selection' menus for your chapters.

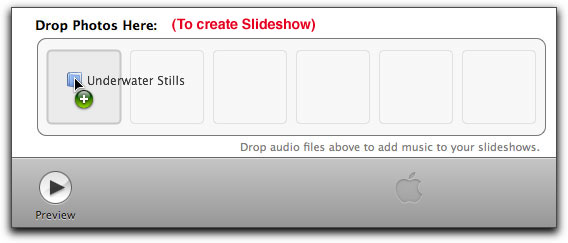
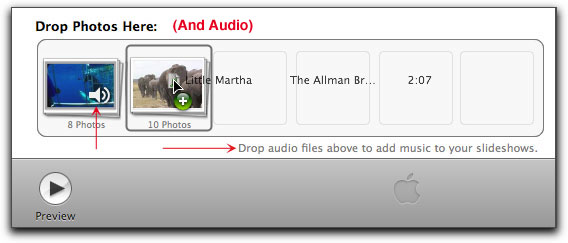
The "Drop Photos Here" is a bit of a misnomer, should read 'Drop Photos here to create Slideshows'. This section is for creating slideshows and you can create up to 7 of them. Drag an Album from iPhoto, a folder from the Finder, you can even drag the photos in one at a time. Magic will automatically add transitions to your slides shows for you.
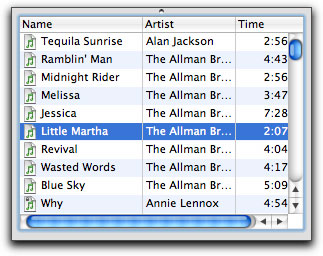
You can add audio to your slideshows by dragging music from the Audio tab onto each of the slideshows. Slideshows that have had audio added will display a 'speaker' icon. If you want to change the audio that you have already added to a slideshow, simply drag your new audio onto the slideshow to replace the existing audio.
When you have added your assets to Magic, you can click on the Preview button (green box below) to open the standard iDVD preview window with remote control (click on 'Exit' to return to Magic). If you are happy with the project you can click on the Burn button and Magic will take over and build and burn your DVD. Because Magic does everything for you, you might want to 'tweak' your project. For example, you might want to change the slideshow transitions that Magic has selected or delete them completely. If you click on the 'Create Project' button (blue box below), iDVD will close Magic and open up your project in the standard iDVD interface where you can make all of your final changes. Once you have opened the project in standard iDVD there is no way to return to the Magic interface. When working in Magic you will note that in the iDVD menu bar, all items are grayed out. Unless you have picked an older theme that exists only as 4:3, it appears that Magic defaults to creating a 16:9 widescreen DVD and I can see no way in Magic to change this, it will be necessary to 'Create Project' to open your DVD in the standard iDVD interface where you do have the option to change the DVD aspect ratio back to 4:3. There is a caveat with Magic iDVD, there does not seem to be a way to save your project when in Magic iDVD. The Save option is grayed out in the menu and if you close Magic, it's gone. If you need to save your work you will have to switch to the standard iDVD interface (Create Project) and then save it from there.

Summary
iDVD 6 is filled with new features, the new Widescreen (16:9) menus are gorgeous and are the wave of the future, even if we have to wait until the hardware world, DVD players and widescreen TVs, catches up to iDVD 6s abilities. Other new features, Magic iDVD, Slideshows with text and comments, third party burner support, drop zone auto fill, volume control for menus and slideshows, add functionality that greatly enhance the ability to produce professional DVDs. More to the credit of the people who created iDVD 6, even the older features that came in earlier versions of iDVD have been improved and refined. What iDVD now offers are different levels of both sophistication and ease of use. OneStep DVD, where iDVD will pull video from your camera and go directly to DVD, Magic iDVD, a simple and easy one window set up for quickly building a DVD and the standard iDVD mode which allows great design flexibility. The best news of all, it all works.
Enjoy,
--ken