
White Paper - SuperDrive Installation May 6, 2002
White Paper - SuperDrive Installation May 6, 2002
Installing A SuperDrive in a G4
Updating your G4 CD/DVD-rom drive to the SuperDrive
By Vince Hubbell
Having spent the last few years working in ProTools and Final Cut Pro,
I've run into the same problem over and over again - where to store my finished
projects. As a musician I have found that a ProTools master file for one small song can run as high as
1.6 gigs.
I'm currently working on a 2 year old G 4 450 with a CD/DVD
Drive. When I found that I could replace my old CD/DVD-rom drive with a
Pioneer DVR-104 DVD-R/CDRW combo drive, for $379.99, I knew I had
found my storage solution.
The first thing I did was upgrade my system from 9.0.4 to 9.1, an
absolute necessity for running the internal, DVR -104 Superdrive. The
new Toast 5, Titanium, by Roxio cost $89.95. To upgrade to the new drive no additional cables or hardware is required. It's important to
realize that we are only switching out one drive for another and will use the existing cables.
Prior to installation I'd gone online for tech support and found very little in the way of
tech or support. I
decided, with a little nudge from my friend ken stone, to attempt an
instructional article taking
digital photographs as I progressed.
Before you open the G-4 's case, unplug the computer from the power
outlet. I found that unplugging everything else from my computer was
additionally helpful as I could then move my G-4 onto an uncluttered work
surface (my desk is not that). Laying down a towel will prevent
scratching the exterior of the Mac case while it is open.
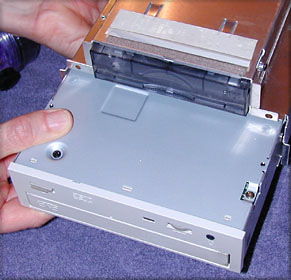
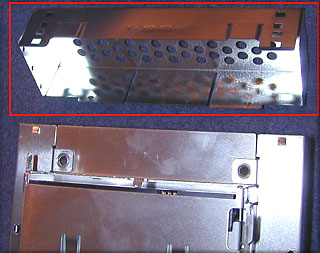
The DVD/CD-ROM and Zip drives are housed together in a shared carrier.
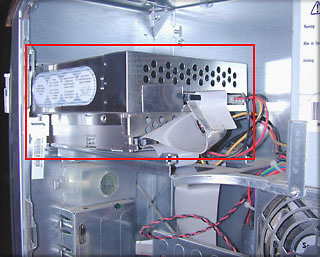
Carrier housing DVD/CD-ROM and Zip drives shown inside red box. |
Find the IDE ribbon cable that is attached to both the CD/DVD-ROM and Zip drives. Remove the cables that are attached to these drives, including the individual power cables.
Next, you need to remove the faceplate that covers both drives on the front of the Mac. There are two clear plastic tabs on the inside of the case that secure the faceplate, (shown below, red arrows).
These tabs are designed to unlock by squeezing both tabs, at the same time, in towards the drives, then pushing out to the front of the computer. There is no need to be overly forceful. These are fairly long tabs and must be pushed out almost entirely from the inside of the Mac's case. On the front of the Mac, the faceplate is held in position on the left side by two small stationary tabs. Do not attempt to swing the faceplate completely open; rather, wiggle the faceplate up and down until it comes off.
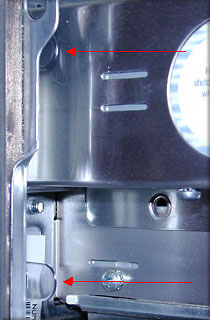
With the face plate removed, you will find two screws (shown below, red arrows). With a #2 Phillips head screwdriver, remove these two screws. The carrier is now free.
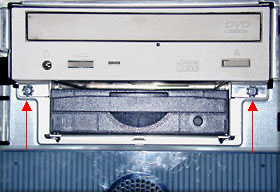
Remove the carrier by pushing it through the front of the computer where the faceplate was. It is a tight fit, push gently.
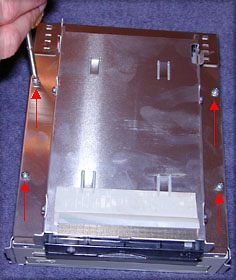
Now that the carrier is free of the computer you can remove the CD/DVD-ROM drive from the carrier. Turn the carrier upside-down so that the Zip drive is on the top. You are now looking at the bottom of the carrier. There are four mounting screws, (shown below), that you will need to remove. Once the screws are out, simply slide the CD/DVD-ROM out of the carrier (shown below).
Before installing your SuperDrive you will need to set your jumpers to the appropriate Master or Slave setting for the IDE channel. Since the SuperDrive is replacing the drive that you have just removed, flip the removed drive around and take note of how the jumper is placed. I found that the number of pins was different on each drive. The diagram above the pins will help you in the placement of the jumper.
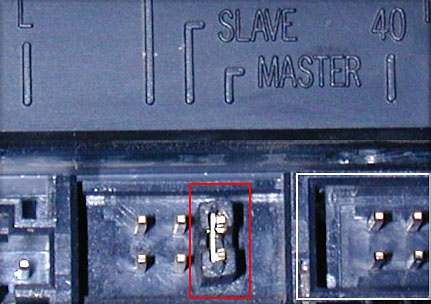
Old CD/DVD-rom drive. Red box shows pins for Master/Slave. White box shows ribbon cable pins. |
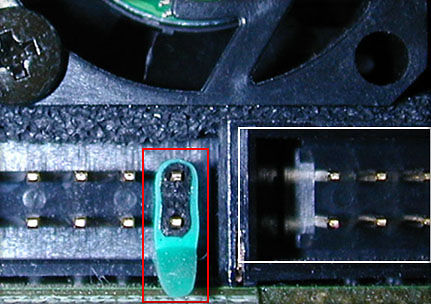
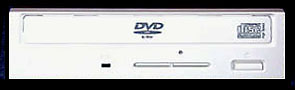
New DVR-104 DVD-R/CDRW drive. Red box shows pins for Master/Slave. White box shows ribbon cable pins. |
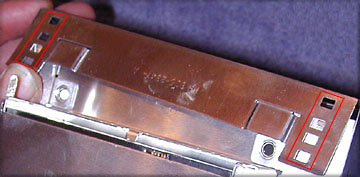
Before you install the SuperDrive into the carrier, to avoid frustration, you will want to remove the back of the carrier.
Back plate of carrier, red box. |
I found that my SuperDrive was slightly longer than the CD/DVD-ROM that I had just removed and the the mounting screws no longer lined up. Not to worry. The carrier is adjustable. You won't need any tools. On both sides of the carrier at it's rear you should see four rectangular slots, one of which has a tab in it. Lift the plate over the tabs and lean the rear of the carrier away (shown below).
4 rectangular slots, each side, red boxes. |
Now you can install the Superdrive and easily realign the mounting screws.
Once the screws are snug you can replace the rear of the carrier. Give it a test pull to ensure that the tabs at both sides are properly seated.
Before you reinsert the carrier, it would be a good idea to reconnect the individual power cables and the IDE ribbon cable.
Now reinsert the carrier. The mounting screws that you just replaced are what made the drive so difficult to remove from the computer in the first place. I found that getting low and looking under the carrier, I could see two slots (below, red arrows). By slightly elevating the carrier, the mounting screws fit cleanly through the slots, allowing the carrier to be reseated without wiggling or the use of a pry-bar.
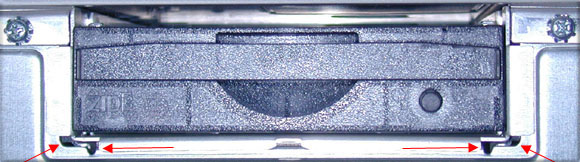
Red arrows point to the two slots through which you slide the carrier. |
Now you can slide the carrier and drives all the way in. Replace the two screws that sit behind the faceplate and replace the faceplate itself, left side first, then press both right side tabs, at the same time, in towards the drives as you close the faceplate. Keep the inward pressure on the tabs until the faceplate is so close that your fingers won't fit the gap anymore. Ease the plate closed.
I was surprised to find that switching out drives was not a difficult tacks. I am now burning DVDs. Great.
copyright © www.kenstone.net 2002