May 2, 2005
By Ken Stone
Okay, you have the Tiger box sitting next to your Mac and you are ready for the 'big' upgrade. You can, of course, pop the installer disk in and go at it, but there are several things that you should do before you jump in. I admit to being a bit over cautious when it comes to major system upgrades but it has served me well in the past.
Hard Drive Maintenance
Before we install Tiger we want to be sure that our Hard Drive is in pristine condition for the upgrade. There are several procedures that we can perform to insure a healthy hard drive.
-
Repair Permissions
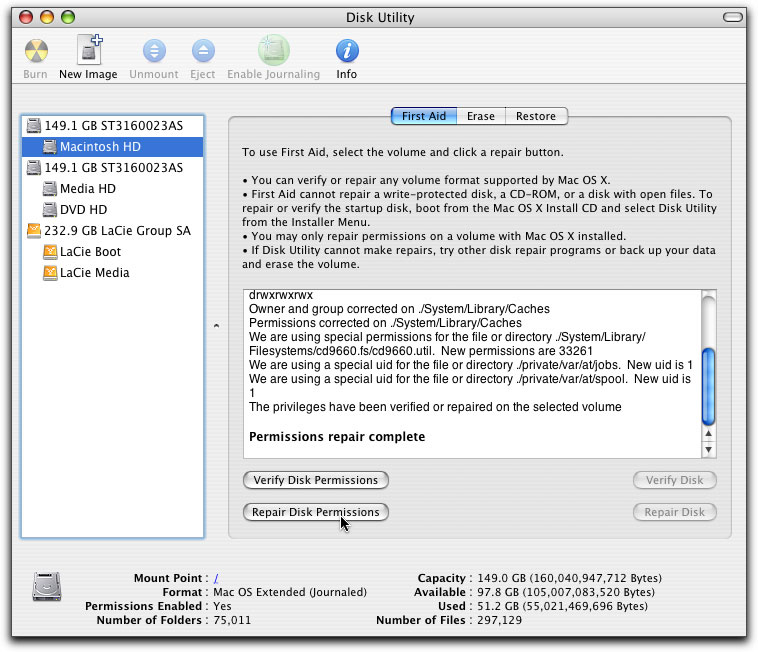
Mac OS X is based on UNIX and UNIX sets Permissions for all files and folders on our hard drives. These Permissions determine who has access to files and folders and whether they can 'read only' or 'read/write' to these files and folders. Permissions are a powerful security device that help protect our Macs from the outside world. Over time, these Permissions can get out of whack and need Repairing. Corrupted Permissions might demonstrate problems such as a slowing down of the Mac, denial of access to files and folders and other strange behaviors. Repairing Permissions is used not only for system upgrades but should be consider a standard maintenance tool for our OS. You should run Repair Permissions every week as well as after installing any software on your Mac.Open 'Disk Utility' which is found in the Utilities folder inside the Applications folder on the hard drive. Select the boot (startup) drive in the left hand column window, then click on the 'Repair Disk Permissions" button.
-
Mac Janitor
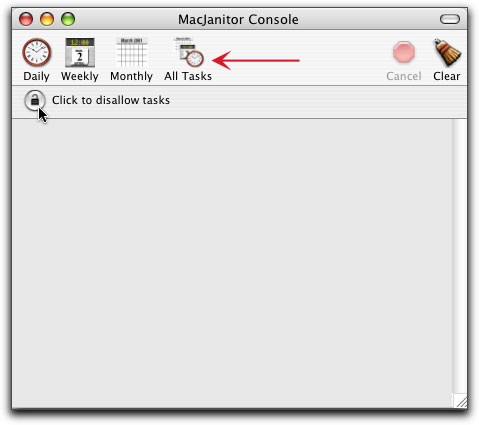
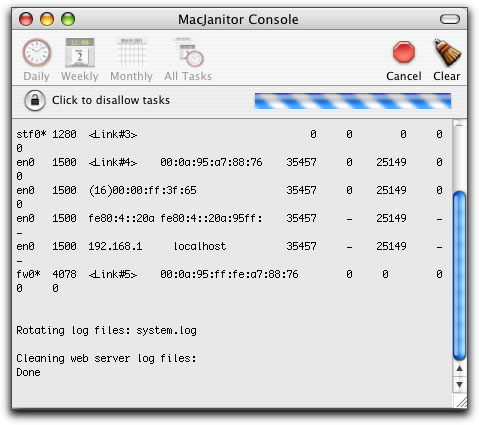
If you leave your Mac running 24/7, UNIX will perform regularly scheduled maintenance tasks on your OS during the dead of night, like the clearing log files and the system database, which can become extremely large or fail to back up properly without maintenance. However, many of us shut down our Macs at night thus denying UNIX the opportunity to do its maintenance tasks. Brian Hill provides us with the freeware application, Mac Janitor which will enable us to perform these system tasks with the click of a button.When you first launch Mac Janitor, the Console window will appear. Click on the padlock to permit Mac Janitor to run, you may be asked to enter your password. Then click on the 'All Tasks' button. Mac Janitor takes just a minute to run. Aside from running Mac Janitor for the purpose of preparing for the Tiger install, you should make the running of Mac Janitor part of your regular maintenance routine, running it every week or two.
- Cache Out X
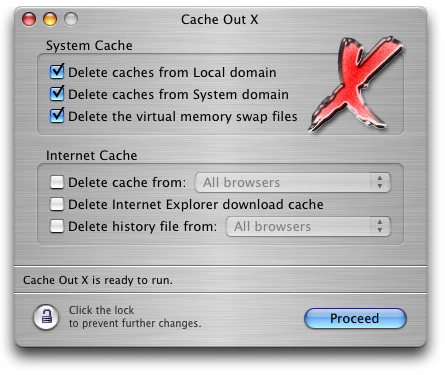
This 'Freeware' application (donations are accepted) by NoName Scriptware performs additional house cleaning on your Mac OS by cleaning out system cache files, deleting Virtual Memory Swap files, and more. Click on the padlock and enter your password. After doing this, the three items inside the 'System Cache' area will become active, click on the Proceed button. When Cache Out X has finished it will ask you to restart your Mac. For general maintenance you might run Cache Out X once a month.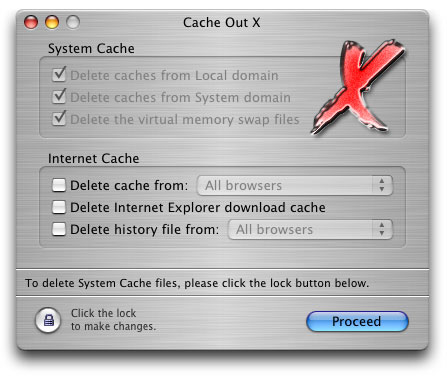
Safe Boot
Using the above procedures we have cleaned up and cleaned out our system, files and folders. There is one area left and it's important. The hard drive has a set of Directories, it is in these directories that the location of everything on the hard drive is kept. It's the directories that keep track of everything and obviously we want our hard drive directories to be in perfect working order and not just for the Tiger install.If you select your boot drive in the left hand column of the Disk Utilities window you will notice that the option to run 'disk first aid' is grayed out. This is because we can not repair a hard drive that we are booted from. However, if we start up in 'Safe Boot', Panther turns off the OS extensions (not unlike in OS 9) and is then able to run a File System Check (FSCK). To run Safe Boot, hold down the Shift key on start up and continue to hold it down until you see a large gray Apple logo and a small spinning animation just beneath. Because the OS is running a File System Check during the launch, this will be a slow process. When the desktop appears, restart your Mac to return to normal operation.
Backing up your Hard Drive
You've heard this before. There are a number of very good applications for making a 'bootable' clone of your hard drive. I have been using Carbon Copy Cloner for several years now and it has always worked well for me. But what if you don't have a second hard drive to clone to? You should still consider backing up what you can. For your most important files (your Home Directory, Keychain file, Mail program data base, FCP Project files, etc) you can burn to CD or DVD.
Carbon Copy Cloner
So how does one create a second boot drive in these days of OS X? Actually it is rather simple using Carbon Copy Cloner � by Mike Bombich. While this five dollar shareware utility is simple to use, it does more than just create a new bootable drive. It also enables you to create an exact clone of your startup drive; applications, files, folders, internet settings, preferences, passwords, etc.
So why would you want to have an exact clone of your startup drive as a backup? Several reasons actually. First would be when you are updating your system, like moving up to Tiger, or upgrading major applications when you are not sure of the outcome or are in the middle of a Project and do not want to risk encountering problems that could be caused by updating. Another reason would be if you started having problems with your main drive, even a crash, you could reboot from your clone drive and continue on with your work until such time that you could go back to the problem drive and deal with it.
Using Carbon Copy Cloner
Download Carbon Copy Cloner and place the application in your Utilities Folder found inside your Applications folder. Double click to launch. You will be presented with the 'Cloning Console'.

1. Select your Source disk and your Target disk (red arrows, below left). After selecting your Source disk The 'Items to be copied' window will show all items to be transferred, including those invisible files. If there are items that you do not want to transfer to your clone drive, select the items in the 'Items to be copied' window and then click on the red 'delete' button (red arrow, below right). Be careful here and do not delete any files that you don't recognize, they are items that your Mac needs to make a bootable disk.


2. Click on the Preferences button (red arrow, below left). This will open the Preference window. The important item here is the "Make Bootable" box (red arrow, below right) which you will want to check. In this same box, at the top, are several boxes for performing disk maintenance on the Source disk before you clone. Always a good idea. Typically I do all my disk maintenance on both the Source and Target drives before I launch CCC. In addition, just below the "Make Bootable" box, is the "Launch Disk Utility" button so that you can do your maintenance from inside CCC. When done click 'Save' which will return you to the Cloning Console window.


3. Click on the padlock (below left) and enter your Administrative Password. This will activate the Clone button (below right). There is also Scheduler dialog box if you choose to use CCC to do automatic backs for you.

4. The time that CCC needs to make the transfer will depend on how much stuff you have on your OS X drive. The process can take some time. Once completed, open the 'Startup Disk' panel from your System Preference window and select your new 'bootable' drive. Interestingly enough, even though this is an exact clone I have found that several system settings return to default, 'Energy Saver' will be turned back on and 'Software Updates' may also be enabled.
For me, having a perfect clone of my OS X boot drive, as a backup, gives me a feeling of security in this new world of OS X.
Installing Tiger
Bet you thought that we would never get here (grin).
- Insert the Tiger installer disk , when the window opens, double click the 'install Mac OS X' icon. When the Tiger window opens, click on the 'Restart' button lower right. You will be asked to enter your Password.
- After Restart, you will be presented with a 'Welcome' window > Continue. You will be asked to choose a language, then to accept the software license agreement.
-
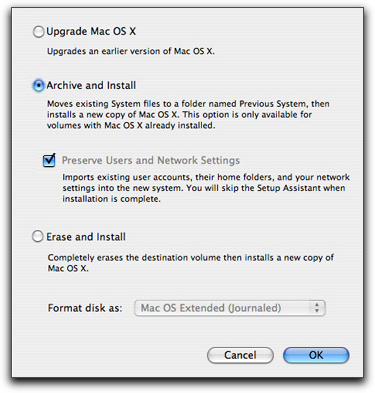
You will now be presented with a 'Destination' window in which you will select the hard drive that you want to install Tiger on to. After selecting a hard drive, click on the 'Options' button, bottom of the screen.
This is the most important part of the install process. As you are already running a previous version of OS X (10.2 or 10.3) you will want to install Tiger but during the install you'll want to have everything moved from the User Accounts into the new Tiger system. Everything, from your Address book, Preferences, Plugins, Keychain, 'Users/Shared' folder, and all Mail and Internet settings.
To achieve this first select 'Archive and Install', and then check the 'Preserve Users and Network Settings'.
Click Okay and continue with the install process. When the process has been completed, which took me about 35 minutes, your Mac will restart and launch running Tiger.
After the Install
After the restart, open your hard drive. At the Root level you will see a new folder called ' Previous Systems'. Everything that did not get moved into the new Tiger system during the install will be placed into this folder. If something did not get moved forward during the install, you can move it manually by dragging from the Previous System folder into the new System folder. When I upgraded from Jaguar to Panther, my Desktop folder got left behind (strange). All I had to do was drag the Desktop folder into the new System folder.
The first thing to do is check that your new Mac OS is running as it should. Test your Internet connection with Safari (Internet Explorer is no longer included) and check your e mail application for functionality. Then move on to testing all your applications by launching each one in turn. In rare instances you may be asked to re enter your serial number or even reinstall the application if it fails to launch. After the Mac OS install, I discovered that Motion would not launch, I had to reinstall it.
With some applications, including those that have passwords on the Keychain and iChat, you may get a dialog box telling you that the app has been updated and would you like to 'Change' (read update) your keychain.
In Conclusion
My upgrade to Tiger went well, but I found that I needed an additional restart to smooth things out and I had to Repair Permissions to get Compressor to launch, (no need to reinstall). I would suggest that you Repair Permissions on your new Mac OS. BTW, the Repair Permissions in Tiger now only takes about a minute.
When we install Tiger, QuickTime 7 Player is installed. For those of us who had QuickTime 6 Pro before the install, we will find that the Pro aspect of QT 7 is gone. I have been told that when FCP 5 is released, installing it will unlock QT 7 Pro for us. If you can not wait for FCP 5 and need QT 7 Pro now, you will need to purchase the unlocking Key from Apple for $29.95. The Pro version of QT 7 is required for File Export as well as for access to the many new features that have been added to QuickTime 7.
Please note that the utilities recommended in this article were written for Jaguar (10.2) and Panther (10.3). Once you are running on Tiger (10.4) you will need to check the respective web sites to see if these same versions will run on Tiger or if updated versions are required or available.
Enjoy Tiger.
--ken