

April 17, 2006
iWeb
By Ken Stone
Backgrounds
Working with Photos
Slideshows
Working with Text
Shapes
Hyperlinks
iWeb Preferences
Publishing
Summary
I started building web sites well before there were any applications to assist with the process. When web site applications did arrive, I was so comfortable with hand coding, that I did not see any need, pretty arcane of me (grin). Recently Apple released iLife 6, which introduces a new application called "iWeb", so I decided to take a look. In my 14 years on the Mac I have never been so impressed with an app as I was with iWeb and considering that this is a 1.0 release, the word 'amazing' comes to mind. It is truly drag and drop and is fully integrated with the other iLife apps, iPhoto, iTunes, Garageband and Movies. While we are occupied dragging and dropping elements to build our web pages, iWeb is busily working behind the scene (read out of sight) creating the buttons, hyperlinks and all other necessary .html code for us. iWeb uses just one tabbed 'Inspector' window, which contains all the settings necessary to build and customize our web pages. iWeb also offers up to 99 undoes (command z ). Don't let the simplicity of the iWeb workflow fool you, you can build a very customized and original web site.
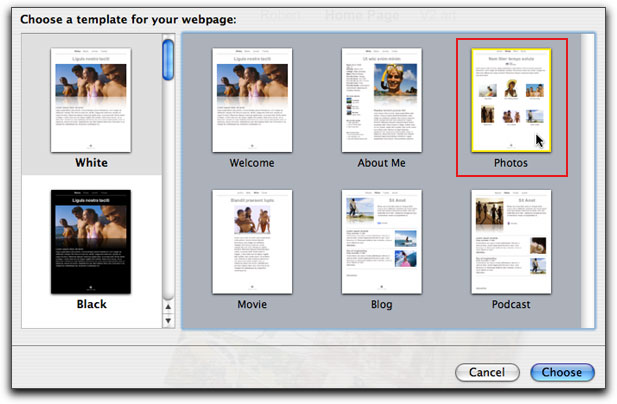
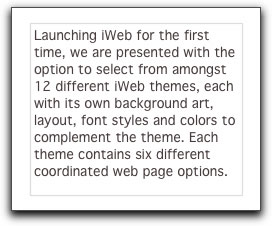
Launching iWeb for the first time, we are presented with the option to select from amongst 12 different iWeb themes, each with its own background art, layout, font styles and colors to complement the theme. Each theme contains six different coordinated web page options. Two general layouts in 'Welcome' and 'About Me' and a photo page for creating slideshows. In addition there are pages for displaying movies, blogs and podcasts.
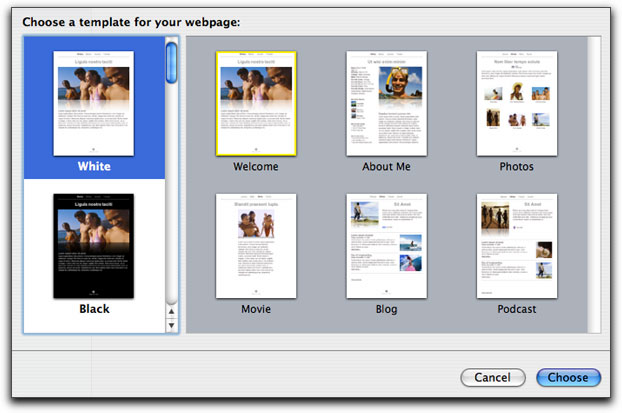
The 12 different themes in iWeb offer an interesting choice of general purpose motifs: White, Black, Watercolor, Travel, Baby, Kids Blue and Pink, Modern, Night Life, Freestyle, Road Trip and Formal. Each of these themes has its own background art with additional art to match the design and it is possible to modify any of these prebuilt themes to achieve a more customized look. However, it may be that none of the provided themes offers a design scheme that you can use, or it could be that you want to build your web pages from scratch for a totally unique look. iWeb is very accommodating and offers us two themes, White and Black, that we can use as a starting point for creating our web pages. I am going to choose the White theme and select the 'Welcome' template for the first web page.
After choosing a theme and page style, the iWeb window opens, comprised of three sections. Along the left hand side is the 'Site Organizer', this column lists each page that you create for your web site. It is here that you can change the default page name like 'Welcome' or 'About Me' to a more unique name. Each page listed in the Site Organizer has a corresponding page button (link) displayed at the top of the web page. Changing the name of a page in the Site Organizer will also change the name of the button at the top of the web page. You can choose which page you want to work on by selecting it in the Site Organizer, which will then open it into the iWeb work space. Along the bottom of the iWeb window are a row of buttons that offer tools used in constructing of web pages. The large center area of the iWeb window is where the work is done.
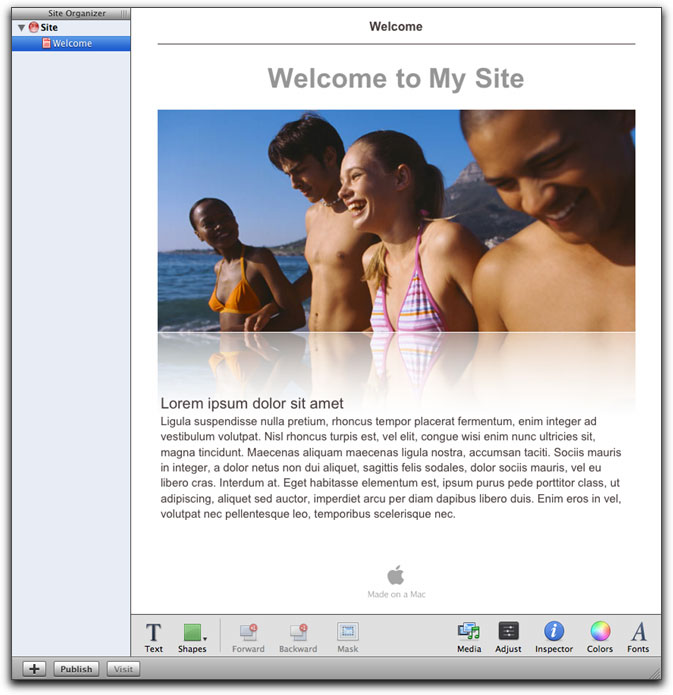
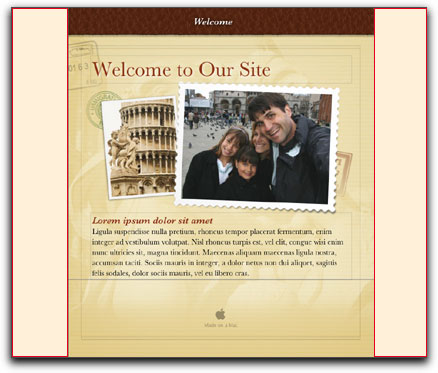
When the iWeb window first opens, as shown above, it contains a 'Welcome" link at the very top, a title, picture, a block of text and even a 'Made on a Mac' logo. All of these items are simply place holders into which we can drag our own picture(s), enter our own text or delete entirely.
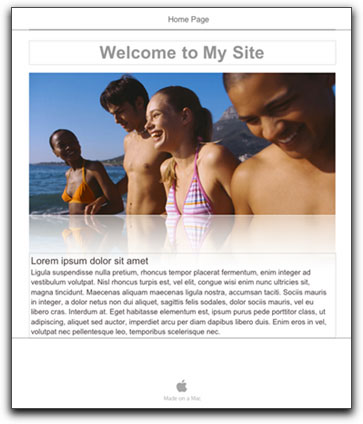
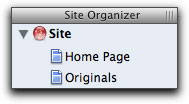
Before we start work on the web page lets change the name of the button (link), this is done in the Site Organizer. When we selected the White theme, Welcome page, a web page is create with the name 'Welcome' and places a 'Welcome' page button (link) at the very top of the page above the horizontal line, iWeb always places the navigational buttons at the top of the page above the horizontal line. For now, we have just the one page and so there is only one button at the top. As we create more pages, each page will add a button (link) to the top of the web page. As shown below in the Site Organizer, the default name for this page is Welcome. Select the name and change it to 'Home Page'. We can not change the font, size, color or position of the buttons that iWeb creates for us. As a matter of workflow, each time you create a new web page, first give it a proper name in the Site Organizer before you start in on the web page.


[Top]
Backgrounds
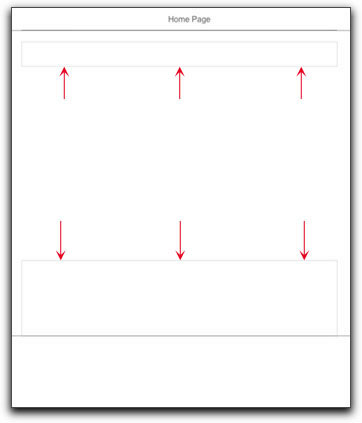
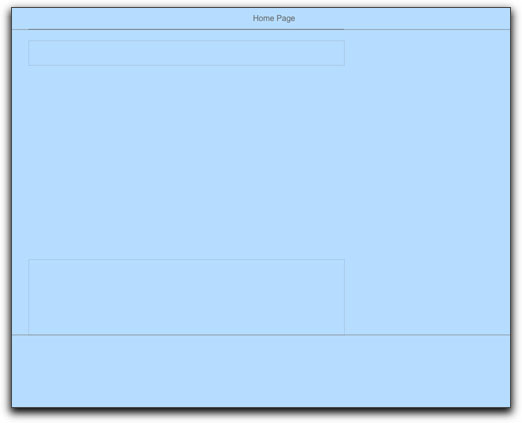
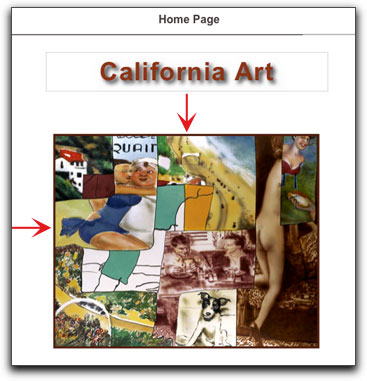
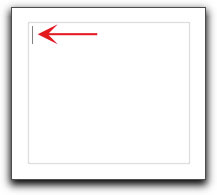
Starting with the White theme, Welcome page, we are going wipe the slate clean. Select and delete the page title and text block. After deleting the text from these two items you will notice that the now empty text boxes (faint gray lines form the box) are still visible (red arrows below right). This is okay, we can use them later to add back in our own page title and text, or, you can simply ignore them as no matter their size or position in the page, they will have no effect if simply left alone (empty). Any additional number of text boxes can be added to the page as needed by clicking on the 'Text' button in the tool bar at the bottom of the iWeb window, more on this later. Now, select the placeholder photo and delete.
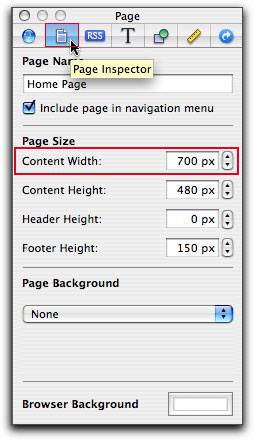
All of the pages offered by iWeb default to a width of 700 pixels which is a safe width. However, most people expand their browsers horizontally and I personally think that wider pages have greater appeal and offer more room for content with less scrolling required. The lessons that follow are applicable to any width web page, but I am going to expand the width of the page to suit my own taste. Click on the Inspector button bottom right of the iWeb window. Now select the 'Page Inspector' second tab from the left. It is in the Page Inspector that we set the basic size parameters of our page as well a create backgrounds for the page. At the top is 'Page Name' which should reflect the name given the page in the Site Organizer. We can change the name of the page from here which will change the name in the Site organizer as well. There is a check box to have this name be an active button (link) which is turned on by default, leave it checked. In the Page Size section, the Content width is set to the default of 700 pixels, (shown below red box).
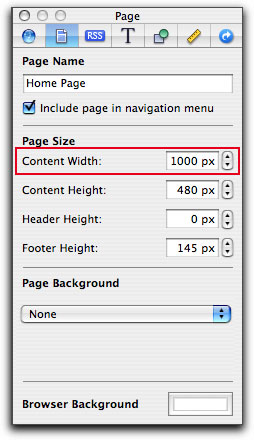
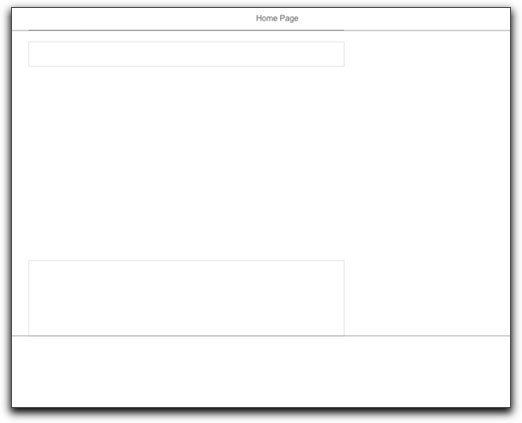
In the Content Width box, change the size to 1000 pixels. When you do this you will see the width of the web page expand horizontally to its new size. Next is the Content Height setting which will add additional vertical space to the page. I have found that as I add content to a page, the vertical height of the page automatically expands to accommodate the additional material. Next is Header Height, increasing this number will push the Header, the area that contains the buttons at the top of the page, down lower on the page adding space above the buttons. When using a web page that has supplied background art, the Footer Height setting can be used to crop the bottom of the background art, to make the background art less tall.
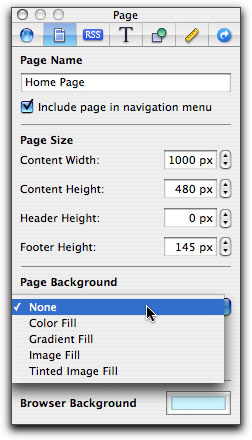
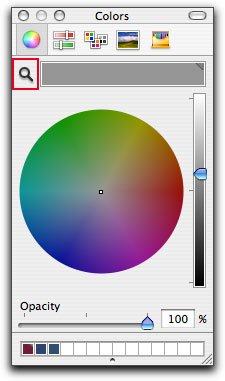
At the bottom of the Inspector window is the 'Page Background' option, which, by default, will show the background used by the theme that you are working with (a background color or image, etc) if the theme uses a background. The first choice in the Background options drop-down menu is Color Fill, which will paint the entire web page background with a solid color that you set in the color wheel (remember that you can use the 'magnifying glass to sample a color anywhere on your computer screen). After setting your color in the wheel, click in the color box, (top of the color wheel) and drag into the color 'well' in the Page Background section, (shown below right).

Solid background color
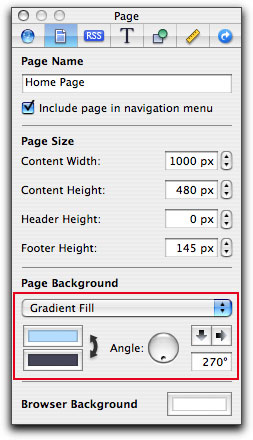
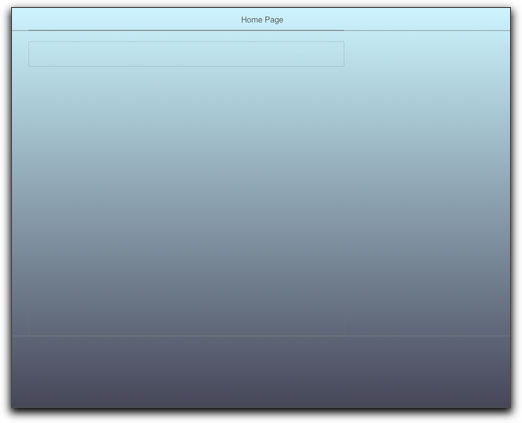
The next option in Page Background is Gradient Fill. The two color swatches on the left can be changed by clicking on either and picking a new color in the color wheel. The angle of the gradient can be changed using the Angle wheel and the gradient can be flopped either horizontally, vertically or both.
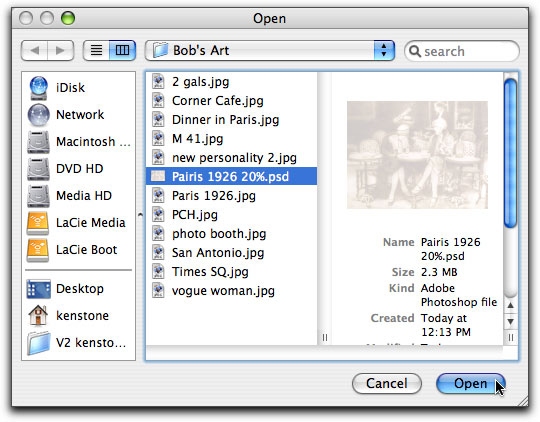
With Image Fill we have the ability to turn a photo, any art really, into a background image for the page. When using a photo as a background we would normally want more of a faint image, rather than a normal photograph, as having too strong a background will make the other elements on the page hard to see and read. With the photo I'm using here, I first opened it up in Photoshop and reduced the opacity of the image to 20%. To bring a photo into iWeb, click on the 'Choose' button which will open the standard Mac navigation box. Find the photo that you want to use, select it and click on the 'Open' button. The photo will now be applied to the background.
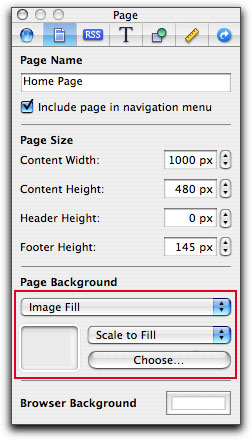
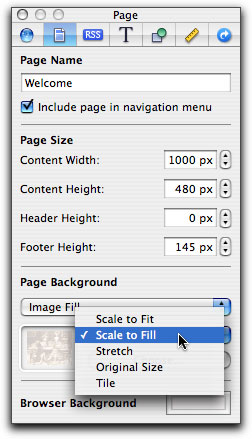
It is most unlikely that the size and shape of the photo (aspect ratio) will exactly fit the page we are working on. This is where the Scale options come into play. 'Scale to Fit' will match the longest side of the photo to the longest side of the web page, but this option can result in pillar or letter boxing of the photo on the page. 'Scale to Fill' will adjust the size of the photo so that it fills the entire page but iWeb will need to distort the photo a bit in order to accomplish this. If the photo is close to having the correct aspect ratio of the page, plus the fact that the photo is faint (lowered opacity), any small amount of distortion should not be noticeable. The 'Stretch' option seems to deliberately stretch (read distort) the photo for effect. 'Original Size' locks the image size and 'Tile' will repeat the image across and down the page.

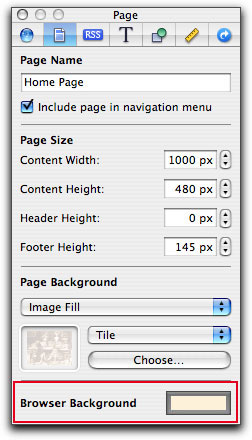
It is possible for you to be working with a web page size that is smaller in width than the browser widows of your audience. For example, if you left the page width at its default size of 700 pixels. When this happens your audience will see empty borders left and right of the actual page. The last item in the Inspector window is 'Browser Background' which, when a color has been set, will fill the empty borders with the selected color, as shown below right in the red boxes. You can select any color in your web page as Browser Background to provide a more seamless look.
[Top]
Working with Photos
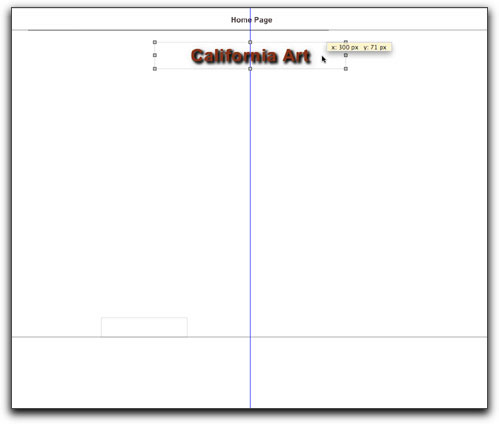
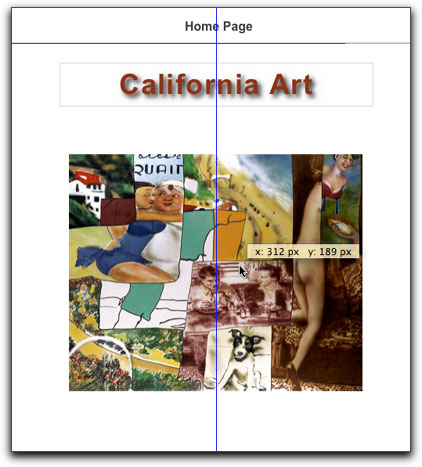
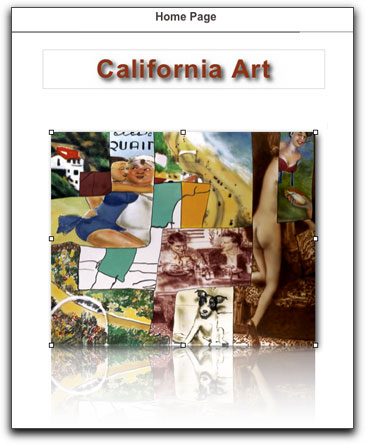
iWeb fully integrates with the other iLife applications, we can take advantage of this feature to help organize our media for use in iWeb. As I plan to add a number of photos to different pages for this web site, I have first created an 'Album' in iPhoto and have placed all of the photos I intend to use into the album. Even though using iPhoto really helps with organization, you can drag any photo from the Finder, right into iWeb. As shown below, I have placed a page title on the page for some perspective. The title is centered on the page using the blue dynamic guides. As more items are placed on the page horizontal, as well as vertical, dynamic guides will appear to help with the alignment of the different elements.
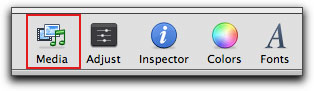
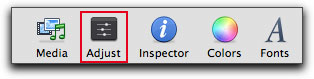
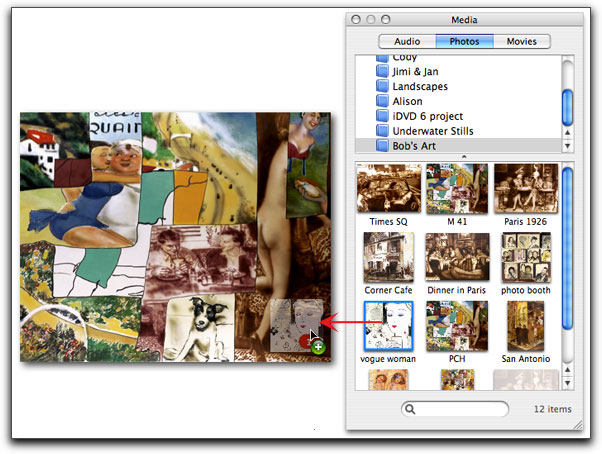
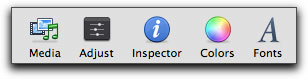
Bottom right of the iWeb window is the 'Media' button, click on the media button to open the Media window which provides easy access to our media. The Media window contains three tabs, Audio for access to GarageBand, Photos for iPhoto and Movies for iMovie.
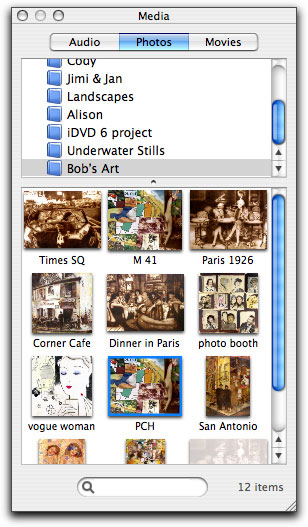
With the Photos tab selected in the Media window, I have selected the 'Bob's Art' album which then displays photo thumbnails in the lower part of the window. To add a photo, simply click and drag from the Media window into iWeb.
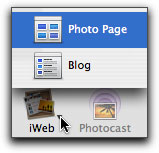
iPhoto 6 has an iWeb button in its tool bar. If you select a photo or an album in iPhoto and then use the iWeb button, those images will be sent to iWeb which will open either a new Photo page (Slideshow) or a Blog page for you and place the photos onto the new page.
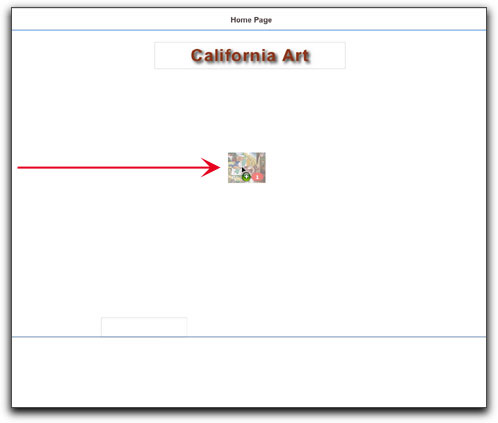
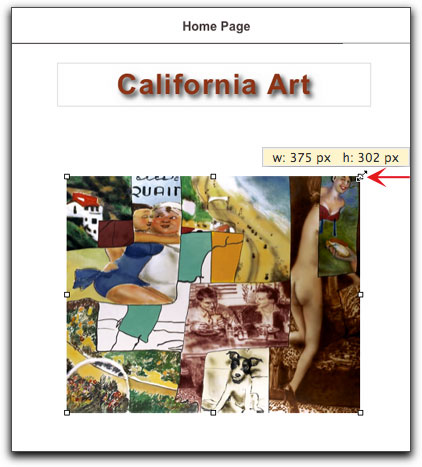
When you place a photo onto a page, the photo will display 8 small squares bordering the edge of the photo, called selection handles. Click on any corner square and drag either in or out to resize the photo. After resizing, use the dynamic guides to center the image.
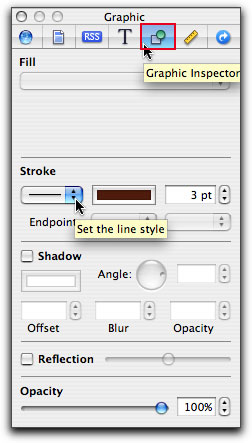
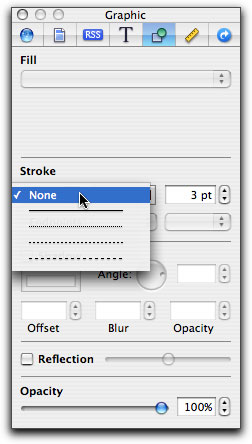
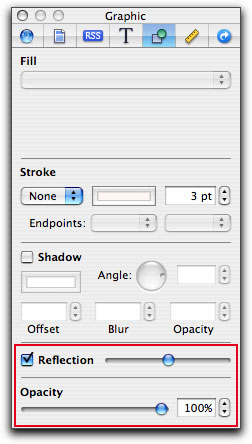
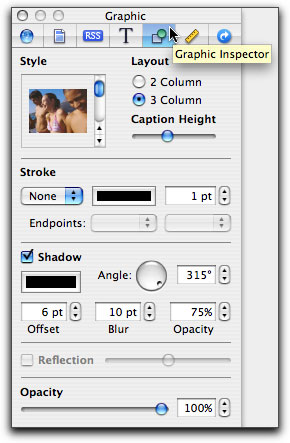
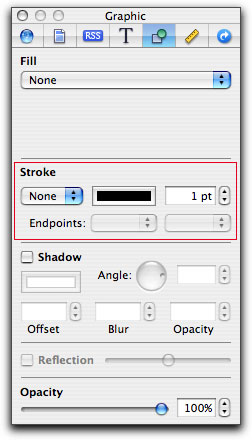
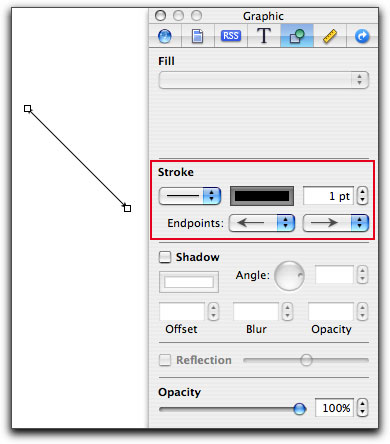
There are a number of controls available to us to help to modify and enhance our photographs. These controls are found in the Inspector and there are two tabs that relate to working with photos, the 'Graphic Inspector' tab, and the 'Metrics Inspector' tab. Starting with the Graphic Inspector tab, the first section 'Stroke' allows us to place a border around a photo. The width, color and shape of the border can be set in this section.
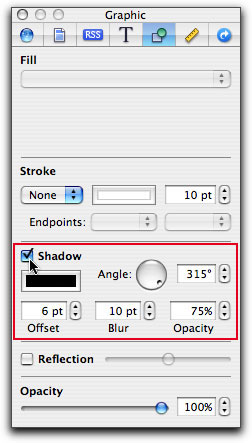
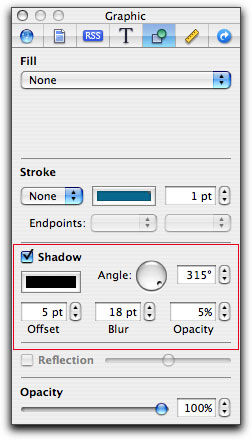
Drop Shadow is the next section down and avails to us standard drop shadow features.

Most of us have seen the Reflection feature on music and video art at the iTunes store and elsewhere at the Apple web site. This exciting feature can also be found in iWeb in the 'Reflection' section, placing a check in the Reflection box enables this feature. Just to the right is a slider which controls the opacity of the reflection. Below this slider is the Opacity slider which controls the opacity of both the picture and the reflection. Does add a bit of class to our images.
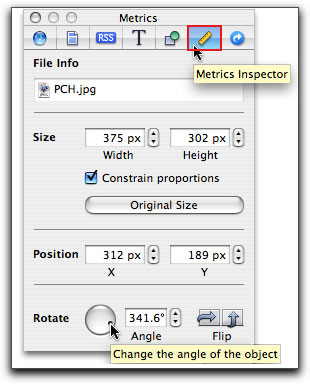
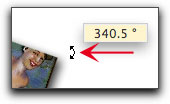
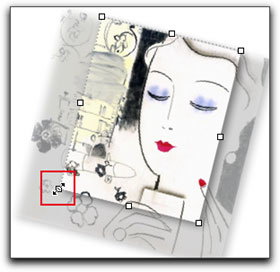
The Metrics Tab in the Inspector contains controls for exact numeric sizing of photos as well as exact placement on the page. At the bottom is the 'Rotate' control for rotating the photo on screen, you can also rotate a photo at any time by selecting the photo, then, while holding down the Command key, click on a corner square and drag to rotate, below right. Having the ability to rotate an image is a powerful and welcomed feature.

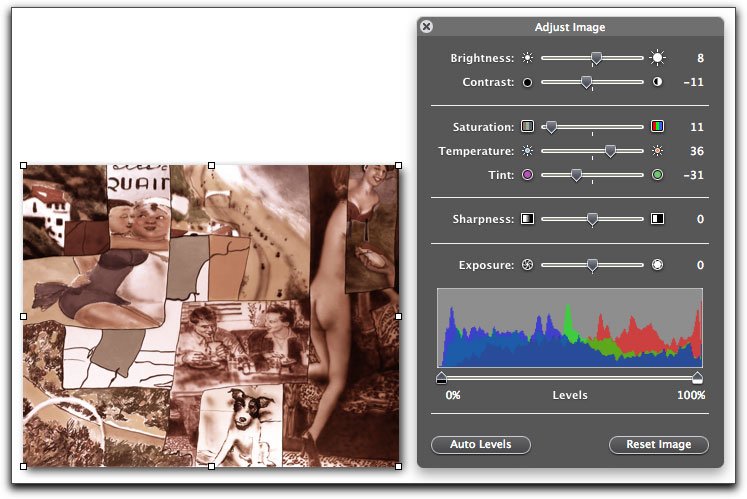
iWeb offers us a powerful photographic correction tool in the form of the Adjust Image palette. With the controls found in the Adjust Image palette you can correct for Brightness and Contrast, adjust the Saturation, Temperature and Tint of a photo. There is a Sharpness control, which one should always use sparingly, (regardless of the photo application you are working with) and finally an Exposure control with a Levels Histogram. The Adjust Image tool works very well and all changes are reflected in the photo in real time. There is a 'Auto Levels' for one click adjustment and a 'Reset Image' to return to the original image, the Adjust Image tool is 'non destructive'.
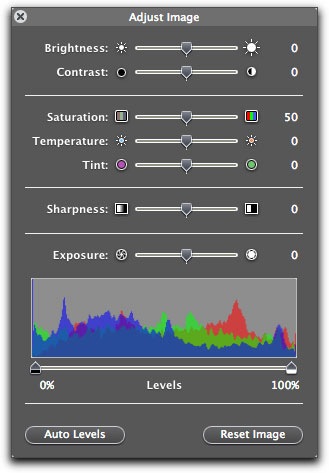
You can use this tool to correct your photo if it is not up to par, but additionally, you can use these same controls to modify a photo for a highly stylized image.
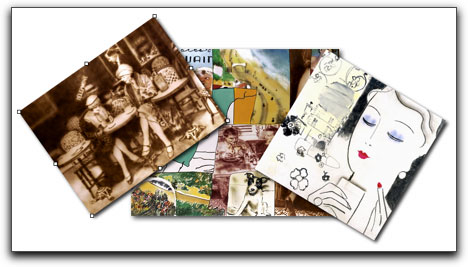
iWeb has exceptional photo placement abilities, any number of photos can be used and even stack or place one on top of other. Select your photos in the Media palette and drag into the iWeb window.
Each photograph is considered a unique object by iWeb and as such, each photo can be adjusted independently, utilizing of all the image controls: size, borders, drop shadow, rotation, reflection and color correcting (Adjust Image palette). When selected, a photo can be 'nudged' (moved) one pixel at a time by using the arrow keys on the keyboard. As shown below, photos can be stacked on top of each other, but still retain their independence.

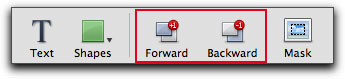
But wait, it gets even better. Not only can we stack photos but we can select a photo and send it behind any other photo (or bring any photo forward in the stack). Select the photo whose position you want to change and click the appropriate Forward or Backward button. When working with a number of photos in a stack, each on its own layer, sometimes it might be necessary to send one photo forward and another one backward to achieve the desired effect. I have found that sometimes it is necessary to reselect a photo and reselect Forward or Backward to get the photo to change layers.
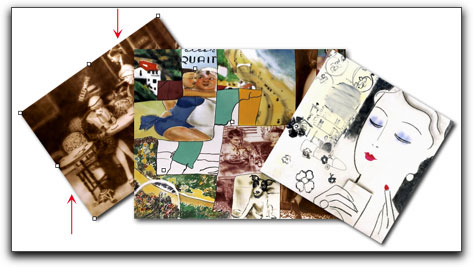
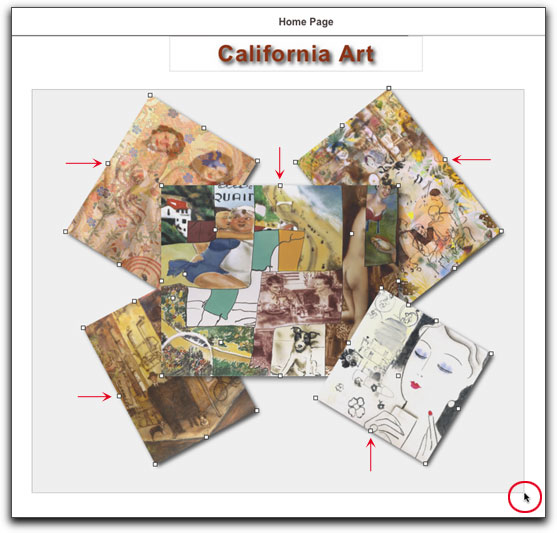
Even after you have positioned or stacked your photos, you can click and drag (marque) around the stack of photos which will select all of the photos, now you can drag to reposition the entire stack. When all the photos are selected you can apply changes to all the photos at the same time, like adding a drop shadow or border, etc.
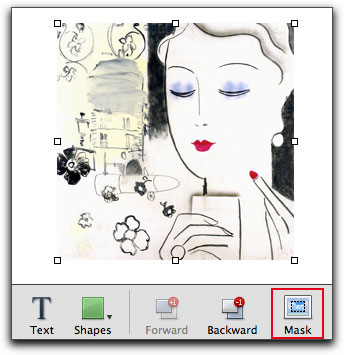
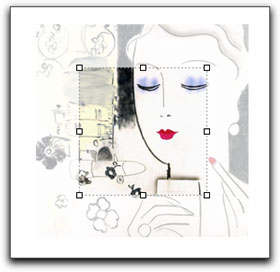
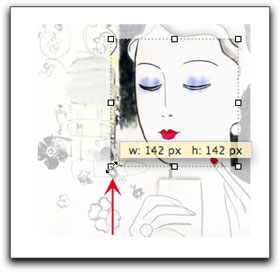
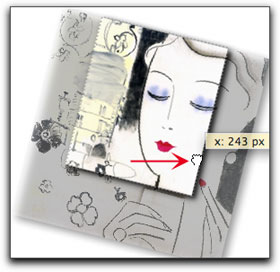
We can easily place any photograph onto a web page from iPhoto or the Finder but very often there is a need to crop the photo for our intended use on the page. iWeb has a cropping tool called 'Mask'. When a photo is selected the Mask button becomes active, shown below left, and will place the Mask in the center of the photo, below center. Notice that the area of the photo that is outside of the mask is now displayed as a ghosted image. Click and drag to position the mask, drag on any of the small control squares that border the mask to resize, below right red arrow.
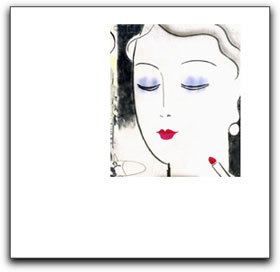
When you have your mask sized and positioned, click outside of the photo to set the mask, the ghosted image now disappears, below left. Once the mask has been set you can apply any of the iWeb photographic controls. As shown below center, I have rotated the photo and applied a drop shadow. Double clicking on the cropped photo will reactivate the mask and once again display the ghosted image and allow further adjustments to the mask, shown below right. The reason that the ghosted image now appears darker than before is because I have the drop shadow turned on.


Placing your cursor onto the photo will turn it into a grabber hand, you can now shift the position of the mask on the photo, a tip will display the current position of the mask, below left. Click and drag on a square box to resize the mask, below center. Click away from the photo to set the mask. Once the mask has been set you can click on the masked photo and drag the finished image to reposition. You can remove the mask feature and return the photo to its original state by clicking again on the Mask button.

[Top]
Slideshows
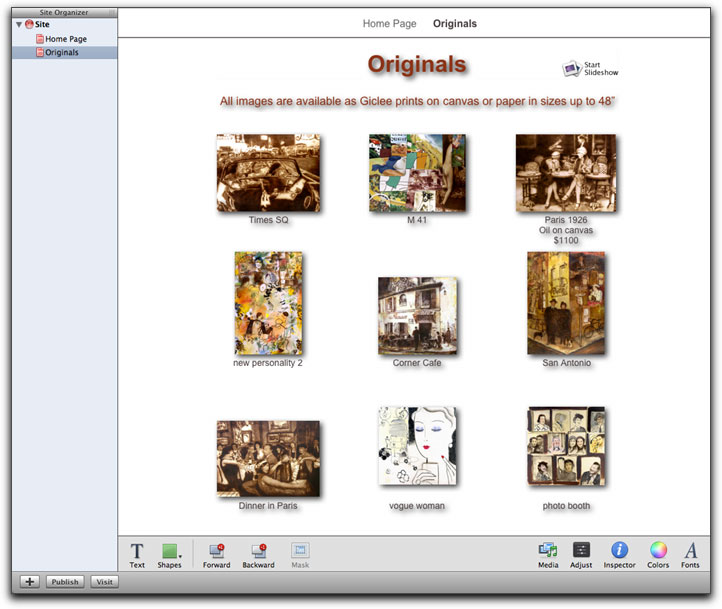
iWeb can produce amazing looking slideshows and like everything else in iWeb, its drag and drop. We create slideshows by selecting the 'Photos' template that is available in all themes. Slideshows in iWeb consists of two distinctly different elements. The first is the 'Photos' page and it is here, on the Photos page, that we do our work and build the slideshow. After publishing, this page will display the photos as thumbnails. Click on any thumbnail and a large, full sized photo will open on screen. This page also contains a 'Slideshow' button, which, when clicked by the viewer, will open and run the slideshow. The slideshow will only run after the page has been Published to .Mac and there is no way to preview a slideshow before Publishing and viewing it in your web browser.
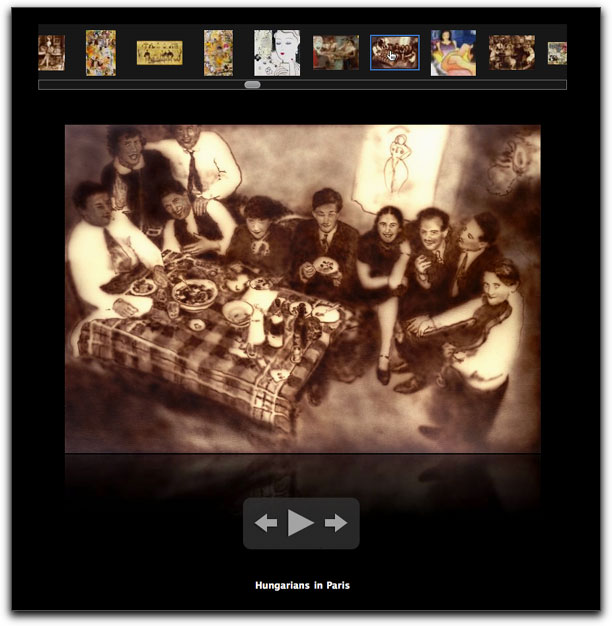
The second element is the slideshow itself, which is built for us, automatically and out of view. iWeb takes all the info, photos and captions, that we entered into the 'Photo' page and builds the slideshow. iWeb does the work, we enjoy the show. The photos appear one at a time on a black background with the lower portion of the photos reflected beneath the photo. Any captions that you use with your photographs will appear with the photos in the slideshow. If you place your cursor near the top of the slideshow window, a scrollable thumbnail bar with of all of the photos appear at the top of the screen, you can click on any one of the thumbnails to view that image. There are also manual start/stop, forward/backward controls at the bottom of the screen. Regardless of the theme you are using, slideshows will always display in this one style. As we can not preview a slideshow in iWeb, I have grabbed a screen shot of a running slideshow for your perusal.
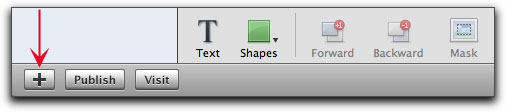
So far we have been working with the White theme, Welcome page. Now we want to add a Slideshow and iWeb has a special page for Slideshows this called 'Photos'. To add a new page, click on the "+" button at the bottom of the Site Organizer column.
The Template window will open, with the White theme active, select 'Photos' and click Choose.
The default 'Photos' page will open. The new Photos page has been added to the Site Organizer and a Photos button (link) has been added to the top of the web page. You can change the name of this page by changing it in the Site Organizer.
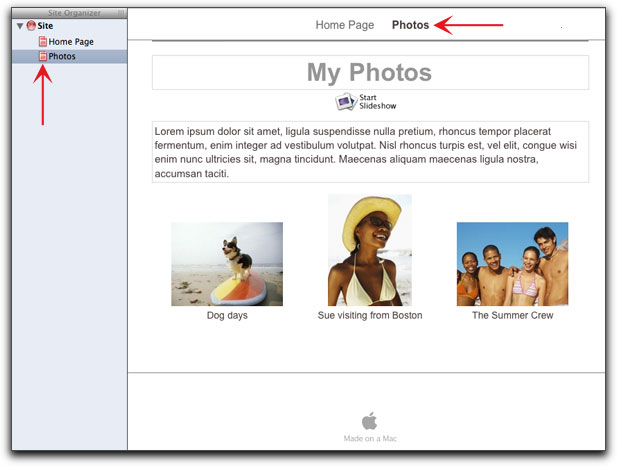
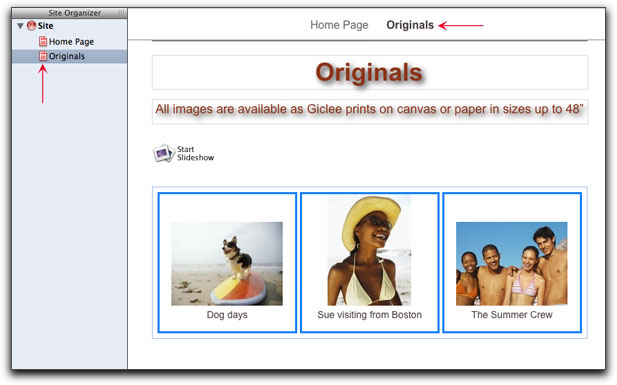
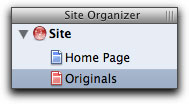
Before I start working on the Slideshow I want to set up this new page. Keep in mind that all of the titles, text, photos and art displayed on the default page are only placeholders that can be replaced, moved or deleted altogether. First, I have changed the page name in the Site Organizer from 'Photos' to 'Originals', which is now reflected at the top of the page as well. The page title 'My photos' has been changed and new text as been entered into the text box. Working with text is covered in the next section. In previous versions of iWeb, you could reposition the 'Start Slideshow' button, but alas, no longer.
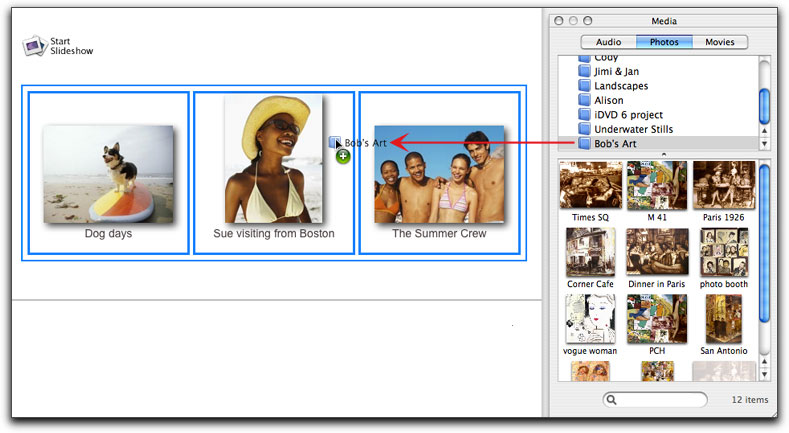
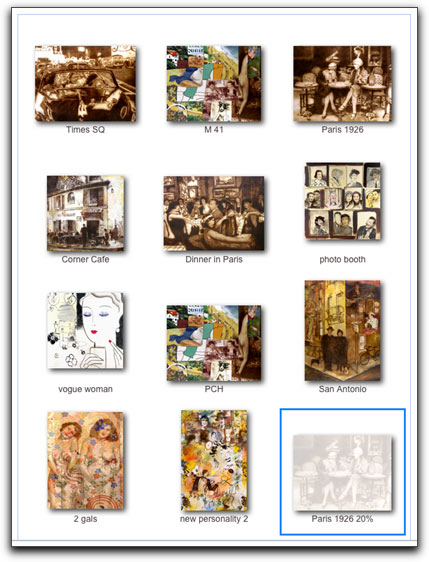
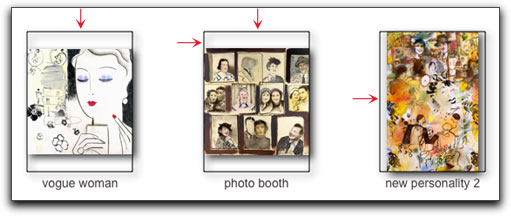
Clicking on any one of the three slideshow placeholder photos will display a special slideshow container. Each photo will have its own blue box, but all three photos are surrounded by yet another blue container box. It is this outer blue border that is your slideshow drop box. In order for iWeb to build a slideshow all photos must be dragged into this area. If you drag photos outside of the slideshow container, iWeb will treat them as regular photos, but these photos will not be included in the slideshow. As shown below, I have dragged an entire folder from the Media window - Photos, into the slideshow container. You can also add photos to the slideshow container one at a time from the Media window or even from the Finder.
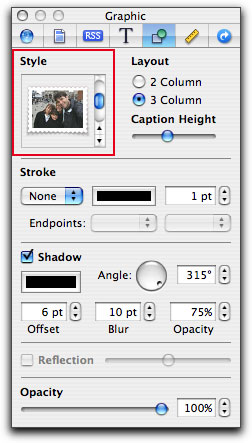
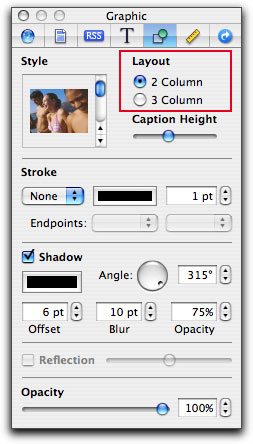
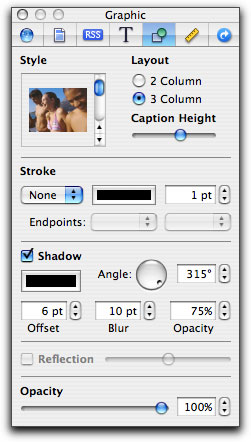
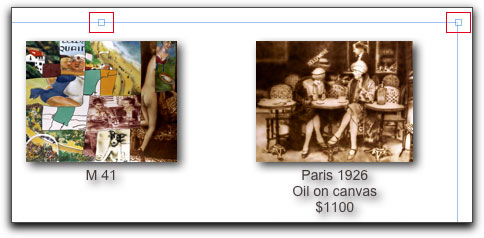
As soon as you release the mouse button, the slideshow container will be populated with the photos that you have dragged into it. Shown below left, one photo, 'Paris 1926 20%' is being used as a background image for another page and is not intended for this slideshow. I can select any image in the group and hit the delete key to remove. In addition, I can rearrange the order of the photos by clicking and dragging the photos into new positions within the slideshow container. With the slideshow container selected, open the Inspector and click on the Graphic Inspector tab. You will notice that the top section of this window has changed and now has special settings used only with preparing slideshows, Style, Layout and Caption Height.
In the Style section we can scroll through an offering of different border styles for our thumbnail images. Choosing a border will apply that border to all thumbnails in the slideshow container, however, these borders will not show up in the slideshow itself. These 'style' picture borders can only be used with photos that are inside the slideshow container and can not be used with regular web page photos, but it would be nice to have this feature.
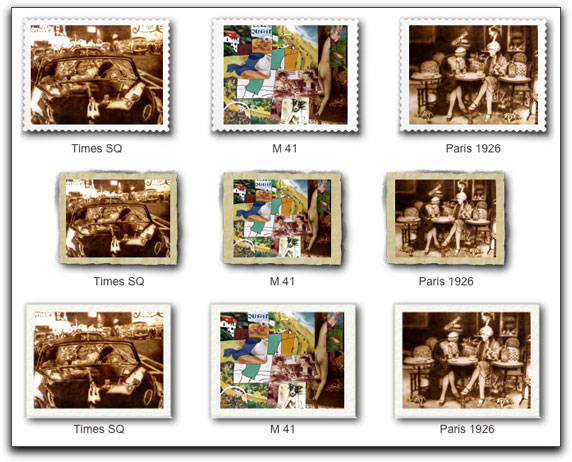
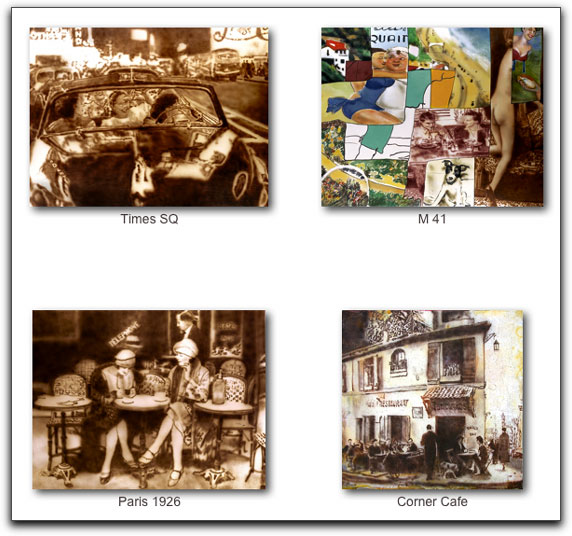
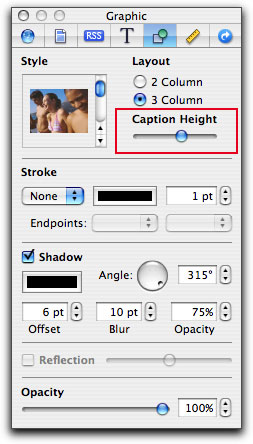
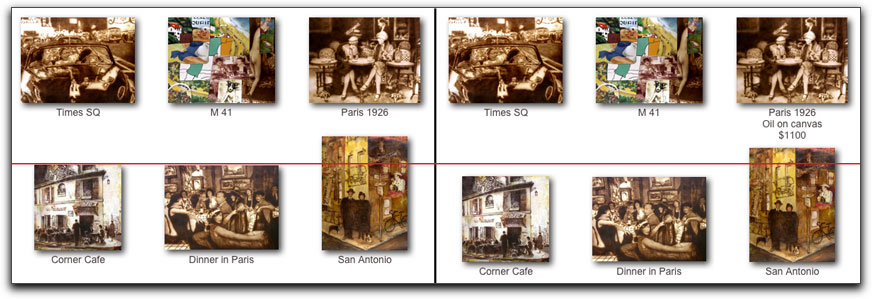
In the Layout section we can choose to have our photos displayed in either a two or three column arrangement. Three across is shown above right, below right, two columns. you will notice that the photos are displayed at a larger size in the two column arrangement.
The Caption Height setting is used to add additional vertical space between the rows of photos in the slideshow container and works in the same for either two or three columns. This ability serves two purposes. It could be that you want more space between the rows of photos or you may need to add more than one or two lines of text in the caption field. The amount of caption height that is needed will depend on the font and font size used. The width of the caption field is fixed and can not be widened.
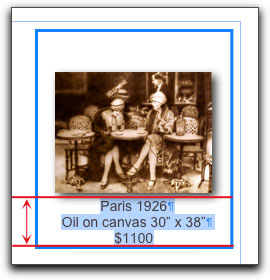
The default caption height is shown below in the left panel, the right panel is shown with the caption height increased, space has been added between the rows of pictures.
The Stroke option in the Inspector can be used to place a lined, color border around each of the photos, however, as you can see below right, the Stroke border does not seem to trap the photos properly.
A drop shadow can be applied to the photos. The 'Reflection' feature is grayed out and is not available for photos in the slideshow container, however, this setting has no effect on the Reflections that are applied as standard to the photos in the slideshow itself. The Opacity slider can be used to lower the opacity of the photos in the slideshow container. The entire slideshow container can be moved and repositioned, not by clicking in the container, but rather by dragging on one the small 8 squares on the outer blue slideshow container.
This is how a finished slideshow page might look in iWeb. As I mentioned, there is no way to preview the actual slideshow until this page has been 'Published' to a .Mac account or other server. More on publishing later. Additionally, the 'Adjust Image' palette does not work on photos that have been placed in the slideshow container.
[Top]
Working with Text
iWeb offers numerous tools for working with text. Open the Inspector, Colors and Fonts windows from the bottom right of the iWeb window.
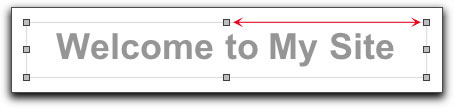
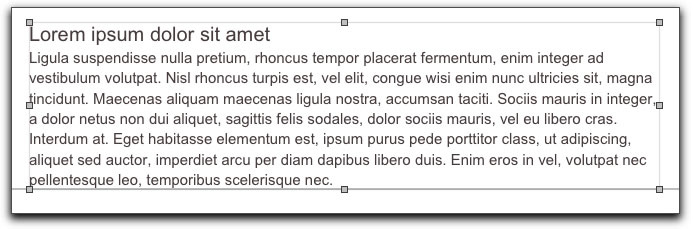
We are going to work with the title of the page. Click on the title and iWeb will display the 'text box' or bounding box which is denoted by a gray box around the text with 8 small squares in the corners and around the sides of the box. If you click on any of the small square boxes, you can drag in or out to change the size of the box, hold down the Shift key as you drag to constrain proportions. Resizing the text box is useful when you are working with a block of text and the box is either too large or small for the text you plan to add.
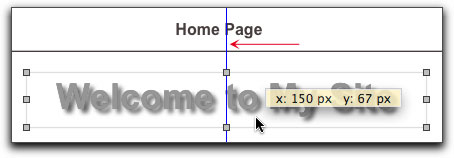
If you click in the text box, you can drag anywhere on the page to reposition the title. You can also use the arrow keys on the keyboard to nudged the text box into place one pixel at a time. iWeb provides blue dynamic alignment guides for centering your text box on the page. These dynamic guides work for the placement of any objects on the web page, great for aligning photos and or text, either horizontal or vertical. They can also be use to align edges of objects.
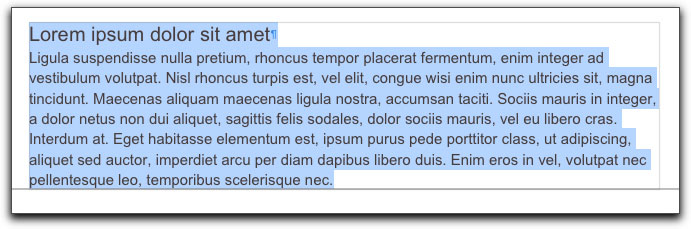
With the text box active select the text.

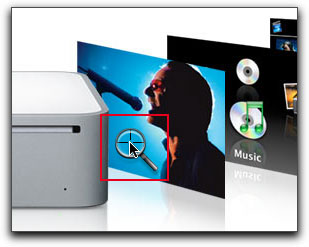
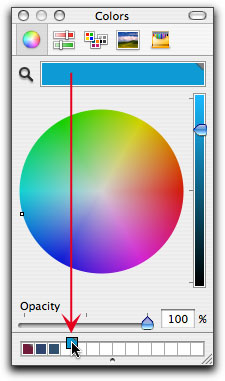
In the Color palette using the color wheel, you can choose your color. The color palette has a very cool feature in the form of a magnifying glass, actually a color sampler (below left red box). Place the magnifying glass on any object on your screen and click (below center), the color will now be set in the color wheel in the long rectangular box to the right of the magnifying glass and the selected text will reflect the new color. You can save this color sample for future use by clicking in the color box and dragging down to the 'favorites' boxes, bottom of the color window. To reuse a color from the favorites section, click on the sample and drag back up into the color box at the top.
With the text still selected, change the wording of the title.

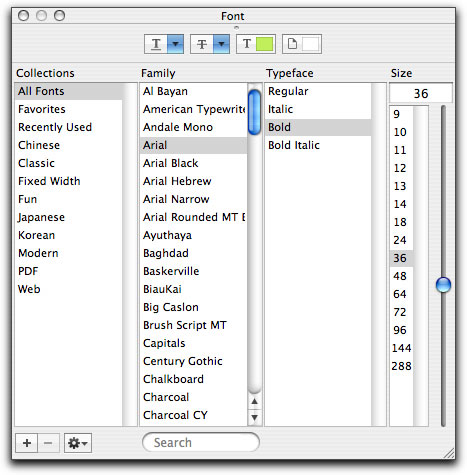
In the Fonts palette you have access to all of the fonts on your system. As you click on the different fonts available in the fonts palette, the selected text in iWeb updates in real time, enabling you to preview and select the right font for your page.
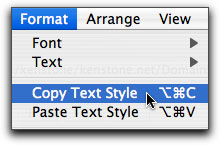
Once you have applied a text font, size and color, you can select the text and then, from the Format menu, 'Copy Text Style'. When working with new text, you can select the text and from the Format menu, 'Paste Style'.

Okay, we have set the font and color of our text, so far pretty standard faire. It is in the iWeb Inspector window that we have additional controls over our text. The Inspector window has seven tabs across the top, three of these tabs, Text Inspector, Graphics Inspector, and the Metrics Inspector can be used to modify the text. With the Inspector window open, click on the 'Text Inspector' tab, top center. Remember that any text that you want to modify must be selected first in order for the Inspector to have an effect. In the 'Color & Alignment' section, far left is a text color box. Clicking on this box will open the color wheel. In the center are four text alignment options, flush left, center, flush right and justified. These controls are used when we are working with blocks of text. On the far right is the line height control which will align the text to the top, center or bottom of the text box.
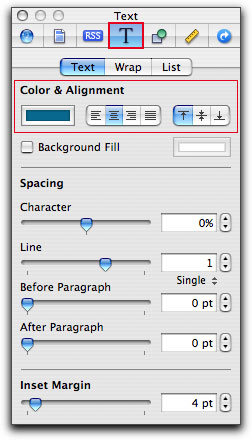
In the next section down, checking the 'Background Fill' box will fill the background area inside the text box with the color that you choose from the color selection box, (red arrow), which when clicked, will open the color wheel.


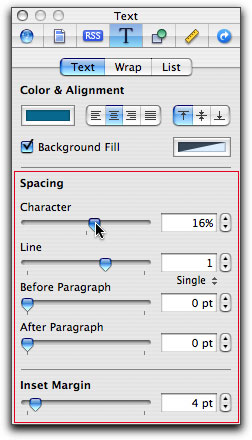
The bottom section of this tab houses the spacing controls. The first item, Character, enables you to add or remove spacing between each letter (sometimes called tracking), shown below right. The remaining items are used with blocks of text. Line (sometimes called leading) controls the amount of space between each line of text. Before and After Paragraph controls the amount of space between each paragraph. The last item, Inset Margin is used to indent the entire block of text.

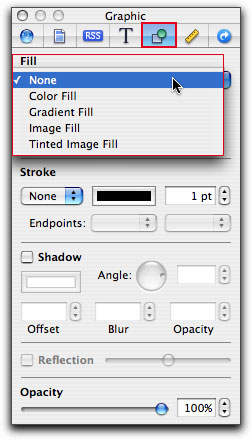
The next tab to the right is the Graphic Inspector. The first item, Fill, is again for the background area of the text box and offers a number of options. The first is Color Fill which is the same as the Background fill found in the Text Inspector tab. Gradient Fill adds a customizable gradient to the text box background and bevels the edges (shown below right). Image and Tinted Image Fill allow you to place a photo or any graphic into the background area.


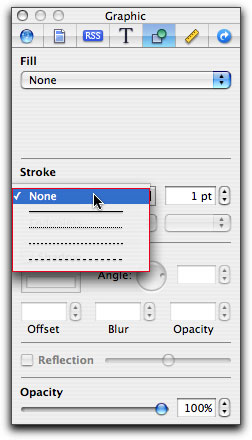
Stroke is next. Each text box has a bounding box which is a visual aid for us while working in iWeb and does not show in the finished product. Using the Stroke feature we can convert the bounding box into a visual border around our text. Several styles of lines are available and we can set the color and thickness of the border.

Next is Drop Shadow which utilizes standard drop shadow controls. Beneath this is 'Reflection' which is grayed out as it not an available option for text, the Reflection effect is for photos only. At the very bottom is the Opacity slider which is used to lower the opacity of the text.

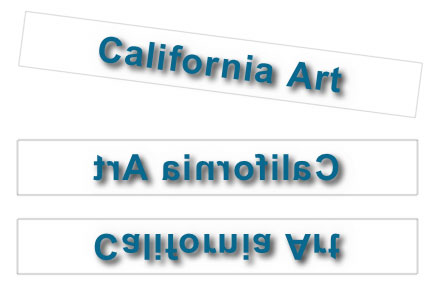
The last tab in the Inspector that we will use to work with text is the Metrics Inspector. At the top is 'File Info' which, when a photograph is selected, will display the name and format of the photo. The next control field is Size. Using this feature will increase or decrease the size of the text box and everything inside the container. You can use constrain proportions to maintain the aspect ratio of the text box. You can accomplish this same task by clicking and dragging on any one of the 8 small squares around the text box. The Original Size button is a reset button. You can enter numeric values into the Position section to position the text box in the web page (of course you can click in the container and drag to reposition). The last section, Rotate, is probably the one that you will use in the Metrics tab. There are horizontal and vertical 'Flip' controls which you access by selecting the container rather than the text. This feature would most likely be used with photos or Shapes like arrows or triangles (to change the direction that they face), rather than with text.

Working with blocks of text is much the same as working with a page title. With the 'White' theme, 'Welcome page' there are two default text boxes. At the top is the page title, shown below is the second place holder text block. Clicking in the text area activates the text box.
Select the text you want to replace.
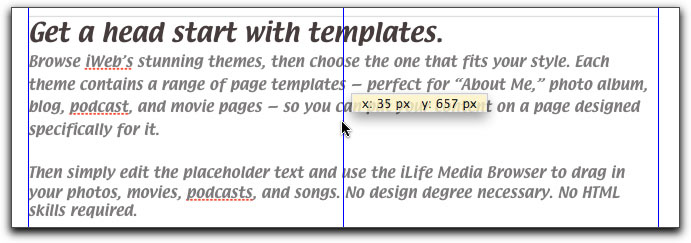
I have Copied and Pasted in new text and then draged the text block to re-center on the page (blue dynamic guides).
Clicking on one of the text boxes corner squares, I have dragged in to reshape the text box (red box below).
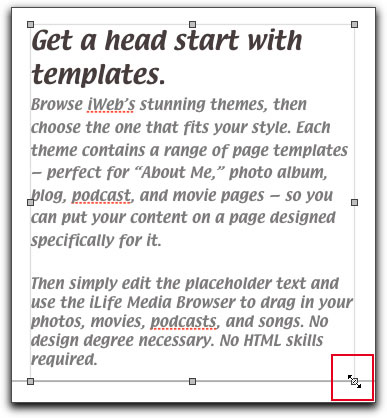
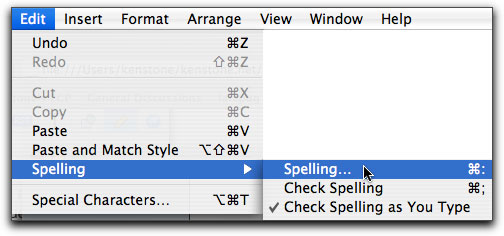
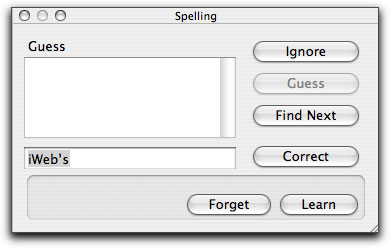
What are those red dashes underlining some of the words in the text (shown above)? That's right, iWeb provides a spell checker (grin).
[Top]
Shapes
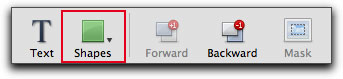
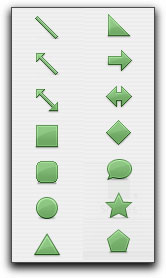
iWeb provides a means to add Shapes; squares, circles, arrows, etc. to our web pages. These shapes can be used as graphic elements in our web page design, to create text blocks like 'Lower Thirds', arrows that can be used as buttons (links), like page forward and back. iWeb shapes are malleable and can be refashioned into new shapes. Shapes can be formatted in the same way as other iWeb elements by using the 'Text', 'Graphic' or 'Metrics Inspector' tabs in the Inspector window, they can be filled, stroked, rotated, resized, reshaped and drop shadows can be added.

Text and graphics can be placed together in one of two ways. The first method is called 'Inline', in which the text can be made to wrap around an object (a shape, logo or photo). With Inline, both the text and object are placed into a container which can be either a shape or a text box. When both the text and object are inside a container, they can be moved or repositioned on the page as a single entity, they are locked together. The second method is as a 'Fixed Object' where the object and text are created in their own discrete containers and then placed on top of each other, they can be modified or positioned independently. However, when working with 'Fixed Objects', the text wrap feature is not available.
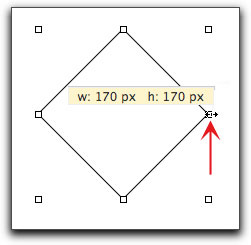
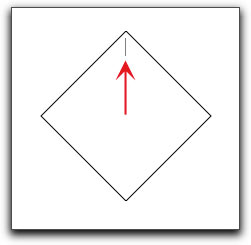
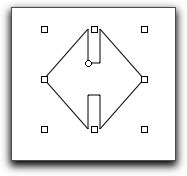
Lets start by picking a diamond shape, (below left) and adding 'Inline' text, where both items can be moved as a single unit. You can resize the shape by clicking on one of the squares and dragging. Hold down the Shift key when dragging to constrain proportions, below center. To add 'in line' text to the shape, double click in the shape to activate the text function. A insertion cursor will be displayed, below right.

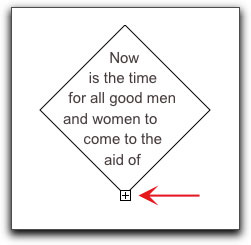
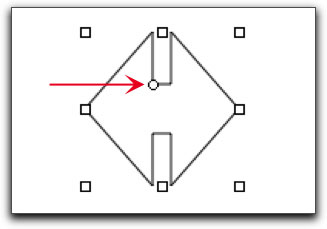
Type your text into the shape. If the text you need to enter (copy and paste works too) exceeds the amount of space available, iWeb will display a 'clipping indicator' warning icon in the form of a + sign, below left. Click on the + sign which will display the square boxes, click on a square and drag to enlarge the shape to accommodate more text then add the additional text, below right. If you added more text than the space can handle, as in copy and paste, click on the + and enlarge the shape, the missing text will now appear.

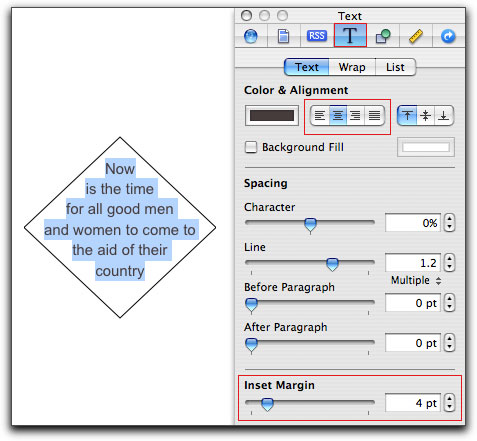
Text that is applied to a shape can utilize all of the standard text controls as regular text, including text wrapping. Above left, the text is attempting to be aligned flush left. In the Text Inspector tab, below left, Center Text is now selected which centers the text in the shape. You can control the margin space between the edge of the shape and the text by using the 'Inset Margin' slider found at the bottom of the Text tab window. If you increase the margin size you might find that you'll need to increase the over all size of the shape as well. Season to taste.

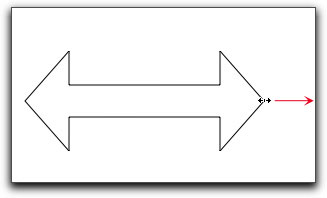
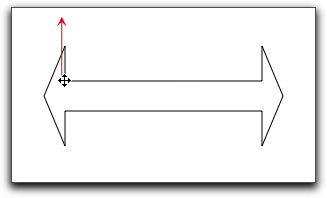
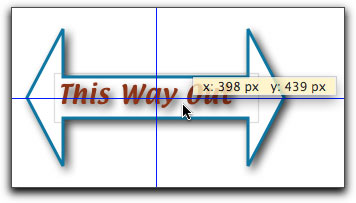
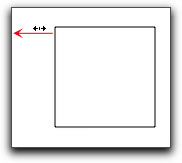
We are going to use the 'Fixed Object' approach to add text to an arrow shape so that the two elements will remain independent. Some of the iWeb shapes have additional controls, noted as small circles, in addition to the 8 square boxes that we use to drag to resize. The arrow shape is one with an additional control, shown below left normal size and below center, enlarged. Dragging on the circle left or right changes the shape of the arrow head(s). Dragging the circle up or down changes the thickness of the arrow shaft. Below right, I have dragged out the length of the arrow using the regular control square, to make space for the text.
Clicking on the circle control, below left, turns it into a directional size tool which I have dragged up to resize and reshape the arrow head(s), shown below right.
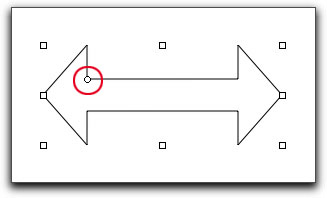
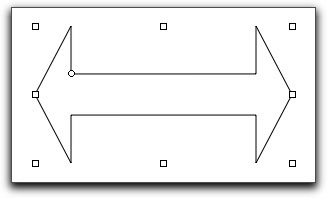
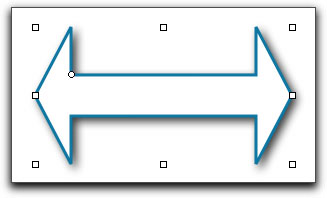
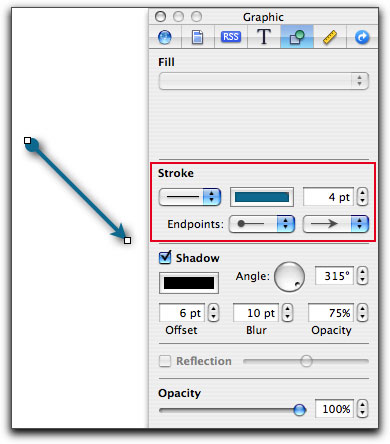
The reshaped arrow is shown below left. Below right, using the stroked feature, I have increase the thickness of the outline, changed its color and add a dropped shadow.
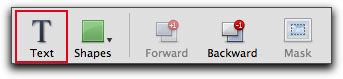
Next I am going to create a new text box by clicking on the Text button which will place an empty text box on the page.

I have entered my text, resized the text box and changed the font, font size and color and added a drop shadow to the text.


The next step is to drag the text box onto the shape container, blue dynamic guides can help with positioning.

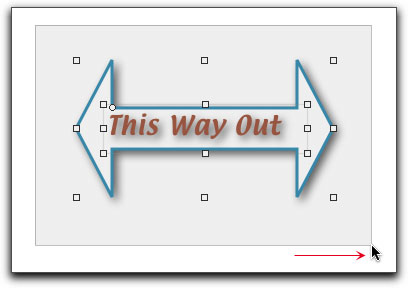
Even though the two containers are overlaid, we can still select either one for additional modification. The arrow shape is selected below left and the text box is selected below right.


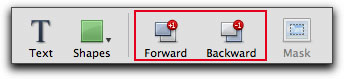
Even though we are working with two separate 'Fixed Objects' (containers), we can still move them in unison by clicking and dragging around both objects (marque), which will select both containers so that they will move together. It is possible to add as many containers (text and shapes) as you want. When stacking you may need to reorder the position of a container front to back, to do this, select the container you want to adjust and click on the appropriate 'Forward' or 'Backward' button. I have found that using the Forward and Backward buttons (for photos too) can sometimes be a little 'sticky' (select a different item and then reselect the one you want to change), and sometimes its a matter of sending one container backward and bringing another one forward.
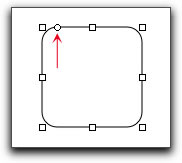
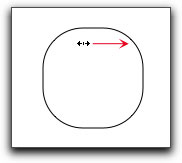
The shape shown below is a rounded rectangle and has the additional circular control. Drag the small circle to the left turns the shape into a square. Dragging to the right slowly turns the square into a circle.
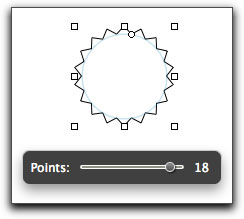
The Star shape has both a circle control and a 'Points' slider. Click and drag on the circle control to change the shape and height of the star points as shown below.
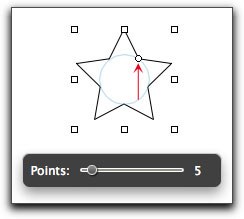

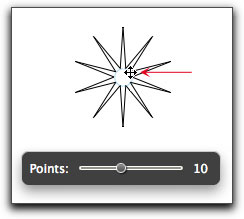
Adjusting the number of star points also changes the shape of the star.

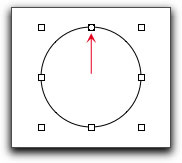
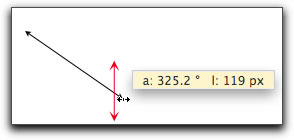
The 'Line with Arrowhead' shape can be rotated by clicking and dragging an end point.
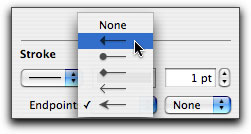
In the Graphics Inspector tab, in the Stroke section, the 'Endpoints' option is now active. You can set different endpoints for each end of the line.
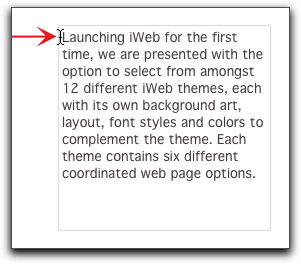
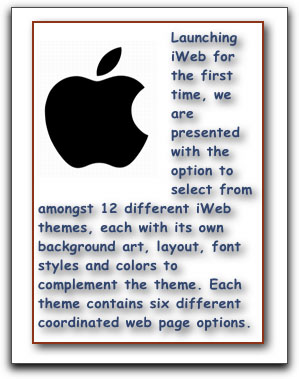
We can wrap text around an object, either a piece of art, like a logo, a photograph or a shape. In order for text wrapping to work, both the text and the object must be 'Inline'. That is to say that both the text and object must be inside a container. The container can be a shape itself or a text box. I have created a new text box, shown below left, by clicking on the 'Text' button. Now I set an I Beam (insertion point) by clicking in the text box, shown below center. I have already Copied my text so I Paste into the box, shown below right.

Again I am going to click into the text box to set my I Beam (insertion point). The location that I set the point will determine where the object will be placed. As in this case, I am setting the point at the very start of the text as I want the logo to be placed at the top. You can set the point anywhere in your text field and it will be at that position that the object will be placed. From the Insert menu I now selected Choose.
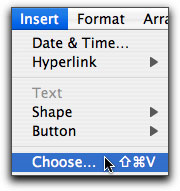
This opens the Mac navigation window, I have selected an Apple logo. Both Button and Shape are also available from the Insert menu. As shown below right, the Apple logo as now been inserted into the text box.
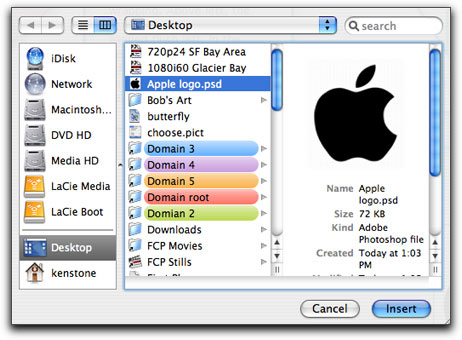
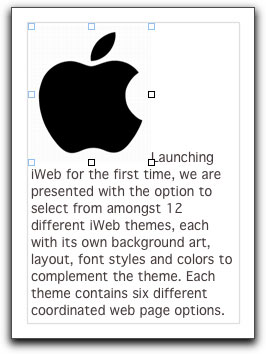
Click on the Apple logo to select, open the Text Inspector tab and click on the 'Wrap' section. Turn on 'Object causes wrap'. This will cause the text to wrap around the logo.
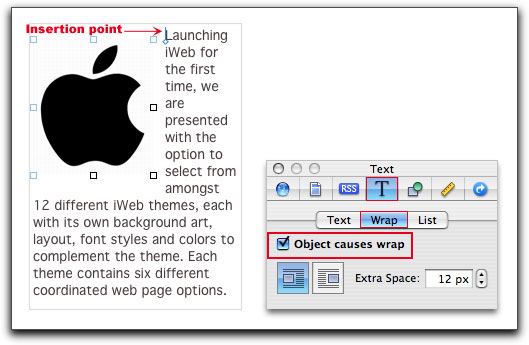
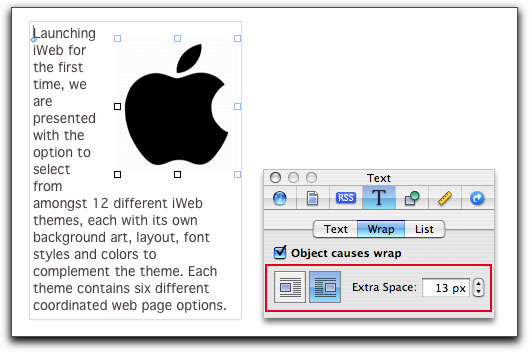
The Wrap section has controls to place the object (Apple logo) on either the right or left hand side and then wrap the text appropriately. You can also adjust the margin spacing between the object and the text using the 'Extra Space' setting.
[Top]
Hyperlinks
Hyperlinks are those ubiquitous buttons and links that we see on web pages and are what makes the World Wide Web (WWW) so useful. When you click on a link something happens. In the case of the buttons at the top of the iWeb page, clicking on one will move you from one page to the next, iWeb automatically creates these page buttons for us. We can create our own links in iWeb, which can be used to take you to a different web site, create 'forward' and 'backward' buttons or open a new e mail message that is pre addressed to you to be used by your visitor. You may want to have a 'Resource' listing with URL links to other web sites,
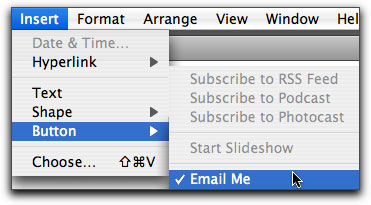
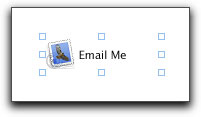
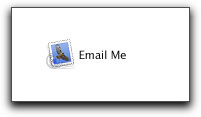
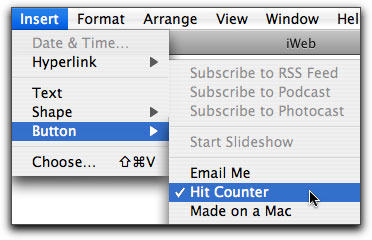
iWeb has a pre built 'e mail' button that we can use, found in the Insert menu > Button > Email me. When you select this, iWeb will automatically place the e mail button on the page. You can move the e mail button around but you can not modify it in any way (size, font, color, etc). If you are using a .Mac account, the e mail button will be addressed to your .Mac mail account.
However, this may not be what you want, either you find the iWeb 'Email me' a bit simplistic or you maybe using an e mail account at a different ISP, or have several different e mail accounts. It is easy to create our own e mail link and this link can be text, a graphic (maybe you have a better looking or more unique e mail graphic) or even a photo. We will work with text but the process is exactly the same for any other item you want to use. Open a Text box and enter the words you want to use. Click on the text box to make it active and open the Inspector and select the Link Inspector tab.

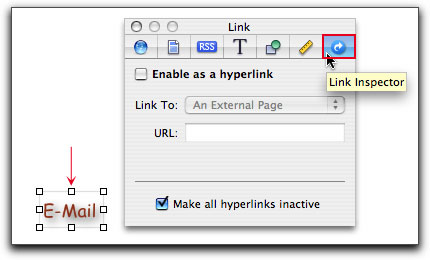
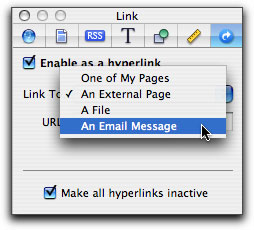
Be sure that the text box is still selected, then In the Link Inspector, turn on 'Enable as a hyperlink'. When you do this two things happen. First a small blue curved arrow icon appears inside the text box showing that the text is now an active hyperlink, below left. This icon is displayed only in iWeb, it will not appear on the link when you publish the web page. The second thing is that the 'Link To' drop down menu becomes active. In this drop down menu we will select 'An Email Message', below right.
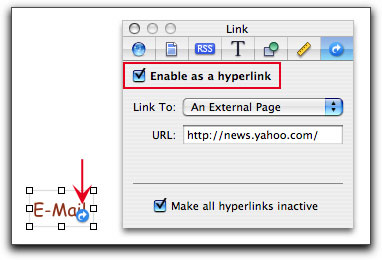
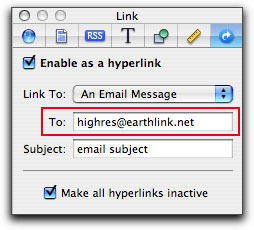
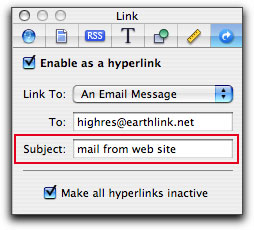
In the 'To' box enter your e mail address, below left. iWeb may automatically place an e mail address in this box, be sure that this is the address that you want. In the 'Subject' box, enter an appropriate subject, this text will appear in the Subject line of incoming e mail. This Subject can alert you to the fact that the e mail is from your web site, you can set up a filter to place all of these e mails into a special folder for you.
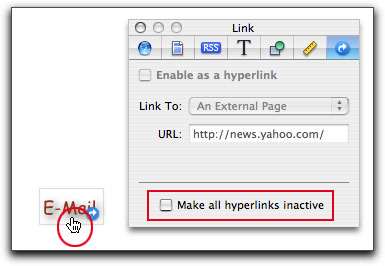
At the bottom of the Links tab is the 'Make all hyperlinks inactive' setting which is turned on by default, as shown above. This is because it is difficult to work with the e mail text when this option is active, as clicking anywhere in the text box will actually activate the link and open an e mail message (hard to type this way). When you have finished the e mail link, you can un check this and then test your e mail link on the iWeb page by clicking on it. This 'Make all hyperlinks inactive' option works the same for creating any type of hyperlink. Don't worry if you forget to un check this when you publish the page as the link will publish as 'active' regardless of this setting.
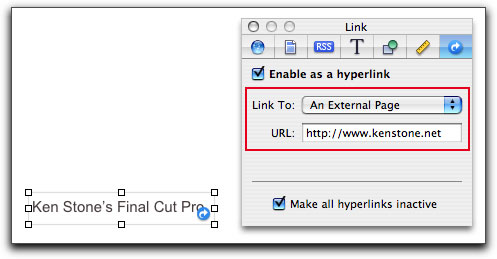
To link out to another web site set 'Link To' An External Page, then enter the URL.
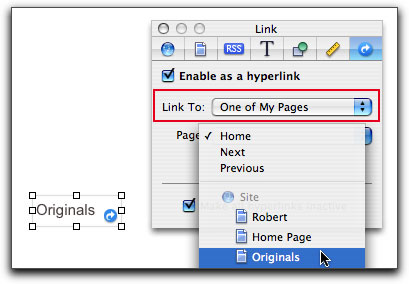
You can link back to any page at your site by choosing 'One of My Pages' in the 'Link To' option.
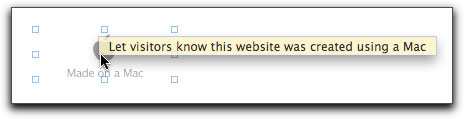
The 'Made on a Mac' logo appears by default on every iWeb page and is actually a link to the .Mac page at Apple despite what the pop up says. You can select and delete this logo if you choose. If you decide that you want the Apple logo back, you can reapply it from the Insert menu.

The Insert menu also offers a Hit Counter.
iWeb Preferences
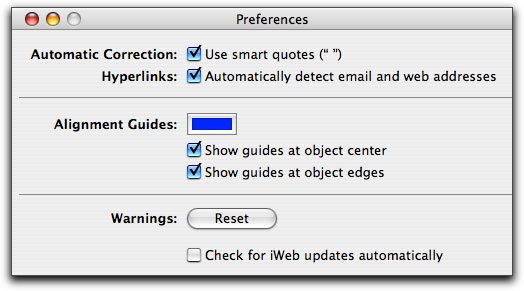
iWeb has but one Preference window, you can leave this at its default settings.

Publishing
Okay, your masterpiece is ready, it's time to 'Publish' your web site. In keeping with the iWeb 'ease of use' philosophy and a .Mac account, this is done with just one click of the mouse. You can sign up for a 60 day free trial .Mac account at the Apple .Mac page. The iWeb 'Publish' button will upload your site from iWeb to the .Mac server, where it will be available for the world to see. With a .Mac account in place, the first time you click Publish, you will be asked for your .Mac User name and Password, then the upload will begin. This info will be remembered by .Mac and not asked for again. It's really that simple. If you are using an ISP other than .Mac to host your site, you can Publish to a Folder and then upload the Folder to your server.
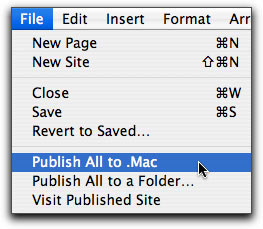
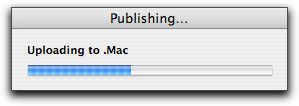
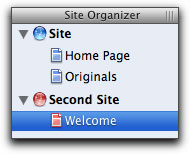
As you work on and build the pages for your web site you will notice that the site and page icons in the Site Organizer are red in color. The red denotes that the site and pages are not yet at your .Mac account. From the File menu, select 'Publish All to .Mac. You will be provided with a progress bar during the upload process.
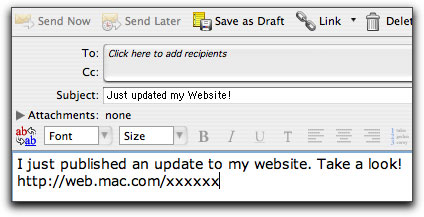
When the process has been completed you will be offered several choices. The first is 'Announce' which, when selected, will open an e mail with the URL for your site ready to be addressed. 'Visit Site Now' will take you to your site. Clicking on 'OK' will return you to iWeb. If this is your first time publishing to .Mac you will need to save the URL for your site, once there, bookmark the site. The URL is displayed in the 'Your site has been published' window, below left.
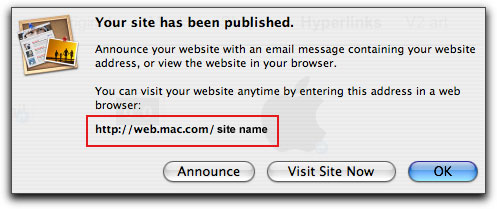
If you fail to note the URL, you can return to your site at .Mac by clicking on the 'Visit' button bottom left of the iWeb window.

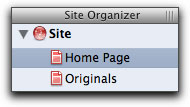
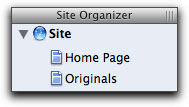
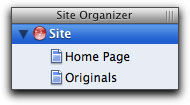
After publishing, you will notice that both the page and the site icons in the Site Organizer have changed from red to blue, below left. Blue means that the item has been published and that the page in iWeb is the same as the page at .Mac. When a page icon in the Organizer is red it means that the item has not been published or that you have change this page and it no longer matches the page at .Mac. If you delete a page from the site organizer, the site icon will turn red denoting that the iWeb version of the site is now different from the version at .Mac, shown below center. When you make a change to a page in iWeb, the page icon will turn red in the Site Organizer, below right. If you add a new page to your site it will show as red until published.
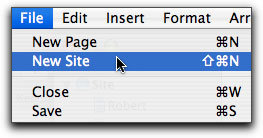
You can Publish more than one web site to your .Mac account. If you need or want to have more than one web site, from the File menu > New Site. As you can see below, a new site icon and page as been added to the Site Organizer. You will work with this new site in the same way as your first site. When you Published, the new site will be uploaded along with any changes you have made to any of the other pages in the Site Organizer. There is one caveat, this new site will not be linked to from your first site, iWeb will not automatically create a button (link) at the first site that will take you to the new, second site. Of course, now you know how to create a button (hyperlink) on any of the pages at the first site that will link to the new site. There can be an advantage to not having the second site linked to from the first. With no link, this second site is 'private' and would only be accessible to people to whom you have given the 'unlisted' URL. So, how do you find the URL for the second site? After publishing, select the new site in the Site Organizer and click on the 'Visit' button. The URL will be displayed in the 'Location' box at the top of your web Browser. Bookmark the URL or Copy and Paste it for future reference.
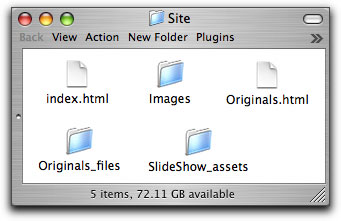
If you have your own web server (ISP account) other than .Mac, you can publish your iWeb site to a 'Folder' from the File menu > 'Publish All to a Folder'. You can then FTP (file transfer protocol) the contents of the Folder to your server. This process is a bit more advanced. In addition, if you have a Domain name at another ISP, you can use this as a 'front door' to your iWeb .Mac account. Build and publish your iWeb site to .Mac as normal. Then at your domain web site, on your domain homepage (index.html) place the word 'Enter' and make 'Enter' a link to your .Mac account. This way you can continue to use your Domain name for your viewers and still use iWeb .Mac to build your web site.
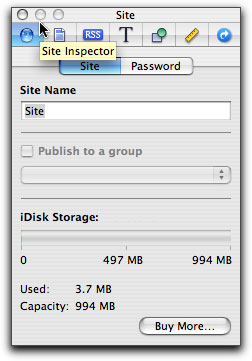
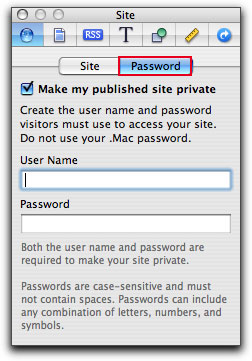
When using a .Mac account, you can 'Password' protect your web site, but not individual pages at your site. Doing this will require your visitor to enter a 'user name' and password to have access to your site. To Password protect, select either the site icon or a page in the Site Organizer. Open the Inspector and select the 'Site Inspector' tab which is divided into two sections. The first tab, 'Site', will display information about your .Mac account. Click on the second tab, 'Password' and check 'Make my published site private'. Now, enter a User Name and Password. The next time you publish, Password protection will be in place.
[Top]
Summary
iWeb offers several other special templates that we can use to build our web site. There is a 'Movie' page into which you can drag and drop a movie from the Media window or Finder. iWeb recognizes and can work with chapter markers and will display chapter controls after Publishing. You can 'Share' (export) from iMovie to iWeb. There is also a 'Podcast' template, with 'download and subscribe' features, into which you drag your Podcast (audio file), or 'Share' from Garage Band. Unlike slideshows, in which we can not preview the slideshow until it has been published, when you have placed your movie or podcast onto a page you will be able to play and preview without publishing first. The full integration of all of the iLife apps, the ability to 'Share' (export) from these apps to iWeb plus the iWeb Media window with its access to the media files of the other iApps, makes adding content to our web pages a very simple task. When you Share (export) from any iLife app to iWeb, the correct formatting and compression of the Shared export is done automatically for you. In addition you can export from FCP and FCE. File > Export > QuickTime with Conversion > Format > 'iPod 320 x 240' or AIFF (audio only) and use these QT exports in iWeb. Also, with QuickTime 7 and an iSight camera, you can create audio and video Podcasts right on your desktop for use in iWeb.
My apologizes for the length of this article, I could not help myself (grin). From the very start I was extremely impressed with iWebs abilities and as I worked with iWeb, writing this article, I discovered that it had an unexpectedly rich and powerful feature set, its graphics abilities are sophisticated indeed. I was so taken with iWeb, that I felt the need to show you all that I had found. In truth, the thing that amazed me the most, is that iWeb is rock solid, everything works as advertised, everything. The only small issue I found is that sometimes, when trying to select an object (text box, shape or photo), it is necessary to select some other object first and then click on the first object to select. I have been pounding away on iWeb for several weeks now, never even a hiccup, not once. For a 1.0 version of an app to be so capable and so robust is truly remarkable, kudos to the people who put iWeb together.
Special thanks to Robert Weil for letting me use his art work for this article. You can visit his iWeb web site at www.robertweil.com to see more of his art.
Enjoy,
--ken
[Top]
Article copyright © www.kenstone.net 2006
Art copyright © Robert Weil 2006
© 2000 -2006 Apple
Computer, Inc. All rights reserved. Apple, the Apple logo, Final
Cut Pro, Macintosh and Power Mac
are either registered trademarks or trademarks of Apple. Other
company and product names may be trademarks of their respective
owners.
All screen captures, images, and textual references are the property and trademark of their creators/owners/publishers.


