
White Paper - Location Sound 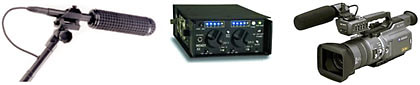
October 21, 2002
Location Sound: The Basics and Beyond
By Dan Brockett
White Paper - Location Sound October 21, 2002
Location Sound: The Basics and Beyond
By Dan Brockett
The First Link - Sound Itself
The Second Link - Microphones
The Third Link - Cables and Adaptors
The Fourth Link - Mixing and Routing Devices
The Fifth Link - The Recording Device
The Sixth Link - The Monitoring Circuit of the Recording Device
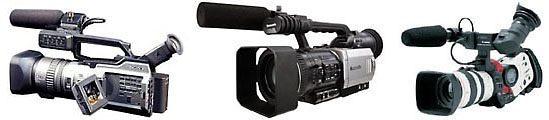
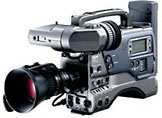
DV users with many different experience levels and widely diverse backgrounds are producing their own projects. The fact is that almost all of the tools needed to produce broadcast quality video and DV "films" have become relatively inexpensive and widely accessible. Final Cut Pro and AVID Express DV both have about 90% of the capability of a $100,000.00 AVID Media Composer system at a minute fraction of the cost. Camcorders like the Sony PD-150, Panasonic AG-DVX100 and the Canon XL-1S are capable of producing extremely high quality images.
The immense popularity of digital video means that a large majority of users today have access to the most advanced communications medium society has ever seen. We have small, relatively affordable, high quality camcorders that can make amazing images with far less light than ever before. We have very sophisticated and capable video editing tools available on both platforms. Assuming we all want to produce work of quality, what's missing from this equation? You guessed it, the sound. The fact is that most independent, low/no budget projects that are produced today seem doomed to suffer with sound that ranges from merely average to barely usable. Whether you are producing video for your friends and family, to view, weddings and events, corporate audiences, or for broadcast or theatrical release, no matter which category your audience falls into, they expect "transparent" sound from your project's soundtrack. Let's define what "transparent" sound is.
 Audio conveys almost all of the emotional impact in the visual medium. It's a fact. If you watch your favorite scene from any film or TV show with the sound off, you soon discover that moving images on their own are typically not very emotionally involving. Don't forget, silent films could be scary, sad, happy, dramatic or interesting BECAUSE they were conceived without sound. To be totally fair, most silent films were viewed with either live or pre-recorded music. Obviously, most of us want to produce projects that will emotionally involve our audience. For most of us, video has become the single most common collective vocabulary in our lives. It is also a given that video is great for communicating almost any message to almost any audience, if done well.
The Experience Economy
What may be less obvious to you if you are new to film and video making, is that audiences of all kinds now expect to be entertained while you are conveying your message. If you are in the entertainment end of this business, this is understood, but for those of you who want to create home video, weddings, events or video for business, your content must also be entertaining and compelling. Emotional involvement from your audience is what defines good entertainment. You may not feel that the Shop Safety training video you are producing can or should be very entertaining, but if the production values and concept are not very high quality, your training video will bore your audience. If it's done well, even a Shop Safety training video can be entertaining. Your sound is largely what will determine if your project is entertaining to your audience. Unless you want to conceive your project as a "silent film", you have to be concerned ('obsessed' might be a better term) with your project's sound.
One of the toughest concepts for many newer DV users to grasp is that the better job you do with your project's sound, the less it will be noticed. I feel that this concept is one of the reasons why most projects don't end up with very high quality soundtracks. We are very used to spending time, effort and money on a better camera, lens, bigger and better lighting, crew and visual effects and seeing an immediate "payoff" when our images are viewed. It's instantly recognizable if a scene is lit effectively or if a visual effect is done well. We feel "justified" in shooting on a higher quality, more expensive format or with a bigger crew because the end result is usually easily identifiable on-screen. Most of us can immediately recognize if a project was shot on 35mm film versus DV or if a project's motion graphics or visual effects were well executed. If we notice a sound mix though, it is usually because the sound was done incompetently. This is the central concept of "transparent" sound. If your location sound is recorded correctly, the easier it will be to work with the basic audio during the post-production process. The better job you do with the sound during video and audio editing, the less the audience will notice it. The only sound that is noticed in a visual medium is usually poorly executed. Great sound works on a subconscious level with the viewer by drawing them into what they are viewing. Great sound supports and enhances the stories you are trying to tell. Now that we have a basic understanding of the goal for your project's soundtrack, let's review what we have covered before we dive headlong into equipment and technique.
Four points to remember about sound for picture
1 . The principles of location sound are the same for almost everyone shooting anything.
2 . No matter who the audience is, at the very least, they expect "transparent" sound
3 . Sound conveys emotion - picture conveys information
4 . The better your soundtrack, the less it is consciously noticed
It's All Just a Chain
The easiest way to discuss location sound is to think of the entire audio path as a chain.
In the case of location sound, the "links" are:
Just as in an actual chain, the audio path is only as strong as it's weakest link. This means that a high-quality, accurate recording device paired with a low-quality microphone will not be able to record anything better than what the microphone is capable of picking up. It means that a great microphone and audio mixer paired with a substandard recording device will only be able to record to the limitations of the device's recording circuit. While it is not practical for most DV users to acquire and use the best quality location sound equipment made, it should be the goal of every user to acquire and use components that match each other in features and quality. Don't buy the best mixer you can afford and then skimp on cables and connectors. Don't buy the best shotgun microphone on the market and then skip using a mixer because you spent your entire budget on the microphone. You get the idea. We'll discuss rental versus buying later in the article but needless to say, buying one or two high quality pieces and then renting the rest as needed is a viable option.
[Top]
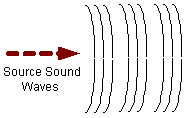
It is not possible to try to give even the basic principles of sound within the confines of this article but let's talk about some basic concepts of what sound is and why sound behaves the way it does. At the most basic level, sound can be described as waves moving through air. The farther apart these sound waves are, the lower the frequencies. The closer the sound waves are to each other, the higher the frequency. In the most basic terms, sound is "messy". It bounces, reflects and behaves in ways that seem mysterious to most us. It cannot be seen and all of us perceive sound differently. There is an entire branch of study and academia called "Psychoacoustics" which is the study of how humans perceive, process and react to sound. Sound is definitely a case of "perception being reality."
 Sound waves cannot be seen in most cases, but effects of sound waves are evident if you know where to look. Although not actual sound waves, the ripples produced when a rock is dropped into water produce a nice visual approximation of what sound waves would look like if they were visible to us.
 If you place something lightweight, like a piece of paper in front of a typical transducer, like a two way audio speaker (a two way speaker has only a woofer for generating low frequency sounds and a tweeter for reproducing high frequency sounds), you will probably see the paper physically move if placed in front of the woofer while the speaker outputs sound at a decent volume level. However, if you place the paper in front of the tweeter only, you will probably see either very little or no perceptible movement. This is because the high frequencies generated by the tweeter are much closer together and occur at much more rapid intervals. Too rapidly to perceptibly affect the mass of even something as lightweight as the paper unless the amplitude of the sound is increased to very high levels. Understanding this concept is central to understanding how sound waves behave.
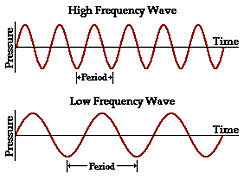 Low frequency sound waves (bass sounds), because of their larger physical size, tend to interact with their surrounding environment in much more perceptible ways than high frequency sound waves (treble sounds) seem to. All sound waves reflect off of physical objects but because of their larger size, lower frequency sound waves reflect and penetrate objects more than higher frequency sound waves do. If you can grasp this idea, you will begin to have an understanding of how to help modify or eliminate undesirable sounds when you shoot in any location. If your apartment or hotel neighbor is cranking his stereo loudly in the room next door, which frequencies are you hearing through the walls? Obviously, the higher frequency sound waves do not have the strength to penetrate the wall. Few of the mid range sound waves will penetrate the wall. What you will mostly hear through the wall are mostly the low frequency sound waves.
"Preventative Maintenance"
What we deem as "poor quality" sound can be manipulated and adjusted all along the audio path in different ways but in most cases, it is best to adjust and compensate for the "poor quality" sound before it ever enters the audio path. Although this sounds like a simple concept, the reality is that it is much more common for people to hear what will obviously be a sound problem (undesired noise, excess ambient sound, technical sound problems like hum or buzzes, etc.) and to just go ahead and shoot, rather than determining the source of the undesirable sound and fixing it. In some cases, it's just sheer laziness. It's a pain to hunt down an audio problem and fix it before rolling. When shooting with a crew or in limited access or time-constrained situations, this is somewhat understandable but you should know that despite all of the great postproduction technology available, basically, what you hear is what you get. If you record poor quality sound, it will always be poor quality, no matter what types of filters, plug-ins or processes you run it through. It pays to spend a few extra minutes to fix audio problems before you shoot.
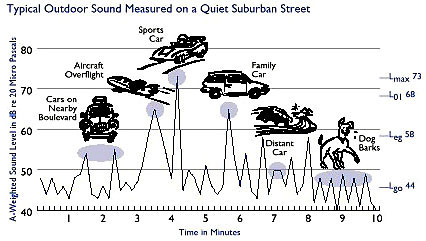
Below are the top five most common causes of location sound audio problems that most people will run into when shooting. You will notice that several of the categories kind of overlap each other in definition. Such is the nature of sound. Included are some suggestions for mitigating, reducing or correcting the problems before you shoot:
Excessive ambient noise.
Too much background noise. Too much traffic noise. People speaking or making noise in the background or in the room next door. Dogs barking in the background. Sirens in the background. Aircraft flying overhead.
Possible solutions.
Excessive ambient noise is one of the toughest issues to work with because often, the excess ambient sound is beyond your control. The solution can be as simple as repositioning your microphones or waiting until the excess ambient sound dies down or goes away to more elaborate steps such as soundproofing a location. Obviously shutting doors and windows can help when shooting interiors. Exteriors are tougher. In the past, I have resorted to "paying off" a tree trimming crew using chainsaws to take a "long" lunch or knock off early. In that instance, I paid to record better sound. You must be creative in your thinking and do whatever is within your power to limit ambient noise when shooting. Microphone choice is extremely important here as well. More on that later.
Building noise.
HVAC (heating, vacuum and air conditioning) noise. Building creaking or settling. Elevator noise. Clocks ticking. Doors opening and slamming. Noisy lighting fixtures.
Possible solutions.
HVAC can be tricky to deal with. If you have done your homework, when scouting a location to shoot, you should always determine where the access is for the HVAC controls for the areas you'll be shooting in. Unfortunately, many newer buildings have "zone climate" HVAC systems where there is one control for an entire area or even a floor of a building. So if you turn off the HVAC system to shoot, you may be fine in the room or area you are shooting in but people in other areas may be dying of heat or freezing to death. If you cannot obtain access to HVAC controls or personnel to control the HVAC system, you can also reduce the "whoosh" of vents by bringing sound blankets or foam and temporarily blocking a single HVAC vent. Blocking one or two vents at a time is rarely an issue for an HVAC system. We typically chill down a room to just above "teeth chattering" point before beginning an interview, and then turn the air conditioning off to get rid of the low HVAC system rumble. Video lights and shutting all of the doors and windows will typically heat the room right back up fairly rapidly. The added benefit is that shooting in a cool room will also keep everyone alert and awake.
As far as creaking and settling of a building, there is not much you can do other than listen carefully as you shoot and shoot alternate takes. You can do the same with elevator noise.
Carefully worded signs (quiet please - video crew shooting) on the doors can be of help or stationing a crew person at the offending adjacent door to act as a "doorman", carefully and quietly opening and closing the door can help.
 Typically, the noisiest lighting fixtures are fluorescent light banks. As the ballasts age, they typically become more and more noisy. The obvious solution, if you are lighting the scene is to just turn the offending lights off. Many newer buildings have motion sensor light switches though and taping black gaffer tape over the light's sensor can take forever for the light to turn off. Always bring a stepladder and if necessary, you can just remove one tube and the bank or at least part of it will go out. As in HVAC systems, in many newer buildings, you may encounter a single set of lighting control switches that control all lighting in a large area or even an entire floor of a building. Learn how to quickly and safely remove fluorescent tubes from fixtures. Many times, it's the quickest, easiest option.
Machinery.
Fan/hard drive noise from computers. Carrier tone from computer and video monitors. Refrigerator/freezer noise.
Possible solutions.
Beware of computers. The obvious solution is to turn the CPU off, if possible. When it is not possible, another solution is to isolate the CPU within it's own nest of sound blankets (a.k.a. known as furniture pads). Make sure to leave room around the CPU so that its fan system still has access to adequate airflow. We typically use two or three C stands with sound blankets grip clipped to the extension arms.
Beware of the "carrier" tone, the high-pitched whine that all CRT's emit when turned on. It varies from monitor to monitor but if it is loud enough and at the correct frequency, it can be recorded and can be difficult to EQ out.
Refrigerators are commonly encountered in many locations. They can be tricky to hear because as the unit's compressor cycles on and off, you may hear the sound and not know what it is, then as you look around, the unit's compressor, may cycle off. It's not usually a good idea to unplug a refrigerator, unless you obtain permission from its owner. We usually will close doors and or isolate the refrigerator using sound blankets ands C stands. If you do unplug a refrigerator, it's a good idea to place your car keys inside so that it's impossible to leave without remembering to plug it back in.
Talent & Crew Noise.
Talent/crew fidgeting or moving. Creaking floorboards. Squeaks from shoes. Clothing rustling/rubbing. Microphone (usually lavalieres) rubbing on skin or clothing. Stomach rumbles. Heavy breathing. Mouth sounds (clicking or sticky mouth)
Possible solutions.
Make sure that your talent and crew holds still and breathes softly during takes. This can be tough during long takes and having an assistant director on the crew can really help enforce this. Most crews are fairly savvy about this but at times, observers, crowds and even clients can cause a lot of off-set noise that can be a nightmare to deal with in post so deal with it before you roll.
Creaking floorboards can be challenging. If the talent's feet are not seen in shot, carpet or "dance floor", a portable type of flooring system can be laid down for crew and talent. Squeaking shoes can be remedied by removing them if they are out of frame, using baby powder or even a lubricant like WD-40 or silicon spray although these can stain shoes. Shoes squeaking on floors can be tougher to deal with than squeaking shoes themselves. A bit of sawdust or even once again, removing the offending shoes can help although it's a little strange to see a crew and talent doing scenes in their socks. I've done it though and it can lighten the mood although it's probably not the safest way to shoot a scene. Grip equipment can be heavy and dangerous.
Clothing rustling and rubbing are also one of the most common challenges. A lot of this can be mitigated I the correct types of clothing are used. The "sound mixer's nightmares" are silk, rayon and corduroy. Trying to mic a female talent wearing a silk blouse will test the patience of even the most experienced sound person. The other half of this equation is just learning basic mic techniques. There are many different "tricks of the trade" when it comes to learning how to put a mic on talent and no having it rub and pickup extraneous noise. More on this later in the article.
Mouth sounds are more of a problem when doing voiceovers but can be a problem on set as well. Water helps. Always make sure that all talent has easy access to water as they shoot scenes. Depending on the person, water alone may not remedy "sticky" mouth. One of the best solutions for sticky mouth is, believe it or not, green (Granny Smith) apple slices. The acidity and sugar content balance of this particular variety tends to stabilize the saliva and make it so that mouth clicking and smacking is reduced or eliminated. I work with several VO talents who have been using this method for years and swear by it. It works.
Sound/Video Gear.
Ground loop hum/buzz. Loose or defective connector/cable crackle. "Hits" when using wireless microphones. Camera motor noise. Video monitor carrier tone. Substandard microphone mounting/handling. Wind buffeting.
Possible solutions.
Ground loops are perhaps the most common equipment problem as far as location sound. Many of these issues occur because professional balanced gear is interfaced with consumer-unbalanced gear. Using the proper gear will remedy most ground loop issues. In general, using Radio Shack style adaptor plugs and jury-rigged cable adaptor plug combinations are a recipe for hum or buzzes. Always use professional balanced XLR gear as much as possible. More on this in the equipment segments later in this article.
Cables are easy. If you experience bad or loose connectors or cables, mark them with a piece of tape and either repair them, if you are talented with soldering cables and connections or replace them.
 Wireless microphones are susceptible to noise. From the very cheapest consumer models to the top of the line pro units that sell for $4,000.00 to $7,000.00 per system, all wireless systems can experience interference. The more expensive the unit, generally, the less susceptible to extraneous noise, plus the higher the sound quality. Only use wireless when you must. Do not shoot sit down interviews with wireless systems because you are too lazy to run a cable on the floor. With the advent of new high-end digital wireless systems, noise is becoming less of an issue than with analog units. Eventually, all wireless systems will probably be digital and we'll be free to use them anywhere we want for the most part.
Camera motor noise is almost always a by-product of using an on-camera microphone. It's really simple to fix this one. Don't use an on camera microphone unless it's ONLY for ambient sound. NEVER try to record talent with an on-camera microphone; it's the perfect recipe for bad sound. The on-camera microphone will pickup very little of the talent's sound and lots of background ambient sound. If you must use an on-camera mic, buy a high quality microphone mounting system and you should eliminate most camera motor noise.
Video monitor carrier tone can be picked up if it occurs near the microphone. Move the monitor or turn it off.
Microphone mounting or handling. Booming technique is an acquired skill. You don't just buy a boom and start using it successfully. It takes training and practice to become a good boom operator. As far as the microphone mount itself, beware of using cheap, rubber band mounted microphone mounts. These are simple metallic ring systems where the microphone is suspended in the ring using rubber bands. These types of mounts are okay for stationary use but for hand booming, many of these mounts are inadequate. A high quality microphone mount can take a lot of handling and not transmit it to the mic element.
Wind buffeting can be very tough to prevent when shooting outdoors. The easiest solution is to use a quality microphone mounting system, zeppelin and windsock. More details on these later.
Four points to remember about the "first link" in the audio chain and "preventative maintenance"
1 . The audio chain is only as strong as it's weakest link[Top]2 . Low frequency sounds, because of their larger physical size, tend to interact with their surrounding environment in more perceptible ways than high frequency sounds seem to.
3 . Fix as many sound "issues" as possible BEFORE shooting
4 . If you record poor quality sound, it will ALWAYS be poor quality
 In our discussion of sound, we talked about some basic concepts of what sound is (and sound waves) and a few basic characteristics of how sound waves behave, (they are 'messy', the differences between how low frequencies behave versus high frequencies). Microphones are, at their most basic, transducers that that convert input energy of one form into output energy of another. Microphones are broken down into two separate categories; Dynamic and Condenser. Most Dynamic microphones are the moving coil type. Moving coil microphones use a magnet, a coil wrapped with wire and a diaphragm that sits over the top of both. Sound pressure hits the diaphragm and moves the coil across the magnet. This creates the voltage that travels out and
along the mic cable on the way to the mic preamp. With Condenser microphones, Phantom power from a battery inside the mic, or from mic cable from the mixer or recording device, or a separate power device is used to power the microphone. The phantom power charges a capacitor. This capacitor holds a charge in the microphone's fixed backplate. In front of the backplate, a thin diaphragm is located. When the diaphragm moves in relation to the fixed backplate, a charge is created in proportion to how much movement the diaphragm makes. Unlike the signal created by the dynamic mic, a condenser's signal is very weak and must be amplified before it gets to the mixer or recording device. Condenser microphones contain a small amplifier that boosts the signal before it leaves the mic
In our discussion of sound, we talked about some basic concepts of what sound is (and sound waves) and a few basic characteristics of how sound waves behave, (they are 'messy', the differences between how low frequencies behave versus high frequencies). Microphones are, at their most basic, transducers that that convert input energy of one form into output energy of another. Microphones are broken down into two separate categories; Dynamic and Condenser. Most Dynamic microphones are the moving coil type. Moving coil microphones use a magnet, a coil wrapped with wire and a diaphragm that sits over the top of both. Sound pressure hits the diaphragm and moves the coil across the magnet. This creates the voltage that travels out and
along the mic cable on the way to the mic preamp. With Condenser microphones, Phantom power from a battery inside the mic, or from mic cable from the mixer or recording device, or a separate power device is used to power the microphone. The phantom power charges a capacitor. This capacitor holds a charge in the microphone's fixed backplate. In front of the backplate, a thin diaphragm is located. When the diaphragm moves in relation to the fixed backplate, a charge is created in proportion to how much movement the diaphragm makes. Unlike the signal created by the dynamic mic, a condenser's signal is very weak and must be amplified before it gets to the mixer or recording device. Condenser microphones contain a small amplifier that boosts the signal before it leaves the mic
It may help you to visualize what is happening inside the microphone by imagining how a speaker works. A microphone works the exact same way that a speaker works, only in reverse. When a speaker receives an electronic signal, it moves its transducer in response to the amplitude and modulation of the signal that it is receiving from the amplifier. When a microphone element is moved by the sound waves, it generates the same kind of electronic signal. The main difference is that the microphone SENDS the signal out to a monitoring or recording device, whereas the speaker RECEIVES a signal from an amplifier.
Balanced versus Unbalanced
What do the terms "balanced" and "unbalanced" mean? Without going into a lengthy explanation of impedance and electronic signal measurement, balanced line-level equipment operates at a much higher nominal level (+4dB). Besides a positive and negative lead, it also uses a third grounded lead (or 'earthed' lead as our UK friends say), and usually, but not always, uses three-pin, locking XLR connections. Unbalanced line-level equipment operates at a lower nominal level (-10dB) and has only a positive and a ground lead (no negative) and mostly uses non-locking RCA connections, although unbalanced connections are also occasionally 3.5 mm mini plugs, 1/4" (tip-ring TR) plugs and spade lugs.
Balanced XLR |
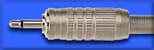
Unbalanced 3.5 mm mini-plug |
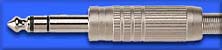
Balanced 1/4" or unbalanced stereo1/4" |
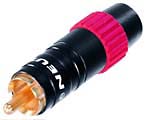
Unbalanced RCA |
The basic difference between balanced and unbalanced microphones, connectors and devices are that professional audio and video equipment predominantly uses balanced cables and connections. Consumer equipment almost exclusively uses unbalanced connections. Why should you care? Improperly wiring to unbalanced equipment is probably the single most common cause for ground loop problems, interference, hum and buzz. I suggest you use balanced professional equipment whenever and wherever in your audio chain that you can. Balanced equipment is much less susceptible to interference, but can still pick up ground loop hums especially if there are grounding problems in the electrical system the equipment is plugged into. However, you will still have fewer problems with interference in your audio if you use balanced equipment. Almost all professional microphones and mixers operate using balanced connections for this reason.
Microphone types and purposes
Although there are probably more than a dozen different microphone types, it probably makes sense to discuss the most common types of microphones used in film and video production. Just as a golfer uses a specific type of club to "tame" specific areas of the golf course, a discerning location sound mixer might use several types of microphones during the typically varied shooting situations encountered in a typical project. Let's discuss the various microphone types that are used in 90% of shooting situations, Shotgun/hyper cardioid, cardioid microphones and lavaliere microphones. Besides physical construction and size, the main factors that categorize microphones are their pickup patterns and characteristics. Do you recall our discussion of what sound waves look like and how they behave? Certain pickup patterns are better than others for picking up different subjects and specific portions of the audio frequency spectrum. Certain pickup patterns have specific desired characteristics. Add up these factors and you will see that there is not always a "right" or "perfect" microphone for any given situation. You could give three different cinematographers the same lighting and grip package and each of them will use a different combination of lights and support gear to realize each of their individual interpretations of how the scene should look and feel. You could give three different location sound mixers a sound kit and each of them might possibly use a different combination of microphones and techniques to shoot a scene. It should be apparent to you by now that there is no such thing as a "general use" microphone. This should also prepare you for the fact that you will need to eventually rent or own multiple microphones.
Shotgun/Hyper Cardioid & Cardioid Microphones
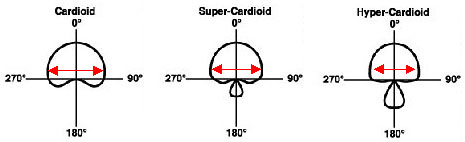
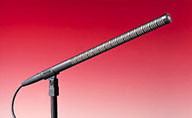
A common misconception is that a shotgun microphone has a longer "reach" than other microphones, as if it can "magically" record sounds that originate a considerable distance from the microphone element. This is the wrong way to think about how microphones and sound behave. Longer microphones don't have any "reach"; they have a narrower angle of acceptance than other microphones. Even the longest shotgun microphone will pick up lots of extraneous ambient sound in the right situation. Remember that sound is "messy"? This means that the undesirable sound is reflecting and bouncing into the area where you are trying to record clean sound mixed with just a slight amount of ambient sound. In order to understand the reason that overhead booming is used whenever possible, think about what lies beyond the talent. If the mic is pointed at the talent at mouth level from near the camera, not only will the microphone pickup the talent, the microphone will also pickup whatever is behind the talent. By pointing the microphone element down toward the talent from above, it picks up the voices of the talent and mainly, the floor or ground as the case may be, rather than all of the sound of the activity behind the talent. Shotgun microphones are more directional than other types of microphones. Hyper cardioid and cardioid microphones have a slightly wider angle of acceptance than shotguns but narrower than most other microphone types. Some seem to prefer the more open sound of a cardioid or hyper cardioid instead a shotgun, but it can be difficult to get enough isolation on talent when using a cardioid, especially when shooting exteriors. In my experience, the single most typical problem encountered when shooting on location is excessive ambient sound creeping into the recording.
Above all other factors, the distance between the mic and the sound source will have the largest influence on the overall sound in your recordings. Regardless of pickup pattern, cost or quality of your mic, if it is placed too far away or aimed improperly, then your sound quality will be diminished.
Which shotgun/cardioid microphone should I buy?
I wrote a review of inexpensive shotgun microphones that is also posted on this website so if you are in search of a good, low cost shotgun microphone, I suggest you read this article. In the interest of not adding all of the copy of that review to this article, here is the link to the review Low Cost Shotgun Microphone Comparison In a nutshell, plan on spending from $250.00 to $450.00 for a low cost shotgun microphone.
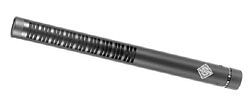
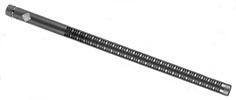
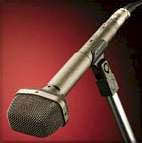
If you are interested in a higher quality shotgun, hyper cardioid or cardioid mic, I will list a few of my favorites but just realize that these are by no means the only good microphones of this these types available. Probably the most common shotgun microphones used in sound for picture production are the Sennheiser MKH series. The Sennheiser MKH-416 ($999.95 street) is an industry standard short shotgun and for good reason. It is very flexible, reliable, simple and efficient. This MKH-416 was slated to be replaced totally by the newer MKH-60 ($1,299.00 street) years ago but the continuing demand for the MKH-416 has been such that Sennhesier has continued manufacturing and selling both models for years. The MKH-60 is a more modern, sophisticated take on the MKH-416 and both are excellent short shotgun microphones. Two other favorites of mine are the Neumann KMR-81i ($1,199.00 street) and the Sanken CS-3 ($1,499.00 street). The Neumann line of microphones are world renowned for their superb German construction quality and sound and KMR-81i is a beautiful sounding example. The Sanken CS-3e was developed in conjunction with NHK, Japan's largest broadcaster and has fast become very common on film and television sets all over the world. It is an excellent sounding microphone.
Sennheiser MKH-416 ($999.95 street) |
MKH-60 ($1,299.00 street) |
|
Neumann KMR-81i ($1,199.00 street) |
Sanken CS-3 ($1,499.00 street) |
As far as long shotguns, The Sennheiser MKH-70 ($1,399.00 street) is a great workhorse long shotgun that I find very useful for exterior interviews and dialogue as it's narrow angle of acceptance reduces exterior ambient to a low level. It is also quite rugged and reliable. The Neumann KMR-82i ($1,599.00 street) is basically a longer version of the KMR-81i and also features that smooth sound quality that all Neumann microphones are known for.
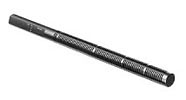
Sennheiser MKH-70 ($1,399.00 street) |
Neumann KMR-82i ($1,599.00 street) |
There are also numerous other shotgun, hyper cardioid and cardioid microphones available from Schoeps, AKG, AudioTechnica, Beyer Dynamic, ElectroVoice and others that are great microphones. As we discussed earlier, plan on using, renting or owning several different microphones. There are no absolutes when it comes to microphones; it's just that certain brands may offer a sound quality that is more appealing or more effective in various situations. Certain brands and models may be more rugged or have a more delicate sound but also a delicate construction. I personally own eleven microphones and will probably acquire more of them in the future. Each is a unique tool that is better suited to certain situations, budgets and uses. The bottom line here is to rent, borrow, demo and listen before you buy. Certain microphones will be better for your situation.
What Else Do I Need to Use Shotguns/Hyper Cardioids and Cardioids?
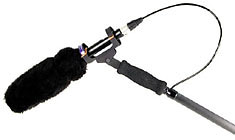
If you are serious about recording high quality sound, you soon realize how futile mounting a microphone on a camera is. The time will come when you will finally decide to get serious and go with a microphone mount, zeppelin, windsock and boom pole. You should remember that all of these tools that are necessary to work in conjunction with shotguns, hyper cardioids and cardioids, in total, may cost as much or more than the microphone itself. Allocating your budget intelligently here comes into play once again. It would make much less sense to buy a top of the line Neumann shotgun, then skimp by purchasing a rubber band mount only and not purchasing a zeppelin, windsock and real boom pole. Buy a more reasonably priced microphone and all of the support gear needed to use it correctly. You should budget for purchasing all of these items at once. Let's break down all of these support items, one at a time:
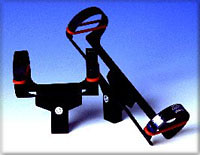
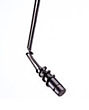
Microphone Mounts
As we discussed earlier in this article, there are many different models of "rubber band" mounts. Even if you are on a tight budget, this is not a place to try to skimp. If all of your sync sound shooting is stationary interviews, you may be able to get away with using a rubber band mount, but if you are planning on doing any "walk & talks" you must invest in a more sophisticated mounting system. Both Lightwave Systems and Rycote make excellent microphone mounting systems. The mount that we use that I am quite familiar with is the Universal Mini Mount from Lightwave Systems. The reason we like this mount so much is because it is extremely effective, it is very versatile and it is well engineered. The beauty of the Universal is that with the proper adaptors, the same mount can be used on a boom pole, on a camera or mounted on a handgrip for sound gathering. You will want to budget approximately $200.00 for a microphone mounting system if you want to obtain top quality results.
"rubber band" |
Universal Mini Mount Lightwave Systems |
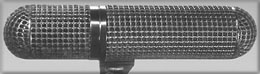
Zeppelins and Windsocks
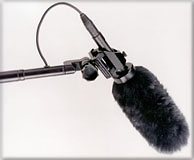
A Zeppelin is a protective enclosure that totally encapsulates a microphone. The name evolved from the microphone Zeppelin's obvious resemblance to the German gas dirigibles of the 1920's and 30's or from their less obvious resemblance to the seminal band Led Zeppelin. The jury is still out on that point. The function of the zeppelin is to not only protect the somewhat delicate microphone element but also to filter out extraneous wind and HVAC air movement. The ideal situation is to have separate sizes of Zeppelin for both long shotguns and shorter shotguns and cardioids although in practice, we have been satisfied in using shorter shotguns in our longer size Zeppelin.
Zeppelin |
Burning Zeppelin |
Led Zeppelin |
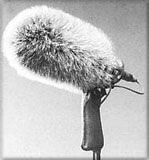
Windsocks (dead kitties or road kill due to their usual gray or black fur appearance) are synthetic fur-covered sleeves that are designed to slip on over a Zeppelin. Most offer Velcro tabs and or zippers to snugly fit a Zeppelin. Windsocks offer a much higher degree of wind resistance than just using a Zeppelin alone. Some of the manufacturers even offer two different length of fur on their windsocks, a shorter hair for moderate wind and a longer hair for strong wind. Besides diminishing wind noise and buffeting, using a furry wind sock will cut out some of your high frequency response so you should not use one all of the time, you need to listen to what the microphone is picking up and choose to use or not use a windsock in addition to the Zeppelin accordingly. There are also socks that are "velvety" instead of furry and work very well in winds up to 15 mph and give minimal high-frequency attenuation.
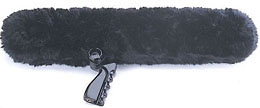
Windsock |
Another alternative to a fully encapsulated Zeppelin are the slip-on windscreen systems. Lightwave refers to their system as "The Equalizer" and Rycote refers to their system as a "Softie Windjammer". The advantage to these systems over using a full Zeppelin is that they are both less expensive and are smaller and quicker to use. This can be handy for more "run & gun" ENG (electronic news gathering) style shooting. The disadvantage of the slip on windscreens is that they do not provide the same amount of isolation and wind buffeting protection since by design; they only cover the front portion of the microphone element. We usually use the slip-on Equalizer when traveling, when space is at a premium or when shooting indoors. When shooting outdoors though, you will obtain better sound using a full Zeppelin and windsock. You should also know that you might sometimes need to use windsocks indoors, particularly when you cannot turn off HVAC systems or in when shooting large auditoriums.
"The Equalizer" |
"Softie Windjammer" |
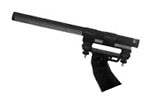
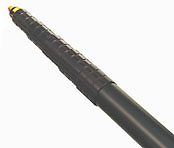
Boom Poles
Now that you have at least one good shotgun, hyper cardioid or cardioid microphone and a microphone mount, zeppelin, windsock or a slip on windscreen, how do you use it? The first step is to obtain a boom pole. Boom poles are available in a variety of lengths, styles and materials with the most popular poles being made of aluminum and carbon fiber. Generally, it would be better to own two lengths of boom pole, a short one for travel and small setups and a longer one for larger wide shots. We own one boom pole, A Gitzo G1553 carbon fiber model that can extend to about 11'. This unit was very reasonably priced (for a carbon fiber model) at about $330.00 street. Aluminum boom poles are generally heavier than carbon fiber but are cheaper and easier to repair. I have seen decent quality 9' aluminum poles start at around $150.00. If you shoot more narrative style projects, it may be worth it to spend the extra money for a lighter carbon fiber model.
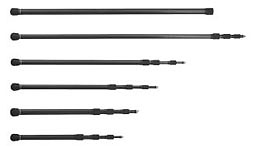
Aluminum |
Carbon fiber |
You will notice that as you begin to look at boom poles, there are a lot of different models on the market. The other decision for you to make besides material construction and length is whether or not you want to pay for an internally cabled model or not. Internal cabling is much handier and a LOT more expensive. The K-Tek version of our Gitzo with a coiled internal cable system runs almost three times as expensive in price than as our Gitzo. We live without an internally cabled pole and it's fine. We do mostly stationary booming setups with an occasional hand boomed shot. If we did more narrative or ENG/reality type work that was largely hand boomed, I would spend the extra money for a cabled pole. When you are doing a lot of different setups, hand booming a lot or when you travel, a cabled pole is more convenient. You just have to decide if the extra money is worth it to you.
Lavaliere Microphones
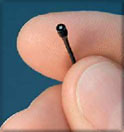 A lavaliere is defined as "a pendant worn on a chain around the neck" which should give you a good idea about what a lavaliere microphone ('lav' for short) is. In the early days of broadcasting, the smaller microphones were actually worn around the neck in the same manner as a necklace. You may not realize that today's lavaliere microphone is an incredible feat of engineering. The most popular lavaliere microphones today are incredibly small. Smaller than a match head. So small that they can easily be hidden in the talent's hair of even behind a tiny button on a shirt. Lavaliere microphones come in usually one of two flavors, omni-directional and uni-directional, although unidirectional lavalieres are rare and are limited mostly to newscaster style applications. An omni directional unit has a pickup pattern that picks up fairly well from all sides. A unidirectional lavaliere has a pickup pattern much more like that of a shotgun or hyper cardioid microphone; it must be "aimed" at the talent's mouth. Because a unidirectional microphone must be aimed at the talent's mouth, the opportunities for hiding the microphone element are mostly eliminated, limiting the use to mostly planting the microphone in the center of the talent's chest. Besides being used on talent, certain lavaliere microphones are also handy for using as a "plant" microphone. A "plant" microphone is typically placed in a hidden spot on the set to pickup talent as a supplement to or instead of a boom microphone. So if you see a "roundtable" or "dinner table" setup, the sound mixer may be covering the scene with one or more "plant" microphones hidden in the centerpiece on the table. Plant microphones can also come into play when scenes are shot with a Steadicam or large dolly moves where it may be impractical to have the boom operator try to follow the camera. Another instance could be that wardrobe restrictions make using body mounted lavalieres tough or impractical.
These Are a Few of My Favorite Lavs
 The Tram TR-50B ($250.00-$300.00 street) has been a workhorse industry standard for many years. It was the first lavaliere microphone to use a "vampire" clip mount (a small plastic clip that holds the microphone and has two small 'needle-like' barbs) and it sounds very neutral. The Tram is available in several different configurations and a frequency-modified version is sold as a Sonotrim ($350.00 street). Another similar mic with a slightly different sound but a similar look and construction is the PSC MilliMic ($300.00 street). All three of these microphones share the same basic rectangular form factor and all Sonotrim and PSC seem to be variants of the basic TR-50B design.
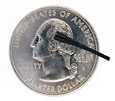 For a completely different approach, the Countryman B6 ($350.00 street) is the smallest lav in the world. You must hold one in your hand to comprehend exactly how small this microphone is. The really cool part is that besides being the smallest, it is also, in my opinion, one of the nicest sounding as well as one of the most flexible designs. This mic is so miniscule, that it can be easily used as a hair or wardrobe microphone. The microphone is also available with small plastic caps that can alter the basic frequency characteristics in case a different response is desired or if the microphone's response from being buried under wardrobe is too muffled. Very cool! The microphone is also sweat-proof and waterproof so if the talent will be in scenes with water or rain (the mic element itself is waterproof, not the power supply although it could be made waterproof with the addition of gaffer tape and silicon sealant) or if the talent will be sweating a lot. The Countryman B6 is also available in different flesh tones as well as black and white.
The Sanken COS-11 ($400.00 street) is another popular lavaliere that is slightly larger than the Countryman B6. The Sanken offers what some people feel is a slightly smoother response than the Countryman B6 at the sacrifice of a slightly larger physical size. The Sanken is also waterproof and available in flesh tone as well as black and gray. The Sanken is another marvel of engineering and is considered a premium, top of the line lavaliere.
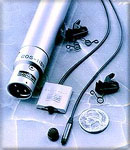
Wireless Microphone Systems
 There are also two methods that lavalieres are typically used with in production, wired or wireless. While wireless transmitters can also be used with a handheld microphone, they are most commonly teamed with lavaliere microphone elements. Some sound mixers also use wireless systems on their boom mic (this is very typical in reality type 'run & gun' style shows like 'COPS') Also, some location sound mixers use wireless systems to "cut the tether" from the sound mixer to the camera although this strategy can be risky unless the camera operator is always monitoring the camera's audio. In general, use cables whenever you can although for certain shooting styles and locations, wireless must be used. A wireless system consists of a single transmitter and a single receiver. For some strange reason (costs?), many new DV users seem to think that a single receiver can simultaneously receive the output signals of more than one transmitter. I have been asked several times if a single receiver can work three or four transmitters. The reverse is actually true, more than one receiver CAN receive the output of a single transmitter simultaneously. So in multi-camera shoots, it is possible to have a single transmitter's output go to multiple receivers on multiple cameras.
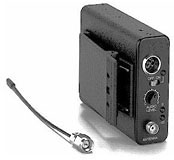
 Wireless systems are improving but the bandwidth that wireless systems operate on is becoming more and more crowded. Diversity (dual) antenna systems are considered far superior to single antenna systems because in a diversity system, when the reception between transmitter and receiver is weak or encounters interference on one antenna, the system can switch over to the other antenna. The UHF (ultra high frequency) band is generally considered more effective and less crowded than the VHF (very high frequency band). There are brand new digital systems hitting the market that have great potential to make wireless usage more reliable than it ever has been. Unfortunately, the first digital systems available are on the pricey side for DV users, costing considerably more than most high-end camcorders. That's the bad news. The good news is that the digital technology will trickle down the price scale just as it did with digital camcorders. In few years, probably almost all wireless systems will be digital. When that occurs, wireless microphone system usage will undoubtedly skyrocket, as wireless systems are so much more convenient to use than dealing with long runs of cable. But until we are all using digital wireless systems, my advice is to only use wireless when you must.
Another term to look for is "frequency agile". If your wireless system is "frequency agile", it means that when your system encounters other users, static or interference, it can be switched over to another operating frequency. I am amazed that all wireless systems DON'T have this feature, but they don't.
What Are The "Hot" Wireless Systems For DV Users?
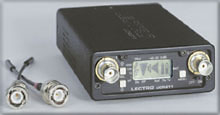 I will admit to being quite biased when it comes to wireless microphone systems. I have rented and used numerous wireless systems during my career and in my opinion, Lectrosonics, hands down, are the best values in wireless systems. There are systems available that perform as well as the Lectrosonics UHF systems, but the problem is that they cost a lot of money. $4,000.00 to $7,000.00 per system. The Lectrosonics 210 systems ($2,800.00 to $4,000.00 street) are another industry standard that deserves their excellent reputation. This system is probably used on more than half of all of the feature films and television shows made. Lectrosonics' product is built incredibly well and performs reliably. No, I don't work for Lectrosonics, have never received and compensation from them. I just love their product.
If you cannot afford a Lectrosonics 210 UHF system, you can check out some of their lower cost systems, but not all of them are frequency agile.
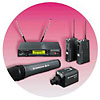
The Sennheiser Evolution 500 series ($600.00 to $1,000.00 street depending on options) is another viable, low-cost option for a wireless system. This system is available with several different options and performs reasonably well, especially considering it's cost.
When using wireless systems, consider renting over purchasing. This is another situation where you probably will not need wireless systems all of the time so it probably makes more sense for the average DV user to rent the best rather than buy something "middle of the road". When using wireless systems, it is essential that you feed the system brand new batteries quite often. Wireless systems eat a lot of batteries and begin to perform poorly as the batteries get weaker. If using wireless all day during a typical 10-hour day, plan on at least one and possibly two battery changes.
Other Microphone Types
Although a shotgun and a lavaliere are the standard production microphones, there are certain instances when you will want to consider using or supplementing your audio kit with other types of microphones.
Dynamic
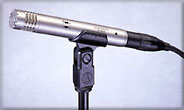
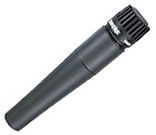
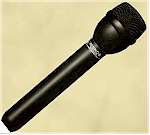
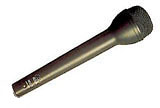 Shotguns, hyper cardioids, cardioids and lavalieres are usually condenser microphones. This means that they each require internal or external power sources to amplify the signal that they output. They must have an internal battery or require phantom power. Phantom power is supplied to the microphone via the XLR connector from the XLR outputs of recording devices or mixers. Phantom power is typically rated at 48 volts, abbreviated as 48V, although some microphones require less voltage. Why all of this discussion about condensers and power? Because a dynamic mic DOESN'T require any power, hence it is more reliable. Another characteristic of dynamic microphones is that dynamic microphones can generally record at much higher sound levels than condensers without distorting. When we discuss a dynamic mic, we are talking about such venerable "institutions" like the Shure SM-57 ($100.00 street) (the standard rock singer stage microphone) and the Electro Voice RE-50 ($165.00 street) (the standard newscaster location microphone). The downside is that dynamics are not very sensitive so they really only pickup sounds that are very close to the diaphragm. Unless you want to have the microphone in your shots, the dynamic microphone is not very useful in most production situations. When you are shooting something that is supposed to look "newsy", the hand held dynamic microphone is the "weapon of choice". Other than this application or recording live, high volume music or sound effects, its use is severely limited in normal video or film production.
Shure SM-57 ($100.00 street) |
ElectroVoice RE-50 ($165.00 street) |
Boundary
 Boundary microphones (PZM - Pressure Zone Microphones) are usually flat or plate shaped microphones that are set on a table or fastened to a wall. These microphones are useful for recording roundtables or audience reactions with certain caveats. These types of microphones use the surface that they are fastened to pickup sounds. When used on a table with talent, these microphones will pickup finger tapping, pencil rolling, cups being picked up and set down and any other physical sounds that reflect off of the surface they are fastened to. Boundary microphones are also effectively used to mic large areas of audience and work well for picking up laughter and applause. They are not effective at picking questions from the audience.
Stereo
Stereo microphones are more commonly used in recording musical or dramatic performances than in typical narrative dialogue situations. Dialogue almost always ends up as a mono element, even in 5.1 surround mixes so there does not seem to be much reason for recording dialogue in stereo since voice is not a stereo element. Another factor to consider is phase cancellation. Without a decent knowledge of stereo recording and postproduction processing and mixing, you may encounter phase cancellation where certain sounds within your mix will be cancelled out. On the other hand, stereo microphones can work very nicely for recording ambient environments. Any environment sounds more realistic in stereo since stereo recording mimics how our ears perceive our actual environments. There are stereo microphones on the market, ranging from inexpensive consumer units that sell for $99.00 to units like the Sanken CS-5, a high-end stereo shotgun. In summary, stereo recording is the exception rather than the rule in sound for picture recording. My rule of thumb for recording in stereo is to determine if stereo recording would enhance the subject matter, live musical or dramatic performance, for instance. In most cases, dialogue would not be enhanced by stereo.
Choir
Choir microphones are designed to be suspended above live choirs. They are good for picking up a large crowd of voices. Although they are good for recording an ensemble of voices, they are not nearly directional enough to pickup individual voices out of a crowd. If you shoot a live event, choir microphones are great for picking up the audience reaction, although once again, choir microphones cannot pickup individual questions or statements from an audience very well. There is no microphone that will pick up an individual sound well unless the microphone element is fairly close to the subject.
 We have already discussed the differences between unbalanced and balanced connections and cables. Cables and adaptors are one of the most underrated yet most important parts of the audio path. It pays to buy the highest quality cables and connectors. Canare, Mogami and Neutrik all make excellent connectors and cables. While there are literally dozens of different connections and adaptors used in audio and video production, let's go over the most common ones:
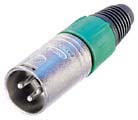
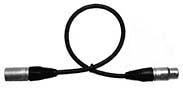
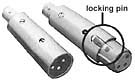
XLR
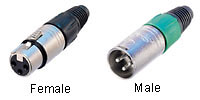
XLR connections and cables use three leads, positive, negative and ground. The XLR connection has two components, a male connector that looks like this and a female receptacle. XLR connectors usually have a locking pin so that they cannot be accidentally pulled out. XLR cables and connectors are the standard audio connections in most professional sound for picture equipment.
1/4"
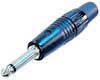 Quarter-inch connections are more common in music gear than in sound for picture gear although there are popular devices like the Mackie line of audio mixers that are commonly used in both music and video applications that use 1/4" connections. 1/4" connections can be mono or stereo and can be either balanced or unbalanced. These connections are also common as headphone output jacks on larger gear.
1/8" mini plug (3.5mm mini plug)
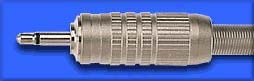 These connections (usually unbalanced) are very common on consumer camcorders as headphone output jacks and as microphone input jacks. This connection is fairly fragile since it is so small and hanging any kind of weight with cables, etc. off of the jack is not recommended. Plug stress is the most common cause of shorts, grounding problems or failure.
RCA (cinch connections, phono)
 RCA connections are the same as the connections used to hook up your home stereo components. Because RCA connectors are always unbalanced, they are almost exclusively used on consumer gear although a lot of pro gear features RCA connectors as secondary connectors, to be used in addition to or instead of XLR connectors.
Impedance Matching
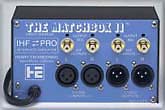 As we discussed above, there are many more types of connections and adaptors to go from any of the above connectors to any other type of connection, but the four listed above will be the most common ones that you will encounter. Special care should be taken when interfacing balanced with unbalanced equipment. There are special devices known as "impedance matching" boxes that are very useful for interfacing pro to consumer gear. You will generally have a better result when using a powered impedance matching device over a passive one. One of my favorites is the Henry Engineering Matchbox ($169.00 street). This is a box that can simultaneously convert balanced XLR connections to unbalanced RCA and unbalanced RCA to balanced XLR. These are very useful for dubbing setups from professional DVCAM and Beta SP decks to consumer VHS decks, for example.
Distance
Another factor to consider is cable distance. Unbalanced connections generally are not very good for distances over about twelve feet because of the lack of a balanced negative connection; noise also has a tendency to creep into the signal. The relative nominal signal strength of -10dB doesn't help either when it comes to distance. Balanced XLR connections generally are safe to use for runs of up to around 200 feet. At distances farther than 200 feet, even balanced lines can use a boost from a line amplifier to restore the signal's strength. Generally, in a location sound kit, you end up using mostly 25-foot cables for the lines from the microphones to the mixer. It does pay to build up a small kit of various adaptor plugs. You never know when you may have to take a sound feed from a telephone to the camera, a CD player to an MD recorder, etc. It pays to be prepared.
[Top]
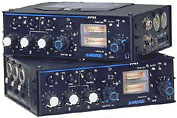
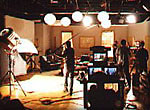
The first point I want to make in this part of the article is that most professional productions use an audio mixer. The exceptions are single camera shoots where the audio is just being used for reference or background ambient. But if you are shooting dialogue, you should be using an audio mixer. It's really that simple. If you are shooting with a stationary camera and AC power is accessible, you can get a great result with small desktop mixers. Just remember, with a location audio mixer you get:
1. Tone generator - You must have a tone generator in order to record reference tone so that the editor has a constant point of reference as to the levels that the audio was recorded at the head of each reel.2. Roll offs and cuts - Location audio mixers often have high and low roll offs and cuts. These are useful for eliminating rumble, hiss and other undesirable sounds before the sound is sent to camera
3. Superior Quality - Almost all location audio mixers have considerably higher quality microphone pre-amps than almost any camcorder, even professional high-end camcorders.
4. Slate Microphone - This is a microphone located on the mixer that lets the operator insert their voice onto the mixer's output. Very useful for audio slates, for example; "room tone :30" when you go to record room tone.
5. Better Monitoring - Location audio mixers usually have a tape return circuit that lets the operator compare the output of the mixer to the output of the recording device by flipping a switch.
6. Panning and mixing - A mixer lets you determine the panning of as many channels of microphones as you have capacity for. Some of the better mixers also have multiple outputs. The PSC M4 MKII mixer that I own lets me route a set of outputs to the camcorder and another set of outputs that we route to a Mini Disc recorder for backup. With a four- channel mixer, you could route three lavaliere microphones to the right channel on the camcorder and the boom to the left channel.
7. Microphone power - Certain mixers can also actually power certain wireless receivers.
8. Phantom power - Almost all location audio mixers can supply phantom power to at least one of their outputs and some to more than one. This saves camcorder battery power, if the camcorder has phantom power. If it doesn't have phantom power, the mixer is able to provide the phantom power instead of having to buy a separate microphone power supply.
9. Better metering - Most camcorders do not have very accurate, high quality audio meters. Most location audio mixers have very high quality audio meters.
10. The ability to "ride" gain - Generally, most location sound mixers "ride" gain, smoothly setting the gain levels being sent to the recording device as the talent's levels rise and fall. This does not mean raising and lowering the volume levels as the talent speaks, it means making sure that the signal being recorded does not clip. Try riding gain as someone is shooting with a typical consumer camcorder. In many models, you cannot even adjust the gain unless you go into a menu.
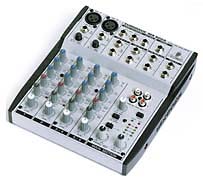
Favorite location Audio Mixers
There are actually quite a few high quality audio mixers available but I will just highlight three here that I feel would most likely appeal to DV users and limited budgets. All three of the mixers described are only two channel models but most are available in three, four and five channel versions. Any of the three mixers listed below are an excellent value and you would not go wrong in choosing any of them.
PSC Mjr
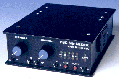 The PSC Mjr ($750.00 street) is a two-channel version of the PSC M4 MKII, a very popular four- channel mixer. Valencia, Ca.-based PSC (Professional Sound Corporation) makes excellent products and this mixer has gained considerable popularity as a high quality, basic simple mixer.
Wendt X2
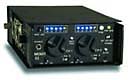 The Wendt X2 ($880.00 street) is a two-channel version of the Wendt X4, also a very popular four- channel mixer. Built by Westlake Village, Ca. based Wendt Audio with military grade parts, rugged construction and high quality assembly; this is an impressive mixer for the money. It is simple to use and provides outstanding sound quality. This mixer has been used to mix MTV's "Road Rules" and on "C.O.P.S." and is a good choice for high-stress, "run & gun" reality television shooting.
Sound Devices Mix-Pre
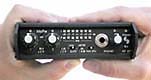 Ex-Shure audio employees founded Sound Devices, the makers of the Mix-Pre ($850.00 street). This mixer is also sold as the Shure FP-24, but is actually built to Sound Device's specifications and is the same unit. The form factor on this unit is a little different than most of its competitors and its cosmetics and design are sleeker and less boxy than the competition. The Mix-Pre is acknowledged to be a high-quality audio mixer and is often seen on ENG news crews.
Impedance Conversion Devices
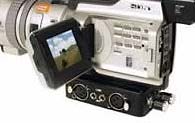
Beachtek DX-A4 ($180.00 street) |
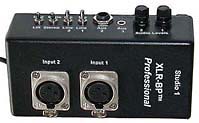
Studio One XLR PRO ($199.00 street) |
I have called this section "routing devices" because both of the devices we will discuss here are not really true audio mixers, they are impedance conversion devices. Both the Beachtek DX-A-4 ($180.00 street) and the Studio One XLR PRO ($199.00 street) adaptors are small boxes that take balanced XLR microphone level inputs and output unbalanced two-channel audio through a 3.5mm mini plug terminated 6" cable that most consumer camcorders can accept. Because the unbalanced portion of the output is only 6" cable, then extraneous noise does not enter the signal path. Both boxes also have internal capacitors that defeat the small voltage that most consumer camcorders output from their microphone input jacks for powering unbalanced consumer microphones. Either box attaches to the camcorder via a screw that connects the box to the camcorder via the camcorders tripod screw-mounting hole. If you own a consumer camcorder that doesn't have XLR inputs, you will need to buy one of these boxes. There are cables and adaptors that can also be used in place of the boxes but only some of these cables/adaptors have the capacitors needed to defeat the powered camcorder microphone jack output. The other advantage of these boxes is that the inputs are microphone/line level switch able and both have separate volume potentiometers for both left and right channel.
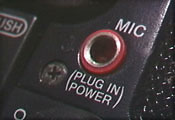
6v charge |
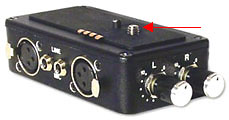
tripod screw-mount |
Since the possibly heavy XLR cables and plugs from the mixer's output also plug into a sturdy box that is mounted to the bottom of the camcorder, there is no strain on your camcorder's fragile 3.5mm mini plug microphone input jack. I have experienced grounding "issues" when using our Sony TRV-900s with the Beachtek when switching over to AC power. The unit sounds perfect when using batteries but a nasty buzz creeps in when using AC power with this particular setup. A grounding wire from the box to the camera's battery connectors solves the ground loop but you may not want to tape a wire to your camcorder. This problem may also be only isolated to the particular combination of camcorder and adaptor I was using. I have not tried the Studio One adaptor but supposedly the Studio One adaptor has a ground lift defeat feature that solves this issue. The latest BeachTek DXA-6 model also has a groundlift switch as well as phantom power on one mic input.
[Top]
The most commonly used recording device for most DV users would be your camcorder. For the sake of covering this section completely, we will also discuss some alternative recording devices including Mini Disc recorders, DAT recorders and hard drive recorders and the dual system sound recording workflow.
The Ugly Truth - DV Camcorder Audio - Class of 2002
The unfortunate truth is that if you use a consumer camcorder, you are already beginning your quest for high quality sound with somewhat of a handicap. A few common consumer camcorders have decent sound quality but the sad fact is that the majority of the most popular consumer camcorders have major sound issues straight out of the box. Below are my observations based upon having either used each particular model or having at least edited with tape from each model. Keep in mind, these limitations are exclusive to each model and have nothing to do with the quality of the audio that is fed into each unit from your mixer. These are strictly the limitations of each device from an audio perspective and are definitely my own opinion although searching discussion boards on the web will bear out most of these observations:
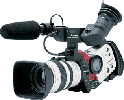 - Two major audio liabilities. The first liability is the use of either of Canon's XLR/shoulder pad mount combinations, the MA-100 or MA-200. Using either adaptor is not advised if you are trying to record high quality audio as both of them add considerable noise, hum and possible buzzing since they ineffectively transport and transcode the rear balanced XLR inputs to unbalanced input for the camcorder itself. The second issue with both of the Canon XL-1 models is that thy both feature one of the worst headphone output stages ever seen in a consumer camcorder. They both lack sufficient output level and both seem to add a pseudo "limiter/compressor" effect that makes it seem as if the audio levels the camcorder is recording are varying more than they are in actuality. It is difficult to record high quality audio if you cannot hear what the camcorder is actually recording. Other than these two limitations, the XL-1/XL-1S seem capable of recording high-quality audio with a Beachtek or Studio One impedance adaptor box in place of Canon's lousy adaptors. It can be tough "flying blind" though. If you are a Final Cut Pro user, there is also the Canon "sync adjust movie" issue and Canons "interesting" audio sample rates to deal with as well. Audio Grade - C
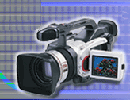 - The lower priced Canons seemed to always be capable of recording decent quality audio. The only problem with the GL-1 seemed to be that it had no manual audio input control. Using ALC (automatic level control), it would occasionally react with incorrect levels when the input was overdriven and "pumping" when levels were not hot enough. The GL-2 seems to have remedied this issue by including manual audio input levels. Unfortunately, the flimsy optional cost Canon MA-300 audio adaptor XLR adaptor is guaranteed to break the first time any load or stress is put onto it so if you buy a GL-2, still budget for a Beachtek or Studio One adaptor. Oh, and both still suffer from the Canon sample rate and FCP issues. Audio Grade - GL-1 C GL-2 B-
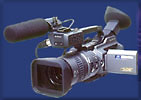 - The first run of the Sony PD-150s had horrendous hiss problems. That problem was subsequently "fixed" during later model runs. All of the PD-150s still have a considerable amount of hiss, although granted, they did reduce the amount of hiss when they "fixed" the issue. The problem is that Sony didn't also "fix" this model's lousy overall audio quality. The PD-150 was blessed with what is probably one of the lowest S/N (signal to noise) ratios ever seen in a consumer DV product. The fact that Sony markets the PD-150 as a "pro" model through their broadcast/industrial division doesn't change the fact that this is one of the sorriest sounding $4,000.00 list DV camcorders ever hoisted on the public. The PD-150 is one of the few consumer camcorders that also will accept line level input. When inputting a clean line level signal, the same hiss and low S/N ratio is still evident. When inputting line level, you are bypassing the unit's microphone preamps, yet you still hear the same audio "issues". I have a couple of Sony's least expensive consumer MD recorders, the MSR-37P that retailed for $129.00. This $129.00 MD recorder is capable of recording sound that blows the sound of the PD-150 out of the water. How can this be unless we hypothesize that perhaps the Sony marketing department was a little paranoid that if the audio was perfect on the PD-150, perhaps they were afraid of is sales cannibalizing too many DSR-300/500 buyers? We will never know for sure, but the circumstantial evidence definitely points to this. I cannot believe that Sony cannot make a $4,000.00 product with such a nice picture yet with totally substandard sound by accident. Once again, these are my opinions.
Audio Grade - D
- The first run of the Sony PD-150s had horrendous hiss problems. That problem was subsequently "fixed" during later model runs. All of the PD-150s still have a considerable amount of hiss, although granted, they did reduce the amount of hiss when they "fixed" the issue. The problem is that Sony didn't also "fix" this model's lousy overall audio quality. The PD-150 was blessed with what is probably one of the lowest S/N (signal to noise) ratios ever seen in a consumer DV product. The fact that Sony markets the PD-150 as a "pro" model through their broadcast/industrial division doesn't change the fact that this is one of the sorriest sounding $4,000.00 list DV camcorders ever hoisted on the public. The PD-150 is one of the few consumer camcorders that also will accept line level input. When inputting a clean line level signal, the same hiss and low S/N ratio is still evident. When inputting line level, you are bypassing the unit's microphone preamps, yet you still hear the same audio "issues". I have a couple of Sony's least expensive consumer MD recorders, the MSR-37P that retailed for $129.00. This $129.00 MD recorder is capable of recording sound that blows the sound of the PD-150 out of the water. How can this be unless we hypothesize that perhaps the Sony marketing department was a little paranoid that if the audio was perfect on the PD-150, perhaps they were afraid of is sales cannibalizing too many DSR-300/500 buyers? We will never know for sure, but the circumstantial evidence definitely points to this. I cannot believe that Sony cannot make a $4,000.00 product with such a nice picture yet with totally substandard sound by accident. Once again, these are my opinions.
Audio Grade - D
- Same exact story as the PD-150 except all of the poor suckers who were stuck with these are stuck with permanent hiss problems. Since the VX-2000 is a "consumer" model sold through Sony's consumer division, after all of the uproar over this unit's hiss issues, Sony decreed, "this unit's sound specifications are within an acceptable range for a consumer product". Thank you, Sony. I'll remember this next time I buy a camcorder. Audio Grade - F
 - Same typical Sony audio issues. Excessive hiss. Poor S/N ratio. Lousy headphone output stage that leaves you guessing. Not as many TRV-900/PD-100A owners complained about the hiss issues as did PD-150 owners. Probably because they only paid about half of the price that the PD-150 owners paid for their cameras. My TRV-900 has been in for audio repairs to Sony service three times. Once, one of the microphone elements went out and had to be replaced and the other two times were to fix the audio hiss issue. Both times, Sony returned the camera, quoting, you guessed it, "this unit's sound specifications are within an acceptable range for a consumer product". I strongly disagree. The audio is acceptable for outdoor interviews and clips that have a decent amount of ambient sound in the background. But try to shoot an interior interview and you will immediately hear the hiss. Even with high quality microphones and a $2,000.00 audio mixer. Audio Grade - D
 - This old warhorse was the first three-chip consumer DV camcorder. Released before the DSR-300/500 existed. Interestingly enough, even though it was saddled with a 32KHz only audio recording capability, the audio that it recorded was actually decent, much better than any of the current or new Sony models. I wonder if it's coincidence or the fact that at the time the VX-1000 hit the market, nobody had any idea that "professionals" would want to do real professional projects with these new consumer "toys". We were all shooting with $60,000.00 Betacam SP camcorders at the time. "Cannibalizing" sales back then was a non-issue. Interesting that when the DSR-300/500 hit the market, the audio in all Sony consumer 3 CCD DV camcorders seemed to head downhill. Seems like too much of a "coincidence" to me. Audio Grade - B
 - If the Panasonic AG-DVX100 were a person, it would be the really good-looking hunk/babe that everyone wants to date, mainly because of it's much lauded 24P capability (IMHO, much 'hyped'). This feature will provide all DVX-100 users the ability to shoot their footage in 24 frame progressive mode and output pseudo "film look" footage via Firewire. Whoopee! I doubt if more than 1% of the DVX-100 users will ever output their footage to film so this feature really turns out to be a validation from a major corporation that yes, all DV users want to pretend that they are shooting 35mm film when they are actually shooting with a consumer DV camcorder. Much more importantly, perhaps this model will actually integrate decent audio recording capability? That would be really much more exciting than 24P! The unit does look promising with dual onboard XLRs integrated into the body, not some cheesy plastic adaptor hanging off of the hot shoe. If the audio is good on this unit, it will automatically be promoted to "head of class" in my book for consumer DV camcorders, mainly because the rest of the class are such audio underachievers. We have our fingers crossed. Audio Grade - New Student, remains to be seen but potential is good.
Dual System Sound
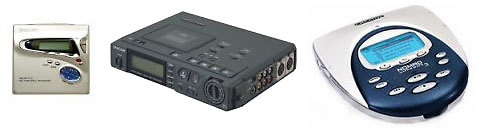
For the past few years, there has been much discussion about using Mini Disc, DAT or hard disk recorders for dual system sound recording when shooting DV. In theory, it's really easy. Sure, your VX-2000 may record horrible, unusable audio with a lot of hiss. Just bring along an MD recorder, pop in a disk and life is good, right? Well, it's too bad that in reality, it's just not that simple.
First of all, from a mechanical standpoint, even though both of the devices (camcorder and MD, DAT or hard disc recorder) are both digital, they are also both completely independently synchronized to their own internal master timing device. You would think that if both devices are digital and both are using the same sample rate that it would be a simple matter of lining up the picture and the MD, DAT or hard disc recorded audio on the same timeline and let them go. The problem is that neither device is synced to each other's master "clock" so eventually, the two sources will lose sync with each other. The two may lose sync at 5 minutes; they may lose sync at 45 minutes. There are no hard and fast rules about how long each set of devices can hold sync. There is no way to determine exactly how long it will take unless you test the devices and notate how long it takes for the two to lose sync. Still sounding easy and straightforward? Let's say that your particular combination of DV camcorder and sound recording device will stay in sync for 19 minutes at a time before they lose more than one or two frames sync. You did your homework and determined the number. The next challenges become ones of routing, organization and media management. Let's go over each of these:
Routing
You're stubborn. You have decided to do the dual system sound thing. That's cool. Your first issue to determine is routing. Realistically, you need the mixer's output to go to your camcorder as well as your digital audio recording device. You DON'T want to use the camcorder's microphone to record the audio for the scene because if you are any significant distance from the action with your camera, there is a distance-induced delay that can make it challenging to match your "guide" audio in postproduction. You need the audio from your mixer on your camcorder as a guide for lining up the audio from your digital audio recording device. In this way, both devices will receive an identical signal. I recommend not using the audio from digital audio recording device audio during the actual post process. If you keep comprehensive sound reports and are organized, it is more efficient to edit your show, approve the cut, and then add the "quality" audio at the end. "Post conform" the audio, as it's called. Does your mixer have dual audio outputs, one set for the camcorder and one for the digital audio recording device? If so, great. If not, now you are looking at an "interesting" combination of either an audio distribution amplifier or splitter or some other way of splitting the mixer's output without destroying the quality of the signal. Is using double system sound still sounding simple?
Organization
Organization is the key to making double system shooting work well. The problem is that most DV users don't have a dedicated audio crew, so who is going to keep sound reports? Sound reports are small sheets of paper that are commonly used to keep track of which sound "reel" goes with which film or video "reel". The sound reports are also used for notation about any individual quirks or anomalies. Who is going to slate each take? It's not absolutely essential to slate each take but it sure does make it easier to organize your material when you enter postproduction. What if you are shooting a scene called "Jose enters room"? You do 17 takes of it, have to change videotape and MD during take 8. How are you or the editor going to be able to keep track of which take is which? A slate at the head of each take at least gives you a point of reference about which take is which.
Media Management
Media management is the simple act of making sure that the sound and picture elements are cataloged and kept organized. This is the act of making sure that each time a videotape or film reel is changed on the camera that a new Mini Disc or DAT is inserted and begun. Having a separate sound element for each reel is not the most economical way to shoot but it is the best way to keep the elements organized. If you shoot with a hard disc recorder, this becomes impractical but it works well when shooting with MD or DAT.
You're Really Sure About This?
So are you getting the picture here? The bottom line is that shooting with double system sound and not having it turn into a nightmare means three things. It takes more time (time is money, right?), it takes more crew positions (who would keep the sound reports, slate and roll the MD, DAT or hard disk recorder each take?) and it takes more work in postproduction. I make the conclusion that most DV users are ideal candidates NOT to use the double system sound workflow. Most DV users do not have enough budget and enough crew. Of course, all of these factors are proportional to how long and involved your project is. If you are shooting a :30 commercial and just a few locations and shots, the double system sound may work fine for you. On the other hand, if you are shooting 60-100 hours of footage for a documentary, think long and hard before you commit to the workflow. But as we stated above, let's assume you are stubborn and have decided to go for it. Here is a little breakdown:
Mini Disc
 Probably the most popular double system sound format, Mini Disc is a good value for the money. You can read a review I did on the HHB MDP-500 professional MD recorder Professional Mini-Disc Recorder Review that you might want to read for a perspective on how professional MD recorders perform. Mini Disc uses a compression scheme called ATRAC that is fairly good, especially for dialogue. Mini Disc does have a somewhat limited dynamic range so it would not be my first format choice to record highly dynamic sound. There are many Mini Disc recorders on the market and there are several that can even take the optical output of a digital microphone preamp. The media is cheap and easily available. One of the downsides of MD is that most of the non-pro units only have digital input but not output so you end up having to purchase a home MD player with optical output as well as an audio card or Firewire audio interface if you want to transfer the MD's digital signal into your computer and keep it digital.
DAT (digital audio tape)
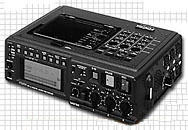 DAT is probably the choice you would use for higher quality than MD if you were shooting with double system sound. The upside is that DAT is basically uncompressed audio. It sounds better than MD. The downside is that it is linear and the media costs four to five times as much as MD media. DAT recorders, even the cheapest DAT "walkman" cost more than MD recorders with comparable features. DAT will be technologically outdated soon since newer portable hard disk recorders are becoming available. DAT does give you the option of using time code although time code capable portable DAT recorders are quite expensive and are not currently being manufactured. They are still easy to rent from most audio houses though. DAT is still used on most Hollywood features although more and more of them are using an an advanced and very expensive time-code-capable hard disk recording system called Deva by Zaxcom.
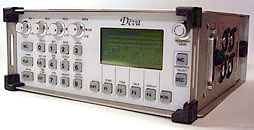
Other Hard Disk Recorders
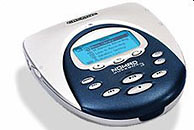 The only inexpensive hard disk I have seen to date is the Creative Labs Nomad. This is a portable CD player-sized hard disk recording system. The advantages are pristine quality and relatively low cost. The Nomads are capable of recording uncompressed but of course, uncompressed recording uses up lot of disk space. There is also the issue of input and output, interface, reliability, verification and the fact that all material must transferred to another format to archive.
The Sixth and Final Link - The Monitoring Circuit of the Recording Device
The monitoring system on your recording device is the last part of the equation. As we have already discussed, there are several recording devices that have substandard headphone monitoring circuits, including the two most popular consumer DV camcorders, the Canon XL-1 and the Sony PD-150. It can be difficult to judge your audio efforts if you cannot hear what is being recorded properly. The good news is that if you have invested in a decent audio mixer with a tape return monitor circuit, you can at least compare the audio signal you are sending the recording device with what the monitoring circuit in the recording device is reporting back to you. By doing this comparison numerous times over a long period of time, combined with listening to what you recorded on accurate audio monitors that you hopefully have hooked up to your edit system, hopefully you can begin to hear past the deficiencies in the monitoring circuit.
Headphones
The last component in the audio chain are your headphones. The headphones you use to monitor what you are recording serve several very specific purposes:
1. You must be able to judge the characteristics of the room, your talent's voice, sound effects and ambient levels.2. You will need to be able to determine if your microphones are picking up the traffic outside, the helicopter in the distance, etc.
3. They must be portable enough that you will always bring them and use them on everything that you shoot that has audio
4. They must be efficient enough to output high enough sound levels from weak or inefficient headphone circuits.
5. They must cover your entire ear. You cannot judge what your recording device is recording with headphones that only partially cover your ears. You will be hearing too much of the live sound and not enough of what the recording device is recording to make informed judgments about what you are recording.
My favorite headphones and the industry standard are the Sony MDRV-7506s ($99.00 street). While the Sonys are not the most accurate headphones available, they are extremely efficient, they are small for a full ear design, they fold up to about half of their own size and they come with a screw-on mini to quarter-inch adapter. There is a consumer version called the Sony MDRV-600s ($109.00 street) that sound close to the same. They cost about the same but they are bigger. They still fold up but not as small as 7506s do. They are more comfortable than the 7506s for wearing for long periods of time.
Some location sound mixers favor the more accurate sound of the Sennheiser HD-25s ($199.00 street) but they are twice as expensive and are not as small as the Sonys. It's up to you as to which features and sound will suit your needs.
Sony MDRV-7506s ($99.00 street) |
Sony MDRV-600s ($109.00 street) |
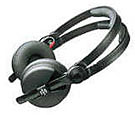
Sennheiser HD-25s ($199.00 street) |
And Your Total Is...

If you have made it this far into the article, you are probably beginning to wonder how much it costs to build a basic location audio kit. Let's total up our little laundry list thus far:
| Shotgun, hyper cardioid or cardioid microphone | $400.00 | to | $1,500.00 |
| Microphone mount | $40.00 | to | $200.00 |
| Boom Pole | $150.00 | to | $900.00 |
| Zeppelin | $350.00 | to | $400.00 |
| Windsock | $100.00 | to | $250.00 |
| Wired lavalieres (2) | $250.00 | to | $500.00 |
| Two channel mixer | $650.00 | to | $900.00 |
| XLR adaptor (Beachtek or Studio One) | $180.00 | to | $230.00 |
| Mixer harness | $225.00 | to | $225.00 |
| Cables, accessories | $200.00 | to | $1,000.00 |
| Audio cases and or bags | $200.00 | to | $500.00 |
| Totals | $2,745.00 | to | $6,835.00 |
As you can see, you are looking at well over $2,000.00 to put together even a low-end basic audio kit. Keep in mind that this kit would have no wireless microphones. To put together a top of the line location sound kit with multiple high-end microphones, lavs and a couple of professional wireless UHF diversity microphone systems can easily run to around $30,000.00. Hopefully you may have read this article before you went out and spent every penny you had on a new camcorder. Hopefully this article gives you some perspective on your budgetary priorities if you hope for your work to be perceived as polished, well-executed film or video. The end result is that you will either have to own or rent most of this equipment to do almost any kind of professional level shooting. In my mind, it makes a lot more sense to own a lower end three chip camcorder and a basic audio kit, than to blow all of your budget for the top of the line DV camcorder with a great lens and a high end tripod and then have to compromise on your sound.
This brings us to our next topic:
Renting Versus Owning
 Even though our production company owns its location sound equipment, I am a big believer in renting. We only bought our own gear because we took on a long-term project that easily paid for all of it in one fell swoop. For some reason, probably because of the low relative cost of DV equipment, many DV users somehow arrived at the conclusion that they should own everything that they need for production. I personally feel that this mindset is somewhat misguided. Most new DV users seem to have very little idea about what is involved to produce professional quality work. Sure, you can buy a nice DV camcorder and have the capability to shoot decent looking images. But what about a real tripod instead of that $189.00 special you picked up at Best Buy? Sure, if you are talented, you can try to light with Home Depot $50.00 work lights. What about the audio? Sure your new XL-1S has a microphone, isn't that all you need to shoot? Hopefully, this article thus far has given you some solid information about the equipment that is needed to obtain professional quality sound on your projects. But should you run out and buy all of this gear? Even if you have the money to do so, unless you are somewhat experienced at audio, I vote no. The best way to determine what equipment will best fulfill your needs is to borrow or rent it. Use different microphones and mixers for a few shoots. Get to know how the different models respond and sound. Choose the best gear that will suit your specific needs. Here are a couple of pros and cons to renting versus owning:
Renting Pros
1. To rent the best, state of the art gear is still fairly inexpensive. Usually from $75.00 to $125.00 per day will get you a basic location audio kit. It cost's about the same price range to rent a quality wireless system.2. You can try out different types and brands of gear before owning to see what works best for you.
3. The rental company takes care of the maintenance and some expendables
4. If it breaks, the rental company has to deal with the repairs, warranties, manufacturer, and dealer
Renting Cons
1. It can get expensive to rent the gear on long-term projectsOwning Pros2. Sometimes, certain rental houses will still try to rent thrashed equipment. Build a good relationship with a reliable, trusted rental house and this shouldn't be a factor.
3. It's not as convenient to have to go pickup the gear and return it
4. Insurance is expensive, especially for "one man bands"
1. You get to indulge your equipment fetish2. If you own it and you use it, you will know who thrashed it or took care of it
3. Convenience. When a shoot comes up, you are ready to go.
4. Cheaper to own on long term projects (if you are shooting enough of them or if they are long term enough)
5. Audio gear doesn't outdate itself very often. Changes in gear are often incremental and not dramatic. Unlike computers and camcorders, rarely will you buy a piece of audio gear and regret it because the "latest thing" just replaced it.
Owning Cons
1. Gear breaks. Gear needs to be maintained. It takes time money and effort to keep everything in top condition and working perfectly.2. Unless you are willing to spend the big bucks, you will not have the best gear, you will probably have to compromise in order to keep your kit affordable.
3. Eats up storage space in your home or business
4. If you have one location sound kit and end up where you are doing multiple projects at once, you will have to rent anyway for a second or third kit.
Putting It All to Work
 By this point, you have either purchased or rented a location sound kit and are ready to do some shooting. Not so fast. As you have hopefully figured out by now, location sound is a craft, not just a crew position. There is no way that you will learn how to record location sound by just reading articles on the Internet. Remember, location sound is somewhat of a paradox in that the better you are at doing it, the easier it will seem. When you sit down to edit the footage you have recorded quality sound on, you will probably not think to yourself, "Wow, I did an awesome job with this sound." You will hopefully hear it, realize that it is fine and proceed with the editing. In a way, doing a really great job with location sound recording is a somewhat thankless pursuit, even if you are editing your own footage. If you do the job well, nobody will complain about the sound. That's about the best you will probably experience with it.
Preparation
One of the most important things you can do to improve your location sound is to be prepared. You cannot record high quality sound without the proper tools to do the job. If you sit down with the director and producer, even if you happen to be both of them, and you determine that you will need eight wireless microphones and two boom operators to successfully record that three camera, live, one-take scene, then so be it, those are the tools that will be needed to successfully record the sound. You may have to be prepared to justify to the producer/client/financier why you will need the tools that you will to get the job done. In order to learn which tools you will need to do a particular job, you must gain experience. The only way to gain experience is to get out there in the field and begin to record.
I am a big believer in location scouts for sound as well as for picture. Go to the location you will shoot at, close your eyes and listen. Listen to the room characteristics or the environmental characteristics, if it's an exterior. Listen to the ambient noises you will have to work around and work with. Which sounds can you eliminate? Which sounds can you minimize and how?
Prepping On The Set
When you arrive to the shoot location, after setting up the sound equipment, DO A SOUND CHECK! If there are actors or just regular non-professionals that will serve as your talent, setup your audio equipment and have the talent rehearse the scene or if it's an interview, setup your microphones and have the talent chat a while hear how their voice projects and what levels you should set. If you are setting up before talent is on the set, have a crewmember stand in and get some levels.
Action!
 The location sound mixer's job is to ensure that the best possible sound quality gets onto the tape. Anything else that is expected of the sound mixer is a distraction to that goal. This is the tough part of resolving recording high quality location sound with the entire DV "do it all yourself cheap or free" mentality that is falsely propagated in advertising for DV products and all over the Internet. The big secret that nobody seems to want to admit is that it still takes talent and people to fill certain crew positions to effectively perform all of the functions necessary for producing high quality work. Cinematography is cinematography; it doesn't really matter if it's lighting for DV or 35mm film. There are differences in how to light for each of the two mediums but actually any DP will tell you that DV is harder than 35mm film to make look good. Audio is the same way. It's easier to work with top of the line audio equipment with film cameras or HD/Digital Betacam and obtain a good recording than it is to work with the convoluted signal path of professional front end audio equipment (microphones and mixers) feeding recording devices with unbalanced inputs, inadequate or no audio metering and questionable sound quality. The main point to all of this is to make it clear that the "DV Revolution" really only has to do with equipment price and performance parameters. The DV Revolution has nothing to do with the talent, skills and education required to be effective at the art of film and video making.
Fifteen Tips and Tricks
As previously discussed, it is not realistic within the scope of this article to try to train you, step by step, on how to setup the equipment, microphone technique with talent, how to mix, etc. There are books you can read specifically on technique or I really recommend getting hands on training in a class, workshop or internship to learn the hands on techniques. But there are some fundamentals and tips that should prove helpful in at least getting you started. Here are a few:
1. Channel Redundancy?
When you are running a single microphone source into the two channels on a camcorder, split the output with a mixer or "Y" cable and feed both audio channels of the camcorder. Set one channel to peak a few dB lower than the other channel. In this way, you will have a buffer of a few extra dB in case the talent or subject gets too dynamic. Also, this redundancy is helpful in a more practical way. The audio tracks on a DV tape are smaller than a human hair so having two of them is always better. A chunk of debris can cause a dropout on the tape that may be just during an important part of the scene. Having that extra track of audio, even when using a mono microphone only is cheap insurance.2. Auto Versus Manual Input Level Control
Should you use auto audio levels if you have manual audio input levels? This is dependent on the specific camcorder and situation you are shooting under. On most consumer camcorders, setting the camera's audio input level to under 50% and controlling the levels with the mixer will get you the best possible sound quality. Each situation is different though.3. Audio Meters
Generally, when shooting with consumer DV, most of the camcorders used do not have segmented meters. The only way to determine which levels on the ambiguous camcorder unmarked meters means what actual dB level is to run tests with a tone generator and FCP. In that way, you can learn what the "red" segment on your un-marked meters is in dBs.4. Panning
When recording two channels through an audio mixer, it is generally a good idea to hard pan each channel all of the way to the left and right so that the two signals are recorded separately and independently of each other.5. Room Tone
What is room tone? Room tone is the ambient sound of the shooting environment that is recorded separately for use in patching, smoothing and matching ambient background levels when editing. It is imperative to record at least :30 of room tone in every sound setup.6. Phantom or Battery Power
Double powering. Beware of double powering a phantom microphone. If your camcorder has phantom power switched on and your mixer has phantom power switched on, this is not a good situation. Only one phantom power source at a time please.7. Checking Playback
After the audio is setup, camera is setup, roll tape on a sound check. Then rewind tape and listen to the playback. This verifies that picture, as well as sound is recording okay. You can get burned by tape head clogs or other problems that won't be apparent unless you check playback.8. Lavaliere Batteries
Most professional lavaliere microphones can be powered off of phantom power from the mixer but if you are using batteries to power your lavalieres, make sure you have a good supply of them on hand. The Tram TR-50B, for instance, takes an unusual size of mercury battery that can be difficult to locate.9. Connections
When using non-XLR connections, many common audio issues can be traced to plugs not being inserted all of the way into jacks. Make sure that all of your connections are tightly connected when investigating noise issues.10. Boom Pole Holder
You can purchase a steel device that is designed to hold fishing poles from most sporting goods dealers as well as places like Wal-Mart for around $10.00. These holders, when coupled with a C Stand and sandbag, make great boom pole holders for stationary booming situations.11. Lavaliere Placement
Hairpiece tape, which can be bought at most beauty supply stores, is excellent for taping lavaliere microphones to skin when setting up lavs under wardrobe.12. Sound Reports
Most professional audio retailers have sound reports available for free or at a very reasonable cost. Using sound reports, especially on long form or involved shoots is a great habit to build and will help you be more efficient in postproduction.13. Clothing
There are professional sound vests available with compartments for lavs, batteries, cables, tape, etc. Very handy. Although wearing one makes you look a bit geeky, when time is of the essence on set, it can be very helpful to have some of your tools at your fingertips as you setup the microphones for each shot.14. Tools
Most of the grips on set will have a small nylon belt pouch that will contain a Mag Light and a Leatherman or Gerber all-in-one tool. You should have one of these as well. The Mag Light will come in handy when set lighting is not on, for tracing cable runs, checking connections, etc. The Leatherman-type tools are handy for a huge number of tasks.15. Microphone Level Versus Line Level
Whenever possible run line level from the mixer to the camcorder (some camcorders accept line level, others, only microphone level). Line level is much higher than microphone level, giving your audio a better S/N ratio and less chances of noise creeping into a weak signal.
Location Sound - Beyond The Basics
In this article, we've covered a lot of ground about location sound and the part that it plays in making your project appeal to your audience. We've discussed preparation, planning for the shoot and we've covered the specifications and use for a lot of location sound equipment. Although I am aware that many of you are reading this primarily because you want to know which equipment to buy, I hope that this article has also given you a sense of the skills, talent and patience needed to record good location sound. Although we have covered a lot here, just realize that we have barely scratched the surface and that producing great audio for your projects really begins with the simple desire to communicate with your audience on a more sophisticated and effective level.
There are many great resources available for learning more about the details of recording location sound but really the most effective way to learn about location sound is to get out there and do it. Many of the better sound rental facilities give monthly lectures and presentations on new equipment, technique and the science of sound and how to record it more effectively. The best way to learn how to enhance your location sound is to work with professionals that have a high level of knowledge and skill. You might hire professionals, or be hired by them or work with them side by side on a PSA or a friend's independent film, but the most important aspect of the entire process is to get out there and become an active participant in the process. As we all know, production is a collaborative process and learning from the ideas and skills that your colleagues posses are what will help you grow as an artist. Use your ears and listen to what works and why. Read some books on basic audio engineering. Take a film school or community college sound for picture class. The skills and a trained ear are so much more important than the equipment. Anyone can buy or rent this equipment, but not just anyone can use it effectively. You have to invest the time and effort to learn how to use it correctly.
Believe it or not, one of the most enjoyable aspects of location sound is that it is never perfected. Once you reach a certain level of competence with sound, then the nuances of fine-tuning the sound come into play. It is much more pleasant to think of ways of enhancing the sound on your projects than trying to repair major audio disasters. There are always new challenges to face and new problems to solve. As we move forward into the age of High Definition, digital filmmaking, DVD, multimedia and surround sound, the requirements and appetite for high quality sound will increase. I hope that this article is your first step towards realizing your goal of producing better quality work.
By Dan Brockett
Big Little Films, Inc.
[Top]
Dan Brockett is a film and video director and co-owns a film and video production company, Big Little Films™ ,
Inc. and a sound design company, Big Little Sounds™ . Dan is also a guide on the premier Final Cut Pro information
source, 2-Pop.com and he serves as Vice President of the Los Angeles Final Cut Pro Users Group.
2955 E. Hillcrest Drive, Suite 121 Thousand Oaks, Ca. 91362 USA
Office (805) 496 8130 Fax (805) 496 4027 E-Mail: dan@biglittlefilms.com
copyright © kenstone.net 2002