
Motion - Audio November 15, 2004
Motion - Basic Audio Tools
Motion - Audio November 15, 2004
Motion - Basic Audio Tools
By Ken Stone
Motion does have some basic audio capabilities and while it is obvious that it would be best to do audio work in other applications, there will be times when it is expeditious to work with audio in Motion. So we'll take a look to see what tools Motion has to offer for working with audio. This won't take long. (grin)
Supported Audio
Motion supports standard QuickTime audio file formats and can work with different audio formats, different audio sample rates and bit depths, all in the same project. It is able to do this because Motion converts all audio to its own 'internal format'. Audio files up to 48 k audio sample rate and up to 24 bit depth, mono and stereo can be used. When it comes time to export audio from Motion the audio will be exported according to the settings in the Export process. Acceptable file formats for import are:
Having said this I would suggest that you use AIFF audio with a 48k audio sample rate whenever possible.
Bringing audio into Motion
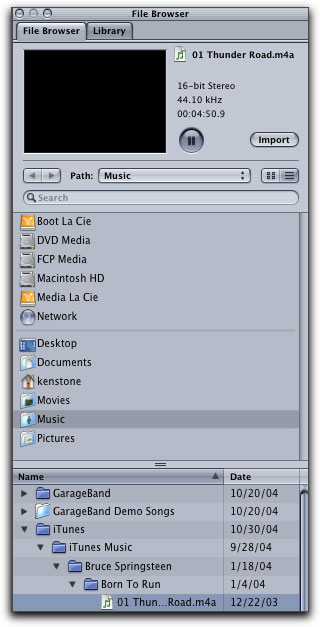
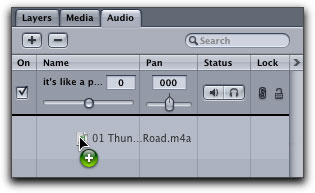
Just as with other Apple applications, importing audio into Motion is drag and drop. Motion makes this process even easier because Motion has a 'Browser' tab in the Utility window. The Browser tab provides full access to the Finder right from inside Motion and so it is easy to locate any audio (or any other file) that is on your hard drives. When you select an audio track in the Browser you can audition the song by clicking on the Play button at the top of the Browser. You will also be provided with information about the audio file. Each audio file that you bring into Motion will have its own audio track in the timeline and will be placed in the timeline at the position of the playhead. You can add an audio track by clicking on the Import button top of the Browser, below left, or you can drag the audio track into the Audio tab found in the Motion Project pane, below right.
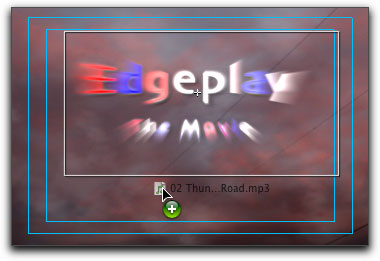
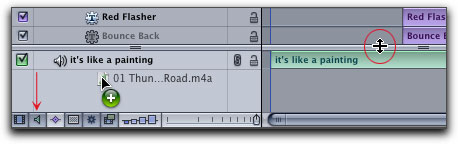
In addition, you can drag the audio file into the Canvas window, shown below left. You can open the audio area of the timeline (F6) by clicking on the small speaker icon, red arrow below right, then drag your audio into it. If the audio area takes up too much space you can reduce its size by dragging downward on the divider bar between the video and audio section of the timeline, red circle below right.
Once you have placed your audio in Motion, the Dashboard will reflect the new audio. In the example above I have imported a song from my iTunes Library.

Project Pane - Audio tab
Audio that accompanies video clips and audio that is imported are handled as tracks by Motion and are located in the Audio tab of the Project pane. The Audio tab is dived into two sections. In the top section each audio track is listed separately, each track has its own set of basic controls. Selecting a track will make it active, place the audio track into the mini-timeline and main timeline for positioning and trimming. The selected audio track will also be displayed in the Audio Editor for keyframing. More on the Audio Editor later.
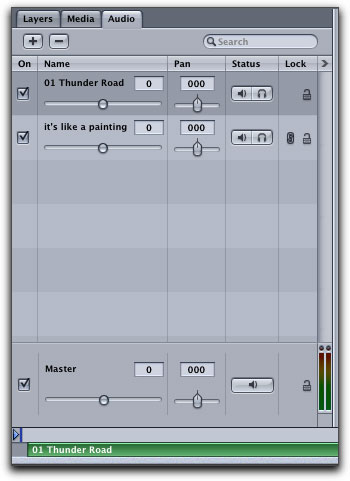 Looking at the audio track controls starting from the far left is the 'activation check box' which defaults to being checked on. Unchecking this box will remove the track from normal playback but more importantly it will exclude the track from being included when the Motion project is exported. The Name column is next; you can change the name of the audio track by double clicking on it. Beneath is the audio volume slider. The volume setting defaults to 0, but this is not the actual dB level of the audio but rather the 0 represents the existing audio volume level of the track when it was it was imported. The volume slider runs from -96 to 6, interesting to note that if you move the volume slider just a hair to the left you will see -0, don't ask (g). The next column is the Pan control setting which defaults to 000 and will play back stereo as it was recorded. Moving the Pan slider to the left, into negative numbers, will move audio from the right channel to the left channel. When set to -100, all of the audio in the right stereo channel will be played out the left speaker with no output from the right speaker. Setting the control to +100 will achieve the opposite effect. Pan in Motion is very much like the 'Balance' knob on a home sound system. The Pan control in Motion works differently than the Pan control in FCP.
In the Status column are two items. The first, a speaker icon, will mute that one audio track when clicked. The next icon, a headphone, is for soloing a track. Clicking on this will disable all other tracks from playback. The last column is Lock, which can be enabled to prevent changes to the audio track. Notice below, in the second audio track, there is a chain icon which represents the fact that this audio came in linked to video. For example, the Audio and video of a captured clip would be linked together. To break the link between the audio and video, click on the chain icon which will separate into two haves. You might need to do this if you wanted to remove the audio that came in with video.
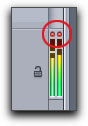
At the bottom is the Master section which contains most of the same basic controls as the track section above except that in the Master section these controls affect the output of all the tracks combined. On the right, in the Master section, are audio level meters. These meters reflect the sum total volume of all the audio tracks being played. If you Solo a single track then the meters will reflect the audio volume of that one track. As the audio volume increase the dB meters move higher in the columns. Near the top the bars turn orange showing high volume. If the audio level is too high and the audio clips, the two small circles, clipping indicators, at the top of the meter will turn red. Unfortunately, once these clipping indicators turn red, they stay red even after the volume drops back to normal audio levels. The only way to turn them off is to click on each one of the red clipping indicators.
The Audio Editor
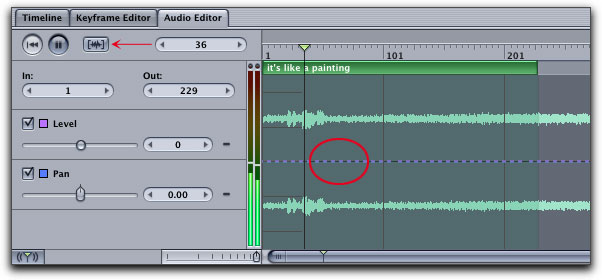
To access the Audio Editor you will need to open your timeline, F6, then click on the Audio Editor tab. The Audio Editor will display whichever track you have selected in the Audio tab. If you have selected the Master section in the Audio tab, then all audio tracks will be presented as one total waveform, this will enable you to set keyframes for Level or Pan for all audio tracks in one shot. At the top left are controls. The first, two left facing triangles, is the 'Home' button returning the playhead to the first frame. Next control is the Play button, followed by the 'play range' control, red arrow, however there is no loop function with this control. Left bottom of this window is the audio scrub button. The dark green area in the waveform window denotes the play range In and Out points. There is a Zoom control at the bottom of the Audio Editor window.
When an audio track is loaded into the Audio Editor, both Level and Pan are checked. This creates a bit of a problem because both of the Level (pink) and Pan (blue) keyframe lines are on top of each other, red circle below, making it hard to set keyframes.
In order to access just one keyframe line, we must turn off either the Level or the Pan control. As shown below, the Pan control is unchecked. Placing the cursor on the Level keyframe line and holding down the Option key turns the cursor into a cross hair, clicking sets a keyframe. If you have worked in FCP or Soundtrack you will note that in FCP we have a Pen tool and in Soundtrack you double click to set a keyframe. As all of these 'Pro' apps come from Apple, it would be helpful if these tool functions used the same icons to represent the tools and worked in the same manner.
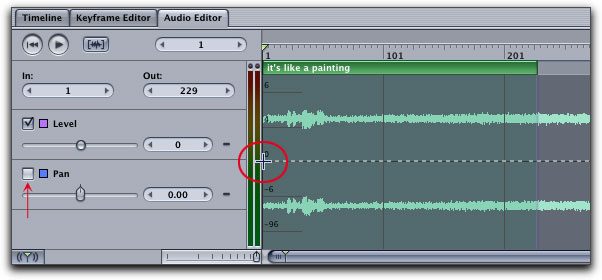
Keyframing in the Audio Editor follows conventional keyframing rules. Set your keyframes then drag the keyframe to change the audio level. Holding down the Shift key will constrain movement either vertically or horizontally. Down the left hand side of the waveform window are reference numbers that become visible when only either Level or Pan is checked on, not when both are checked. When Level is on, decibel markings, 6 at the top and -96 at the bottom, will be displayed for reference. When Pan is on the number 100 will appear at the top, 0.00 in the middle and -100 at the bottom. As you drag the keyframe, a tool tip displays the frame number and the decibel level of the keyframe at that position. As shown below, my keyframe is on frame number 14 with an audio level of -6. While Motion does display the waveforms for both tracks of stereo audio, we are limited to keyframing both audio tracks together, we can not keyframe just one of the two tracks.

Audio Sync
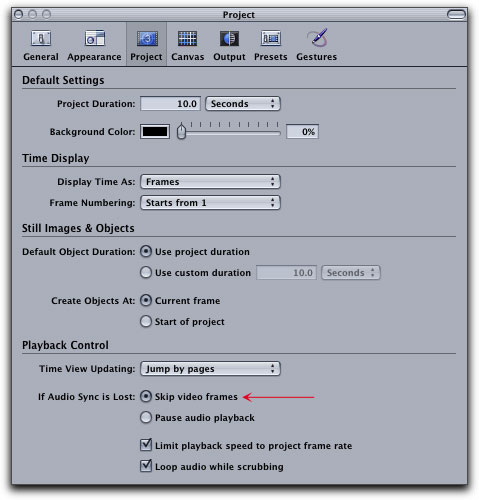
Even with the latest and greatest G5s, lots of system ram and a top of the line video card, most of us find that as our Motion projects become complex, the playback frame rate drops. So what happens to the audio sync when the frame rate decreases? You guess it, we lose audio sync. Motion has an option to help us deal with this. In The Motions Preferences > Project pane is "If Audio Sync Is Lost", selecting "Skip video frames" will help maintain audio sync as we playback.
Exporting Audio
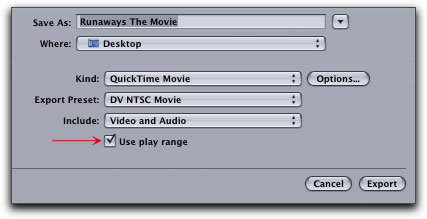
Exporting your audio (or audio and video) from Motion to send via E mail or for the web is easy. From the menu bar select File > Export. You will be presented with a standard export window with one additional item, 'Use Play Range'. In the File Menu there is a second export option, 'Export Using Compressor' for additional compression codecs.
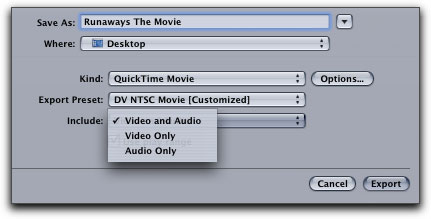
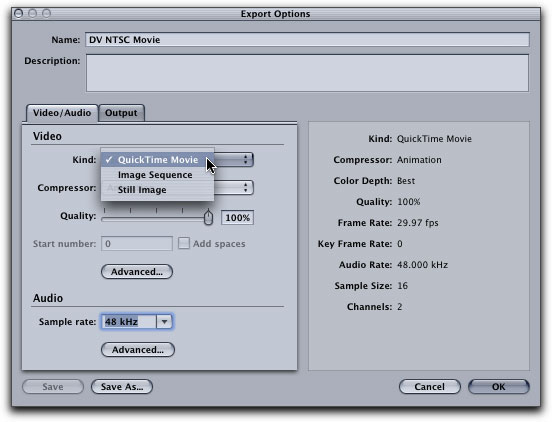
Clicking on the Options button opens the Motion Export Option dialog box. For Kind, select QuickTime Movie. Clicking on the 'Compressor' drop-down offers the standard QT codecs. In the Audio section select 48 kHz, or click on the Advanced button for more options.
Export Caveat
If you need to send your Motion project to someone, either via E mail or posting on the web, say for a review of work in progress, exporting through QT works well. However, we might think of the term 'export' to involve moving a Motion project to FCP or DVD SP. There is a problem here.
Lets say that you create a Motion Project, in this project you use a captured video clip with attending audio, which will show as linked audio in the Audio tab. When you play Motion you will hear the audio. Now you add some background music to your project and save your Motion project. If your drag the Motion project icon into the DVD SP Editor window, the Motion project will appear along with both audio tracks, audio captured with the video (linked) and the background music. This works properly. However, if you bring your Motion project into FCP, the audio will not come across, it gets lost.
As you may be aware, you can create a project in FCP and then export from the FCP timeline, to Motion, creating a new Motion project in the process. If the material that you export from the FCP timeline consists of audio and video that are linked (a captured clip), the audio will show up in Motion. When you open this Motion project back in FCP the linked audio will be there having survived the round trip. (Actually it never left, the audio in Motion is referenced back to FCP, it's just a pointer.) However, if you have added any additional audio tracks like background music while working in Motion, this additional audio will not come across.
There is a workaround. If you have added audio to a Motion project that you need to bring back into FCP, you can export from Motion as a QT movie. When you export from Motion your 'Export Presets' in the QT export dialog box, will want to match your FCP Sequence settings. Click on the Options button to access additional presets found in the 'Compressor' drop-down menu. Your Motion project properties should match your FCP sequence settings.
Conclusion
Motion is a 'motion graphics' application and as such, its audio abilities are very limited. You can import audio, position it on the timeline, trim the audio and keyframe audio Levels and Pan settings. That's about it. There are no audio Filters or Behaviors. If I could have just one audio Behavior it would a Fade In - Fade Out. Fading audio in and out is a common task and having a Behavior would save a great deal of keyframing time. While we can keyframe audio Levels and Pans, keyframing affects both audio tracks, it is not possible to keyframe the Level or Pan for just one track.
As I said, 'Motion has some basic audio capabilities'. Limited, yes, but the need might arise to do some quick audio work in Motion. Basic, but it works.
Enjoy,
--ken
Copyright © www.kenstone.net 2004
All screen captures, images, and textual references are the property and trademark of their creators/owners/publishers.