
Motion - How To 'Color Mode' November 8, 2004
Motion - Using Color Mode
Motion - How To 'Color Mode' November 8, 2004
Motion - Using Color Mode
By Ken Stone
When we use Emitters or 'Make Particles' out of objects, Motion will generate or birth copies (cells) of that object for us. We can control the birth rate, number of objects born each second, the speed and life of each particle as well as the size of the cells. We can control the direction of the cells flowing from the emitter as well as the spread of the flow. This makes for great control over the particle cells, but all the cells emitted are the same color.
Motion has a 'Color Mode' function that gives us the same flexibility over color as we have over the cells themselves. We can change the colors of the cells as they play out on screen, in either a predetermined manner or randomly from a Range of color that we select. This can be either a single constant color or by applying a gradient that changes color over time. You can also choose to apply prebuilt Library gradients, called 'Gradient Favorites', to the particles and you can save custom gradients for future use. Color Mode works by adding or tinting the original colors of the emitter cells with the colors that you have chosen. If you are working with grayscale objects, Color Mode will color the objects with pure color as opposed to tinting the color.
Before we experiment with Color Mode we need to go over the different parameters and options that are available. There are different cell parameters based on which Color Mode is selected.
Color Modes
With the Cell selected in the Layers palette (F5) click on the Particle Cell tab in the Inspector to access Color Mode found in the middle of the column.

There are five different Color Mode settings, each one uses a different approach to coloring the cells. Depending on which of the five is selected, different parameter settings will become available.
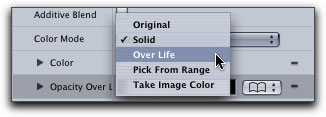
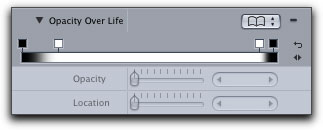
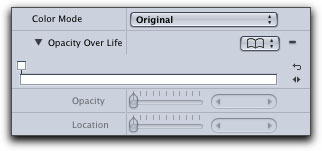
Original - Maintains the original colors of the cells and the 'Opacity Over Life' parameter becomes available allowing you to change the opacity of the cells over time. The Opacity Over Life bar shown below is set up for Fade In/Fade Out.
Solid - Selecting a color in the Color parameter box tints the cells with that colors, the Opacity Over Life parameters is also available.
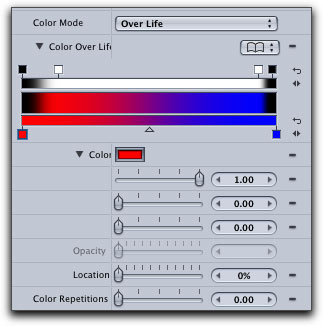
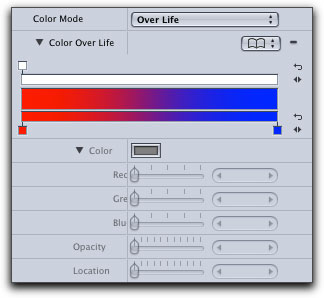
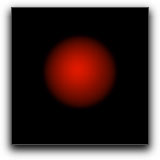
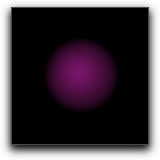
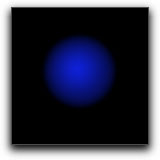
Over Life - Cells change their color over their life span taking their colors from the colored gradient strip, starting with the color on the far left of the gradient when the cell is born. As the cell ages it selects its colors further to the right in the strip, changing from red to purple and then, at the end of its life, blue. Above the colored gradient strip is the 'Opacity Over Life' control.
Pick from Range - As each cell is emitted, Motion will randomly select a new color for each new cell from the color range that you have created in the gradient color strip. Each cell will maintain its birth color for the duration of its life. As the color selection is a random process, the larger a block of color in the gradient strip, the more likely it is that it will be used.
Take Image Color - When you choose this command, each new particle's color is based on the color of the image at the position at which the particle was generated.
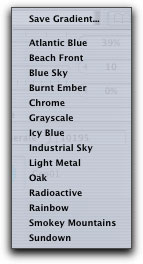
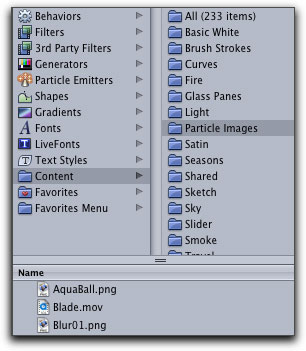
Gradient Library Presets - Just below Color Mode is a Book icon that provides us with a Library drop-down menu offering a number of preset gradients that can be used as is or modified. Customized gradients can be named and saved for future use by clicking on 'Save Gradient' at the top of the list. It is interesting to note that the Motion components; Behaviors, Content, Filters, Gradients, Particle Emitters, Shapes and Text Styles are not stored where you would expect. They are found in the HD > User > Shared > Motion > Library. When you Save a custom gradient it will be stored at a different location; HD > User > User Name > Library > Application Support > Motion > Gradients.
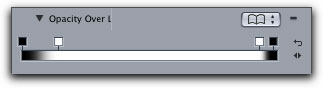
Opacity Control - We can control the opacity (Alpha channel) of the cells over their life. The Gradient bar is like a timeline, taking opacity settings from left to right as the cell are born and play out on screen. We can do a simple Fade In and Out, shown below left, or we can fade in and out several times over the course of the cell life, making the cells come and go on screen, shown below right. In the opacity bar, Black represents 0% opacity (totally transparent) and White represents 100% opacity.


Color Repetitions - With a Color Repetition setting of 0.00 Motion will run through the color bar one time over the life of the cell. Increasing this setting will cause Motion to run through the color bar multiple times over the life of the cell.


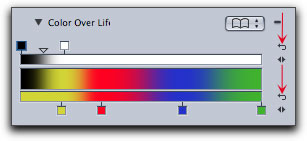
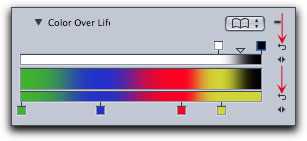
Reverse Arrows - Reverse Arrow icons are found just to the right of the Opacity and Color bars. Clicking on the reverse arrow icon will reverse the order of the Opacity settings or Color settings. As shown below left, the Opacity bar is set to Fade In and the colors run; yellow, red, blue, green. As shown below right, after clicking on both the Opacity and Color Reverse arrows, there is now a Fade Out and the colors run; green, blue, red, yellow.
Just below the Reverse arrows are right-left facing triangles. Clicking on these triangles will cause each color swatch to become the same size and will evenly distribute all the color swatches in the gradient. It will do the same thing for Opacity settings.
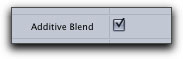
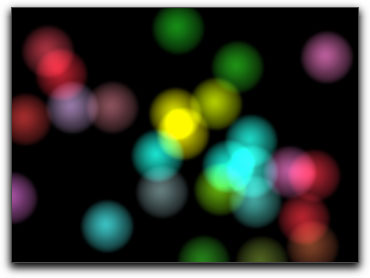
Additive Blend - Lastly we can enable 'Additive Blend', which by default is turned off and is in the Normal Blend mode. Additive Blend will composite the color and shape of the cells as they pass over one another resulting in brighter color intensity. Additive Blend affects only the particle's cells themselves and how they affect each other, not how they are composited into the overall project. To affect the way that the cells are blended into the project, the emitter must be selected as opposed to selecting the cells.
Opacity Over Life - All of the Motion Color Modes except 'Take Image Color' have the 'Opacity Over Life' feature. Click on the twirl down to disclose the Opacity parameters.

With the other four Color Mode options the Opacity Over Life defaults to a Fade In Fade Out as shown below. The Opacity bar is a timeline. The very left represents the first frame of the life of the cell which is shown as black in the Opacity bar and is 100% transparent. As the cell life plays out the opacity selection moves to the right and into the white area which is 100% opaque (solid). As the cell nears the end of its life the opacity selection is taken from the far right which is, once again, black, 100% transparent. Percentage settings between 100% transparent and 100% opaque will create semitransparent cells. Percentages are displayed beneath the opacity bar in the Opacity setting.
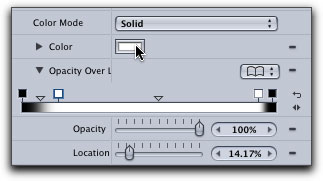
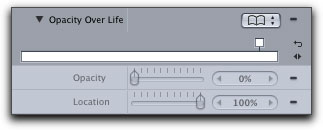
The small square boxes (called Gradient Tags) that hover just above the Opacity bar are very much like keyframes, each small square represents a position in time and an opacity setting. We can remove the Gradient tags by clicking on the squares and dragging away. When you drag the squares up they turn into puffs of smoke and disappear. As shown below right I have removed the black square boxes and one white square. The last square can not be removed, as at least one is required to set the opacity for the life of the cell regardless of what that setting is, in this case, 100% opaque.
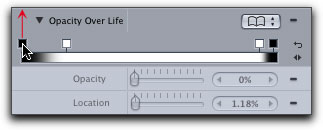
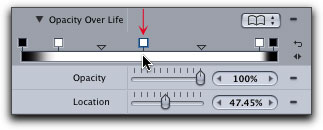
As you will notice above, the Opacity and Location parameters are grayed out. To activate the opacity parameters, click on the Gradient tag (small square box), it will display a blue border showing that it is active, shown below left. I have changed the opacity slider to 50% which is demonstrated by the 50% gray tone in the opacity bar shown below right. In this case the particle cell would be 50% transparent over its entire life.
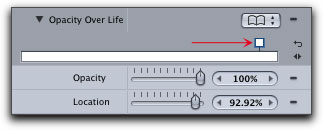
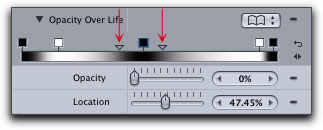
Lets say that you want a fade In Fade Out but you want to the cells to disappear momentarily midway through their life. Starting off with the default Fade In Fade Out, shown below left, we need to add a Gradient tag in the middle of the opacity bar. Clicking inside the opacity bar will create a new square box which shows as active by its blue border, below right.
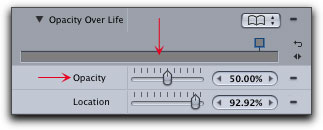
To change the opacity setting, with the Gradient tag active, adjust the opacity slider or enter a value in the entry box, below left. When the tag is active there will be two downward facing triangles on either side of the square. These triangles can be repositioned to change the timing and duration of the opacity change, below right. These triangles are much like In and Out points for the opacity change.

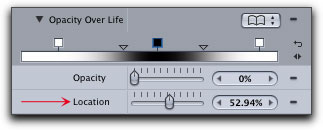
The position of the Gradient tag can be moved left or right by clicking and dragging, using the Location slider or entering a value in the entry box. You can add any number of opacity changes by creating multiple Gradient tags.
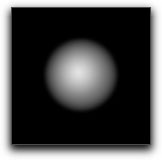
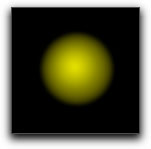
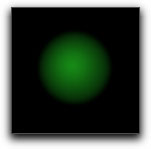
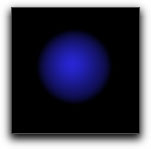
To demonstrate Color Mode, I have chosen the 'Blur 01.png' from the Content Library. I chose this art work because it is grayscale and will demonstrate the color changes more clearly. If you are working with art that already is colored, then using Color Mode will tint the already colored cells with the colors from Color Mode. Just as with any object in Motion, this still image can be turned into a Particle Emitter. I have applied the Edge Collision behavior so that the cells do not fly off the screen and we can see our color effects throughout the life of the cell. I feel that the two most exciting Color Modes are 'Over Life' and 'Pick from Range' so we will look at this two options.
Over Life
Color Mode defaults to 'Original', which as you can see below offers only Opacity controls and no color options. With our playhead parked on the first frame of the project, the first cell is on screen in it's default state, grayscale.
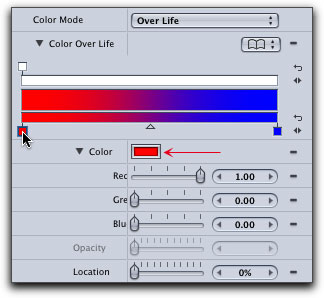
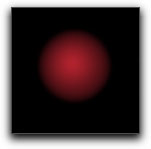
With 'Over Life' selected from the Color Mode drop-down, the color bar is now available, defaulting to a red-purple-blue gradient. As the Over Life color bar is like a timeline, the first frame of the cell takes its color, red, from the far left of the color bar, shown below right.
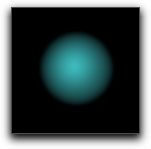
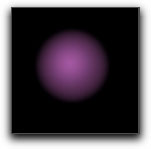
As the life of the cell plays out the cell color is selected from further to the right on the color bar. Halfway through the cell life the color is selected from the middle of the color bar, purple. At the end of the cell life the color is taken from the far right, blue.
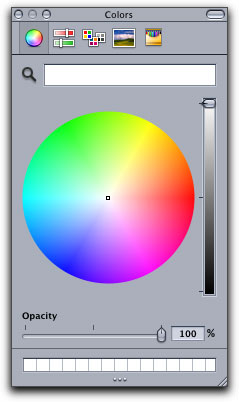
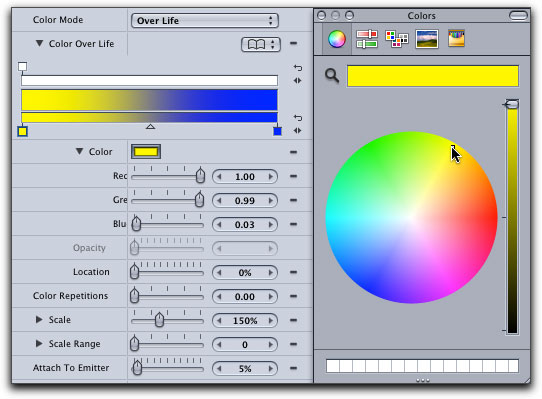
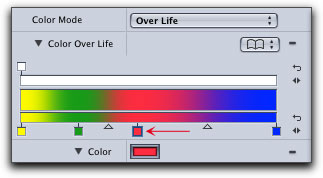
Red-purple-blue not to your liking, easy enough to change. Lets start by clicking on the small red square box (called a Color tag) at the left of the color bar. This will activate the color parameters, then click on the color box, red arrow below left. This will open the color wheel where I have selected yellow. Notice that the start of the Over Life color bar has changed from red to yellow. In addition to selecting from the color wheel, you can enter numeric R-G-B color values into the entry boxes or use the small magnifying glass to sample any color in the Canvas window.
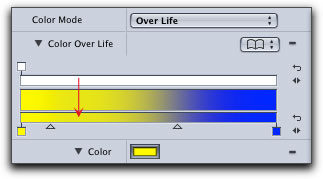
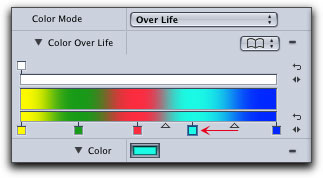
So far we are working with just two colors, yellow at the start and blue at the end, the center point is a blend of the two colors. Easy enough to add as many different color swatches as we want. Locate the position that you want to create a new color swatch and click in the lower color bar at that location, red arrow below left. This will create a new color swatch box (color tag), red circle below right. The swatch box is active as noted by the blue bounding box.
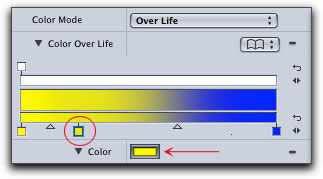
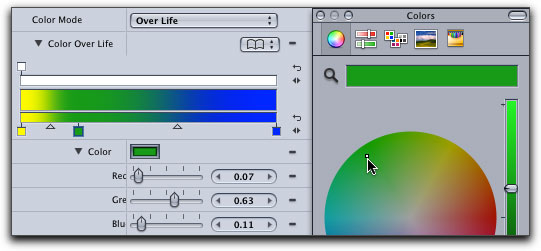
Click on the color selection box, red arrow above right. This will open the color wheel. When you select a new color in the color wheel, the color will be loaded into the color bar.
To add additional color swatches, repeat the above process for each new swatch. If you are unhappy with your choice you can go back to the color wheel to change the color or drag the square color box away to remove the swatch completely.
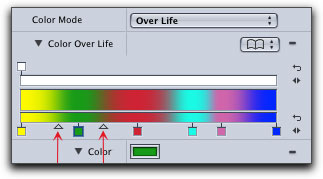
When you click on a square color box it becomes active and two upward pointing triangles will appear on either side of the square color box. These two triangles are like In and Out points, drag in either direction to extend or reduce the over all size of the color swatch and the degree of blending with adjacent color swatches. You can adjust these setting independently of each other.
As each cell is birth and lives its life on screen it is constantly changing color as it draws each new color from the color bar, shown above. The screen shots below were taken 'Over the Life' of the cell from start to finish.
Pick from Range
'Over Life' uses the color bar like a timeline, changing the color of each cell as the cell grows older, drawing each color from further down the color bar. 'Pick From Range' uses a random method of selecting the color for each new cell, each cell will be birthed with a different color. While Motion randomly selects colors from the color bar for each cell, we can control this random color selection by setting a range of colors that Motion will randomly pick from. Unlike 'Over Life' where each cell changes colors over time, 'Pick from Range' assigns a random color for each cell and the cell maintains that one color for its entire life.
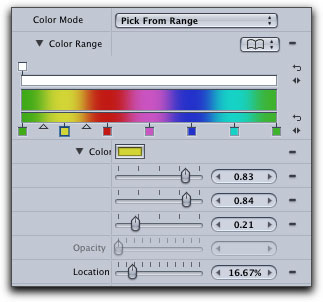
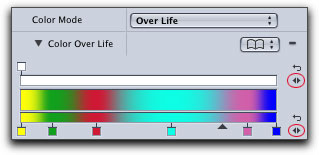
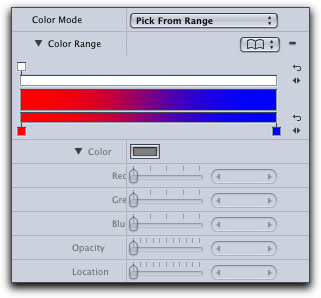
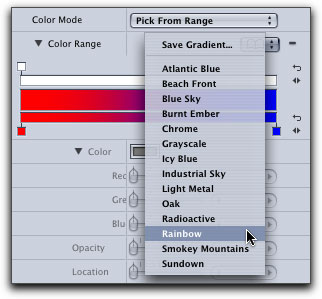
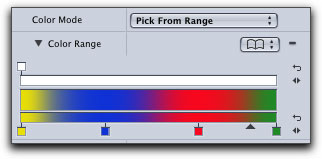
With the Cell selected in the Layers palette (F5) click on the Particle Cell tab in the Inspector. In the Color Mode drop-down chose Pick from Range, for this example, from the Gradient Library Presets choose Rainbow.
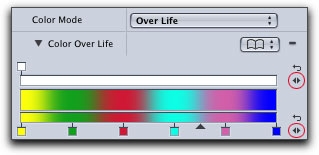
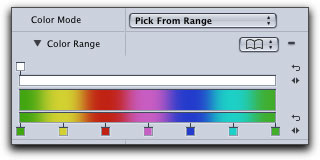
The Rainbow gradient is displayed in the color bar. The way that 'Pick from Range' works is that even though it uses a random process when picking different color swatches from the color bar, color swatches that are larger in size will have a better chance of being picked than smaller swatches. You will notice that in Rainbow, below left, each color swatch is about the same size, so each different color swatch has about the same chance of being picked. Below right, I have built a different color bar with the preponderance of space given to the blue and red swatches. This means that most of the cells will be birthed as either blue or red.
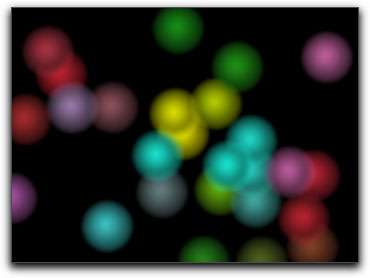
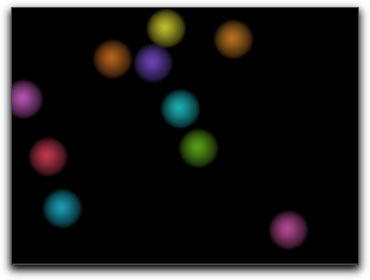
With the Rainbow gradient selected, you can see below that even though this is a random process and several colors are repeated, the cells colors are a close representation of the color swatches found in the Rainbow gradient because the swatches are of about equal size and therefore stand an equal chance of being selected.
Motions' Color Mode gives us a number of different ways to customize the color of our particles cells as they live on our screen as well as the ability to change the opacity (Alpha channel) of these cells as they play out. The ability to animate color and opacity in Color Mode is a powerful and creative tool.
Enjoy,
--ken
copyright © www.kenstone.net 2004
© 2000 -2004 Apple
Computer, Inc. All rights reserved. Apple, the Apple logo, Final
Cut Pro, Macintosh and Power Mac
are either registered trademarks or trademarks of Apple. Other
company and product names may be trademarks of their respective
owners.
All screen captures, images, and textual references are the property and trademark of their creators/owners/publishers.