
Motion - text in motion September 13, 2004
Motion - Text moving in a Circle
Motion - text in motion September 13, 2004
Motion - Text moving in a Circle
By Ken Stone
If you have spent any time at all with Motion you'll quickly discover that much of the tedious and complicated work, like keyframing, is done 'behind the scenes'. This ability is most evident in Motion's 'Behaviors', which are complex motion animations that can be applied to any object in a drag and drop manner. These Behaviors, once applied, can be further adjusted in a floating palette called the Dashboard, which contains basic settings controls. Great effort went into creating an easy to use, intuitive application. Motion does this very well, but this ease of use belies the fact that under the hood, Motion is a very powerful and minutely controllable application. You can use Motion to create motion graphics and never concern yourself with keyframing, yet there will be times when you want to drill down deeper into the applications abilities, setting keyframes and parameters manually.
One of the more powerful features of Motion is the fact that as you work, adding different elements and making adjustments, Motion is playing in real time on your screen, in an never ending loop. This gives you enormous control during the creation process and is a feature not found in most other motion graphics applications. Having said that, for the following project, the use of the real time playback feature will be limited.
To demonstrate some of the 'under the hood' features of Motion we are going to set some text, wrap it onto a circle, spin the text around the circle, fly each letter onto the circle one at a time and add motion color and background. Much of this work will involve setting keyframes manually.
Keyframing in Motion
Keyframing in Motion is done a little bit differently than in FCP. In FCP you set your first keyframe and parameter. When you move to a new location in the Timeline and change the parameter, FCP will automatically set a new keyframe for you, not so in Motion. In Motion you must set a keyframe each and every time. When you move to a new location in the Timeline, you must first 'Add Keyframe' and then change the parameter.
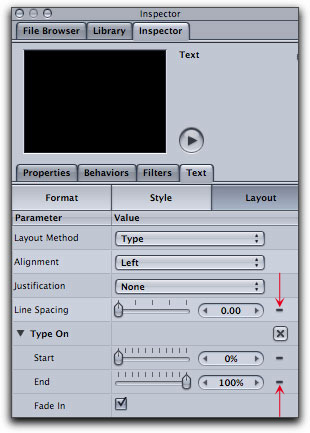
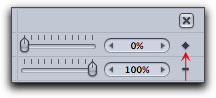
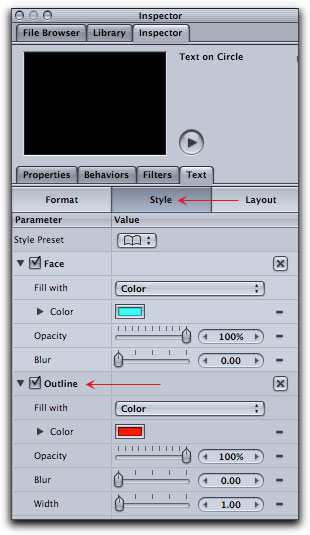
There are several ways to add keyframes in Motion. There is a Keyframe Editor in Motion (F6 > Keyframe Editor tab), you can use the 'Record' button found at the bottom of the Canvas window, however we will set keyframes in the Utility window (File Browser/Library/Inspector) using the Inspector tab. Down the right hand side of the window are dashes next to all keyframeable parameters, (below left). When you place your cursor on top of a dash, it changes, offering a dash and a downward facing triangle, a drop-down menu, (below right). Oh yes, that little 'X' in a box that you see with each parameter is the reset button.
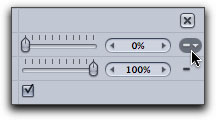
Clicking on the dash will produce a drop-down menu where you can select 'Add Keyframe'. Holding down the Option key when you click on the dash will set a keyframe without the need to visit the drop-down menu.
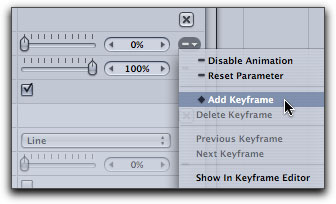
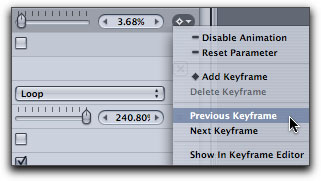
When a keyframe has been set, a solid diamond will be displayed, (below left). When you move your playhead to a different location on the Timeline, the diamond will show as hollow, noting that there is a keyframe set for that parameter, but your playhead is not on the keyframe, (below center). The only way that I have found to navigate from keyframe to keyframe is to select the parameter and click on the diamond, then choose Previous or Next keyframe from the drop-down menu, (below right).

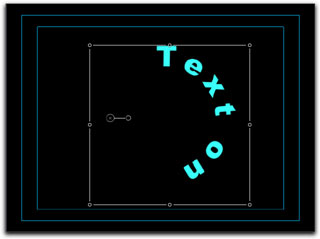
Setting Text and placing it onto a circle
Open a new Motion project with a length of 300 frames for NTSC or 250 frames for PAL. In the Canvas window turn on the 'Safe Zones' (read 'title safe') from the top right corner of the Canvas window in the View menu, or simply by hitting the 'single quote' key. Use the home key to move your playhead to the beginning of the Timeline. As we work through this project you will see that Motion utilizes numerous keyboard shortcuts and hot keys that make working in Motion a lot easier.

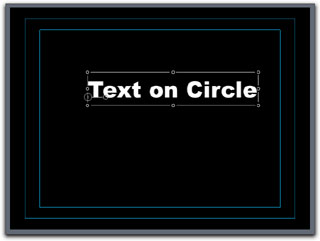
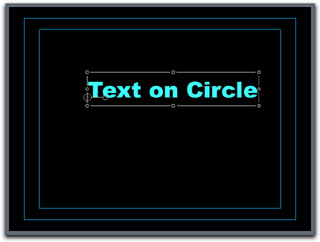
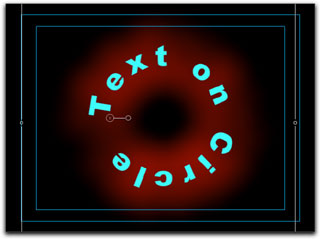
Select the Text tool and click in the Canvas window and type 'Text on Circle'. When finished, hit the Escape key to exit 'text setting' but still leave the text selected.


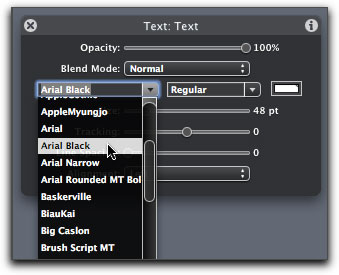
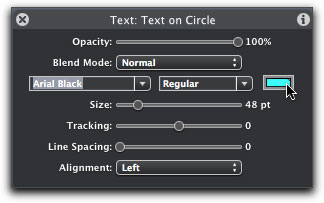
Motion has an on screen floating window called the 'Dashboard' (use the F7 hot key to display and hide the Dashboard) which provides basic text controls. Clicking on the Font drop-down menu offers up your fonts. As you drag through the font list, the text in the Canvas updates dynamically displaying the actual font in the Canvas. Great way to choose a font. Select Arial Black as we'll want nice thick text for this project.
In the Dashboard click on the white color swatch to open the color wheel and select a light Aqua Blue.
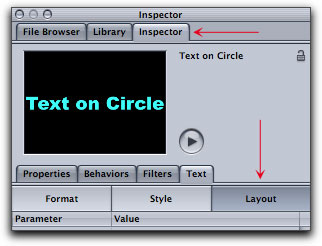
With the Text still selected click on the Inspector tab and then the Layout tab.
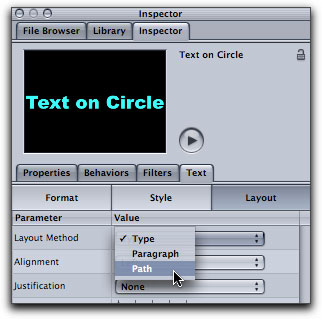
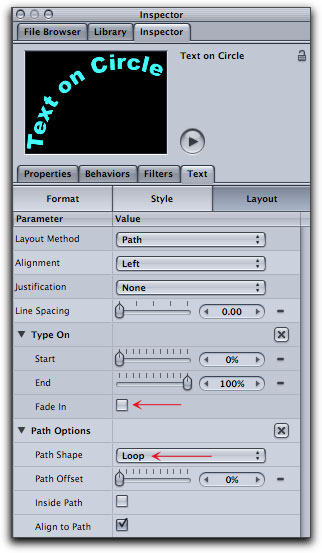
We are now going to place our text onto a Path and convert the Path into a circle. Click on the 'Layout Method' drop-down and select 'Path', (below left). After selecting Path you will see that 'Path Options' is now active, in 'Path Shape' select Loop. Uncheck 'Fade In' as we will add our own Fade in/out later. Keep 'Align to Path' checked.
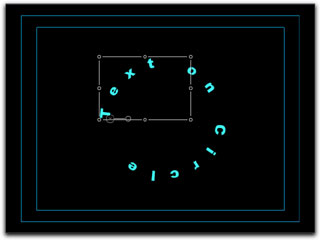
Looking back at the Canvas we can see that the text is now curved but part of the text is out of view. Click and drag the text back to the center of the Canvas.
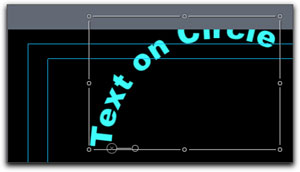
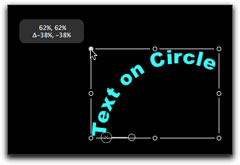
Our text is curved but we need to wrap it around in a circle. You may want to reduce the size of the text so that it does not fall off the Canvas as we continue to work. Click on one of the corners of the text bounding box and hold down the Shift key to constrain proportions as you drag in. At the same time hold down the Option key (Shift + Option) to keep the text centered in the work area.
In the Dashboard (F7) begin to drag the Tracking slider to the right, as you do this the text will wrap around in a circle but stop short of completing the circle.
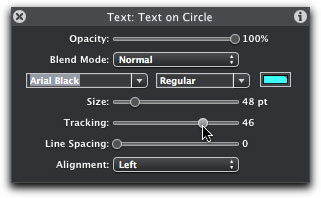
In the Dashboard drag the Size slider to the right increasing the size of the font. If the letters start to overlap on the circle, drag the Tracking slider back to the left to adjust. When done, reposition the text in the Canvas.

Adding motion to the text
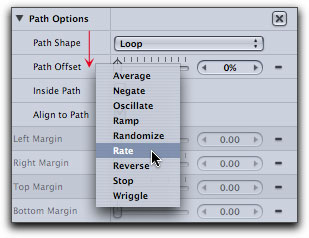
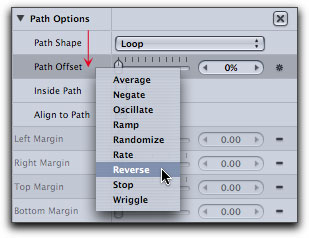
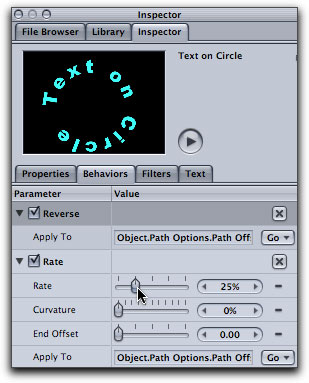
Okay, we have our text sized and wrapped around the circle, now we need to add the motion, spin the circle. With the text selected we are going to return to the Inspector > Layout tab. Control click just to the right of 'Path Offset' (below left), in the drop-down menu select 'Rate'. After you select Rate you will be returned to the 'Behaviors' tab in the Inspector but we have one more parameter to set so click on the Text tab > Layout. Control click to the right of 'Path Offset' and this time select 'Reverse', for a counter clickwise direction, (below right).
Again you will be returned to the 'Behaviors' tab which now lists the two behaviors that we have just applied, set the Rate to 25%. If you now click on the Play button in the Canvas window or hit the spacebar you will see your text spinning around in a circle.
Type On - one letter at a time
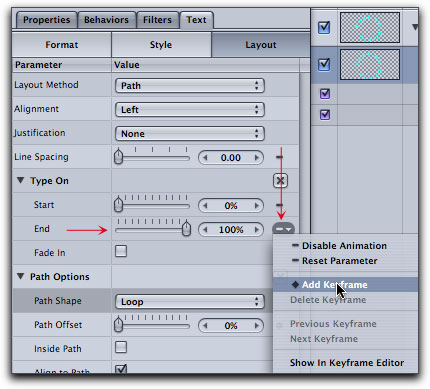
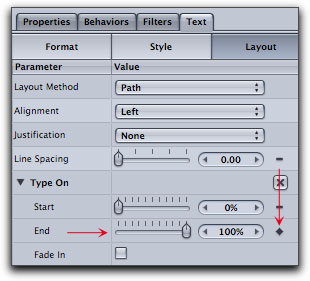
We will keyframe the 'Type On' parameter so that each letter comes on the screen one at a time, one after the other. Go to the Inspector and select the Text tab > Layout tab. We will be using the 'Type On' section, 'End' slider. Press the Home key to place the playhead at the beginning of the Timeline. Control (Option) click on the small dash to the right of the Percentage box in the End row and select 'Add Keyframe', (below left). Drag the 'End' slider all the way to the left to 0%. The dash will turn into a diamond demonstrating that a keyframe has been set, (below right).
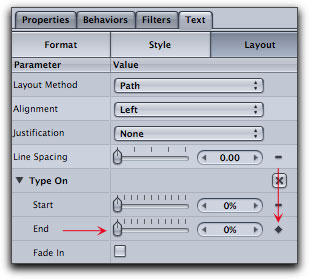
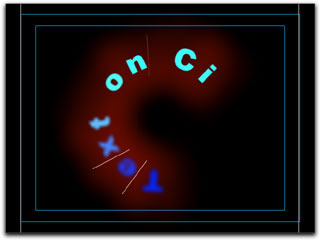
Press the End key to move the playhead to the end of the Timeline. Remember to 'Add Keyframe' first. After setting a new keyframe, drag the slider back to 100%. Now, when you play the Timeline you will see the text spinning in a circle and each letter being added one at a time.
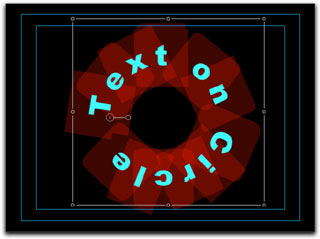
Background blur using Text Outline
We want to add a bit of a background blur around our text and have it fade in over time. With the text still selected; Go to the Inspector and select the Text tab > Style tab. Check the Outline box then click in the color box and select the color Red.
We want to fade in the text Outline using the Opacity setting. Press the Home key to return the playhead to the start of the Timeline. In the Opacity Control, Option (Control) click on the dash found to the right of the Opacity percentage setting, (below left). Once 'Add Keyframe' has been set the dash will turn into a diamond, (below right). With the keyframe set, lower Opacity to 6%.

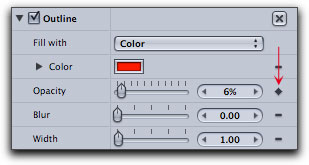
We want to increase the Opacity over time so press the End key to move the playhead to the end of the Timeline, 'Add Keyframe' and set Opacity to 25%. If you play the Timeline you will not see the Outline that we just applied. Set the Outline Width to 45 (below left) and set Blur to 30 (below right). Now play the Timeline.
Blue Flasher
I want to add some animated color to the face of our text. For this I am going to use a Text Behavior. With the text selected, click on the 'Behaviors' button, top of the Canvas. Choose 'Text Miscellaneous' slide down to 'Blue Flasher' and select.
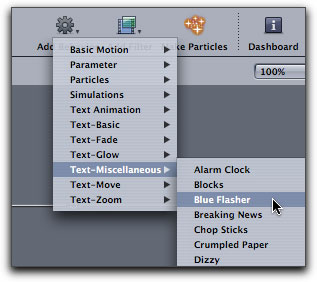
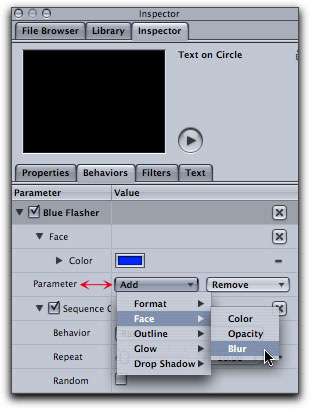
The Blue Flasher behavior is now added to the Behaviors tab. I happen to like the stock blue default color, however, you can change the color by clicking on the blue box which will produce a color wheel. You will also note that to the right of the color box, (below left), is a dash which means that this color setting can be keyframed if you so chose. The Blue Flasher behavior flashes color in a pattern. If you do not like the pattern you can check the 'Random' box which will create a new pattern. You can further modify the flashing pattern by clicking on the 'Generate' button next to Random Seed, each time you click on Generate, a new pattern will be displayed, (below right).
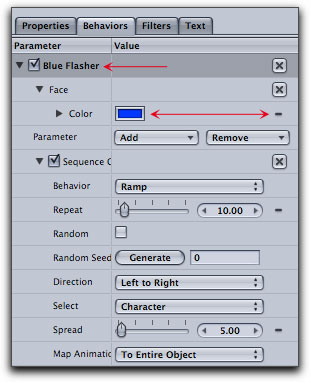
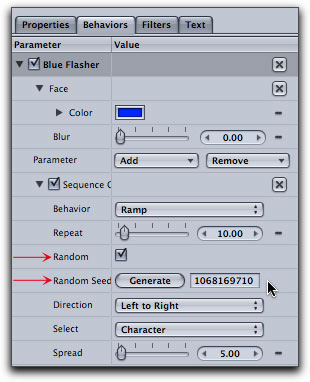
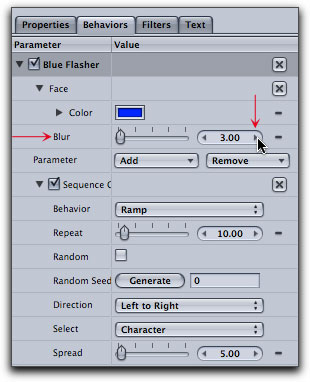
I want to blur the face of the text so in the Behaviors tab I am going to modify a Parameter of the Blue Flasher, because I want the blur to flash on and off too. Click on the Parameter 'Add' menu, select Face and then Blur, (below left). The Blur parameter has been added to the Behaviors tab. Give it a value of 3. In the Blur amount box are right and left facing arrows, clicking on one of these arrows will change the amount in exact increments, (below right).
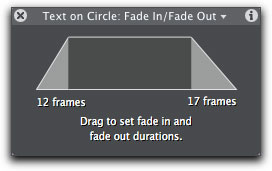
Fade In - Fade Out Behavior.
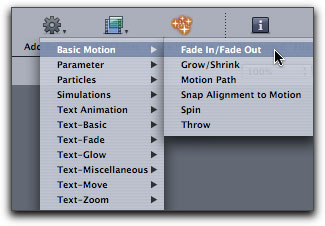
Almost done. The last thing I want to do is fade the text in and out. With the text selected, Add Behavior button > Basic Motion > Fade In/Fade Out. In the Dashboard set the fade in to 12 frames and the fade out to 17 frames.
Now we're done. You can now play the completed project. If your Mac or Monitor card does not have the stuff to run full speed, Command R from the keyboard will perform a very fast ram preview which will enable you to play back at the full frame rate. Oh yes, those annoying overlays that we need to work with in the Canvas. You can toggle them on and off using Command /. That's better. Now if you use the F8 hotkey you will see your project playing solo on the screen. Of course, the screen shot below looks a whole lot better when in 'Motion'. (g)

Enjoy,
--ken
copyright © www.kenstone.net 2004
All screen captures, images, and textual references are the property and trademark of their creators/owners/publishers.