

March 12, 2012
Noise Industries' Nattress Curves Plugins for Final Cut Pro 7 & X

www.noiseindustries.com - $49.00
Review by Steve Douglas
Noise Industry's Fx Factory plugin engine has graced Final Cut Pro users for quite awhile now. Consistently providing new, and often unique plugins from many 3rd software companies such as Luca Visual Fx, PHYX, DV Shade, NVeil, Boinx and yanobox, all running under the Fx Factory umbrella engine, the editor has been able to continually update their Fx Factory software. Products start in Trial mode with a watermark, and remain watermarked indefinitely until they are purchased and registered.
New on the market but certainly not new to the Final Cut Pro world is Graeme Nattress' set of 4 Curves Plugins. What we have here is the latest in curve based color correction tools which function in both Final Cut 7 and X as well as Adobe After Effects.
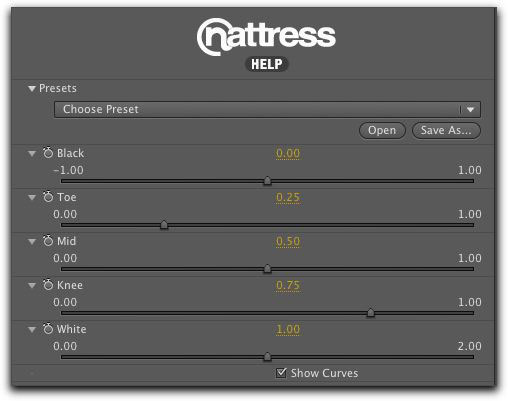
In Photoshop and other 'curves' based plugins, you actually utilize the selecting of various points of the curve and drag up or down to affect the sweetening of the image's appearance; a little push up here on the curve, and a drag down there as final tweaks to your image. The Nattress Curves plugins do not quite work that way, but they can still be very useful to the editor working on their final color grading. The Nattress Curves set consists of four plugins, 'Curves', 'Curves Luma', 'Curves RGB' and 'Levels'.
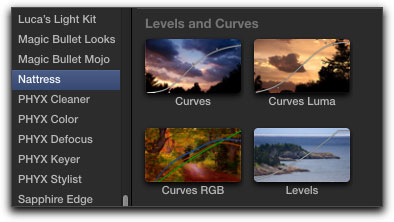
Found under 'Nattress' in the Final Cut Pro X Effects browser.
Especially so when filming with a DSLR, it is often best to shoot with the lower contrast settings to avoid loss of picture information and then to add back both contrast and color saturation when in post production.
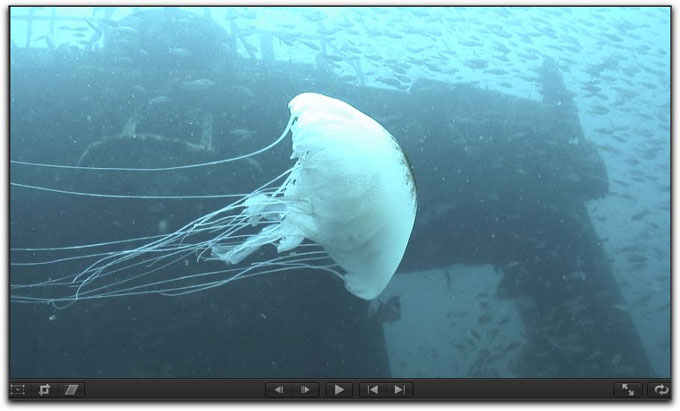
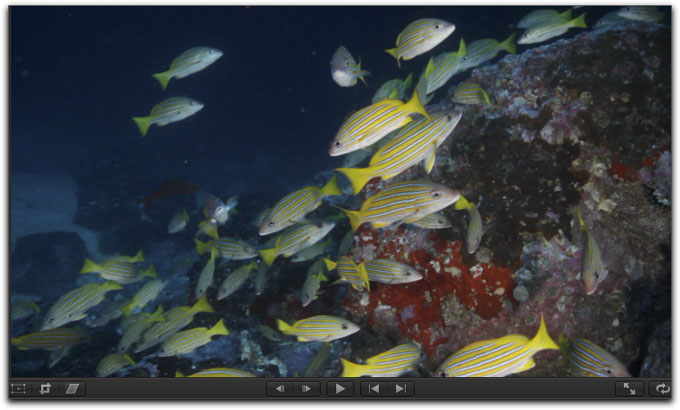
Original Frame
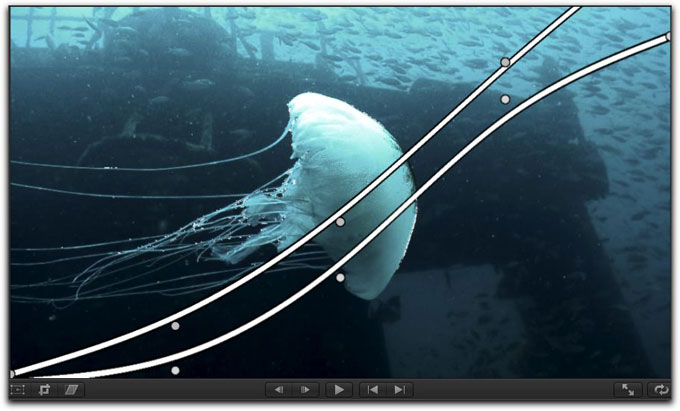
This is where the first of the set, 'Curves' can be especially useful. By either dragging 'Curves' over to your timeline clip, or by simply selecting the clip and then double clicking on the plugin, the Curves plugin is then applied. The first thing you will notice in your Viewer is the diagonal white bar across your clip in the viewer. This white bar represents the curves parameters adjustments found in Final Cut Pro X's Inspector window. When adjusting any of the sliders, the bar, representing these adjustments, provides a visual cue to how you are affecting your image. Of course, I would always recommend that you use your video-scopes along side any color adjustments you are making.
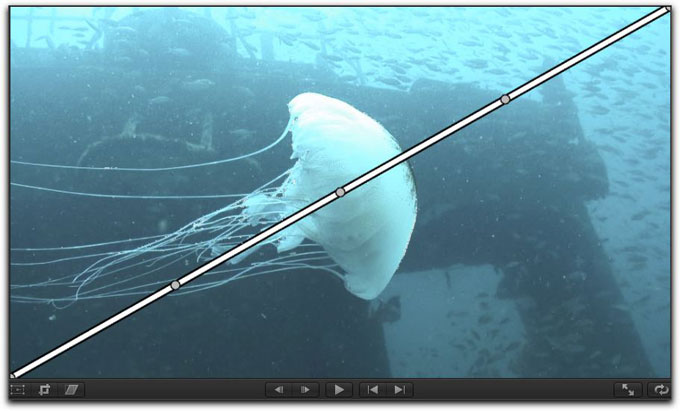
The curves bar shown with parameter settings untouched. As you can see, there is no change to the image as yet.
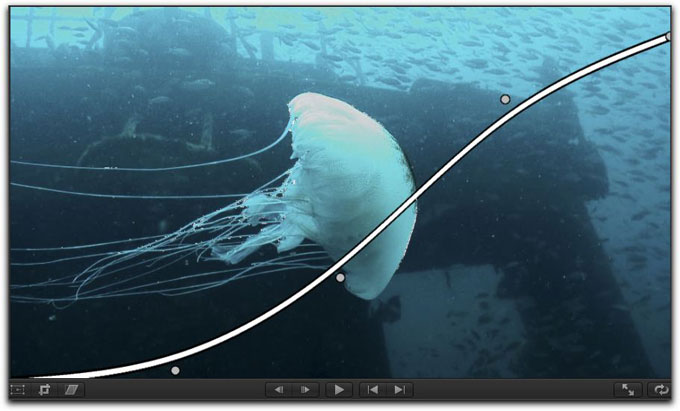
With the Curves plugin's parameters now adjusted by using black, toe and knee sliders, I am able to bring up the contrast a bit while using the white slider to prevent blowing out the image. By bringing the toe slider down a touch, I can bring my blacks and mids down to get closer to black. I always like to crush my blacks a bit but am careful not to crush them too much and create an unnatural appearance. Nudging the knee slider brings some 'pop' to the white of the jellyfish.
My work isn't done yet. The Nattress Curves Luma plugin is the next to be applied. With the first Curves plugin's 'show curves' unchecked, I apply the Luma plugin which places an identical diagonal bar across the image. This plugin affects only the luma information in the image and does not affect any of the color itself.
Shown below is the same image with both the Nattress Curves and Nattress Luma plugins applied. I left the 'show curves' box checked on both for your own visual viewing.
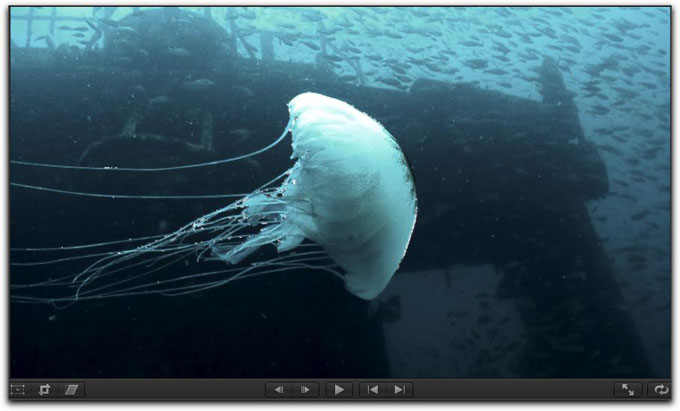
The finished image using only the Nattress Curves and Luma plugins and with the 'show curves' unchecked.
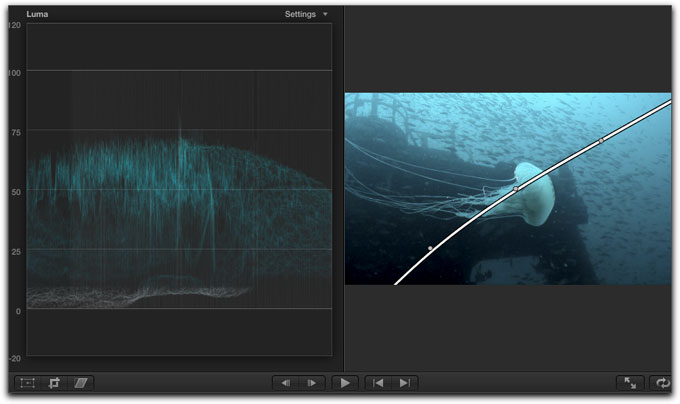
Using the waveform monitor along with both the Nattress Curves and Curves Luma added,
I have to be careful that whites do not blow out the shot from the upper left to right of a different portion of the clip.
Whether working in Final Cut Pro 7 or X, or Adobe After Effects, the parameter settings, as shown below, all appear to be the same so there is no re-learning of how to use the Nattress plugins in one application as opposed to another.

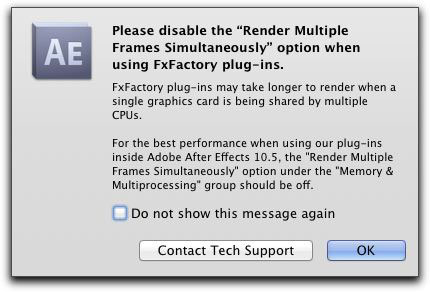
However, when using the Fx Factory plugins in Adobe After Effects, you do get this warning message. I don't care to have to switch preferences in any application on a regular basis but, for After Effects, it is what it is.
The Nattress Curves RGB plugin can really help out when attempting to balance out the colors in your image. Using the Parade scope along side of your clip will further help
you see just which colors need to be boosted or trimmed down.
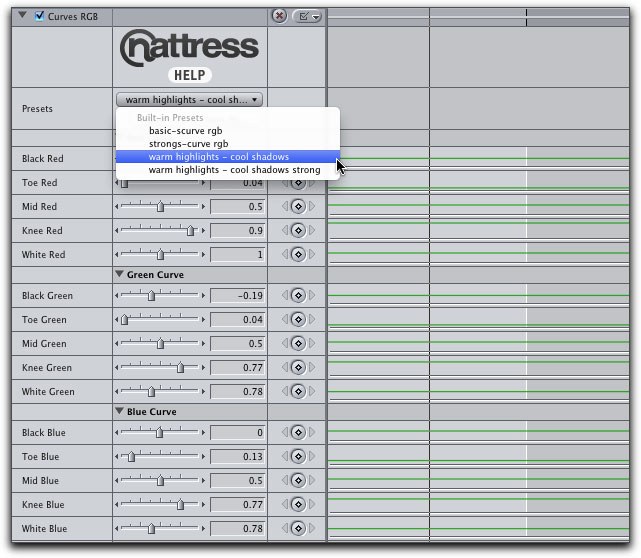
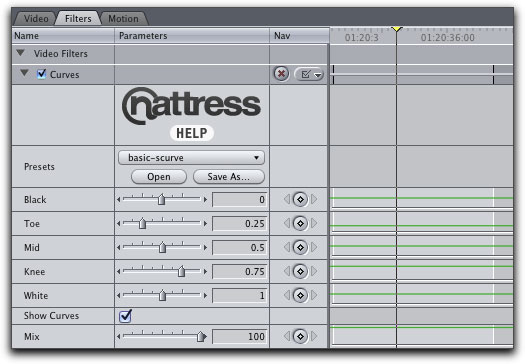
As displayed in Final Cut Pro 7, the Nattress Curves RGB plugin provides similar Black, White, Toe, Mid and Knee parameters
to help you set your color saturations as well as to define the warmth or coolness of the shot.
Remember that the diagonal representing the Nattress Curves serves only as a visual representation of what you are tweaking; you do not click and move the illustrated curve itself in the viewer.
In the original frame shown below, the colors appear both to be dark and muted, there's no pizzazz to the image.
In this case I applied the Curves, Curves Luma and Curves RGB and used both the Parade in RGB Overlay and Waveform scopes to help out.
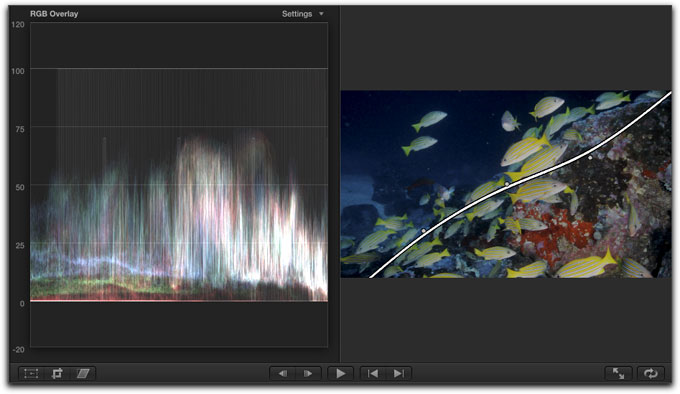
After some quick tweaking I was able to improve the image a great deal.

I left one of the 'show curves' on the image. You can see the colors to be considerably more alive in the final image.
Yes, there are several far more expensive, advanced and complicated plugins that one can purchase that are also capable of doing a great job with color correction. However, 'complication' can also be synonymous with 'I screwed up and have to start over again'. This is especially so with editors who have not mastered their color correction skills. Noise Industries' Fx Factory offers these stable and accurate color correction tools at a ridiculously low price. The Nattress Curves Plugins can do the job and keep it simple at the same time.
Addendum: Levels and Curves 2.0 which allows you to manipulate the curves via the on screen controls was just released and is a free upgrade for all existing users.
Steve Douglas is a certified Apple Pro for Final Cut Pro 7 and underwater videographer. A winner of the 1999 Pacific Coast Underwater Film Competition, 2003 IVIE competition, 2004 Los Angeles Underwater Photographic competition, and the prestigious 2005 International Beneath the Sea Film Competition, where he also won the Stan Waterman Award for Excellence in Underwater Videography and 'Diver of the Year', Steve was a safety diver on the feature film "The Deep Blue Sea", contributed footage to the Seaworld Park's Atlantis production, and productions for National Geographic and the History channels. Steve was a feature writer for Asian Diver Magazine and is one of the founding organizers of the San Diego UnderSea Film Exhibition. He is available for both private and group seminars for Final Cut Pro and leads underwater filming expeditions and African safaris with upcoming excursions to Bali, Raja Ampat, Indonesia, and the Maldives Islands. Feel free to contact him if you are interested in joining Steve on any of these exciting trips. www.worldfilmsandtravel.com
[Top]
copyright © Steve Douglas 2012
© 2000 -2012 Ken Stone. All rights reserved. Apple, the Apple logo, Final
Cut Pro, Macintosh and Power Mac
are either registered trademarks or trademarks of Apple. Other
company and product names may be trademarks of their respective
owners.
All screen captures, images, and textual references are the property and trademark of their creators/owners/publishers.


