
June 23, 2008
O-Ring Care for the Underwater Shooter
By Steve Douglas
I have received a great many emails asking just how O-rings are best handled. Both underwater videographers and photographers store their cams and cameras in housings that are waterproof for generally a depth of 30-100 meters. As you can imagine, the water pressure can be quite great at such depths whether the housing is made from acrylic or aluminum. In fact, for every 33 feet, the pressure increases by one atmosphere. Thus, at a depth of 100 feet, you and your housing are withstanding 4 atmospheres of pressure. The only thing that truly prevents your camcorder/camera from becoming a very expensive doorstop is an inexpensive piece of rubber called an O-Ring. This o-ring creates the seal between the front and back plates of the housing. A failure of the o-ring will result in a flooded housing, a destroyed camcorder and a completely ruined shoot. A basic and simple maintenance of these o-rings is vitally important.
I think that this is one of those things that many simply assume that everyone knows. We can recognize the fallacy in that. After all, at one time, I needed to be shown as well as probably every videographer and photographer out there. We all had to learn these skills that we often take for granted. With that in mind, let us go through the process one step at a time. Keep in mind that there is no one way to do anything and that there are probably several techniques, all successful, that can accomplish the same thing. This is my method taught to me many years ago by noted videographer, Bruce Robison.
As a reminder, I grease my o-rings only before I leave on a trip and once I arrive safely back home. Certainly, if you were doing a lot of diving and filming near your home site, additional cleaning and greasing would be called for.
As a videographer I first note where the o-rings are on my housing, my video ports and my battery pods. It would be a shame to skip one and have that one be the one to fail on you. On my Light & Motion housing I have one o-ring on each of my battery pods, two on the back plate and two on each of my three ports. That is a total of 10 o-rings I will need to remove, clean, grease and replace.
I would strongly suggest that you do not remove all the o-rings at once, as some of them are very close in size and you would not want to put the wrong o-ring in the wrong place. Instead, and to keep myself organized, I remove one o-ring at a time, clean and grease it, place it back where it belongs, and then move on to the next one.
To start with, I make sure I have all the tools I need to do start this job. Have your housing, ports and battery pods with you, your supply of L&M O-ring grease, a cloth diaper or 'blood' cloth and half an old credit card. Cloth diapers or hospital type blood cloths are lint free so you will not risk getting lint or hair transferred from the cloth to your o-rings.
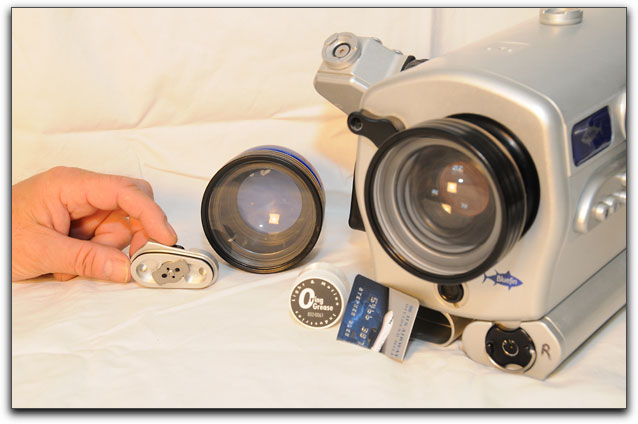
All materials should be ready before you begin the process of cleaning and greasing your o-rings.
First we must remove the o-ring already in place. We can start with the one in the battery pod. Notice that I use an old credit card to slide in between the grove of the pod cover and the o-ring itself. It is imperative that you do this carefully so as not to slice the o-ring itself. Notice that I am using the corner of the credit card that has not been cut by the scissors. It is more rounded and the cut edge can be too sharp. NEVER use a dental pic; it is very sharp and can cause damage to the o-ring very easily. Now very thoroughly inspect each o-ring once it is removed from its groove for any cuts, slices or anything that might require a complete replacement of the old one for a new one. If they look okay then you can continue to clean and grease them for future use.
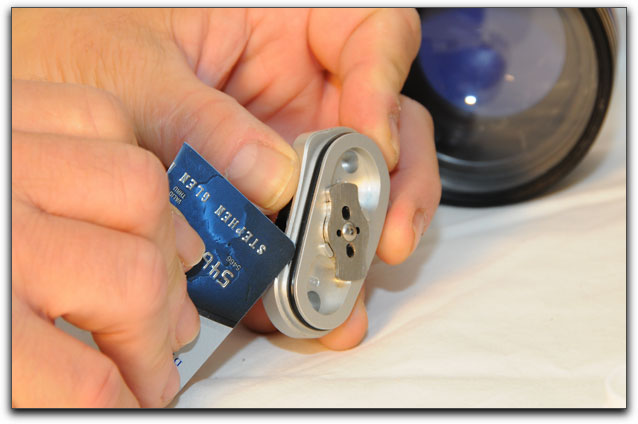
Caution should always be used when removing o-rings. The credit card helps me remove them safely.
With either a blood cloth, as shown below, or a cloth diaper, I run the cloth through the o-ring groove to remove any dust or particulate that may damage the o-ring causing a possible flood.
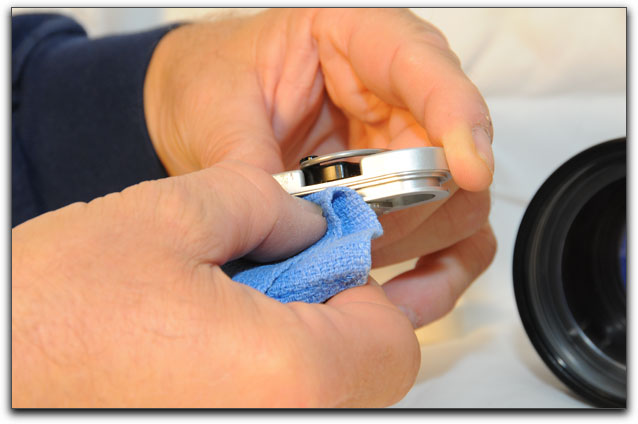
Using the right cloth will prevent lint and hair from getting in where it doesn't belong.
You do not need to use very much o-ring grease. The first picture below shows a huge glob of it on my finger. I have scooped up far too much and using too much grease can cause possibly more problems than not using enough. Too much grease will attract, and cause to stick, any dust particulate or hair to the o-ring. All it takes is a very small amount of this lint to cause an 0-ring failure.
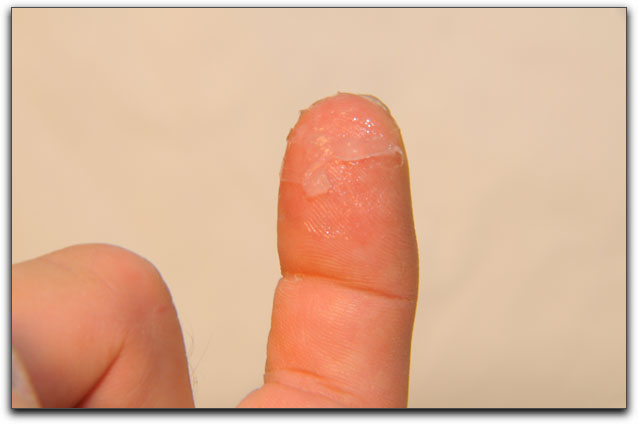
Far too much grease. You just need to use a little bit for each o-ring.
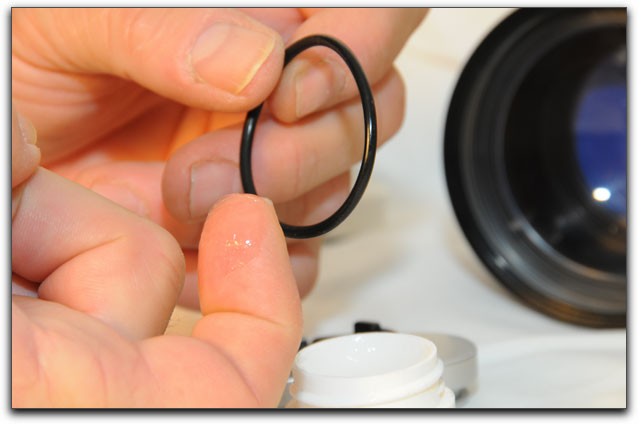
Considerably less grease on my finger now, and even most of that will be wiped off.
Next, we hold the o-ring between our thumb and forefinger and gently grease it, sliding it between our fingers. Do not pull or stretch the o-ring as this can cause permanent damage necessitating an o-ring replacement.
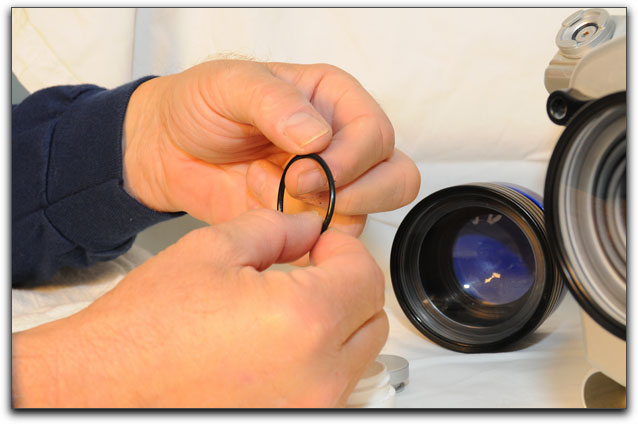
Make sure to grease the whole o-ring inside and out using just a small amount of grease.
Our next step is to use your cloth to wipe away any and all excess grease. Your o-ring should look fresh and shiny, but you should not see any grease residue on it. If you do, you have used too much. The cloth will remove it safely without leaving behind lint or extraneous hair.
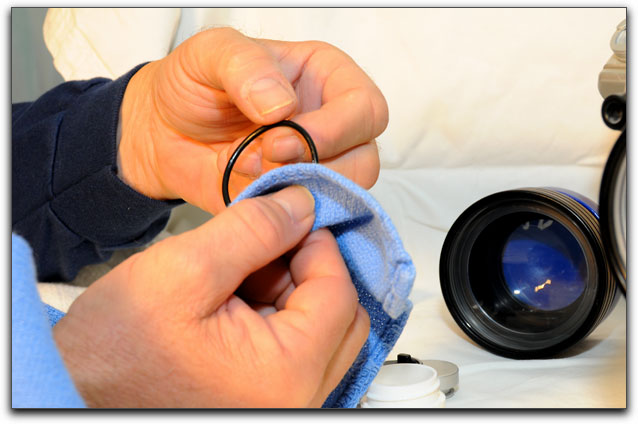
I use either a blood cloth or soft diaper as neither will leave behind lint.
Of course, I keep these cloths clean and always pack extras for myself and any buddies who may have forgotten to bring theirs.
The O-ring is now ready to be placed back in the groove. I generally start at one side of the groove and slowly use my finger and/or card to tamp it carefully in place. Once again, be careful not to stretch it out like you might do with a rubber band. O-rings do not like being stretched. Double check that the o-ring is properly seated in its groove and that one end is not lifted up. Tamp it down gently around the entire circumference.
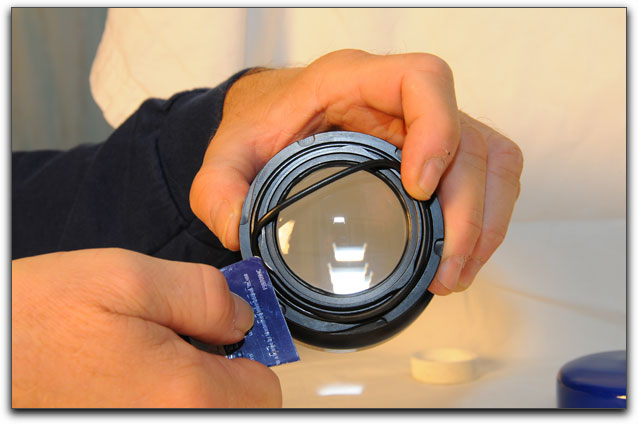
It really is not necessary to use both a card and finger.
The photo shows you how the card is keeping the o-ring in place while the finger glides it back into the groove.
Inspect your work. Look for any hairs or lint that may have been left behind. The picture below demonstrates a piece of lint stuck to the o-ring. Left there, this could cause an improper seating of the o-ring and thus a leak.

It doesn't take much to cause a problem so inspect carefully your o-rings after you have placed them back.
Once you have put the o-ring back in its place you can start the whole procedure over with the next o-ring. My advice is to do one at a time. This assures you that each o-ring is placed back into its proper groove.
Obviously, to complete the proper care of your o-rings will take some time, so set aside that time when you know you will be free of distractions and interruptions.
I do hope that you have found this maintenance tutorial helpful.
Photos by Randy Siegel
Steve Douglas
 Steve Douglas is a certified Apple Pro for Final Cut Pro 6 and underwater videographer. A winner of the 1999 Pacific Coast Underwater Film Competition, 2003 IVIE competition, 2004 Los Angeles Underwater Photographic competition, and the prestigious 2005 International Beneath the Sea Film Competition, where he also won the Stan Waterman Award for Excellence in Underwater Videography and 'Diver of the Year', Steve was a safety diver on the feature film "The Deep Blue Sea", contributed footage to the Seaworld Park's Atlantis production, the History channel's MegaDisaster show and other networks. Steve is one of the founding organizers of the San Diego UnderSea Film Exhibition and leads both underwater filming expeditions and African safaris with upcoming excursions to Indonesia and the Coco Islands, Costa Rica in 2008, Kenyan safari in Africa and the Red Sea for 2009, and Truk Lagoon in Micronesia for 2010. Feel free to contact him if you are interested in joining Steve on any of these exciting trips. www.worldfilmsandtravel.com
[Top]
copyright © Steve Douglas 2008
© 2000 -2008 Ken Stone. All rights reserved. Apple, the Apple logo, Final
Cut Pro, Macintosh and Power Mac
are either registered trademarks or trademarks of Apple. Other
company and product names may be trademarks of their respective
owners.
All screen captures, images, and textual references are the property and trademark of their creators/owners/publishers.


