
FCP 4 - Ultimate Shortcuts March 1, 2004
Using The Option Key In FCP 4
Ultimate Shortcuts
FCP 4 - Ultimate Shortcuts March 1, 2004
Using The Option Key In FCP 4
Ultimate Shortcuts
By Andrew Balis
I can't remember who I heard this from first, but one way to get an overall idea about the vast capabilities of the Option key is to think of the Option key as your "opposite" key. An action without the Option key will perform one way, and the same action using the Option key may produce an opposite or reversed action. That will come into play in a lot of the shortcuts in this article.
The next simple key commands are a good basic example of this premise:
Linked Selection
Next we'll explore what is probably the broadest of all functions that's made quicker and easier using the Option key: trimming linked video/audio clips.
While cutting, you may often switch back and forth between wanting to trim both video and audio together, and other times trimming just video or just audio. To switch back and forth, you would normally toggle the Linked Selection button in the Timeline before making an edit.
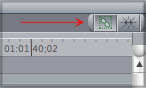
Linked Selection on |
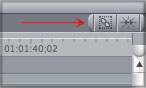
Linked Selection off |
When Linked Selection is on, video and audio are treated as one item.
When off, then the video and audio portions of the clip can be edited independently of one another.
But we can simplify the process of switching between the two. Instead of constantly clicking the Linked Selection button, we can use the Option key as a quick override of Linked Selection. You can leave it turned on, and use the Option key to simply temporarily turn it off for the next edit, but after the edit is complete, Linked Selection is left on. Next are several examples of how to use this, and they all assume that you start with Linked Selection turned on.
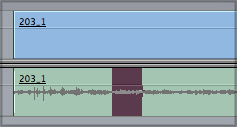
Split Edit
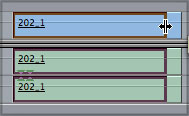
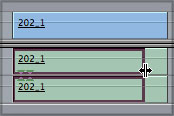
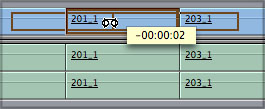
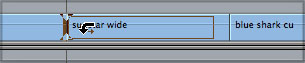
When you want to roll the video or audio edit point, do the following:

In the above example, a split edit is achieved as only the video is rolled. This same technique can be used in conjunction with any of the trimming tools, including the slip or slide tools.
Slip Edit
Here's the scenario- a clip in the Timeline seems out of sync, although there is no indicator from FCP. It simply doesn't look right. Or you simply want to modify the existing sync for effect.
More With Option and Selection
Here's a few more. Anytime you need to select one or more things, the Option key can override Linked Selection for you.
Option/track selection tool(in this case, the audio is mono)
Option/range selection tool: hold down Option with the Range Selection tool to select only audio.
Range Selection tool |
|
Reversing Linked Selection
In the above scenarios, we left Linked Selection on and used the Option key to temporarily turn it off. But the Option key doesn't really turn off Linked Selection, it actually reverses whatever is the current state of Linked Selection. Therefore, if Linked Selection is off, and you press the Option key, and click on the audio or video of a clip, then you would select both.
The Timeline Panel
The Option key comes into play with almost all of the Timelines controls, including Locking, Auto Select and Visibility. These commands apply to audio and video controls separately.
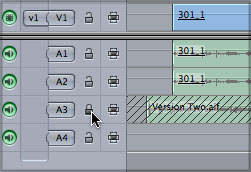
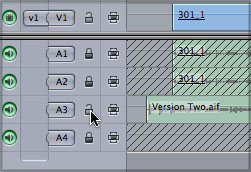
Lock All But One Track
Hold down the Option key while you click on a lock button, and all other tracks are locked, but the current track remains unlocked.
If you Option/clicked on an audio track, then all other audio tracks are locked, and if you Option/clicked on a video track, then only the other video tracks are affected.
To unlock all tracks again, then Option/click on the one unlocked track.
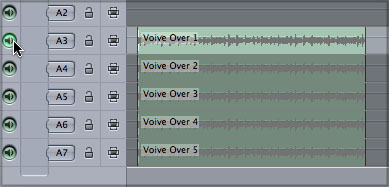
Monitoring And Soloing Tracks
The same Option/click behavior is found with the Visible/Audible buttons (the green buttons) to the left of the Timeline panel. For video, when the button is green, that track is Visible (seen). For audio, when the button is green, then that track's audio is Audible (heard). When a button is off, the track is grayed out and the track can't be seen or heard.
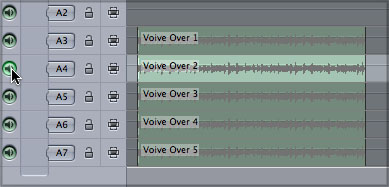
Hold down the Option key and mouse click on a Visible or Audible green button and it turns off all other tracks(audio or video, not both). One great use of this is when auditioning different takes of audio recorded with FCP's Voice Over tool. Multiple takes would be added to lower tracks automatically unless you choose otherwise. If you Option/click on one Audible button, you can solo and only just listen to the one track.
Then Option/click on the next track down to audition just that track.
When done, and you want everything back on, then Option/click on the tracks that's on.
Note: You may like using the new Solo/Mute buttons instead of the green Audible buttons, but I still find this Option/click approach faster. The only downside is that turning off any tracks previously rendered as a "mixdown" will lose render files using the above method. But if you render audio as "item level" or "for playback" then Option/clicking on Audible buttons won't result in a loss of renders.
Auto Select Controls
The same is true with Auto Select buttons. To turn off several tracks' Auto Select, and leave one on, then Option/click on that track's Auto Select button.
Moving Between Tracks
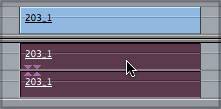
To move a clip or group of clips up or down:
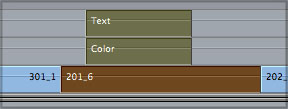
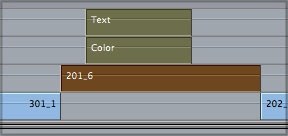
One helpful scenario for this is when you want to "checkerboard the audio", in other words stack the audio clips on different tracks so they could overlap one another if needed. This time though, we'll add the Command key to help us select the multiple clips together.
Release the key combo once the clips are selected.
Press and hold the Option key again and press the down arrow key as many times as needed. In the following case, the clips are brought down two tracks.
Swap Edit
This action removes a clip from one location and inserts it at another spot in the Timeline.
Let go of mouse, then Option.
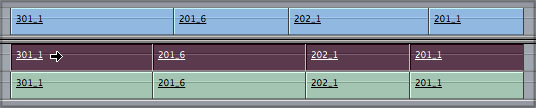
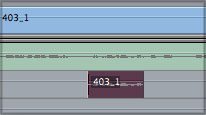
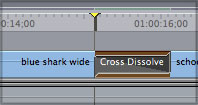
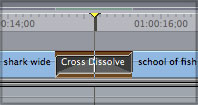
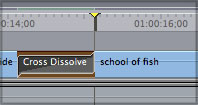
Copying clips (left or right of original)
Select a clip in the Timeline, hold down the Option key, and drag left or right.
The new copy appears wherever you let go of the mouse. Be careful of this feature, though. When you Option/drag a clip it also performs as an insert edit wherever its dropped.
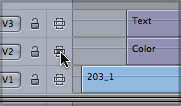
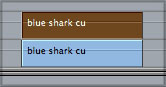
Copy Above or Below
Forget copy and paste. This is quicker. This will duplicate the clip directly above or below the original clip. The benefit over the previous method for copying: this one doesn't do an insert once its copied, so the rest of the Timeline is left intact.
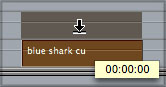
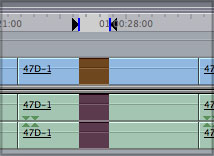
Next the video clip is copied as its dragged upward one track.
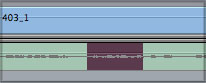
Next, a portion of an audio clip is selected and copied. Start by using Option and the Range Selection tool to select the audio. In this case, the portion is then copied down one track.
Opening Bins As Tabs In the Browser
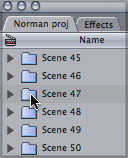
This one is cool. Normally, double-clicking on a bin in the Browser results in a new window opening. But your screen can get cluttered this way and you'll find yourself constantly moving around windows.
Instead, hold down the Option key, and double click on the icon for a bin in the Browser.
A new tab appears in the Browser. This is the opened bin. To choose to view the rest of the project's elements, click on the project tab.
Tip: Turning a bin into a tab can also be done by selecting the bin, then pressing Option/Enter (this does not work by pressing Option/Return, only Option/Enter).
Keyframing
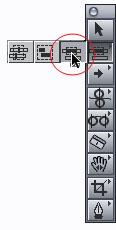
This one definitely can save a little time. I'll give an example next for audio keyframing in the Timeline, but this technique applies to most keyframing in FCP. To add keyframes in the Timeline, you would normally choose the Pen tool from the Tool palette. But we don't even need to switch to the Pen tool to still use its functionality.
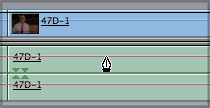
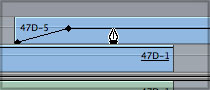
Using the standard Selection tool (Arrow tool), move cursor directly over a pink audio level overlay line in the Timeline.
Press the Option key and the cursor turns to a Pen icon.
While the Option key is still pressed, click on the overlay line to set a keyframe at that point.
To remove a keyframe you use the Option key the same way.
Normally, using the mouse to click on a track's lock button will lock that one track.
Select the clip or clips.
Press and hold the Option key.
Press up or down arrow keys for as many tracks as you wish the clips to move (depending on whether you want to move up or down).
With Linked Selection on, press and hold Option and Command and then click on every clip to be moved to a new track. This action selects just the audio of the clips.


Turn Snapping on (N).
Click and drag the clip left or right until the left edge of the clip snaps to the new edit point, but don't let go yet.
Press the Option key and the cursor should change to a little hook.


Select a clip, a portion of a clip, or multiple clips.
Press and hold Shift/Option and drag to another track (straight up or down).

Turn on Clip Overlays in the Timeline.
![]()
With the Option key pressed, move the cursor over an existing keyframe. The icon becomes the Pen Delete tool.
This audio example is just one way to keyframe with the Option key, but many filters and motion effects can be keyframed the same way. Below are a couple other examples for using this Option/click method.
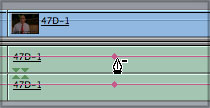
Click to remove keyframe.
Keyframing opacity in Timeline |
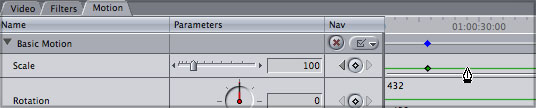
Keyframing scale in Viewer |
Split Marks
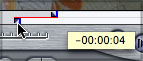
There are two ways to use the Option key to create split marks (for either an in or out point) before editing a clip into a sequence. In this case, we'll split the audio in point.
In the Viewer:
![]()
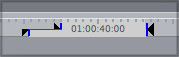
In The Timeline:
This same technique is available in the Timeline for setting or modifying in and out points. Simply hold down the Option key as you drag the top or bottom of a set mark.
Nudging
This one is super important as it allows you to fine-tune the positioning of graphics or titles in the video frame. When dealing with any thin horizontal lines (most often with titles), you may end up with interlace artifacts. These thin lines can appear to vibrate or flicker on television.
To compensate, you need to fine-tune the title's vertical positioning at the pixel level (or even beyond). View all results on your external NTSC monitor (or TV).
Keyboard Combinations With The Option key
A few notable key combination shortcuts:
| Option/D | duplicate selected item (in Browser only) |
| Option/+ or - | The best way to zoom in or out in the Timeline (works whether or not the Viewer, Canvas or Timeline is active) |
| Option/V | Paste attributes. If you copy a clip, you can then paste any or all attributes to another clip like video filters or motion effects |
| Option/P | Press Option/P while playhead is parked before a clip that requires rendering. FCP will play a RAM preview of the effect. |
| Option/R | Render All. Need I say more? |
| Option/A | Select In to Out. This selects those segments of clips between any set in and out point in the Timeline. |
| Option/1, 2 or 3 | Transition alignment. Changes whether a selected transition in The Timeline is set to Start, Center or End on edit. |
Written by Andrew Balis
copyright © www.kenstone.net 2004
All screen captures, images, and textual references are the property and trademark of their creators/owners/publishers.