
'How To' Motion October 18, 2004
Particles in Motion
'How To' Motion October 18, 2004
Particles in Motion
If you think about it, the world we live in is comprised of tiny "particles" called atoms. The chair you are sitting on for example, is really just an aggregation of atoms held together by a unseen forces giving the chair volume, weight and mass. In the world of Motion, you have been given control of the molecular universe. You can turn any object into a particle, controlling it's birth rate, death rate, lifespan and even whether the particle goes to college (well not quite). In short, you get to play god with your visual content.
In this article, we're going to explore the basics of the particle generator. And while deceptively simple on the surface, there are some amazing things you can do with it. And the best part is, it's all in real time.
So let's get started. Since Motion is RAM dependant, I recommend closing all open Motion projects. A fast way to do this is by pressing the keyboard combination - Command-Option-W. Save your work if you need to. (Actually, if you get right down to it, it's not a bad idea to close all open applications to maximize RAM allocation to Motion).
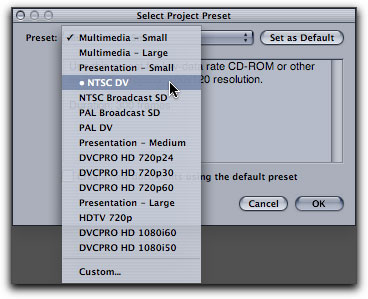
To create a new project press Command-N. A project Preset window will pop up. Choose "NTSC DV" from the preset pop-up. We'll leave the play range set for 300 frames (10 seconds). Click ok.
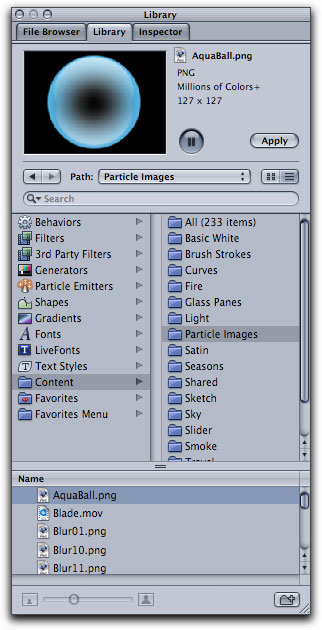
Although you will probably use your own image or video content to generate particles from, Motion ships with a Library of visual content you can use for practice or even for integration into your own projects. To quickly access the Library in the utility window, press Command-2.
In the left column locate the Content folder then click on it. This will display a list of related categories (or folders) in the right column. Locate the Particle Images folder then click on it. In the window below you will see a list of still and/or motion objects that belong to this category. In this exercise we're going to use the "AquaBall.png"
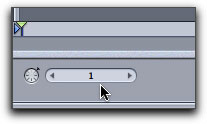
Before we add the image to the canvas, we need to tell Motion where we would like the object placed in time. By default, object placement in the timeline is governed by the current playhead location. You can change this default in the Motion Preferences > Project tab 'Create Objects At' by selecting 'Start of Project'. So if we wanted our object to start at the beginning of the timeline, we would want to make sure our playhead is parked at frame 1. The quickest way to do this is by pressing the Home key. Additionally, you can enter a frame number in the current frame field then hit return.
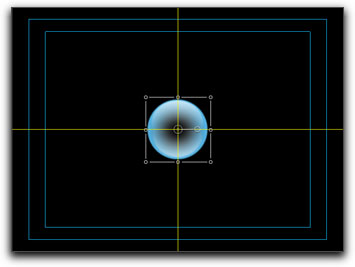
Now let's add the image. Hold down your mouse and drag the Aqua Ball into the center of the Canvas. You will know when you've hit dead center when you see both vertical and horizontal dynamic guides on the screen at the same time. Now release your mouse. If you click on the 'Apply' button near the top of the Inspector window, the object will be added and centered automatically.
If you press your space bar or click the play button you will see the playhead move over the entire 300 frame play range but nothing happens on screen. That is, until we turn this image into a particle. Click the "Make Particles" icon in the tool bar.
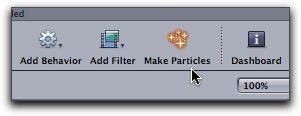
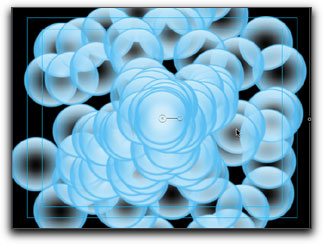
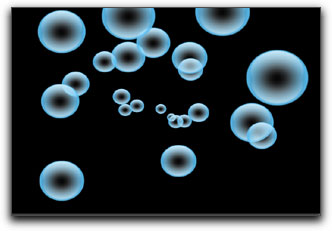
With one simple click Motion is now generating hundreds of AquaBall "instances" and spitting them out in all directions.
Although we're generating particles out of a small still image, you could just as easily generate particles out of video or other frame based content. Said another way, there is nothing in the Motion universe that cannot be turned into a particle. Just keep in mind, that if you plan on "particlizing" content with a high frame rate or frame count, you will be increasing your RAM overhead, potentially reducing Motion's ability to play back at full frame rates.
Before we go any further, it would be helpful to discuss the mechanics of the particle generator. There are actually two components to particle effects; the emitter and the cell. Like the name implies, the emitter is the part that "emits" the objects. The cell is what is being emitted - in this case, the aqua ball. Using a real-world metaphor, a garden hose could be considered an emitter and the water itself, the cell. The cool thing is, you have access to both the emitter and the cell in terms of manipulating the effect. If you press F5 on your keyboard you will reveal a hidden window called the Project Pane.
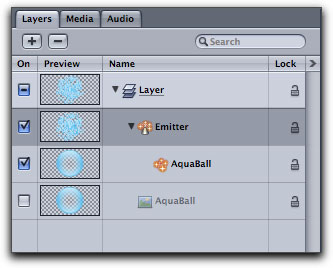
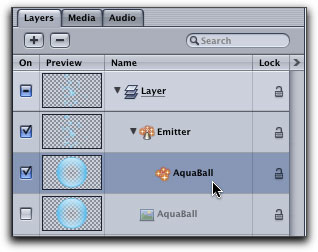
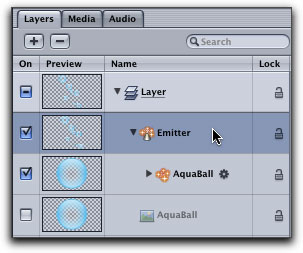
The project pane displays a list of media and objects currently used in your project. All motion projects begin with one layer. When we added the Aqua Ball to the Canvas, Motion placed the object into a layer. The layer functions as a "parent" for all the "child" objects inside it. The "children" in this case are the Emitter and the AquaBall (the cell). You should also notice the original image at the bottom of the stack has been turned off. This is because the Motion is no longer using it in the image. It is only being used as a reference by the particle generator.
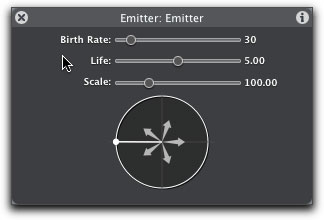
By default, hundreds of aqua balls are being "birthed" every second. To control the birth rate make sure the Emitter object is selected in the project pane then hit "D" on your keyboard to call up the dashboard.
As you can see from this screen shot, 30 balls are being birthed every second. Dragging the 'Birth Rate' slider to the right increases the number of balls being birthed while dragging the slider to the left decreases the number. Drag the slider to 8.
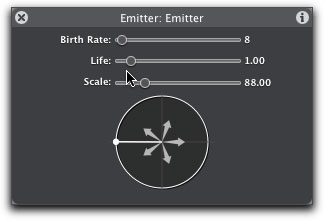
Now the balls are no longer propagating like jack rabbits. You can control how long they "live" by dragging the Life slider. By default, these balls have a pre-determined life span of 5 seconds. To decrease their life span, drag the slider to the left until the value reads 1.
Now you see the balls sputter out of existence every second, just like the life span of many Hollywood stars.
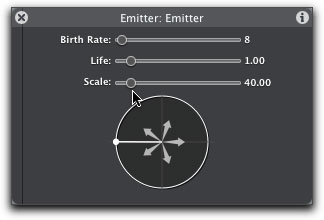
The scale slider does exactly what you think it does. It makes the balls humongous or miniscule.
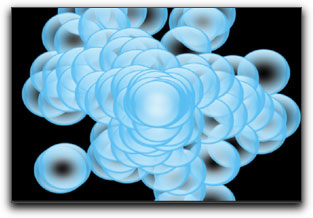
Drag the scale slider to around 40.
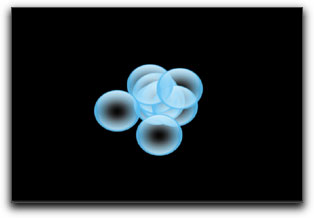
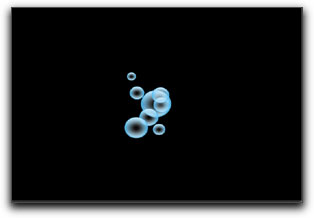
The image in your canvas should now look something like this.

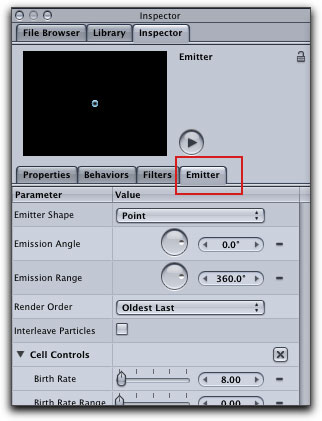
The dashboard is a great tool for quickly adjusting parameters for the effect but you are not seeing the whole picture. The parameters listed in the dashboard are only subset of a much larger set of parameters available to you. Press F4 on your keyboard to bring the Emitter tab forward in the Inspector. The objects outlined in red are the parameters that the Dashboard shows you; everything else is where the real magic happens.
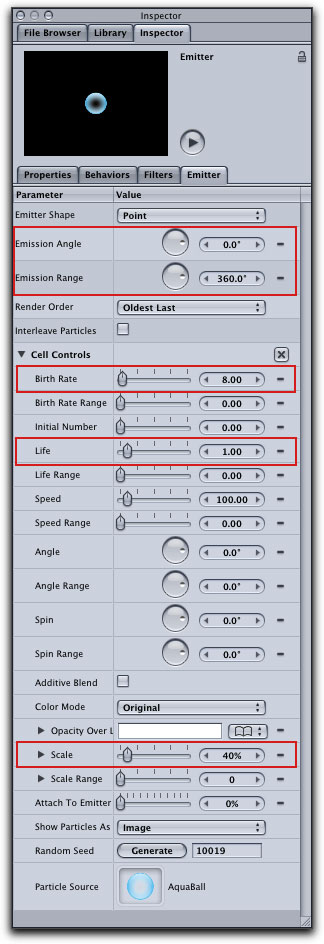
Locate the Scale Range slider in the inspector and drag the slider to the right unto the value reads 50. If you are having trouble being precise with the slider you can always click in the field and enter the value from your keyboard. You can also change this setting one unit at a time by clicking on the right or left facing triangles.

The Scale Range slider randomly generates a scale value between 1 and 50 percent for every ball that is birthed so just like in Whoville, you will get the "tall and the small" or I should say, the big and the small, but that doesn't rhyme.
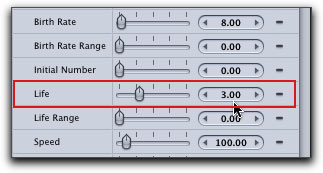
Drag the Life slider to 3 to keep the balls on the screen a bit longer.
This is more interesting, but each ball being born maintains the same scale it was born with over its entire life - not much growth potential. We want to give each ball the capacity to govern it's own growth by applying a behavior called "Scale Over Life". In the layers tab of the project pane, select the Aqua Ball cell. It is important that the cell is selected and not the emitter.
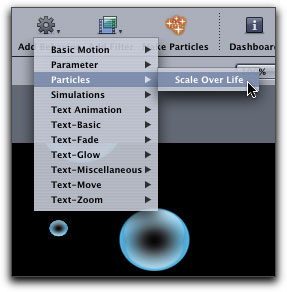
Click the Add Behavior icon in the tool bar and choose Particles>Scale Over Life from the menu
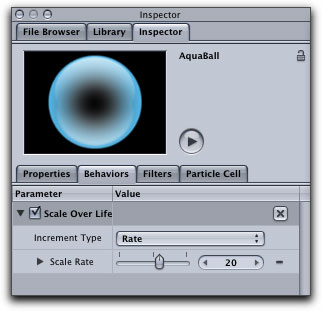
Since we applied a behavior to the cell object (the Aqua Ball) Motion intuitively brings the behavior tab forward in the inspector.
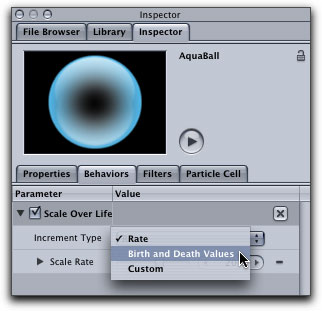
From the Increment Type drop down menu, choose Birth and Death values.
Change the Scale at Birth to 30 percent and change the Scale at Death to 200 percent.
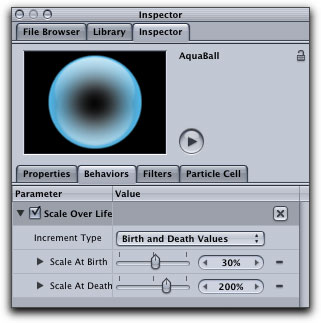
By changing the birth and death values in the Scale Over Life behavior, each ball is now starting its young life at 30 percent scale and ending it's life at 200 percent scale.
We're going to make a few more changes but before we do, I should point something out. With the Aqua Ball selected in the layers tab of the project pane, the forth tab in the inspector says "Particle Cell".

Now click the Emitter object in the layers tab. Notice, the tab now reads "Emitter"
This may seem confusing at first, but it's quite simple really. Remember I said at the beginning of this article that there are two components to particle effects - the emitter and the cell. Using my garden hose metaphor, this means you can control how the water comes out (the emitter) and what the water does when it comes out (the cell). When we applied the Scale Over Life behavior, it was applied to the cell (the ball) and not the emitter because we wanted to effect what the ball did once it was "birthed" by the emitter.
Now we are going to return to working on the emitter. Make sure the emitter is selected in the layers tab. The emitter tab should now be showing in the inspector. If it isn't, just press F4 on your keyboard.

Render order defaults to Oldest First which makes the cells appear as if they are flowing away from you. If you select Oldest Last, the cells appear to flow toward you. This choice will depend on the effect you wanted to achieve.
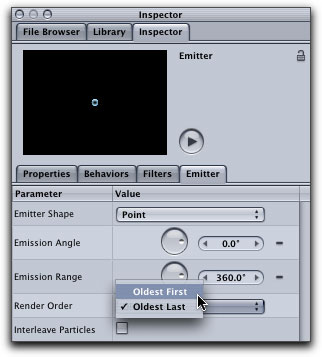
Now it looks like the balls are being shot toward you from some invisible source.
Returning again to my garden hose metaphor, let's imagine you've just returned from the hardware store with a garden hose nozzle for watering your garden. Most nozzles can controll how the water comes out. One setting may blast the water out in a narrow stream (good for washing your car) while another setting may create a wide angle stream more suitable for watering your seedlings.
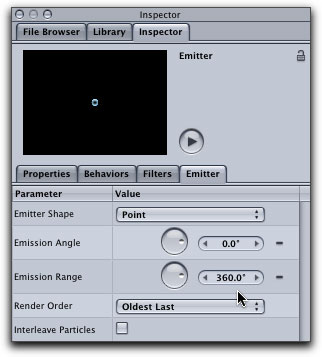
In Motion, the "nozzle" is controlled by the Emission Range parameters. The default setting is 360 degrees which means the nozzle is set more like the sprinklers buried in your lawn emitting water in all directions.
In terms of controlling the particle emission, I prefer using the dashboard because the controls are more intuitive. By clicking and dragging on the white dots representing the emission angle, you can control the angle of the particle cells.

If you click and drag to the right or left in the gray area between the white dots you can control their direction.
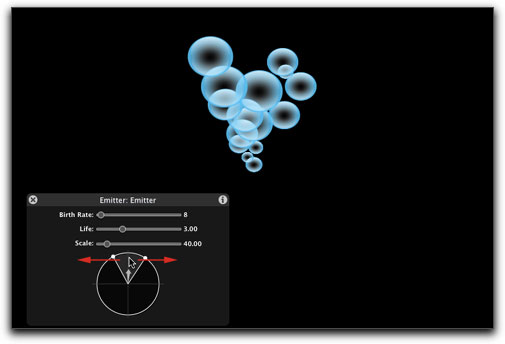
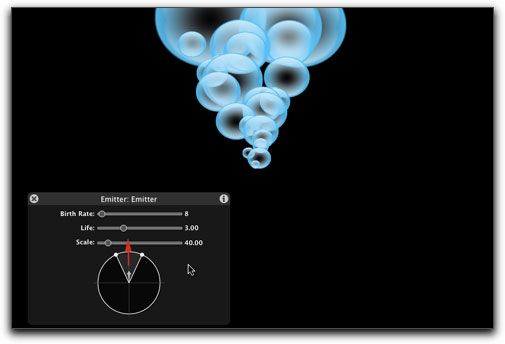
To control the flow of particles, click and drag the small arrow in the between the angle bars. Dragging the arrow inward or outward changes the speed of the flow of particles in the same way your spigot controls the flow of water through your garden hose.
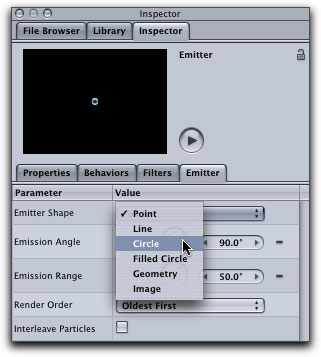
Just for fun experiment with your emitter by applying a different shape. Click on the "Emitter Shape" drop down and choose "Circle".
Now you should see your particles literally going around in circles.
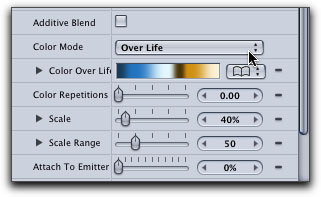
You can also have a boat load of fun playing with the color of the particles. In the Color Mode drop down, choose "Over Life"
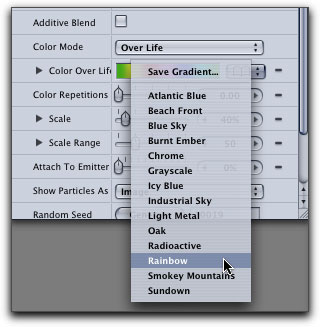
Click on the Book icon for the Color Gradient preset menu, choose "Rainbow".

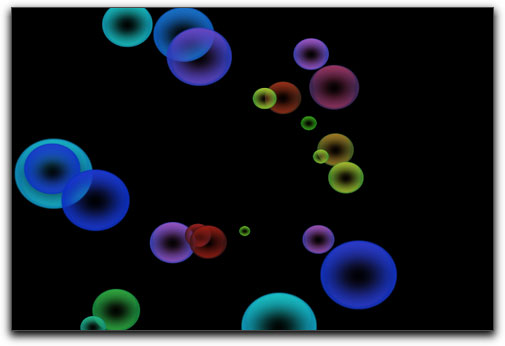
Now I feel like going out an buying a pack of lifesavers.
Since Motion is all about experimentation here are some other cool things you can try. Add an Edge Collision behavior (found in the Simulations folder of your particle library) To really see the effect of this behavior, crank up the Life parameter to 3 or 4. Now your particles will be literally "bouncing off the walls".
So there you have it - whirlwind tour through Motion's particle generator. I hope you found this article helpful in understanding a bit more of Motion's universe.

copyright © www.kenstone.net 2004
© 2000 -2004 Apple
Computer, Inc. All rights reserved. Apple, the Apple logo, Final
Cut Pro, Macintosh and Power Mac
are either registered trademarks or trademarks of Apple. Other
company and product names may be trademarks of their respective
owners.
All screen captures, images, and textual references are the property and trademark of their creators/owners/publishers.