March 22, 2010
Part 2 - How To Create Disc/DMG Images of Application Install Discs
By David A. Saraceno
WARNING: PLEASE BE COMPLETELY FAMILIAR WITH THE PROCEDURE FOR FULLY BACKING UP CRITICAL FILES AND DATA BEFORE ATTEMPTING THIS PROCEDURE. AUTHOR AND PUBLISHING SITES ASSUME NO RESPONSIBILITY FOR LOSS OF DATA IF USER DOES NOT PROPERLY BACK UP FILES. BOTH Carbon Copy Cloner AND COMMERCIALLY AVAILABLE SuperDuper WILL CREATE A MIRROR IMAGE OF YOUR BOOT DRIVE.
Introduction. We saw in part one of this multi-part series the procedure for creating a bootable USB2/Firewire hard disc drive containing the OS X installers. In this installment, we will utilize a similar procedure to create DMG images of your application install DVD/CDs.
Although this task takes several hours to complete, significant time and effort will be saved whenever you need to reinstall your operating system, restore important data files, and critical applications. No technical knowledge is required. If you know how to swap DVD and CD install discs, and click on two buttons in the Disc Utility, you'll have no problems. The process won't interfere with other work that must be done. Check email, and do web research or other tasks as the process occurs. Just compute how long it takes to create the first DMG image, and use that to gauge when the next disc must be inserted.
This process embraces a long term strategy designed to produce a problem-free install, and a quick reinstall if problems should arise with an application or the operating system in the future. It follows the premise that an ounce of preparation is worth a pound of cure. You will be rewarded with far less down time, because a clean reinstall can be accomplished quickly and efficiently using the OS X, applications, and data installer you have created once.
What you’ll need:
1. The install DVDs and CDs for your critical applications.
2. The serial numbers for those applications.
3. The USB2 or Firewire boot drive you created in part one. As you remember, it should be large enough to hold disc images for the applications, and important data and files on your boot drive.
4. An internal or external DVD drive.
5. A clean, soft, dry cloth to clean the data side of the application install discs. Alternatively, use a commercially available disc cleaning solution.
The tasks detailed by the tutorial will take about two or three hours to complete depending on the size and number of install discs, and speed of your DVD drive.
The first step is to assemble your application install discs.
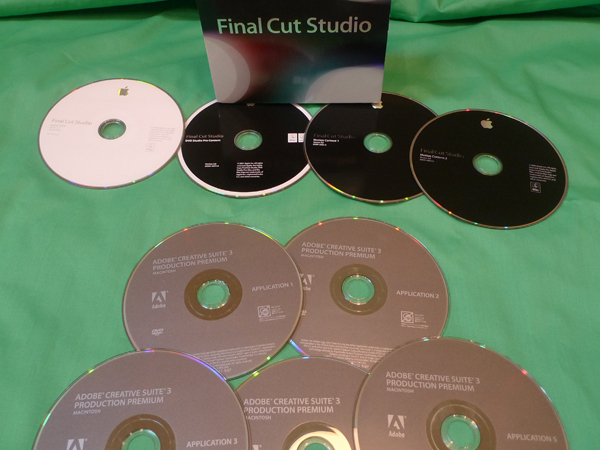
This graphic represents a sampling of the DVD install discs from the Adobe Production Bundle, and Final Cut Studio 3 (2009). Identify and assemble the install discs for the applications you regularly use. Additionally, I set aside discs for iWork and iLife ’09, other commercial discs, and any purchased applications I downloaded from the internet. They included Fotomagico 3, Kinemac, PhotoZoomPro2, and various video related programs. Make it a practice to save the installer packages to your hard drive for any internet purchases. This dispenses with having to create a DMG of those installers.
Store All Serial Numbers. Develop a “best practices” of saving the serial number of each application you purchase. Copy that serial number to a master text or word document immediately and then update that document for each new serial number you obtain. Then export the document as a password protected pdf document to enable quick and secure retrieval of the serial numbers when installing your applications. The document can include log-in passwords as well, and is used to quickly serialize your applications during the reinstall process. This has worked for me, but you are free to develop your own procedure.
Properly Store and Clean Your Discs. Carefully store your original install discs. Damaged or dirty discs result in read/write errors and could lead to disc failures. Avoid touching the writeable or data side of the CD/DVD. Always hold your CD/DVD by its center hole or by the outer edges. Keep your discs out of direct sunlight, away from heat and anything that may scratch on the discs. Always clean dust with a soft cloth or use a CD/DVD cleaning kit. Store all discs vertically and in a dust free box.
The Long and Winding Encode. Once the clean install discs are assembled, mount the first Final Cut Studio install disc from your DVD drive, and launch the Disc Utility from the Utilities folder.
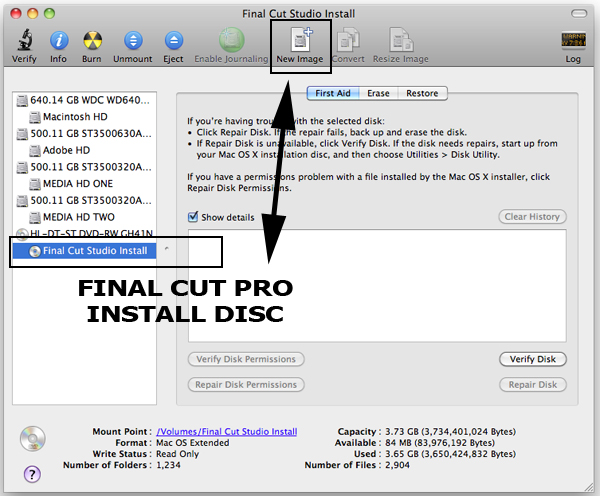
Create a disc image of the first install disc by selecting the installer disc image in the lower left side of the disc utility, and then clicking on the “new image” button in the upper middle of the disc utility. In the resulting dialog box, rename the disc if you want, or accept the default name. I usually append a number to identify the disc.
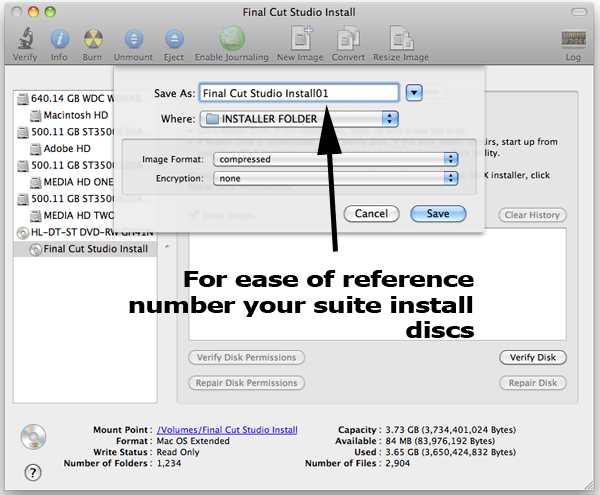
I then save it to a folder on my HDD that corresponds with the program/suite I will eventually install.
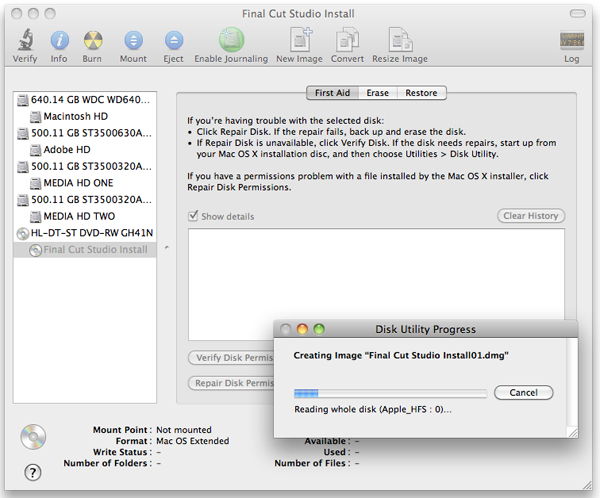
The burn process proceeds as the disc utility creates a DMG image of install disc.
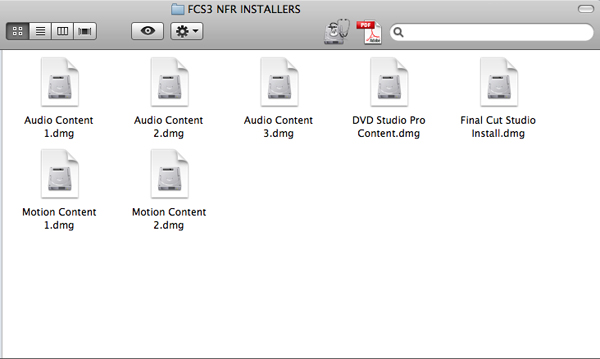
When the process is completed, eject the first DVD installer disc and repeat the process for the remaining discs of each application and suite. When completed, your disc Final Cut Studio (2009) disc image installer folder should look like this:
The Process Completed and Organizing Your Install Discs. Remember to maintain separate folders for each suite and the applications you have purchased and downloaded. When the process for all discs is finished, copy the folders containing the DMG images and the pdf file of serial numbers to the Firewire or USB HDD we created in part one of this series. Put them at the root level of the drive, and they should copy without incident so long as the drive has enough free space -- an issue we addressed in part one of this series.
Final Thoughts. The utility and importance of this process is immense. One afternoon of inconvenience will provide a foolproof, effective and reasonably quick reinstall of your boot drive complete with applications, data, and settings. The process simultaneously creates backup images of application install discs, guarantees their safekeeping, centralizes your serial numbers, and maintains a repository of your important data. We’ll address backing up your important data files and settings in a future installment.
Part 1 can be found here
Part 3 can be found here
Copyright ©2010 David A. Saraceno
David A. Saraceno is a motion graphics artist located in Spokane, Washington. He runs a video blog and review site called secondchairvideo that provides up to date information on most things Final Cut Pro and video related. He has written for DV Magazine, AV Video, MacHome Journal, and several state and national legal technology magazines. David moderates several forums on 2-pop.com, is active on the Apple Support Discussions forum for their Pro Applications, ranked as among the highest contributor as a Level IV in the pro apps forums, and contributes at dvxuser.com.
[Top]
© 2000 -2010 Ken Stone. All rights reserved. Apple, the Apple logo, Final
Cut Pro, Macintosh and Power Mac
are either registered trademarks or trademarks of Apple. Other
company and product names may be trademarks of their respective
owners.
All screen captures, images, and textual references are the property and trademark of their creators/owners/publishers.