April 20, 2009
By Richard Taylor
I've constantly had problems with render files becoming un-rendered in Final Cut Pro. Sometimes just closing and reopening a project will result in the render-required status bar reappearing in the Timeline.
Apple says this was fixed in the Final Cut Pro 6.02 update, but I have render problems in Final Cut Pro version 6.0.5. "Final Cut Pro 6: Rendered items may require re-rendering after opening project"
Sometimes this happens during normal Timeline editing. Resetting In and Out points and adjusting opacity will require a rendered clip to be re-rendered. Going between Final Cut Pro and Motion will sometimes cause an item to lose its render clip affiliation. Nesting is another problem area for render files.
The Final Cut Pro manual states that:
"To avoid constantly re-rendering, you can place a clip with its applied filters into a sequence and then edit that sequence into other sequences [Nesting]. Because you modify the sequence In and Out points instead of the clip within the sequence, the render file for the clip is maintained."
I've had Nested sequence render problems, even following Apple's advice, above. So I've developed a workaround for the (un)rendering strangeness in Final Cut Pro.
Once I get my clip(s) edited and rendered in the Timeline, I add the actual render files to the Sequence in place of the original render-required clip.
The first step is to know the location of your render files. By default, this is the same as your Scratch Disk location. If you specified another location for your render files, you would have to visit that location.
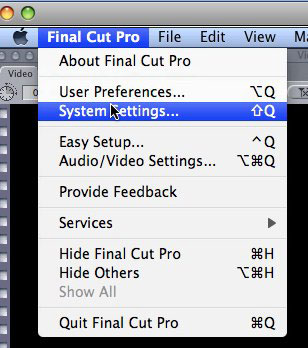
Go to the Final Cut Pro menu and select "System Settings" (keyboard shortcut Shift-Q).
In the System Setting dialog window, click on the "Set..." button where your "Video Render" selection is checked.
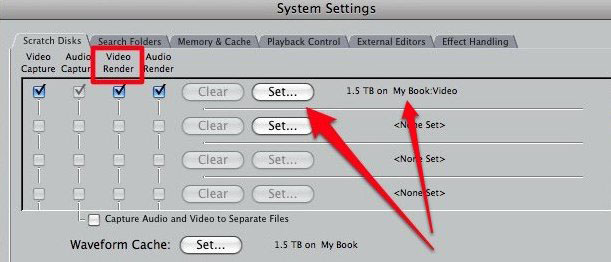
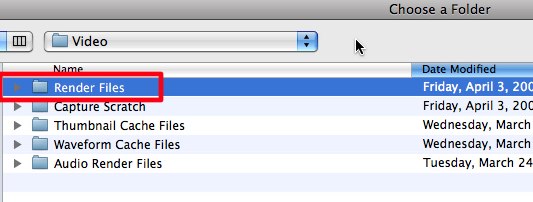
A window will open showing you where your present "Video Render" disk is set. In my case, I made a folder called "Video" and chose it as my Scratch and Video Render disk. By default, along with the "Capture Scratch" location, will be your "Render Files" folder. Make a note of this location.
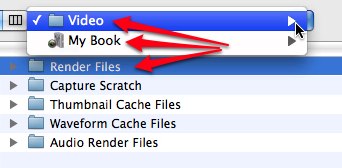
You can use the Finder drop down menu to confirm the Finder path to your "Render Files" folder.
Typically your "Capture Scratch" and "Render Files" disk will be your username > Documents > Final Cut Pro Documents. Since I rarely use my local disk as my Capture Scratch disk, and I always have multiple disks attached to my Mac in various ways, I usually have to check my current "Render Files" location. In this case, it is My Book > Video, a folder that I use for my Capture Scratch disk.
Besides locating your replacement render file, this location is handy to know, because sometimes render files become corrupt. I've also had old render files linking to a current clip in my Timeline, even though I rendered that clip again, with new settings. Deleting the suspect render file in either case, will usually eliminate any related render file problems. Doing this, of course, will require re-rendering.
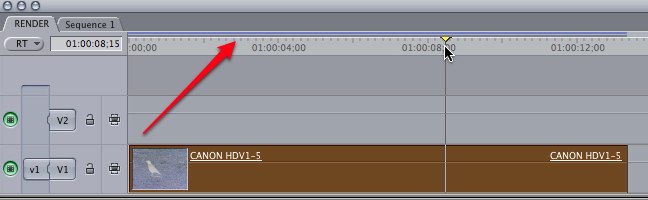
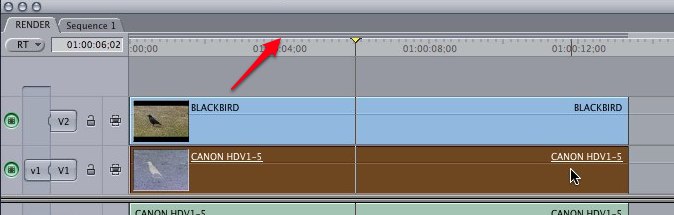
So in my Sequence, this clip requires rendering, as shown by the green render bar at the top of the Timeline.

Select the clip in the Timeline, and go to the Sequence menu > Render Selection > Video. Notice that I have all Render Selections checked.

If you've ever rendered in Final Cut Pro and just gotten a flash, and the render status bar remained unchanged above the clip in the Timeline, you probably did not have the appropriate Render Selection item checked. I just check all of them.
You'll have to visit this menu several times to select all of them, one selection check per visit.
If you position your pointer over a render status bar, a tooltip appears with information about the render status of the clip. Rendering can be required by applied filters (like the 3 Way Color Corrector that I almost always use), a speed change, or the clip and Sequence codecs not matching, as in this case.
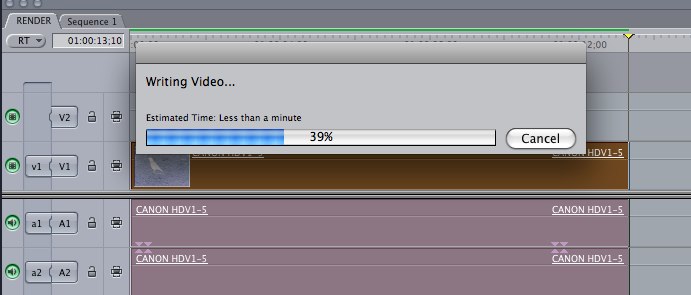
Rendering...
After the render is complete, the green render status bar has changed to a pale purple.
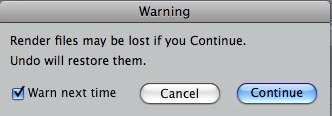
After rendering, if you click this visibility button to turn the track off...
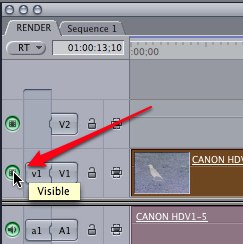
...you will get this warning (unless you uncheck "Warn next time"):
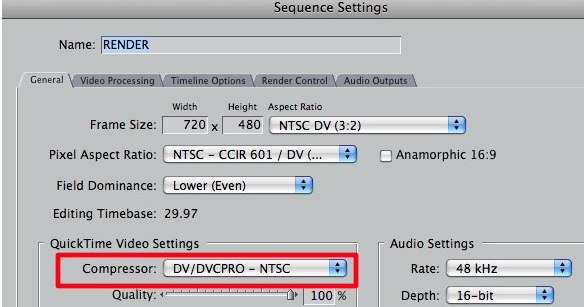
In this case, my Sequence Settings codec/Compressor is set to DV/DVCPRO - NTSC.
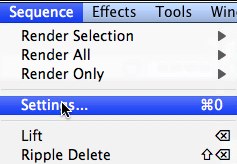
Yet after rendering, by right-clicking on my Timeline clip and choosing "Item Properties"...
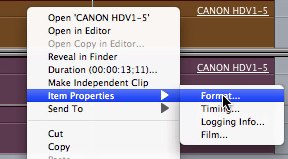
...the Timeline clip is still ProRes 422.
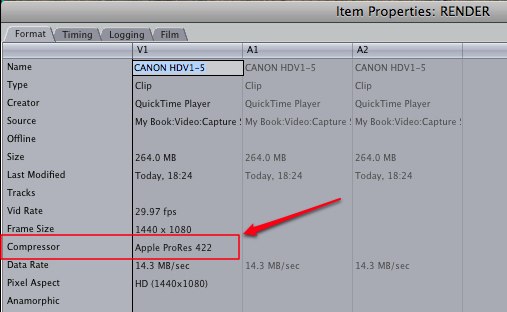
Final Cut Pro is invisibly linking a DV/DVCPRO - NTSC render file to this clip in the Timeline. So we're going to replace this ProRes 422 Sequence clip with the actual DV/DVCPRO - NTSC render file. If renders are required because of an applied filter(s), speed changes, etc., the rendered clip will have all of these applied.
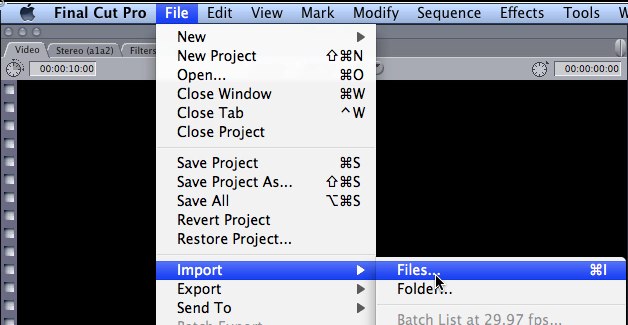
In the Final Cut Pro menu, choose File > Import > Files
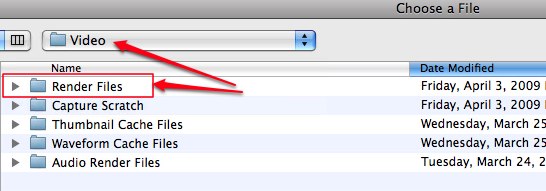
...and navigate to your Render Files folder.
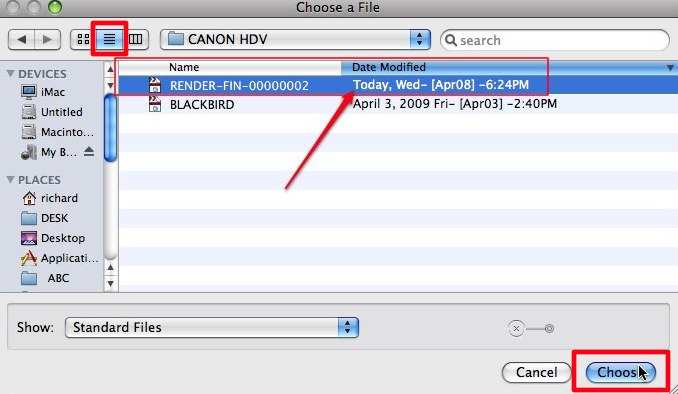
Open your current project folder in the Render Files folder, switch the Finder to list view and sort by Date Modified by clicking on its column heading. The latest render file should be at the top with the Date Modified being "Today".
Select your render file and click "Choose".
You can also switch to column view to see a thumbnail of your selected render file.
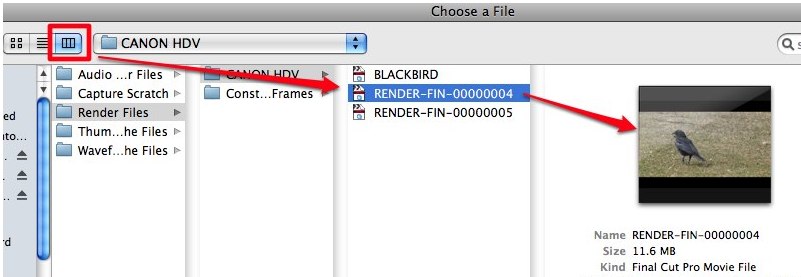
Once your Render file is imported, change the cryptic Finder name to something meaningful.
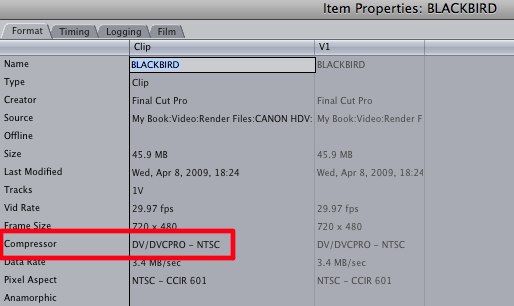
Right-clicking on the render file in the Browser and choosing Item Properties > Format, reveals it is DV/DVCPRO - NTSC, the same as this Sequence.
If you want to, you can change the name of the Render file in the Finder. In the Browser, right-click on the newly named render file and choose Rename > File to Match Clip.
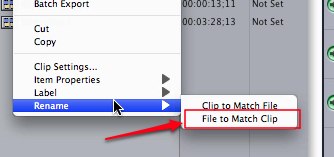
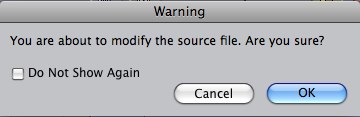
You might get a warning that you are about to change your media file. Click OK.
If you now right-click on the render file in the Browser, and choose "Reveal in Finder", you'll see the render file in your Render Folder has been renamed to match the clip in the Browser.

You also could rename the render file in the Finder and drag it from the Finder into the Browser.
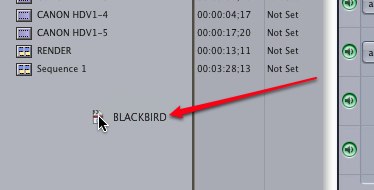
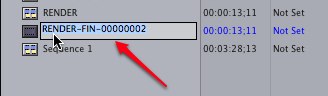
Once in the Browser, drag the render file to the Timeline (with snapping turned on) and either superimpose or overwrite the render file directly over top of, or on, the original clip.
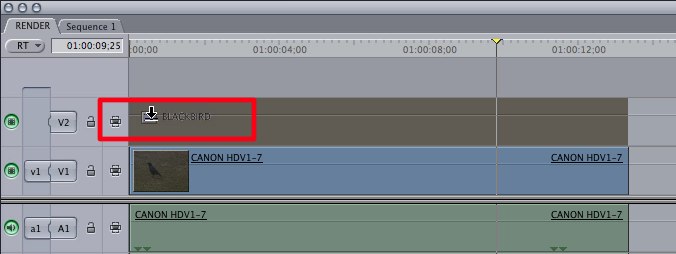
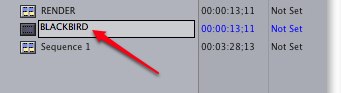
Voila! No more problems with lost render files. And no render-required status bar in the Timeline. You can now set new In and Out points, or change opacity of this clip, without further rendering.
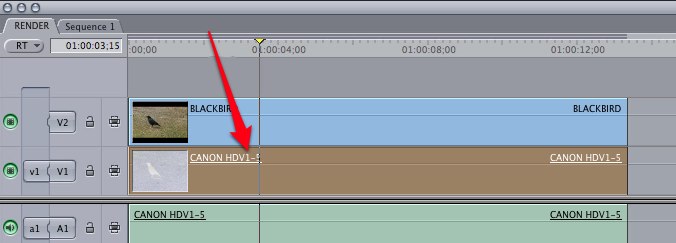
If you superimposed the clip as pictured above, you could either delete your original clip from the Timeline, or just leave the original clip in place for reference.
If you leave the clip in place (as I do) you could select the clip in the Timeline, and then uncheck "Clip Enable" in the Modify menu (shortcut Control-B).
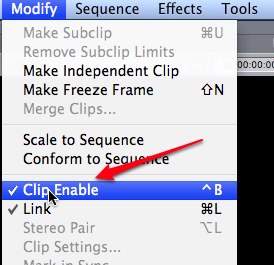
This clip is not enabled and will not play in the Timeline.
This step is not really necessary, as only the topmost clip will play in the Timeline anyway (unless you modify its composite mode or opacity). But sometimes I shift the render file a frame or two in the Timeline, and I don't want the old file peeking through from underneath.
Now, instead of Final Cut Pro invisibly linking to a sometimes problematic render file, you have a clip in the native Sequence codec with all filters and speed changes applied, that never needs rendering.
Richard Taylor is a Level 2, Apple Certified Final Cut Pro Trainer. He is also the Video Editor at the National Archives in Washington, DC. He does Final Cut Pro training and consulting in the Baltimore-Washington area. He can be reached via email at Richard Taylor
[Top]
copyright © Richard Taylor 2009
are either registered trademarks or trademarks of Apple. Other company and product names may be trademarks of their respective owners.
All screen captures, images, and textual references are the property and trademark of their creators/owners/publishers.