June 12, 2006
By Andrew Balis
There's a type of edit in Final Cut that often goes un-used to its fullest potential, and of course I'm referring to Replace edit. This article will hopefully de-mystify this type of edit, going over how Replace edit works and some of the myriad of scenarios where it can be most helpful. In brief, it can be used to make simple and repetitive tasks quicker and more efficient. But it can also be used as a way to replace a shot in the timeline easily in a way that matches the action of the shot to be replaced, or replace a shot in a way that matches the action to other clips in the Timeline.
First let's explore a bit about the basic way this edit works. Let's say you have the following Timeline:
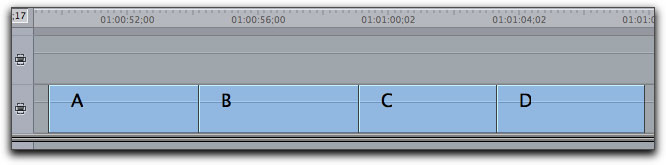
Let's also say that you want to replace clip B with a new clip, clip E. Start by opening the new clip (E) into the Viewer.
In the Timeline, move the playhead somewhere over clip B. Set the target panel to V1.
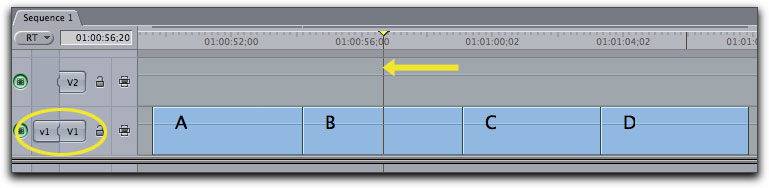
Targeting set to V1
The targeting tells Final Cut you wish to replace a clip on track 1. The playhead lets Final Cut know which clip on track 1 will be replaced. In this example, clip B will be replaced.
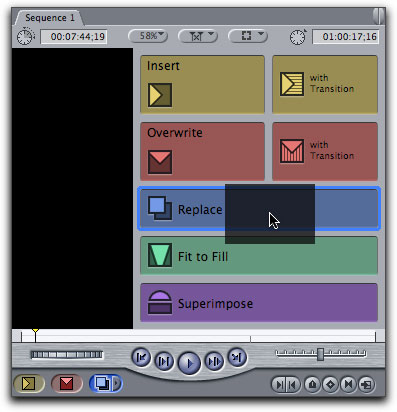
Drag the clip in the Viewer to the Canvas and drop on the edit overlay for Replace edit.
In the Timeline, the new clip E would now be where clip B used to be. Since no in or out points were set in the Timeline (we'll come back to this later), then the entire clip under the playhead is replaced. Nice and simple.

Alternatively, there are two other ways to perform this edit. You can also:
- Press the blue button in the bottom left of the Canvas
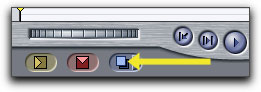
- Press F11 on the keyboard (a Mac OS system function called Expose uses F11 by default, overriding Final Cut's use of the key. If you want to use F11 in Final Cut, change Expose settings in your System Preferences)
This basic use of Replace edit is great for certain things like replacing temp titles with finished titles or replacing placeholders for final graphics. No need to set in or out points, figure out any durations, or do any math for that matter, you simply use Replace edit and you get a clip in the same positioning in the sequence and at the same duration as the previous clip.
When replacing graphics, text clips and some backgrounds, the exact content doesn't matter. In the case of a graphic, it's the same frame from first to last. Our simple mission in the previous example was to replace the Timeline clip with a new clip at the same duration of the old clip in the Timeline. Replace edit does that fine.
But the real power of Replace edit hasn't been discussed yet. Its just how the content of the Timeline is replaced with new content that makes this such a powerful tool.
Replace edit is a type of three point edit, but not as you might expect when you think of a traditional three point overwrite edit. One possible three point edit may be set up like the following example.
Viewer
Timeline
In this case, an in point is set on the new clip in the Viewer, and an in and out point are set in the Timeline. When the clip is then dragged to the Canvas and dropped on Overwrite, the in point in the Viewer is edited to the in point in the Timeline.
Although Replace edit also does a sort of 3 point edit, it differs from Overwrite and Insert edits in that it doesn't use the in points or out points on a clip to determine what portion of a clip is edited into the Timeline. Replace edit allows us to change out the shot using another reference point, one not necessarily found at the in or out point of the edit.
So let's look at the other main factor happening with Replace edit: the importance of the positions of the playheads in both the Viewer and Timeline before making the edit. When doing a Replace edit, the frame under the playhead in the Viewer is edited to the playhead position in the Timeline. No in or out points are needed in either the Viewer or the Timeline.
The rest of the clip is then replaced by other frames from the source clip in the viewer.
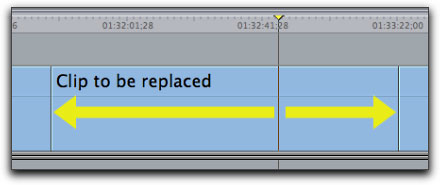
To look at it another way, let's say our Timeline clip is 5 frames long. The playhead is positioned at frame 4, as seen next.
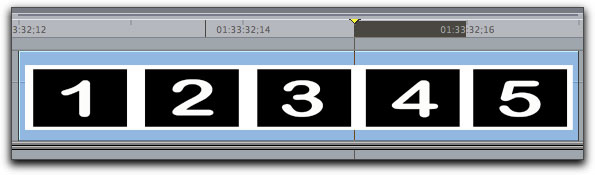
We want to replace this clip with the following clip, which has the following source frames.

Let's say we open this clip into the Viewer and position the playhead at frame G.

Then if we perform a Replace edit, the resulting Timeline clip will still be 5 frames long like the original, and would look like the following:
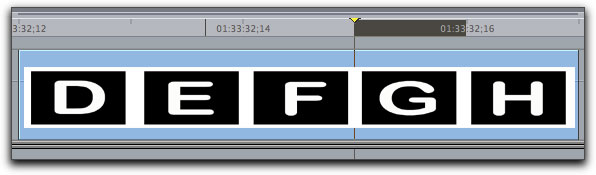
Frame G is edited to the Timeline's playhead, which was parked over frame 4.
If on the other hand, the playhead in the Viewer was parked at frame I, you'd still get a five frame Timeline clip, but with different frames.
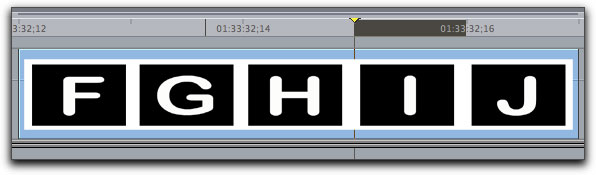
This time, the frame I is placed at the Timeline's playhead position.
This long-winded example is my way of saying that Replace edit allows you to choose content based on the playhead positions, not based on in or out points. This frees you up to a lot of possibilities, as well as doing certain tasks quickly and efficiently. Think of this edit when you're trying to replace a similar action from one shot to another- the original clip in the Timeline, and the replacing clip in the Viewer.
In the following example from a scene, a boy watches through a telescope, realizes he's been caught spying something he shouldn't, and another boy rushes toward him, punching him to the ground for the supposed misdeed. In the following strip, I've pulled out several frames from one of the shots in the scene so we can get the general idea of the action. The second boy rushes forward into the scene, punching the boy behind the telescope, to the ground.

Let's say that you've used this particular take in the sequence, but now want to use or try out another take. Both takes will have similar action making them the perfect choice for Replace edit.
Notice in the above strip, the beginning of the Timeline clip is on a somewhat ambiguous moment. The second boy hasn't yet entered the frame, and there's nothing in the beginning of the action that's going to be exactly the same in both the first and second take. This is not a good candidate for a standard Overwrite edit, because the in and out points of the shot don't give us a good reference point, but the clips do have elements that make it ideal for a Replace edit.
There is another point in the action of the scene that would be important or similar in any take, in this case, the moment of the punch. This action happens in both takes and is easily identifiable (and of course an important moment in the shot). So, based on the above strip, a better point to match would be the fourth frame from the left.

Each take of this shot may have a different pace and physical approach, but each clip will have the moment of the punch. If we want the moment of the punch from this new shot to end up in the same point in time in the sequence, then Replace edit is perfect.
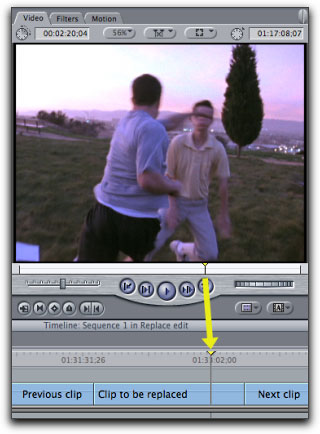
In the Timeline (or Canvas), we would start by placing the playhead directly on the frame of the punch's impact. Then you could open a new take into the Viewer. Place the playhead over the same point in this take, the punch.
Viewer Canvas
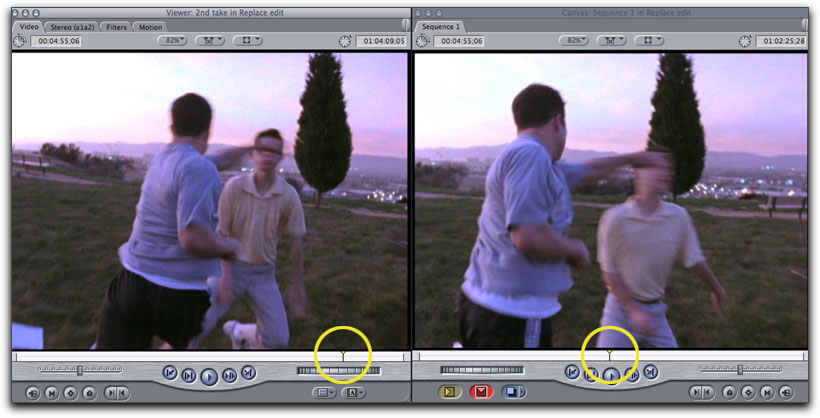
New take Original Timeline clip
Perform a Replace edit by dragging the clip to the Canvas or pressing the blue Replace button in the Canvas. Although there may have been different pacing between the two shots, the new shot is in the Timeline, and the punch happens at the same point in the sequence as with the previous shot. Pretty cool and fast!
In this last example we replaced one take of a shot with another take of that same physical action. But you can expand on this and use it to replace all different kinds of elements that share similar action. And this doesn't need to be a physical action, it can even be something like similar dialogue that happens in two different shots. The following is a list of some of those things that Replace edit is especially good at.
- Replacing different takes of the same shot (like we just looked at). This is a great way to try out different takes and performances playing back to back with the other shots from the scene. This can help see what "fits" best in some situations.
- Replacing one angle of a scene with another angle of the same action. Situation: a scene is cut with several different angles covering the different moments that occur during the scene. In one section of the scene there is a medium shot that contains certain dialogue or physical action. We want to replace this shot with a different angle, let's say a close up of the same action. Using Replace edit we can replace the shot quickly and the new shot will be closely (if not occasionally perfectly) in sync to the clips around it in the sequence.
- Replacing a temp shot with a final shot. For example: a clip shot against a green screen. During the edit, you would use the temp shot, the original green screen clip before the green is keyed out. When the final composited green screen shot is ready, it can be replaced somewhat easily, even if the new final effects shot has a different overall duration or even different timecode from the original clip. Simply find a same frame in each shot (any easily recognizable action or movement) using the playheads, then do a replace edit.
These are some of my favorite uses of Replace edit.
- Replacing a clip with a split edit
- Replacing a clip with transitions
In these cases, you could use other edits, but they would require too many steps and/or can easily bring up error messages from Final Cut.
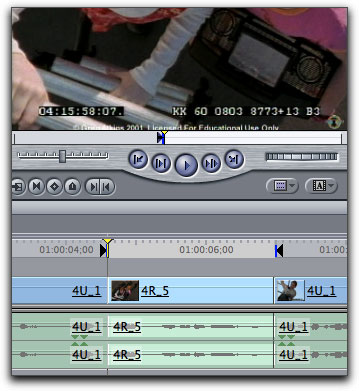
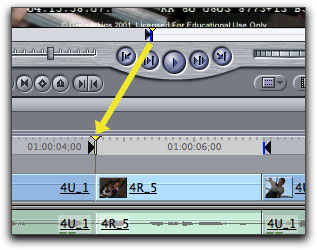
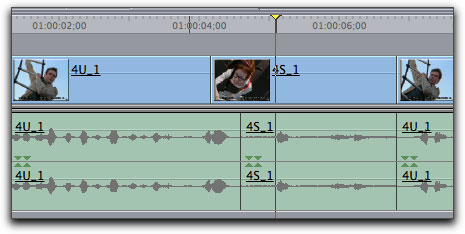
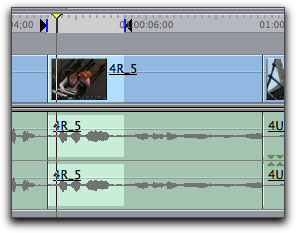
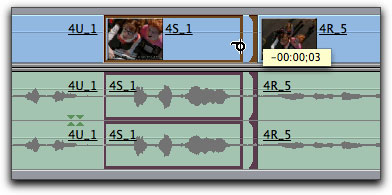
Replacing a clip with a split edit, an overlap of video and audio, is incredibly simplified with Replace edit. In the following example, the beginning of clip 4S_1 has a split edit. We can use Replace edit to replace the entire clip, split edit and all. In this example, to set up for the edit, the playhead is placed just before a word of dialogue that's the same in both clips.
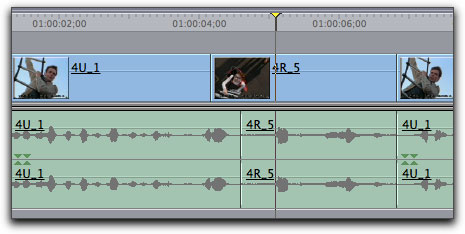
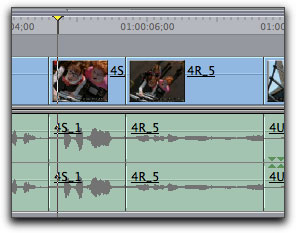
After Replace edit, the new clip, 4R_5 is in its place, as seen below. The dialogue lines up in the same approximate place (although notice the higher audio levels in the new clip). The video overlap remains. Its an elegant solution to a common scenario.
If instead we did this edit as a standard overwrite edit it would have required more steps, like setting split marks, in other words, separate video and audio in points, like the example below.
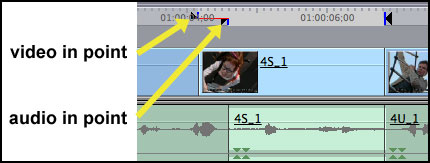
Its doable, but would take longer.
In the following example, a video montage, the middle clip, titled Bench needs to be swapped out for another clip, Steps.

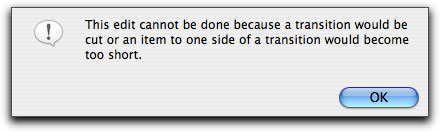
Like in the last example, a standard Overwrite edit wouldn't work here as you'll either get the following error message or you'd have to remove the transitions and re-apply them (either overwriting them, or by removing the transitions before the edit).
Again, Replace edit is much simpler. Simply position the timeline playhead over the clip to be swapped out, then do a Replace edit.
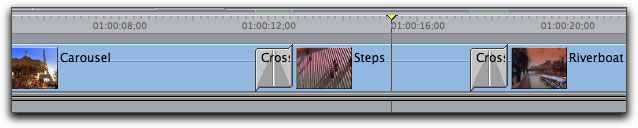
After, the new clip is in place, and the transitions stay properly positioned.
With Replace edit, we've looked at only one variation: replacing an entire Timeline clip. Instead, we may want to cut into a shot, or replace the head or tail of the shot. If you set in and out points in the Timeline, Final Cut will limit the edit to that section.
Before edit |
After edit |
The Timeline and Viewer playheads will still be used to determine how the
clip is edited in, but this time duration is handled differently.
Duration is always determined by the Timeline with Replace edit. In fact, setting any in or out points on the clip in the Viewer will never have an effect when using Replace edit. Final Cut ignores the Viewer marks completely. On the other hand, if there are any in and out points in the Timeline, then they will determine the duration and placement of the new clip. But if there's no in or out point in the Timeline, then replace edit uses the boundary of an entire clip under the playhead as we looked at earlier.
When using a replace edit on a shot that has matching action with the previous or next Timeline clips, its also important to recognize that Replace edit is often just a good starting point, but a little more work may need to be done.
In the previous example, a dialogue scene, we replaced a portion of dialogue with a clip from a different angle. Because performances on set will naturally shift during the course of shooting, one shot's pacing will be different than another's. Because of this, after the replace edit, you may find that you've created a small shift in continuity or timing with the adjacent clips. In that case you can use the ripple tool on the head or tail of the shot you replaced to fix that continuity.
There are many more uses for Replace edit, but these are some great places to start. Hope you enjoy.
Andrew Balis is a cinematographer, editor, post production consultant and Apple certified instructor teaching classes in Final Cut Pro to industry professionals at Moviola Education and UCLA. He is co-author of the Apple Pro Series book Advanced Editing Techniques in Final Cut Pro 4. Andrew co-authored the original Apple certified curriculum for beginner, advanced, and effects classes developed at Moviola Education, and wrote the Final Cut Pro curriculum for the Apple Education/CNN Video Journalism classes offered in the K-12 market.
[Top]
copyright © www.kenstone.net 2006
are either registered trademarks or trademarks of Apple. Other company and product names may be trademarks of their respective owners.
All screen captures, images, and textual references are the property and trademark of their creators/owners/publishers.