July 11, 2005
10 text plugin package for FCP and FCE
Price - $49
CHV-Electronics
By Ken Stone
Back in late 2002, when we were running FCP 3, doing text credit rolls (Apple call them scrolls) was a nightmare to say the least. The FCP stock text generators were very poor and many of us used Photoshop to do the work which was very tedious. At about this time CHV-Electronics released its FCP 'Credits and Sub-Title' plugins. Going from the FCP text generators to the CHV text plugin was like going from the Wright Brothers Flyer to a F-14 Tomcat. The CHV text plugin quickly became very popular with the FCP community. Over the past few years the text plugins have been updated for newer versions of the Mac OS and FCP and new Text plugins have been added to the package. Earlier this year CHV released its newest Text Collection set (V4.0.1) of 10 different text plugins, now updated for Final Cut Pro 5 and Final Cut Express 2 (with keyframeability). The Text Collection includes:
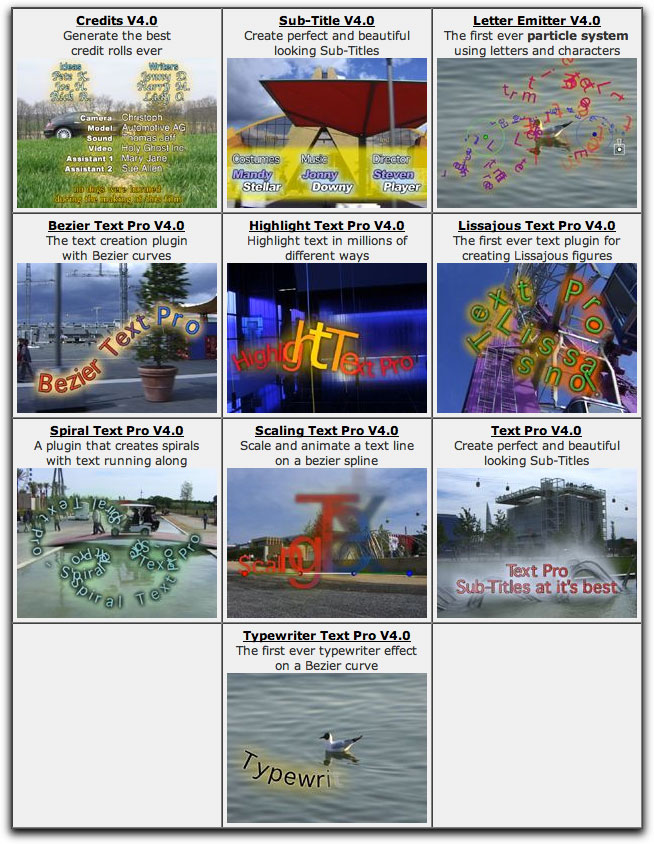
Credits
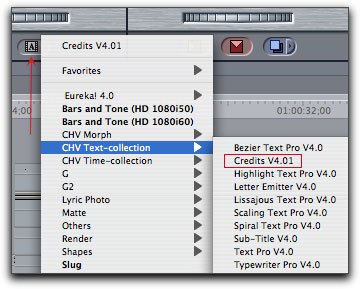
While this set includes some new and very exciting text generators, I am going to look at Credits V4.01 (credit rolls), as this plugin is the most utilitarian (most often used) of the group and is one of the premiere Credit Roll plugins available for FCP. All of the CHV text plugins are generators and are found in the generator drop-down menu, bottom of the Viewer window.
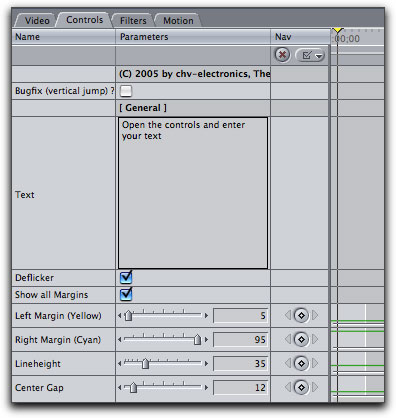
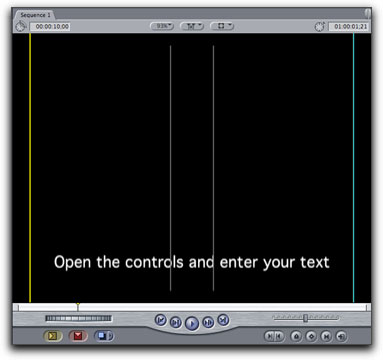
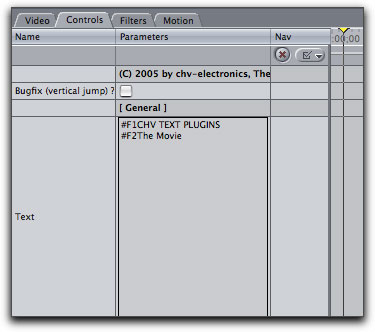
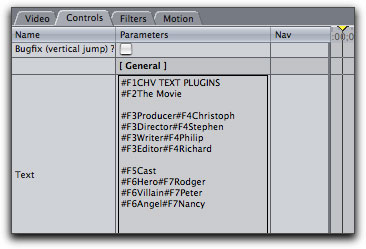
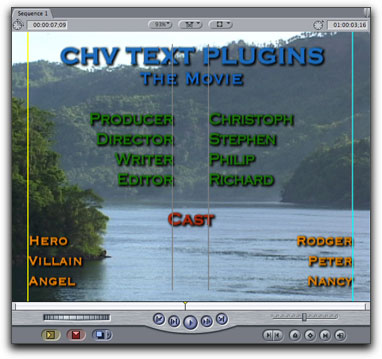
After moving the Credits generator to the timeline, double click to load it into the Viewer and click on the Controls tab. At the top of the Controls are the basic global parameters for the Credits generator. The first item is 'Bugfix', to be used when slowly rolling text seems to jump up or down by one pixel as the text rolls. Below the text box is the Deflicker option which should be left on. You will want to work with Show all Margins enabled. If you do not see the margins in the Canvas window (below right), make sure that Overlays is turned on in the Canvas window. The left and right margins (yellow and cyan) set the outer boarders for text placement. Lineheight controls the spacing between each line of type. The Center Gap (two white lines) can be adjusted to set the width of the gutter for creating columns of text.
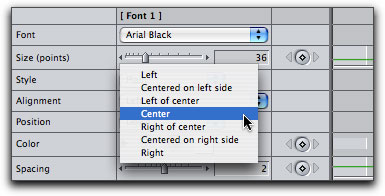
The power and flexibility of the CHV Credit generator comes from its ability to allow us to define up to 9 different 'text sets'. Each set has its own parameters, Font, Font Size, Style, Alignment (where the text will appear on screen, below right). Position defines how the text will be placed within the space created by 'Lineheight', top, center, bottom. Font Color and Spacing (Tracking) controls the amount of space between each letter.
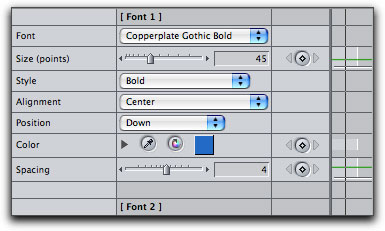
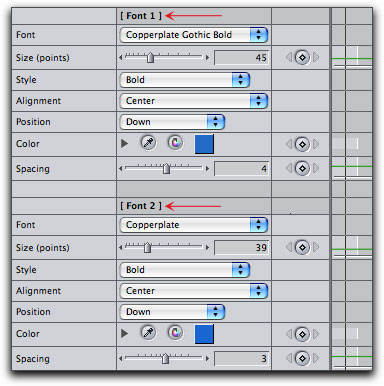
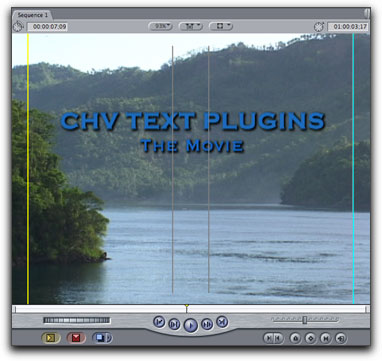
I am going to skip down past a large number of different global settings that can be applied to Credits to demonstrate how Credits works, (more on these settings later). In my credits I want two different text settings for my main and sub titles. In the [Font 1] section I have selected my font, size, style, spacing and color for my main title. I have set [Font 1] to Center. I then set up [Font 2], my sub title, much the same as [Font 1] except for size, style and spacing.
Now that I have defined [Font 1/2], I can call up either one when needed. I want to set my main title using the settings for [font 1]. To do this, in the text box, I enter:
#F1
and then the text for the title. For my sub title I enter:
#F2
and the text. After entering in the text box you must click outside the text box for the changes to show up in the Canvas window. Note, I have applied a drop-shadow for my text, covered later on.
Next I want to set [Font 3 and 4] for the persons job title and name. I want the job title to be on the left, my gutter in the middle and then the persons name to the right. I give both [fonts] the exact same attributes except for Alignment, [Font 3] will be Left of Center, [Font 4] to the Right of Center, (shown below).
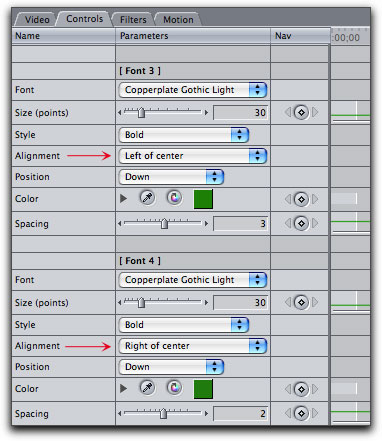
As I want both the job title and name to be on the same line on screen, I enter #F3 'job title' and then with no space after the job title, #F4'name', (shown below left).

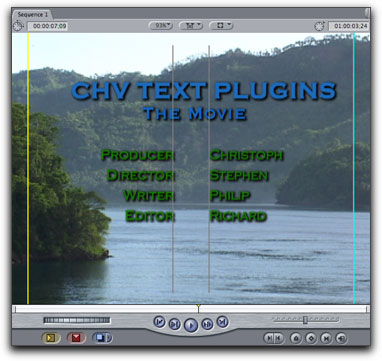
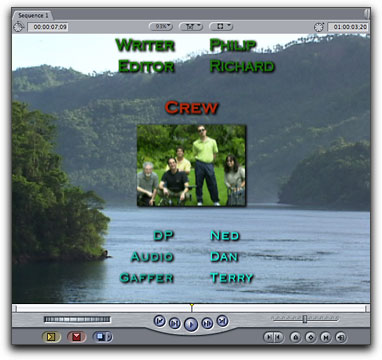
Lastly I want to add a Cast title and then beneath that I want the characters names on the left and actors names on the right. For the 'Cast' title I have created [Font 5] with an Alignment of Center, set a color (red), size, and spacing.

For the characters name and actors name I have created [Font 6/7] with the same font attributes, except for alignment, with characters aligned left and actor names aligned right.
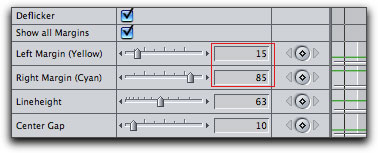
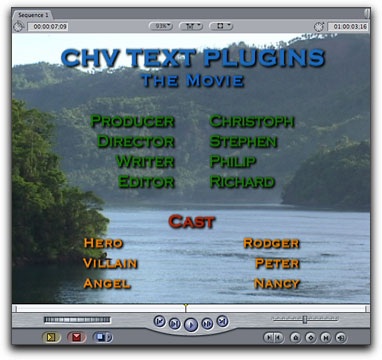
The characters and actors names are positioned left and right, however, they are too close to the edges of the screen and don't look right. This is very easy to adjust. In the global settings just below the text box are 'Left Margin (yellow)' and 'Right Margin (cyan)'. These settings default to 5 and 95 which I have changed to 15 and 85 which moves the text in towards the center of the frame.
That's better.

Adding pictures to your Credits
In addition to having 9 'text sets' to work with we also have 9 'image sets' as well. Image sets [Clip/Image] works exactly the same as 'text sets' except that there are a few additional parameters.
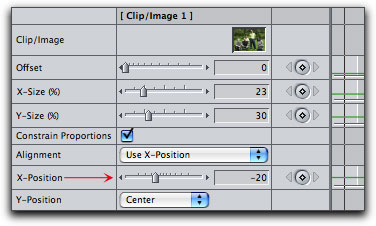
Images can be added anywhere in the Credits. To create an 'image set', drag an image into the image well in [Clip/Image 1]
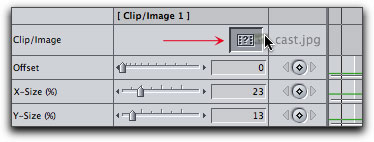
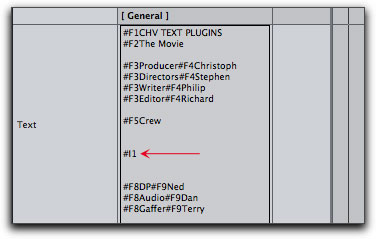
To add your image to your Credits enter:
[#I1] in the text box at the place that you want your image to appear.
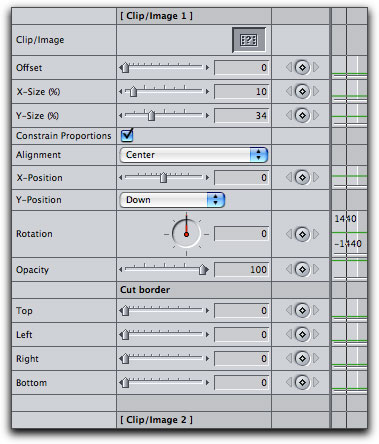
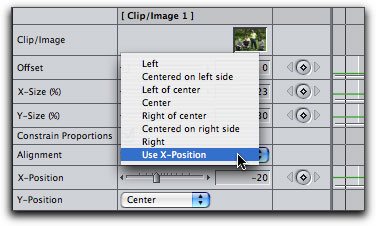
If you select 'Use X-Position' from the Alignment menu, you will be able to enter a value into the X-Position setting. This will allow you to incrementally position your image horizontally on screen.
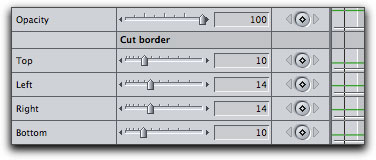
You can adjust the Opacity of the image and crop the image using Cut borders. While it is not often that you see photos in Credits, logos are often employed and so the ability to add images is an important one.
Additional Global settings
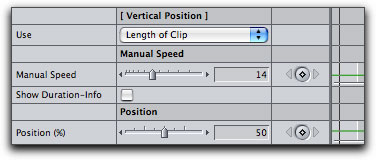
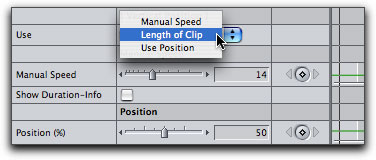
You can control the speed of your Credit roll in the Vertical Position section. The defaults is 'Length of Clip' which will automatically calculate the speed of the roll for you. When Manual Speed is selected the Manual Speed slider becomes active. 'Use Position' is for the vertical positioning of the text and works in conjunction with the Position slider. If you animate this slider in the timeline, you can speed up or slow down the rolling text and even go backwards.
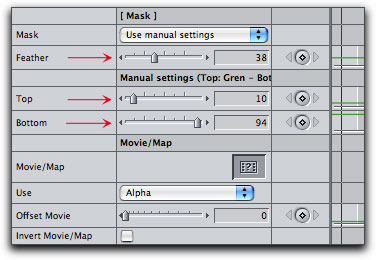
Mask is used to fade in each line of text as it first appears on screen and then fade out each line of text just before it disappear off screen. Mask defaults to Use Manual settings, enter a value for the Top and Bottom and then add Feather. If you select 'Use Movie/Map' in the Mask drop-down you can drag an image into the image well and the image will become your mask.
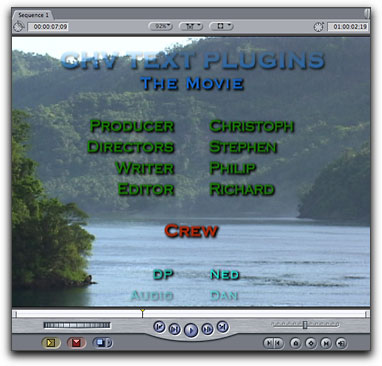
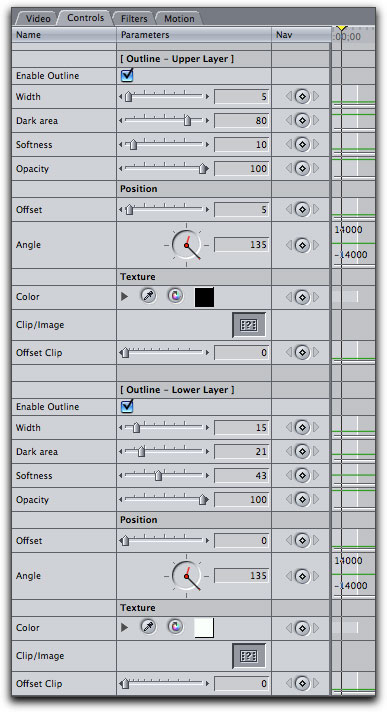
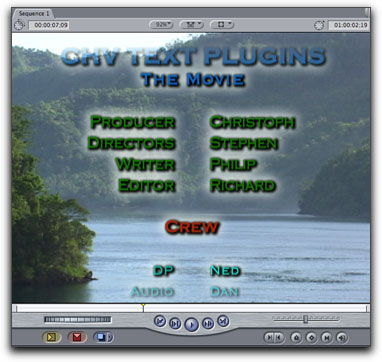
Outline Upper and Outline Lower Layer. These two features are used to create boarders around the text and both are identical in function. The only difference is that Upper Layer goes on top and Lower Layer lies beneath. If the Upper Layer effect is larger than the Lower Layer effect, the Upper Layer will cover over and hide the Lower Layer. I have used Upper Layer to create a black drop-shadow for the text and used Lower Layer to create a white glow around the text. If Opacity is applied to either Outline Upper or Lower (drop-shadow/glow), the opacity of the text can change as well. If this change is noticeable you can adjust for it by darkening the color of the text in [font] settings. There is a great deal of control and flexibility offered with these two features.
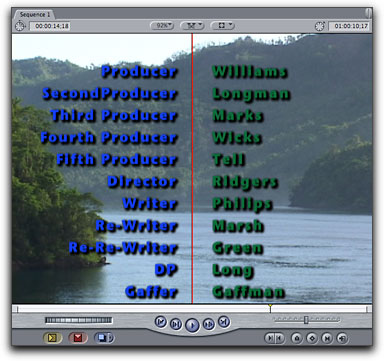
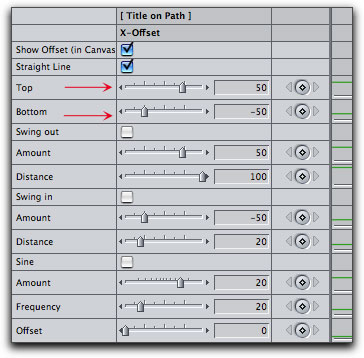
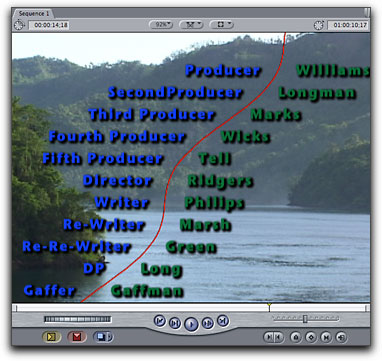
Text On Path, another feature, enables you to set a path for your text to follow while rolling up the screen. Turn on Show Offset and Straight Line.

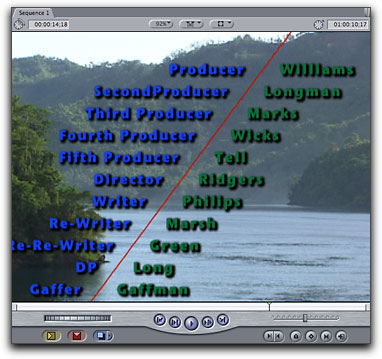
You can control the direction and shape of a path. The 'Top' and 'Bottom' settings are used to position the start and end points for the path, left and right, top and bottom. 'Swing Out and Swing In' settings enables you to add and adjust curves at the start and end of a path.
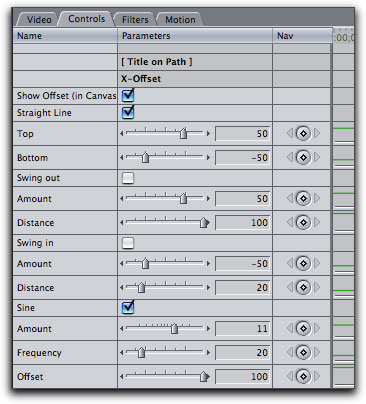
When the 'Sine' feature is enabled the straight path is converted to a curved path. You can control the shape of the curves and the placement of the text along the curved path.
Conclusion
If Credits V 4.0.1 were the only plugin in the CHV Text Collection, at $49 it would still be a great deal. Considering that there are 9 other plugins in this package, purchasing this collection should be a no brainer. While I don't have the time to look at all 10 of the plugins, I should point out that the 'Sub-Title' plugin works in much the same way as Credits only the text 'crawls' across the screen on a horizontal path.
As I said at the top of this review, the CHV Credits plugin has been the first choice for many FCP users for some time now. This package, updated for FCP 5 and FCE 2, has new plugins added to the set and the existing plugins have had new features added. It is my one and only choice for this type of work.
Enjoy,
--ken