August 8, 2005
By Andrew Balis
Choosing the right settings for a project may seem confusing at first, but its important we don't skip these steps or it may easily lead to larger problems down the road. To start out, there are no overall settings that set up everything for a new or current project. This is good and bad. On the good side, this allows you to work with multiple video formats. For example, you can have a hi def video sequence and a DV sequence open at the same time in the same project.
On the down side, this method means that we need to be aware and choose more settings to ensure proper consistency from initial input through to final output. Overall, settings are found from the following main menu items located throughout FCP.
| Setting | Location |
| Easy setup | Final Cut menu > Easy Setup |
| Audio/video settings | Final Cut menu > Audio/Video Settings |
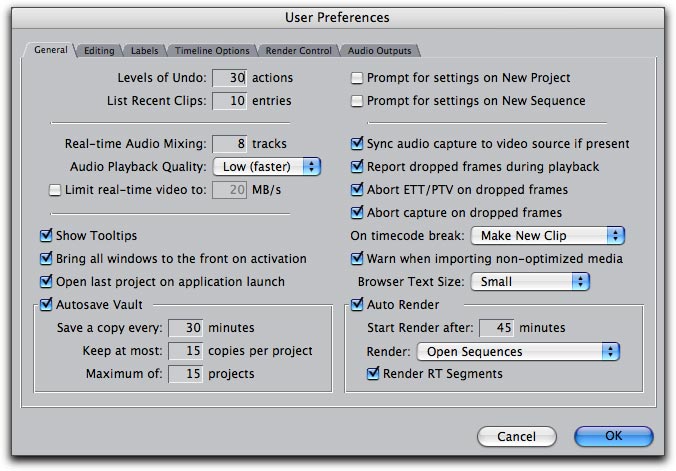
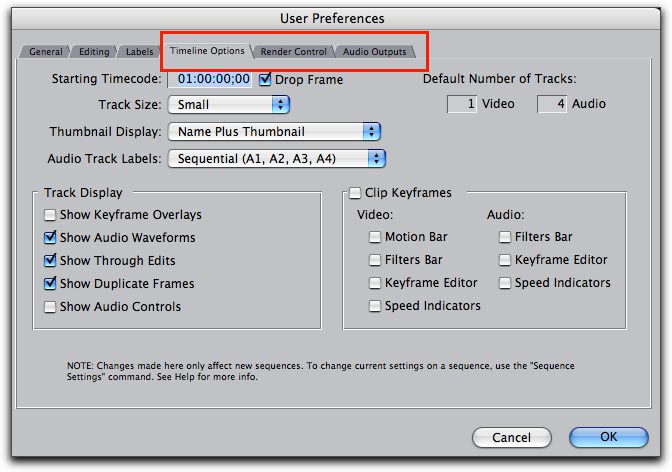
| User preferences | Final Cut menu > User Preferences |
| System settings | Final Cut menu > System Settings |
| Project properties | Edit menu > Project Properties |
| Clip Settings | File menu > Log and Capture > Clip Settings tab |
| Item Properties | Edit menu > Item Properties |
| Sequence settings | Sequence menu > Settings |
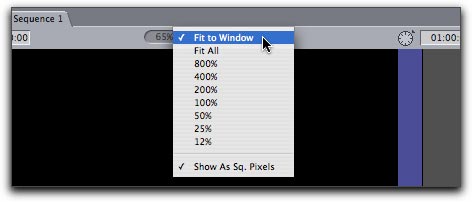
| View menu | View menu |
I know it all seems daunting, but we'll only examine those essential and basic of settings. Once you understand Final Cut's workflows, you can start to design your own variations depending on your needs.
To ensure consistent quality in a project, we want certain aspects of the videotape format to remain the same throughout the project. To break it down into its most simplistic, a typical workflows involves:
- source- determine source settings (particular info from the videotape)
- capture- choose settings for capturing video into the computer that match those of the source material
- sequence- create sequences for video that match how it was captured
- output- for the best quality (or similar quality), output to the same format as your sequence
Problems, some large some small, could happen if these steps are not pursued. For example, if you capture audio at a different sample rate than how the audio was recorded, you'll end up with audio that drifts out of sync. The audio would need to be re-captured to correct the issue.
Although there is no one overall one setting we can choose to change the properties of an entire project, here's the steps we choose in Final Cut to set up our presets for certain audio and video settings.
- Choose an Easy Setup that closely matches your source material.
- Modify Audio/Video Settings as needed to match your footage.
- Modify Log and Capture Settings as needed.
Let's take a look in more detail.
1. Determine certain source settings.
In other words, find out certain information about the video tapes you'll be capturing from. This doesn't matter whether the footage was shot on film and transferred to video, or any particular video format.
Video Format/Input Method
First off, Final Cut handles some formats "natively", in other words, using a similar method to encode/decode video in the computer just as it would happen when playing or recording to tape. These formats can come in directly into FCP from an output on the deck/camera (except IMX). There are many FCP presets for native formats, but you still may find they don't cover your needs completely and will need a little tweaking.
Native formats available in Final Cut 5:
DV, mini DV, DV Cam, DVC ProFinal Cut Pro can also handle non-native formats, which we'll define as any video format not listed above.
HDV
Sony IMX
DVC Pro 50 (Panasonic)
DVC Pro HD (Panasonic)
Non native formats include but are not limited to:
D1
D2
D5
HD Cam (Sony)
Digital Betacam
Beta SP
3/4" tape
VHS tape
Final Cut Pro can capture/digitize non-native formats by one of two ways:
- capture card
A capture card like AJA's Kona or Blackmagic's Decklink are capable of capturing a full array of different analog and digital formats. In this case, you would choose from settings installed with the capture card.
- convert to a FCP native format.
For example, you may shoot film, transfer to Digital Betacam then convert to DV for editing. Or in another example, you can take a 3/4" tape deck, wired out to a DV deck or camera, and the DV device is connected to your computer with a FireWire cable. When choosing settings in the above scenarios, you would select from a DV preset.
Other A/V Settings
In addition to the format or input method, there are other things to look for when choosing an Easy Setup. Since there are a limited amount of presets, they may not list or cover every possible scenario (or list all the attributes of the audio/video in the name of the Easy Setup). That's OK. We still choose an Easy Setup that looks as close as possible, and then make any changes as necessary afterwards. This includes such settings as:
- Aspect ratio of the video (standard or widescreen)
- Video standard
- Audio sample rate
- Frame rate
- Resolution
2. Choose an Easy Setup.
Once you know the basics of your videotape, then choosing an Easy Setup goes a long way toward choosing the all the audio/video settings for your project. It sets up the capture, sequence and output presets. Let's look at what to change, and what not to. Look for criteria in the choices that match your source footage as closely as possible.
Go to Final Cut Pro menu > Easy Setup. In the box that opens, click the button Show All.
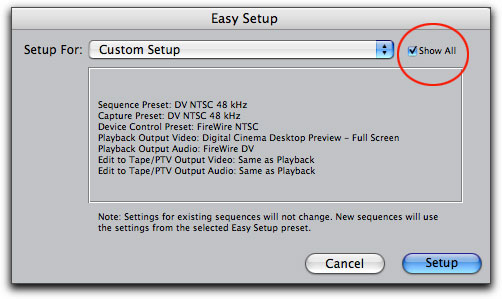
Then click on the menu to see the full array of Presets. If you have a capture card installed, then several more options would also be available.
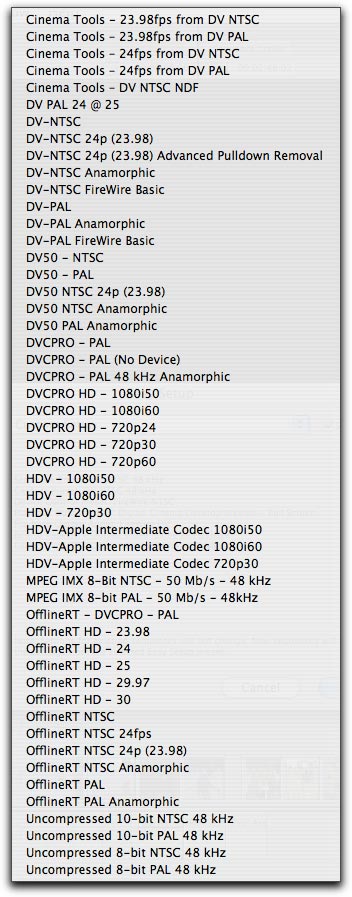
Choose a preset that matches your source footage as closely as possible and click the Setup button.
3. Modify Audio/Video Settings if needed.
If all your settings don't match the Easy Setup, or you're not sure, then go to Final Cut Pro menu > Audio/Video Settings. The items listed here were all derived by the Easy Setup you previously chose. Click on one of the tabs below to inspect the settings more closely.
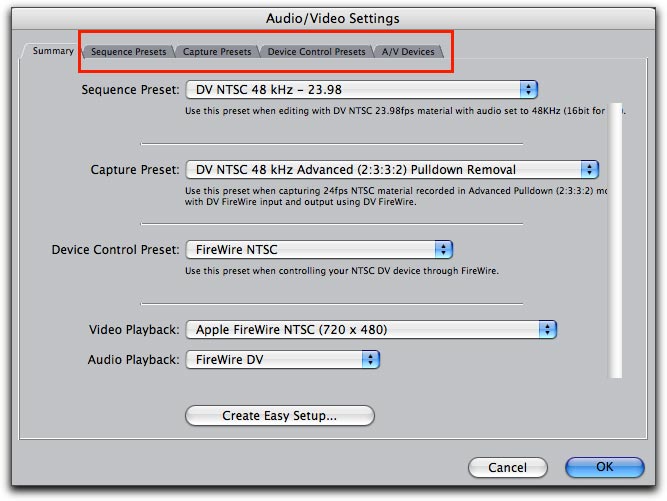
Things to look for when changing a preset from its default is the same list mentioned earlier: format, aspect ratio, standard, audio sample rate, frame rate and resolution. Let's take a look at these things in more detail:
Aspect Ratio of the video:
Standard Definition 4x3 (and DV 3x2)Standard:
Standard Definition 16x9 anamorphic
Hi Def 16x9 (1920 x1080)
Hi Def 16x9 (1280 x 720)
NTSC
PAL
HD (multiple formats)To understand what these above formats are attempting to indicate, let's explore one of them a bit, NTSC for example. Feel free to skip this section if its more detail than you want right now. NTSC standards include the following:
- A video system with 480 active horizontal scan lines (525 total lines)
- Displays at 29.97 frames per second
- Each video frame is made up of two alternating fields, known as interlaced scanning
- Video signal is analog (as opposed to the superior digital method)
- Video signal is composite (as opposed to the superior component method)
Although most often used video formats these days surpass the quality of the standards listed above, like using a digital component format such as Digital Betacam, we will generally, but not always, be looking for settings that are compliant with NTSC.
Audio Sample Rate:
48khz (on DV equipment, this correlates to the "16 bit" setting on the camera).
32khz (on DV equipment, this correlates to the "12 bit" setting on the camera).
Other: FCP 5 can support audios ample rates up to 96 khzIn order to determine the audio sample rate on videotape is to play the tape in a camera or deck. On the deck's or camera's display (or external "super" on a connected monitor), it will show the sample rate of the playing tape.
Frame Rate:
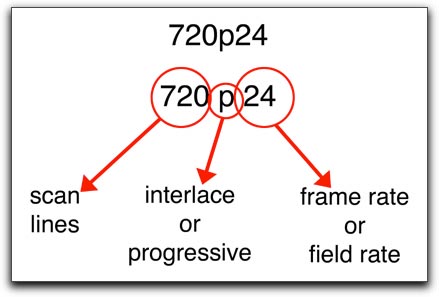
Although above we mentioned one of the things to look for NTSC (which is 29.97fps), or PAL (which is 25fps) there are settings that state NTSC but then also mention a differing frame rate accompanying it- like different 24p formats. This is technically incorrect to use the terminology this way, but its become common and an easy way to describe video that shares certain aspects of NTSC, but not others, like frame rate. Know your frame rate, specifically:
23.98
24
25
29.97
30
59.94
60
Resolution:
You may wish to do an "offline edit" before assembling a high quality version of the project. If you capture footage in a lesser quality, you can save on drive space, and edit with drives that are inexpensive. After the offline is complete, you can re-capture the footage at a better resolution or re-assemble on another system for a high quality version based on your offline edit.
If you don't have a capture card, you can use FCP's low res settings: all labeled as a variation of "Offline RT". You can store about 40 minutes of footage per Gb in Offline RT, but the trade off is the footage is sized to 320x240 so its blocky and not so pretty.
If you own a capture card, you will probably also get a more impressive looking offline resolution with the card to allow you to save on drive space with a higher quality than Offline RT.
Altering Presets In Audio/Video Settings
Here's an example of changing a capture preset from their defaults:
Click on the Capture Presets tab, then highlight the currently "checked" preset, and click the Duplicate button.
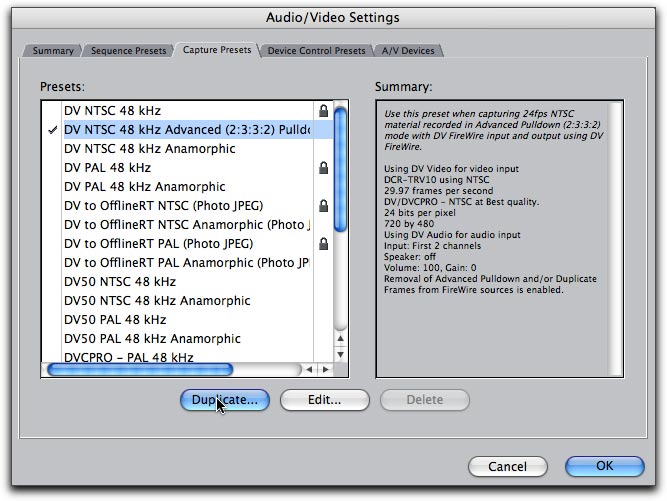
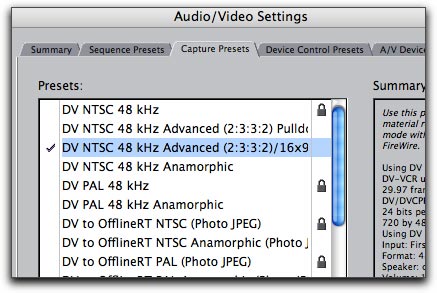
This opens this preset's editor. Let's say mostly everything on the checklist is covered by this preset, in this case the preset is for capturing material shot with a camera like the Panasonic DVX100A in 24 advanced mode. In this hypothetical scenario, let's say the footage is also 16x9. This there is no preset for this particular scenario, so we'll want to make one. In this case, we would check the anamorphic checkbox, rename the new preset and click OK in the window. You now have a new preset as shown below.
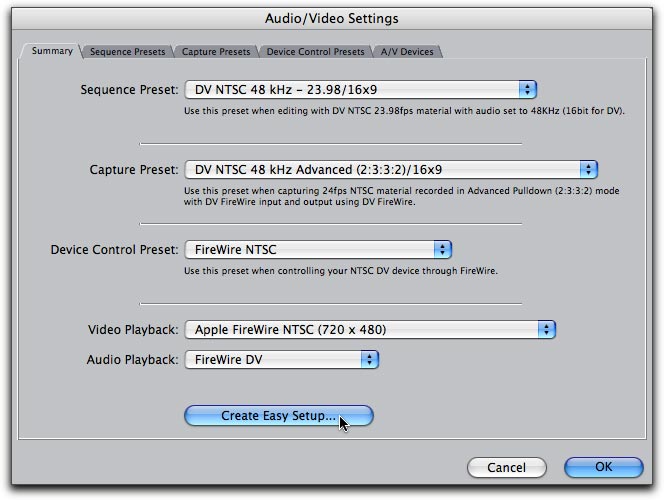
Creating a New Easy Setup
If you have modified several things in the Audio/Video Settings, you should consider taking an extra step, and create a new Easy Setup so that when using this configuration, you can simply choose your saved Easy Setup. This can be done on the summary tab on the Audio/Video Settings by clicking button Create Easy Setup.
4. Clip Settings.
Before you capture any footage, there is one more critical spot to check a couple settings: whether you capture video, audio or both. Also, and very important, is where you choose whether the incoming audio is seen as a stereo pair or mono tracks.
To overly simply, chances are if you capture from video shot with on an on-camera mic you shot stereo. On the other hand, if you shoot with a professional sound mixer recording to a separate device (referred to as double-system), or back to videotape, you would probably be choosing Mono. This is important as it determines how audio will sound when output.
For example, if a mixer records one character to one channel, and another character to another channel, then this audio should be captured as mono. When it plays back, it will be center-panned correctly and each character's audio will output equally to the left and right speakers in a stereo environment. If captured incorrectly as stereo, then each character will strangely come out of only the left or right speaker.
Find out for sure. Although this setting could be changed after capture, it would be more steps and subsequently make this a big waste of time.
Go to File > Log and Capture. This opens the Log and Capture window. Click on the Clip Settings Tab. Click on or off the checkmarks across from Video and Audio, depending on what you want to capture.
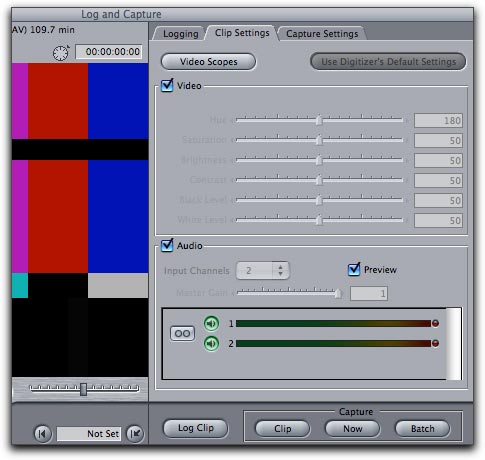
For audio, listed at the bottom of the window is the number of possible audio tracks that can be seen (and captured) by Final Cut. When a button is bright green, it is active and will be captured. To keep from capturing a track, click on the green button so it is darkened.
To choose for stereo or mono, click on this button so it looks like the following:
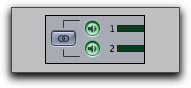
Stereo |
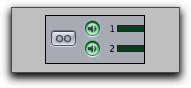
Mono |
One other quick note here. In the Log and Capture window, only video is seen by default while logging. To hear the incoming audio through the computer speakers while you are logging, then click on the button "Preview".