October 2, 2006
Fixing exposure problems in FCP
By Ben Bryant
For his classic Musical Comedy,"Kiss me, Kate", Cole Porter wrote the song, "Too Darn Hot". He was talking about the temperature but in borrowing his title I'm talking about a shooting situation where there is too much dynamic range in the scene, too much of an exposure difference between the foreground and background. Everyone who has ever been involved in a shoot on a bright, cloudless day knows the problem. It's tough enough on film but on video it can be devastating.
If you're working only on big "Hollywood" style movies you can stop reading right now. But, if like most of us, you're working with limited budgets which means you don't have a lighting/grip crew of twenty and several trucks full of equipment plus a genny or two, you know what I'm talking about.
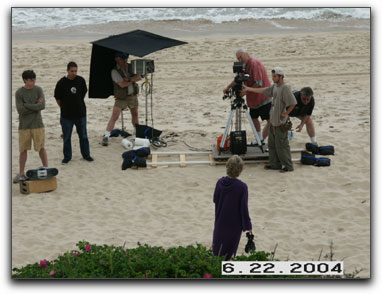
I had exactly such a situation recently on a shoot at Lake George, New York. I was director/editor on a project called "Elizabeth Hepburn's Better & Better Series", a set of healing support programs for surgery patients.
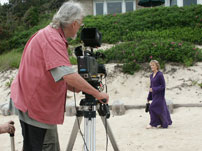
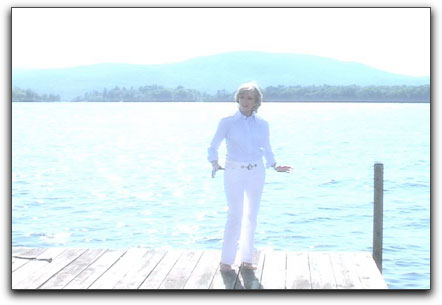
We were fortunate to have a world class DP, the multi-Emmy winning Bob Collins (Miami Vice pilot), who knows how to get the most bang for a buck. We were shooting Elizabeth standing on a dock with the brilliantly sparkling lake behind her. She kept going on about what a beautiful day it was and couldn't understand why we were tearing our hair out. Bob had two 1200 HMIs and some reflectors to work with but he kept telling me that the footage was probably gonna be unusable.
I didn't have an alternative so I told him we would shoot it and I'd see if I could fix it in FCP. (the old "we'll fix it in post" cliché)
If you've read any of my other articles you know I always put in my geek disclaimer. Here it is again; I'm an editor, not an engineer and I don't really understand why any of this stuff we do works (Thank god for Ken!) but I do know how to "work it".
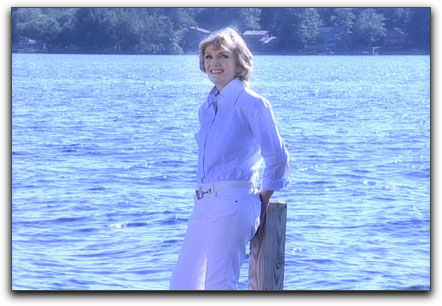
When I looked at the footage it was beautiful; gentle ripples in the glistening blue lake kicked tiny flares into the lens, the texture of the aged wooden dock was splendid, the distant mountains wore misty shawls and... Elizabeth's face, as Bob had predicted, was virtually in silhouette. Arrgghhh!
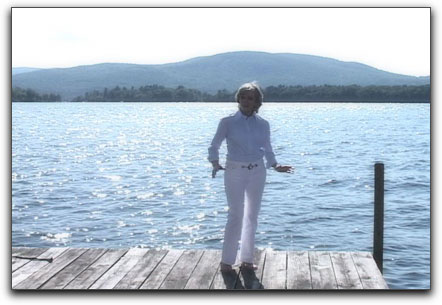
First I tried the obvious; messing around with brightness and contrast but when I got her face visible it looked... well, you might say the rest of the shot was a 'tad' burned out. Not good.
I needed to be able to correct Elizabeth's face, to match the exposure on the lake and dock, while not affecting the rest of the shot. Without boring you with all the things I tried that failed; here's what worked.
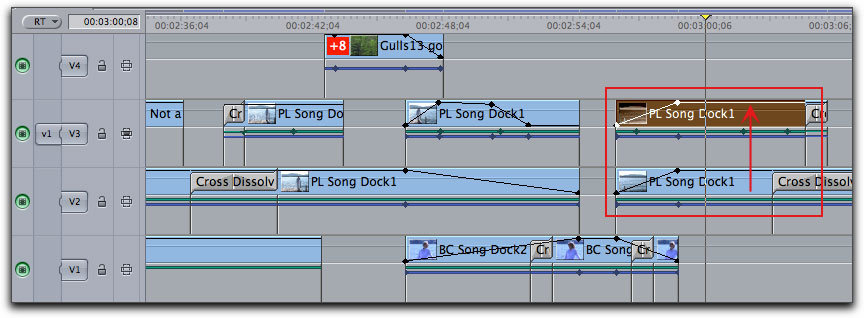
I placed a second version of the clip above the original clip on the timeline. The clip on the lower track will display the image as it is and the clip on the track above will have Elizabeth's face isolated using a mask, so that the face alone can be corrected. FCP will composite the two tracks together on playback.
There was already video clip on V1 so the original clip to be "fixed" is on V2. After I finished editing the dock sequences and had a cut that worked, I copied the clip of Elizabeth and pasted it on V3 right on top of itself. To make a copy of the clip, hold down the Option key, select and drag the clip up to V3. Holding down the Shift key at the same time as the Option key will constrain side to side motion as you drag the clip to the new video track.
BTW, when I'm planning to do an effect like this I always experiment with it on a separate sequence to be sure it will work. Once I know how to (or if I can) fix it, I do the edit on the real sequence THEN apply the effect. If you do the full edit on the real sequence, try the effect and it doesn't work, you have wasted a lot of time and created potential problems in reconstructing the sequence. If I could not have fixed these clips I would have had to find alternate shots to use.
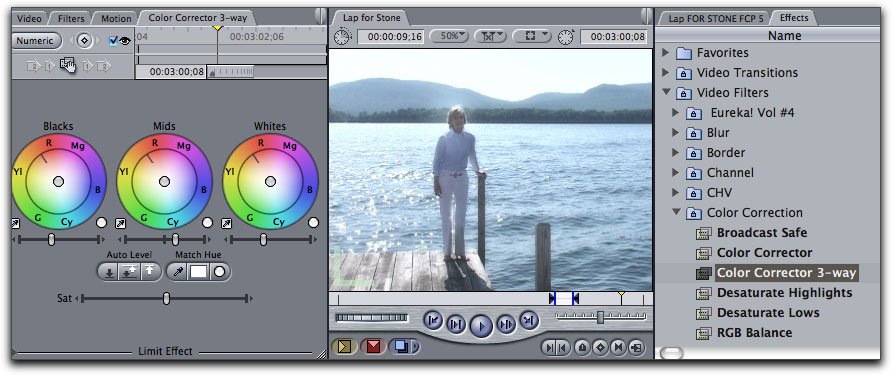
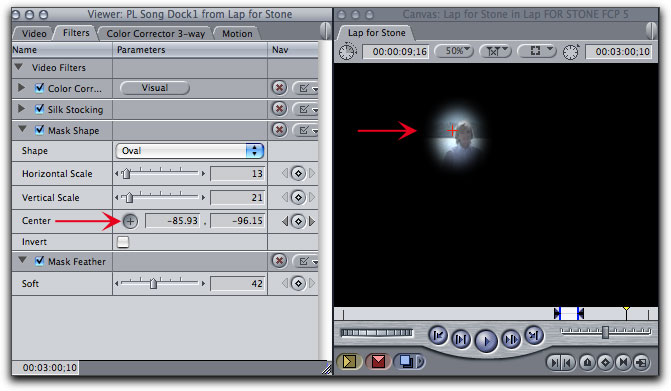
First I applied Mask Shape (oval) and Mask Feather (Video Filters > Matte) which softened and feathered the edges of the oval shape. Notice in the viewer window below; "Horizontal Scale" and "Vertical Scale". Each of them has a slider and a window with numbers. You can enter numbers if you like but I use the sliders which change the shape on the respective scale as you move them. Tweak them until the shape fits your image. (There are other shapes available so pick the one that works for the image you're correcting.) The Mask Feather filter also has a slider to that allows you to adjust the edge softness. Play around with that one, too. Lastly I used a small amount of the Silk Stocking filter. NOTE: I use the Silk Stocking filter in varying degrees on nearly all shots I do of women. It softens the "edges" and, if used subtly, is virtually unnoticeable.
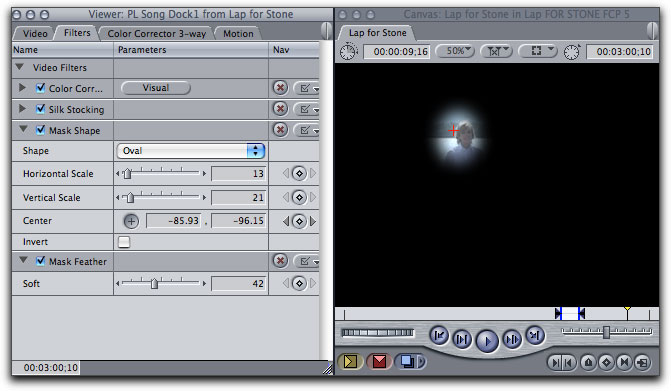
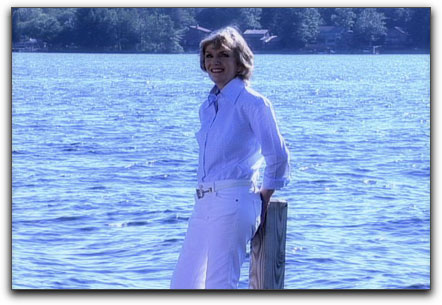
Next I color corrected the clip until her face was right by increasing the brightness in the mid-range and adding just a touch more saturation.
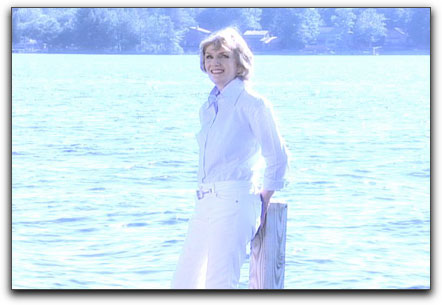
It looked wonderful and had an unintended but felicitous side effect; a sort of mysterious, subtle aura surrounded her face giving her a rather angelic appearance which was appropriate for the nature of the material.
But here's the tricky part: she moved -- and the camera moved. The answer; center keyframes in the motion tab. I applied, sized and positioned the oval mask at the head of the clip and put a keyframe in the "Center" section. I then went to the point in the clip where Elizabeth (or the camera) stopped moving and placed another keyframe. Then I scrubbed through the clip and whenever the mask was drifting off her face I moved it (using the cross-hairs that show up in the canvas when you click on "Center") and placed another keyframe. Because her movements and the camera moves were steady and even, this was not too hard and didn't require more than two or three adjustments in most of the clips.
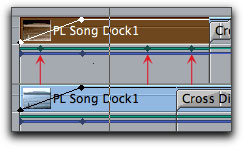
Notice the 3 key top frames under the selected clip. Those are Centers on the Mask Shape to keep it over Elizabeth's face as the camera pans and she moves. The 2 bottom keyframes are the opacity (Motion > Opacity) fading from 0% to 100%. You will need to tweak the opacity of the corrected clip until you get the look you want. On some of my clips the opacity is 100% and on some clips it's 90%.
It took some time but the results were worth it. Sometimes you can fix it in post!
Ben Bryant has acted in prime time TV shows and commercials and on Broadway, sung at the Metropolitan Opera and in Jazz clubs, produced over 1,000 TV commercials and dozens of industrial films, worked as First AD on features, produced and directed over fifty TV shows. Now he shoots, directs and edits video productions of all varieties. Visit Ben Bryant Digital Video
copyright © Ben Bryant 2006
are either registered trademarks or trademarks of Apple. Other company and product names may be trademarks of their respective owners.
All screen captures, images, and textual references are the property and trademark of their creators/owners/publishers.