
Feature Article
June 1, 2001
Feature Article
Video On The Road
Some simple tips for a successful location shoot
By Greg Matty
Introduction:
Last year, I spent seven weeks in Central America getting footage for a travel video I wanted to make. I learned a lot about what to do and what not to do, as well as what to bring and what not to bring while shooting on location in a foreign country. I thought it might be helpful for other folks entering this exciting world if I could share my thoughts and experiences from my trip.
The first thing I would suggest is figure out where you are going ahead of time and buy a travel book for that country. You will find answers to many questions, some of which you may not even have thought to ask. Find out how long you can stay in the country before you are required to leave and re-enter. This varies from country to country; 30, 60, or 90 consecutive days. Extensions are often available but must be applied for in advance. Make sure you are cleared to stay for the length of your shoot and leave a couple of days breathing room. It should go without saying that your passport should not expire while you are away.
A travel book will also have good information about weather. Tropical climates are notorious for their wet and dry seasons. Dry may mean wet and wet may mean monsoon. If you plan to go to a remote area, make sure it is normally accessible during the time of year you will be there.
Scanning the travel book will also give you an idea of what you can expect to pay for hotels and food, not to mention a rental car. Budgeting isn't fun, I know, I used to be a CPA, but you don't want to get halfway through your project and run out of money.
The last thing I did was to visit the health department. Exotic locations mean exotic diseases. Vaccinations aren't too expensive, and they offer great peace of mind. Some vaccines need a few weeks to incubate so plan accordingly.
Lastly, make a hotel reservation for at least the first night. After sitting on an airplane for six hours and at least one more getting through customs, the last think you will want to do is look for a place to stay.
I decided to get a hard shell case for my XL-1 even though it required me to disassemble the camera. Looking back I would rather have used a well padded soft sided case as it is more practical for storing every day items when the camera is not inside. I could also leave the camera in it's assembled state. Either way, make sure your case is certified to fit in an airline's over-head storage bin. If you go soft side, I would gently stuff it under the seat in front of me rather than risk it getting crushed in an overhead compartment.
Bring plenty of accessories with you as they may prove impossible to find at your destination. Within the case, I managed to stuff all the standard Canon XL-1 accessories and all of the following: Two additional two hour batteries; two filter sets; one pocket knife and multipurpose tool; a zoom lens controller (very important, without being able to get a perfectly smooth zoom, my video would be worthless); laminated white cards for white balance; head cleaning tape; lens cleaning cloth and a multi meter (voltage tester).
Depending on your needs, you might consider a lighting kit. I did not bring one as any interview I was willing to do, would have been done outdoors and available light would have worked just fine. I also did not have space for one. You can make your own lighting kit from a local hardware store, but professional ones break down much smaller, and have a more upscale appearance.
Now the only task left was to figure out how to get all this stuff on board an airplane in such a way that one person could handle everything. I knew better than to buy a huge camera case which would announce to the whole world that I was a prime target for kidnap, so I decided on a hard shell golf club carrying case. For only $100 I had a cavernous case that SHOULD provide protection for everything inside; if it was all properly padded. Once packed, I wrapped it with duct tape in a couple of places. This made it tougher to get into and took some of the strain off the buckles. Bring that roll of duct tape with you, it has a million uses.
I used both of them, though neither was absolutely necessary. If I had to choose just one of them, it would be the purifier. We have all heard stories about drinking the water in foreign places.
There has been a lot of discussion about whether x-rays will harm a camera, video or otherwise, and the associated tapes and film. The solution I was told was to request a hand search of the camera case and that would bypass the x-ray machine. It didn't work. On every flight I took, the security people insisted on sending the XL-1 and everything else in it's case through the scanner. To this date, I have never had a problem with tapes being damaged.
Wherever you go, and wherever you stay, make sure the hotel has a secured storage area. I ended up with a lot of stuff and I knew I couldn't take it all with me to each location and this solved my problem. I would pack only enough clothes for three days and pack everything into the golf club case. My backpack would stay at the hotel with my non-essentials and the XL-1 would go with me in it's hard shell case. I used this system throughout Costa Rica and Belize.
An alternative way to get around is to hop on a tour bus. For the most part this worked pretty well. This saves you the stress of driving in a foreign place, and the tour operators will often stop at interesting places along the way that you might otherwise have missed. The only problem is when you want to stay a little longer somewhere, or when someone else's seat has a better angle for something you want to get on tape. If you were alone, you could have stayed as long as necessary and gotten whatever shot you wanted. Unfortunately, private tours are expensive and you need to keep your budget in mind. Most of my traveling in Costa Rica was either in a shuttle bus or with tours. Belize was a little tougher to get around, so I decided to rent a car for a week. I paid over $400 for this 1995 Suzuki Samurai
Carrying your equipment around may prove to be the toughest part of a location shoot. I had a gym bag, which held the XL-1, slung over one shoulder, and the tripod over the other. I have since purchased a backpack style carrying case and consider it to me a good investment. When using the gym bag, I had to constantly hold onto it to keep it from bouncing around. The same is true for the tripod. My thighs and hips were bruised for seven weeks straight as this was the only method I had at the time to carry my equipment.
You tend to stick out like a sore thumb anytime you have a video camera, but do what you can to keep a low profile. While walking around scouting out your location, keep your camera in it's case. Out of sight out of mind goes a long way toward not drawing attention to yourself. Pack and unpack your equipment in your hotel room, never outside. You don't know who is watching and if a thief knows where you are staying and he sees you leave your room without your equipment, it may not be there when you return.
Part I: Planning the trip
 Find out if the voltage is 220 or 110. You may need to buy a converter at a travel store. While you're at it pick up a couple of electrical socket adapters. A few of your items may need a three prong outlet but one may not be available where you are going. On top of that, most modern plugs in this country only fit into the wall socket one way as one prong is wider than the other. Get an adapter for this as well.
Part II: What to bring ?
 I had never been on location before and I had a lot of questions only time would answer. How will the XL-1 hold up in the heat and humidity of Central America? What if something breaks down, how will I get it fixed? Can I get any spares while I am away? Based upon these and other questions, here are some of the items I brought and a photo that reconstructs what all this equipment looked like.
 Now it was time to supplement my XL-1 with any additional items I might need. Not knowing a whole about tripods, I selected the large Bogen model you see pictured. As one observer in Belize put it, "that's a lot of tripod for the jungle!" Point well taken, and next time I will find a little smaller unit. I thought an interview might go over really well on a project like this so I brought along a wireless microphone. What about all those wildlife shots where I would need to cut out ambient sounds? A Sennheiser directional microphone filled the bill nicely. Rounding out my video accessories were 35 DV tapes; several large plastic bags to keep things waterproof, a silver light reflector disc and one for diffusing light as well; and last but not least, a microphone wind screen.
 If there is the slightest chance of rain, invest in a good rain cover. A plastic bag will work, but if there is any wind, the bag will slap around and your microphone will pick that sound up. If you go the bag route, don't seal your camera up as fluctuating temperatures may cause condensation. There is a product available that you can place inside of a waterproof bag that absorbs moisture and prevents condensation. I can't recall the name, but you can probably find it at a dive shop.
 There are a few additional things that I thought might be helpful for traveling in a foreign country. They weren't necessarily video related, but I think it is worth mentioning them. A waterproof battery powered flashlight is a good idea. This proved to be a very worthwhile purchase as there were many occasions when I had to return to a hotel in the dark. Also, some areas in Belize were rumored to not have electricity 24/7 and I did not want to be without some source of light. This never materialized, but it was nice to be covered. I would be out of town on my 30th birthday , so my parents bought me a water purifier and GPS for the trip.
Part II: Getting around your destination once you arrive
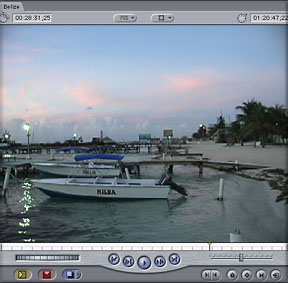
 While on location, I traveled by transit bus, shuttle bus, rental car and airplane. A rental car is the best way to go, but is also the most expensive. On the other end of the scale is public transportation. You meet a lot of interesting people on a local bus, but it takes a long time to get where you are going. In Costa Rica shuttles ran to most of the popular tourist destinations and they were much more comfortable to travel in. They cost more than a regular bus, but getting to your destination a couple hours earlier might be worth it. Traveling by plane is the most expensive, but you might be able to get some interesting shots. This one was taken while I was flying co-pilot in Belize.
 If you don't have too far to go, you should consider hiring a cab. When I needed to get somewhere and I did not have a car, I just took a cab for a few dollars and asked the driver to pick me up at a predetermined time. They always wanted a deposit for this, but I never got stiffed. This method can give you a lot of the flexibility of a rental car, but it is much cheaper.

Miscellaneous points to consider
You may need special permission to shoot in some areas. If you are in a public place, keep your eyes peeled for any notices or restrictions about commerical photography. In Belize, I had to pay $100 per hour for commercial permits to take video at the Mayan cities. Other places did not require anything more than paying an entrance fee

Keep a copy of any permit that you aquire in case you need to prove you had it at some point in the future. If you intend to tape anything that is on private property, make sure you get approval to do so. Most people will be flattered that you bothered to ask ahead of time.
 Video cameras tend to draw a crowd so be prepared for it. I had a few people ask exactly what type of project I was working on. One person thought I might be working for the Discovery Channel and another, the National Broadcast Company. To avoid this, I did a lot of my shooting in the early morning hours when nobody was around. I prefer not to be disturbed and the fewer people I have talking in the background the better. Here is a great tip. If you want to be left alone while taping, put on a set of headphones. Just plug them into your camera and everyone will assume you won't be able to hear their questions and they will wait until you are done to talk to you.
At some point, someone will tap you on the shoulder and ask what you are up to. I usually just stopped recording and answered their questions politely. Sometimes I let people take a look through the viewfinder and pan the camera so they would have some idea what I was doing. Little things like this can mean a lot to some people. Take these little disturbances as a compliment.
The last little bit of advice I would like to give is to remember to enjoy yourself. Location shooting presents all the normal challenges associated with getting good images on tape, with the added complexity of being in a strange place. When you finally get around to logging your video and begin cutting your project, there is a good chance you will wish you were back on location. Try to keep that in mind when the days get a little long or the pace slows to a crawl and you feel like nothing is getting accomplished; most people only dream of doing such things, you are living it.
copyright © Greg Matty 2001