June 12, 2006
Updated September 26, 2006 - 640 x 480
By Ken Stone
I just got my first iPod, a 'video' iPod and, of course, I went to the iTunes store where I purchased several TV shows (Extreme Engineering) and a number of music videos. Great fun. I then began to wonder if I could convert some of the video that I use in Final Cut Pro for use on my video iPod. In the past this has been problematic because in order for video to play on an iPod, a special setting, "x264 Baseline profile", was not available to us. This feature is now available in OS 10.4.6 with QuickTime 7.1. So I started to experiment. Note that while I am exporting from the FCP timeline, FCP is not required. You can use QuickTime Pro as a stand alone converter which will work with most video formats that can be opened in QuickTime Pro, except for MPEG 1 and some MPEG 2 formats. There are two different ways to export video to the iPod.
Quick and dirty one step export.
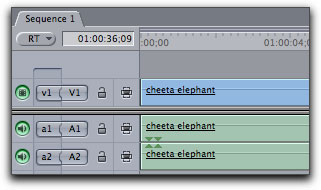
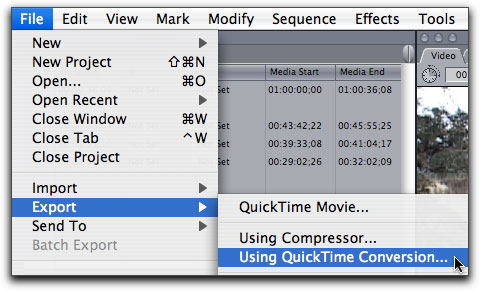
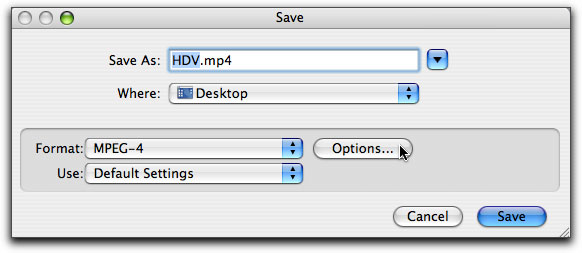
I placed a 720 x 480 DV NTSC clip on my timeline, and then from the File menu > Export > Using QuickTime Conversion.
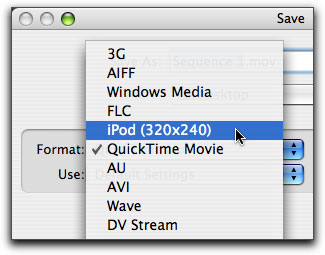
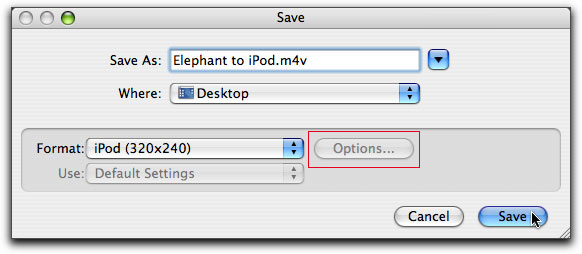
In the QuickTime 'Save' window, Format drop-down, I chose 'iPod (320 x 240). You will note that once 'iPod (320 x 240)' has been chosen, the Options button becomes grayed out. This is a one trick pony.
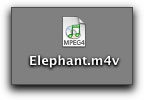
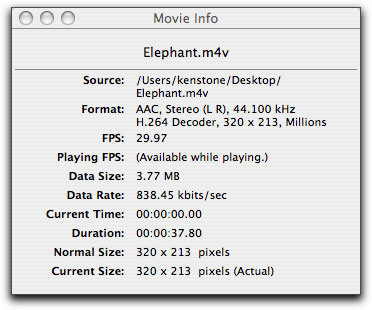
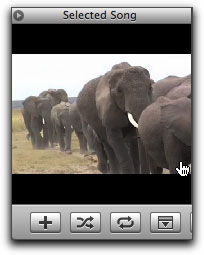
After encoding has been completed, the iPod .m4v file will appear on your desk top, note that the icon displays the iTunes symbol. Opening the movie in QuickTime Player and selecting 'Show Movie Info' from the Window menu, reveals that this file is encoded in the H.264 format and it's size is 320 x 213 and not the standard 320 x 240 size of the iPod. DV NTSC video, at 720 x 480, has a pixel aspect ratio of 3:2 (DV is non-square pixels) and during export, the video should be scaled to 320 x 240 (4:3) but isn't. Unfortunately, this aspect ratio error causes some distortion of the image, the vertical height of the image is squeezed down.
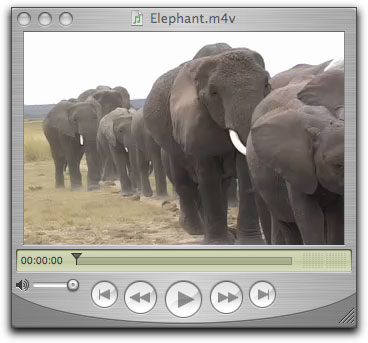
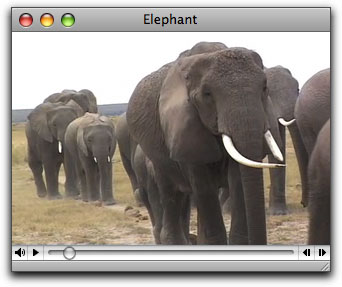
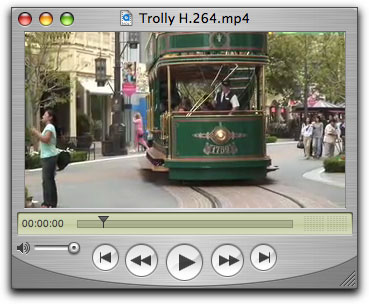
While this is a quick way to export NTSC DV to the iPod, because of the distortion, I recommend using the export method describe further on in this article which will export to the iPod as 320 x 240 with no distortion. Note that when QuickTime Player is used, the Player window will display the movie without pillar or letterbox black boarders. After encoding, I like to open the movie in the QuickTime Player and test it before dropping the movie into the iTunes library.
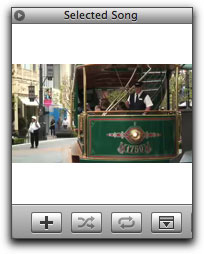
To move the movie to the iPod first requires that it be placed into the iTunes library. You can accomplish this by either double clicking on the movie icon, which will load it into the library automatically, or, you can drag the movie directly into the library.

Once the movie is in the library, selecting it will display the movie in the lower left-hand corner of the iTunes library, clicking on the movie will open it in the iTunes player window.
So ... using the above export process with DV NTSC footage in FCP is very straight forward, one click really, thought some distortion is introduced and the aspect ratio is incorrect. The following export process will produce iPod video with the correct aspect ratio and no distortion.
A better export process.
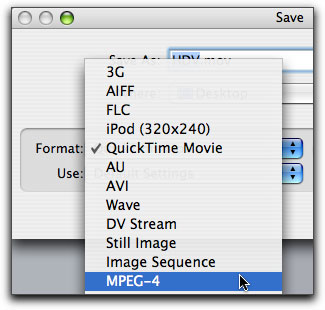
There are other video aspect ratios that we work with in FCP, like letterbox (16 x 9) video. Having access to a Sony HDV camera, I was able to capture footage from the camera in HDV, the Apple Intermediate Codec and SD DV, (down-converted from the camera during capture). After capture, I placed some HDV footage on the timeline. This footage is 1440 x 1080i. With In and Out points set around my test video, from the File menu > Export QuickTime with Conversion. Instead of selecting 'iPod (320 x 240)' as the export Format, I have chosen MPEG-4.
With MPEG-4 selected you will notice that the Options button is available and it is in the Options settings that we have the ability to save the HDV video for iPod playback.
Click on the Options button to open the settings window, shown below at default settings.
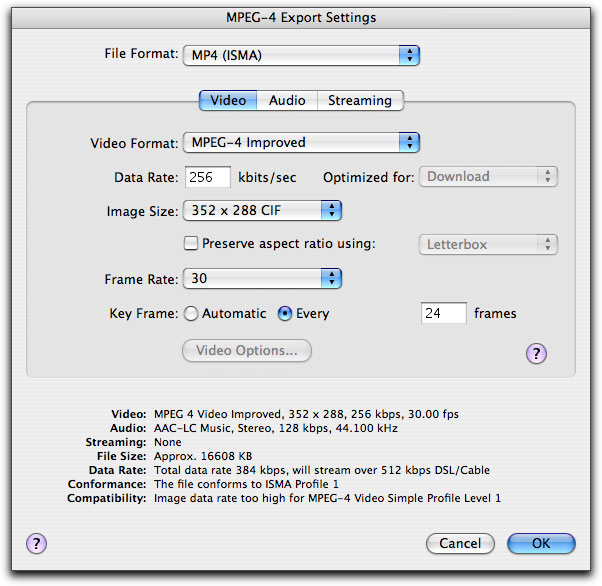
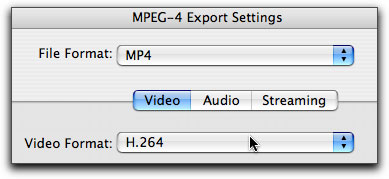
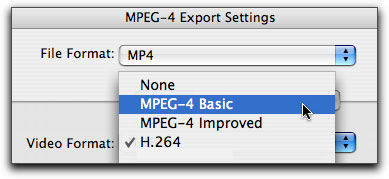
We will need to change most of the settings. Starting at the very top, File Format, change to 'MP4'.

The next setting is Video Format which needs to be changed to H.264.

There does seem to be a very wide range of suggested Data Rates for making iPod videos. The maximum iPod data rate has been given as 768 kbits/sec, but caution is advised, if the data rate spikes above this figure, the movie will not play. I have seen suggested rates as low as 500, but generally you see data rates of around 700 suggested. After testing I have decided to use a data rate of 720 kbits/sec, leaving some headroom for data spikes.

In the Image Size drop-down menu, choose Custom and then enter 320 for the width (the width of the iPod screen) and 176 for the height as our HDV video is letterboxed video. 320 x 176 is the correct aspect ratio for letterbox (16:9) video.

Leave the 'Preserve aspect ratio using' unchecked. When this box is checked three options become available. Two of them, 'Letterbox' and 'Fit within size' cause the video to pillerbox, (don't ask).
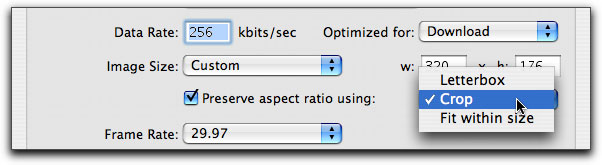
The third option, 'Crop', is demonstrated below. On the left is an unaffected image, on the right, a Cropped version. Notice that while the vertical aspect of the image has been enlarged (stretched), the horizontal aspect has not. This does makes the image larger but also introduces a good deal of distortion.


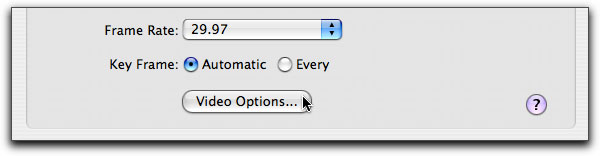
The Frame Rate setting defaults to 30 fps, but as we are working with 29.97 video, change the setting to reflect this figure. For the best results, always use the native frame rate of your source video. If you are working with video that has a frame rate of 23.98, enter this figure in the 'frames/sec' box. I have set the 'Key Frame' to Automatic.

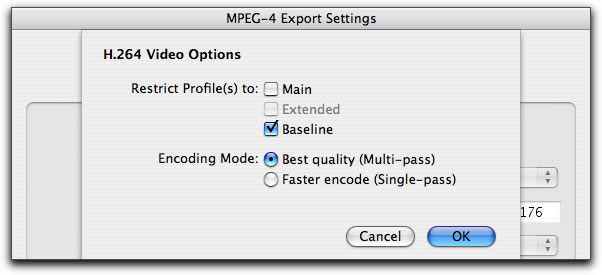
Click on the 'Video Options' button. It is here that we enable the video to be iPod playable.
The "Baseline" profile must be selected in order for our video to play on an iPod. Uncheck the "Main" profile box. Even though it takes twice as long to encode video when the 'Best quality (Multi-pass)' option is selected, the difference in the quality of the finished video is very noticeable. Multi-pass is worth the time it takes to encode.
This is the MPEG-4 Export box after entering our settings.

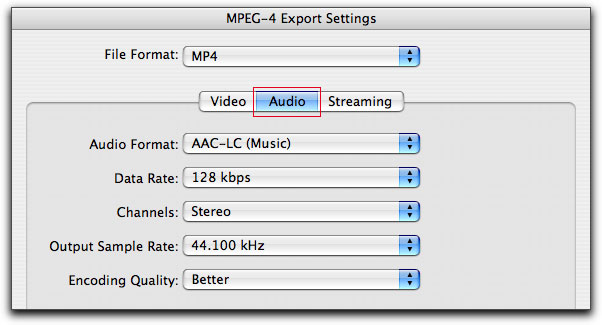
Click on the Audio tab, the default audio settings can be left as they are. While you can increase the 'Data Rate' for slightly higher audio quality, remember that an increase in this audio rate will use up additional iPod playback bandwidth and this could cause playback problems. Adjust with caution and always test.
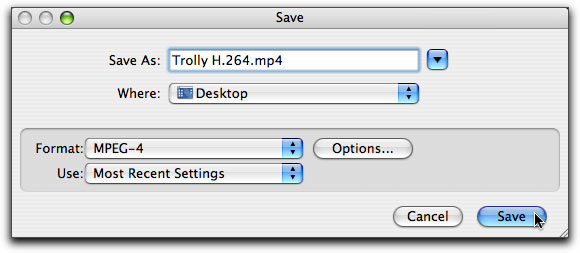
Once you finished your settings click Okay and then Save.
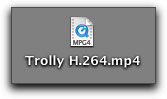
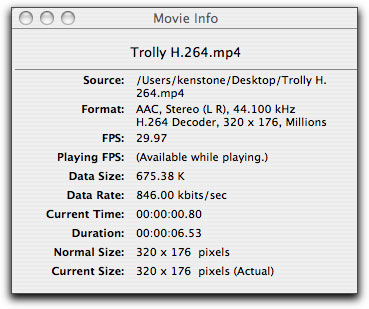
When the process is complete you'll see the movie icon on your desktop, it is different than the icon made using the Export to iPod (320 x 240) process. Opening the file in QuickTime Player, get Movie Info, shows the encoder as H.264, Frames per Second at 29.97 and Size as 320 x 176 (widescreen).
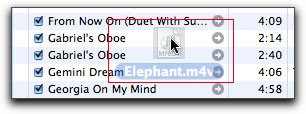
In the iTunes library.
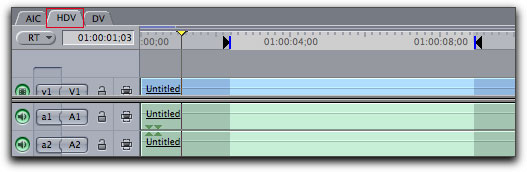
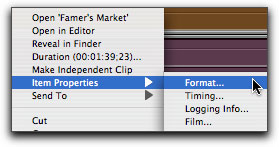
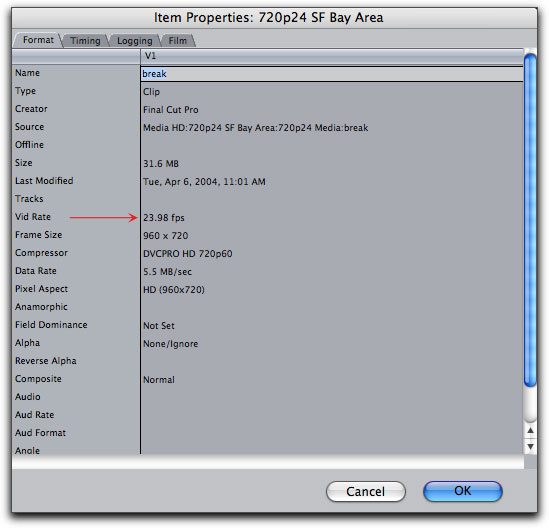
I wanted to test some additional video formats, so I worked with video clips shot in the DVCPRO HD codec, 720p60 (960 x 720) and 1080i60 (1280 x 1080). As I mention earlier, we always want to work with the same frame per second rate as the source video. You can check the vid rate by control (right) clicking on a clip in the timeline and selecting Item Properties > Format. The Item Properties window will display the vid rate.
The finished MPEG-4 Export window for this 720p24 video is shown below. All settings remain the same except for the 'frames per second' rate which, for this video, is 23.98 fps. Even though I worked with two different formats and frame sizes, 960 x 720 and 1280 x 1080, the 'Custom' Image Size remains at 320 x 176 for all letterboxed (16:9) video.

If you are working with SD DV NTSC non-letterbox video, use the same settings shown above except in the 'Image Size' drop-down > Custom > enter 320 x 240.
I have been working with the H.264 codec to create videos for the iPod, but H.264 is not the only format available to us for use with the video iPod. We can use MPEG-4 as well.
One important difference between the two different codecs is the maximum video dimensions allowed. Apple's position is that the maximum window size for H.264 is 320 x 240, while for MPEG-4 it is 480 x 480. If you plan to view your video from the iPod to a TV screen you may wish to use the MPEG-4 encoder as MPEG-4 has a maximum window size of 480 x 480 and therefore has more pixels for displaying on a TV and, thus, a bit better quality. It's a mixed blessing though, because playing back files on your iPod that are larger than 320 x 240 will cause the iPod to scale down the video on the fly, which can cause the frame rate to drop, deteriorating playback performance. While Apple recommends 320 x 240 and 480 x 480 for the two formats for the iPod, it seems that these recommendations are very conservative. I have seen published sizes of 480 x 160 for H.264 and 784 x 288 for MPEG-4. I have not worked in any of these larger sizes because I don't intend is to use the iPod for TV playback. I did check my H.264 videos on TV, not bad. While there is a difference of opinion as to what the maximum size of iPod video should be, there is absolutely no debate on the maximum bit rate setting for iPod video, Maximum for H.264 is 768 kbits/sec and 2500 kbits/sec for MPEG-4.
I prefer H.264 for the iPod because it creates higher quality video at smaller file sizes than MPEG-4. The videos that I created for my iPod using H.264 are equal in quality to some of the videos that I have downloaded from the iTunes store. Now ... I have to stop playing with my new iPod and get back to work.
iTunes and iPod specs updated.
September 12, 2006 was 'Showtime' for Apple's Steve Jobs. Of interest to us here was the announcement of a iTunes Movie download service. From this point on, all iTunes music videos, TV shows and movies will have a new larger format. This changes the maximum width of iPod video from the old size of 320 pixels to 640 pixels, effectively increasing the quality by 4X.
Immediately after the announcement both iTunes and QuickTime were updated to handle this new iPod video size. There is an iPod 'firmware' update as well. If you export from the FCP timeline directly to iPod using the 'Quick and dirty one step export' method at the beginning of this article, your exported videos will now be 640 x 480 if you are working with DV video. If you are using the 'A better export process.' process, second part of the article you will now use the 640 pixel size for your width. Here are the new iPod video specs posted by Apple.
Video formats supported: H.264 video, up to 1.5 Mbps, 640 by 480 pixels, 30 frames per sec., Baseline Low-Complexity Profile with AAC-LC audio up to 160 Kbps, 48 kHz, stereo audio in .m4v, .mp4, and .mov file formats; H.264 video, up to 768 Kbps, 320 by 240 pixels, 30 frames per sec., Baseline Profile up to Level 1.3 with AAC-LC audio up to 160 Kbps, 48 kHz, stereo audio in .m4v, .mp4, and .mov file formats; MPEG-4 video, up to 2.5 Mbps, 640 by 480 pixels, 30 frames per sec., Simple Profile with AAC-LC audio up to 160 Kbps, 48 kHz, stereo audio in .m4v, .mp4, and .mov file formats
Enjoy,
--ken
copyright © www.kenstone.net 2006
are either registered trademarks or trademarks of Apple. Other company and product names may be trademarks of their respective owners.
All screen captures, images, and textual references are the property and trademark of their creators/owners/publishers.