May 23, 2005
By Andrew Balis
With the fancy and long awaited addition of multi-cam editing in the new release of Final Cut, and its slick integration and ease of use, you might be tempted to see a future where you only edit "on the fly". You just play back your multi-clip angles in the Viewer window and click on which angle becomes the active one in the Canvas.
But multi-cam just helps you rough out the different angles. Whether you start out cutting a scene with multi-cam editing or not, you'll still refine the edit one cut at a time, whether using the ripple or roll tools. Here's where you can also use the Viewer window in a different way, other than it just being a source window, or a multi-cam display. In fact, if you open clips from the Timeline into the Viewer, you can ripple, roll or slip the clips directly in the Viewer. And this is not a new feature! Its there in earlier versions of Final Cut as well.
Ripple Editing in the Viewer
Here's the basics on rippling in the Viewer:
1. Double click a Timeline clip into the Viewer. In this instance, let's assume we want to trim the tail of the shot, its out point.
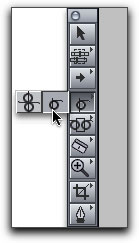
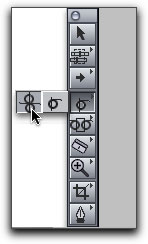
2. Click on the Ripple tool in the Tool Palette (or press R twice).
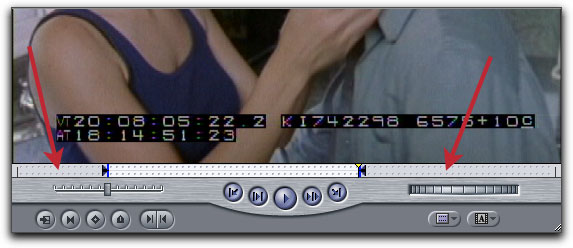
3. Use the Viewer playhead to find the new out point.
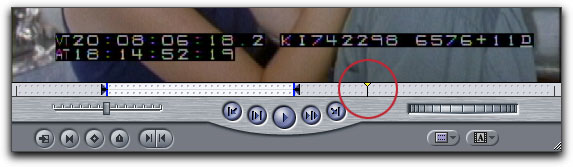
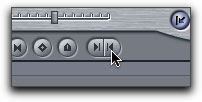
4. Press O on the keyboard or press the Mark Out button.
This marks a new out point for the clip in the Viewer and in the Timeline. Because the ripple tool was "active" when the new out point was marked, you perform a ripple edit and you'll notice that the clips to the right of this edit will shift left or right depending on whether you shorten or lengthen the clip.
Before edit

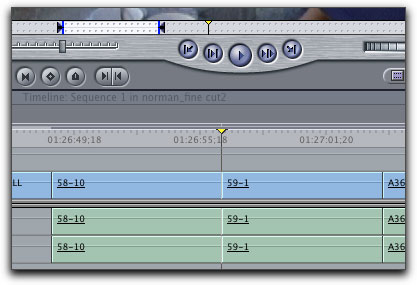
After edit
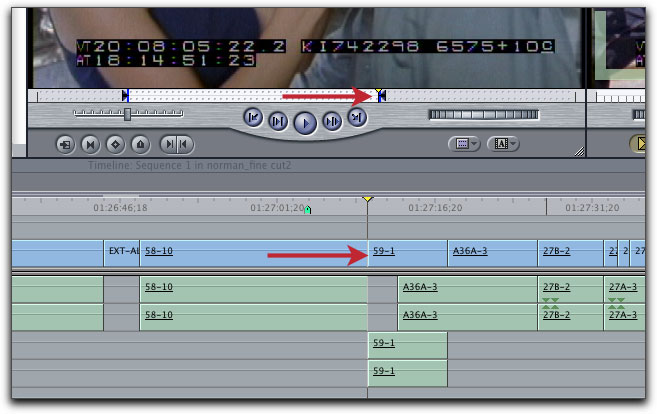
As another point of reference, clip 58-10 now extends past the marker that was set.
One of the great things about Final Cut is that there's always more than one way to do something, so you may want to ask if this method is just going to fill our heads with useless, excess information. On the contrary, I like working in the Viewer because it gives you flexibility you just don't have in the Timeline.
This is especially helpful when you want to extend a clip's length, as was shown in the previous example. When you open the clip into the Viewer, you can play through the handles of the clip, the portions of media not currently used in the Timeline (outside the current in and out points). Its sort of like being able to preview a new edit before making it. If, on the other hand, you were to make the edit directly in the Timeline, you wouldn't be able to preview the new in or out point first.
After finding the right spot in the Viewer, select the ripple tool and mark the new edit.
Roll Editing
You can also do a roll edit in the Viewer. Since a roll edit affects the duration of two adjacent clips, any roll edit done in the Viewer would still affect the previous or next clip in the Timeline.
To do this, open a Timeline clip into the Viewer and select the Roll tool.
Then set a new in or out point.
Before edit
After edit

The extension of 58-10 in the Viewer shortens the following clip in the Timeline, 59-1, just like any roll edit.
Audio editing
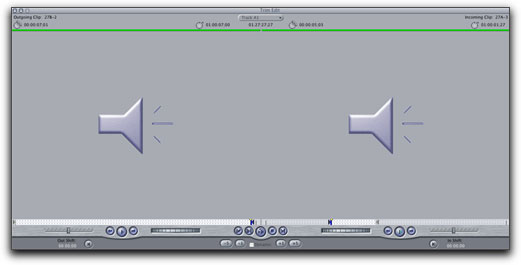
Since the previous examples and other edits can also be done in the Trim window, let's focus on those things that are uniquely beneficial when edited in the Viewer. My favorite use of this is when working with audio, specifically dialogue or interview footage, but it really applies to all audio. When cutting two clips together, you may want to isolate and examine one clip at a time in the Viewer. These are things that the Trim window doesn't display.
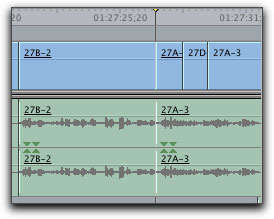
For instance, in the next illustration, notice that this clip opened into the Viewer reveals that part of the dialogue is clipped off as it falls outside of the out point.
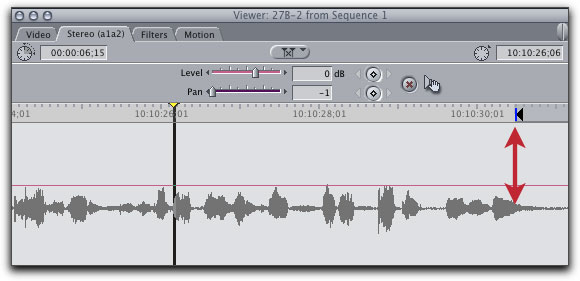
Not something that you could spot in the Timeline or Trim window.
| Timeline | Trim window | |
 |
While in the Viewer, you could then move the playhead to a point after the waveform ends, select the Ripple tool, then click a new out point.
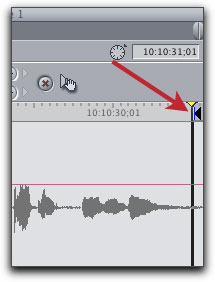
The Timeline would again ripple to reflect the change.
Slip Edits
This edit can also be done in the Viewer. A slip edit changes the portion of media used for a clip, but keeps the same duration, using an earlier or later section of clip. The next illustrations show in and out points before and after a slip edit.
Before edit

After edit

There are some advantages to doing this in the Viewer. As you slip a clip in the Timeline, the Canvas will show a two up display of the new in and out points for the clip, but the two up is rather small in comparison to the window size.

If you do this in the Viewer, you'll get bigger two up displays, as you'll see next.
1. Open a Timeline clip into the Viewer.
2. Select the Slip tool from the Tool Palette.

3. Click and drag on either the clip's in or out point.
As you do this, both the in and out points will move together as one. Additionally, instead of a two up display limited to the Canvas, the Viewer will preview the new in point, and the Canvas transforms to show the new out point for the clip.
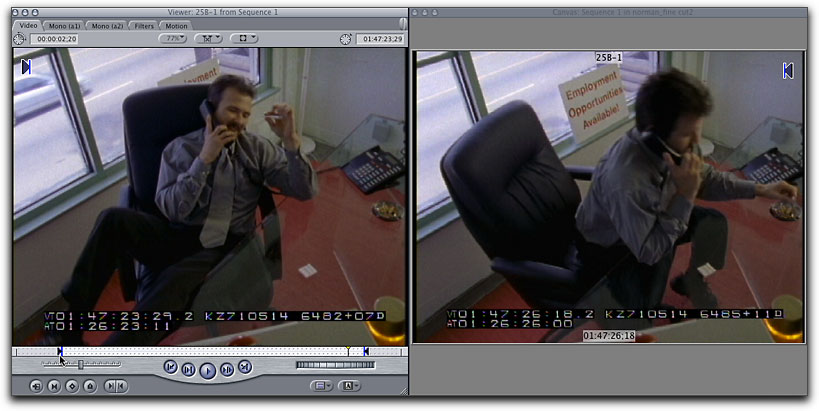
This, by comparison to the Timeline method, gives a larger view of your preview in and out points.
Additional tip: you don't even need the slip tool active for this edit to work. If the standard arrow Selection tool is active, hold down the Shift key as you drag the in or out point. This will also produce a sip edit, without having to select its tool first.
Hope you enjoy.
Andrew Balis is a cinematographer, editor, post production consultant and Apple certified instructor teaching classes in Final Cut Pro to industry professionals at Moviola Education and UCLA. He is co-author of the Apple Pro Series book Advanced Editing Techniques in Final Cut Pro 4. Andrew co-authored the original Apple certified curriculum for beginner, advanced, and effects classes developed at Moviola Education, and wrote the Final Cut Pro curriculum for the Apple Education/CNN Video Journalism classes offered in the K-12 market.