January 12, 2009
YouTube has been a great source of entertainment for those who like to see a child accidentally hit their father's nether regions during batting practice. YouTube has also been a significant factor in the proliferation of videographers hoping to share their projects and media to others around the world. Never the less, I have not been a fan of what I see there as, in more cases than not, the image quality has been deplorably poor, loaded with artifacts, scaling and poor resolutions.
Not too long ago I discovered the Vimeo.com website where one can post their own films as well as view others. The basic vimeo service allows up to 500 MB of download per week, or for $59.95, you can get 2 gigs of downloads, weekly, for a year. The quality of Vimeo's SD uploads is far superior to anything I've seen on You Tube, and many of the films I have viewed show an incredible amount of creativity and professionalism.
For those who might be initially trying it out, the conundrum of getting your multi-gig project down to size so as to download your film in HD might be problematic. Thus, the purpose of this tutorial, which will be based upon using a five minute sequence. .
Our first step is to open Compressor. Here we click on the Settings tab, and then scroll down to the Custom Folder where we will create a custom setting for encoding HD media for upload to Vimeo by clicking on the Add/+ button and go down to Quicktime Movie.
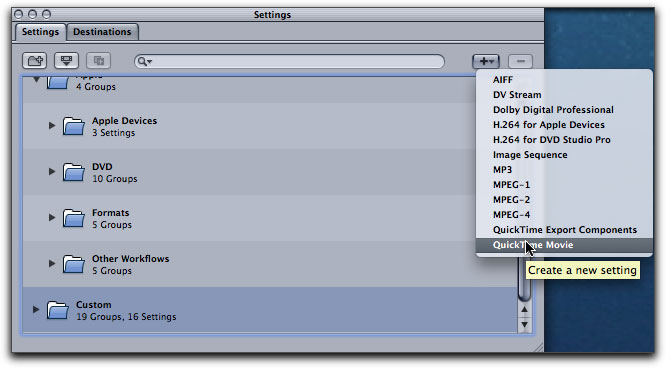
Once done, you can provide your new preset with a name that will help you recall just which setting it is for, for future uploads. "Vimeo HD Encode" is as good as any.
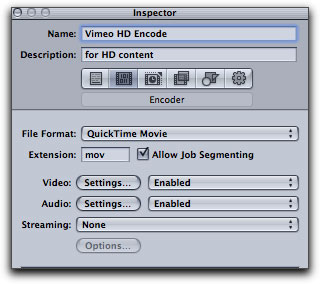
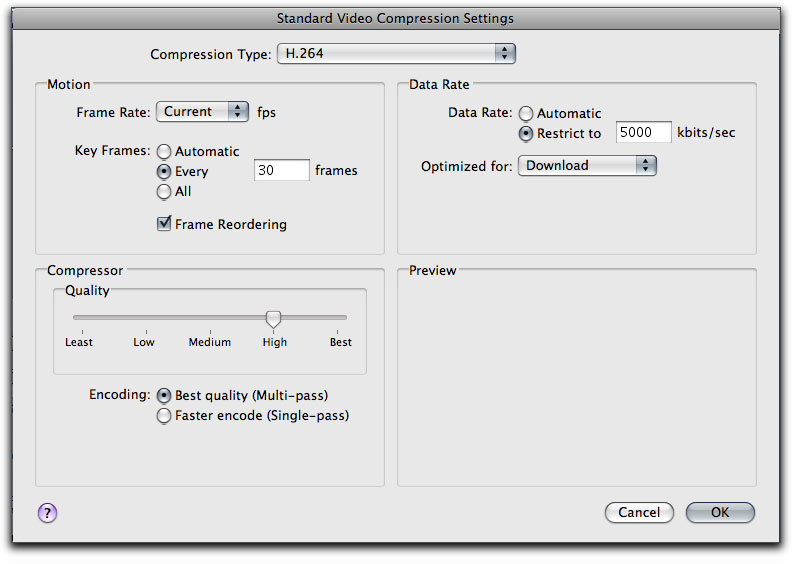
Once named, in the Encoder tab, 2nd tab from the left, we will change our video settings. Click on the settings button. This will bring up our window where changes can be made. We will first change our Compression Type to H.264. Under Data Rate we will change from Automatic to 'Restrict to and type in 5000 kbits. We then adjust our Key frames to every '30' frames and keep our Compressor quality setting set to High and encode using Best Quality (multi-pass). Click on OK.
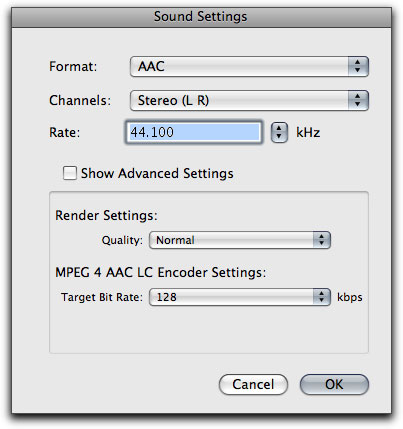
Next we go to the Audio settings and change Audio Format to AAC, and the Sample Rate to 44.1. We will keep the Target Bit Rate at 128 and click OK.
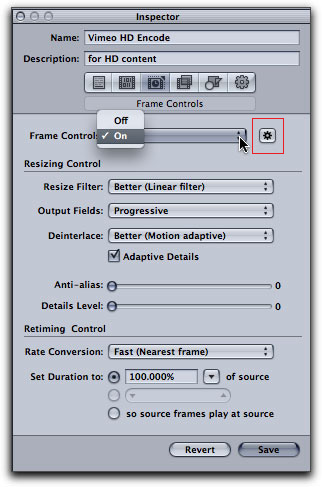
Next, while still in the Inspector, we go to the Frames Control tab (3rd tab from the left). To activate 'Frame Controls', we must first click on the little gear icon which is found to the right of the Frames Control drop down menu. Should you forget to do this, the Frames Control menu will be grayed out. Set the Frame Controls drop down menu to 'On', change our Output Fields to 'Progressive' and then go to the Deinterlace control and change it to 'Better' (Motion Adaptive). Change the Frame Control's drop down menu to 'On'.
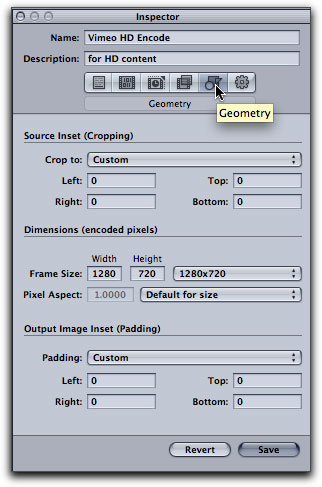
We are almost done but still have a bit more to do. My HDV video was shot with the Sony A1U at 1080i. As I want to reduce my file size yet maintain high quality, I'll need to reduce the width of the the video frame from 1080 to 720. Click on the Geometry tab (2nd from the right) and type in the new frame size, 1280x720. Reducing the frame dimensions retains the highest resolution of your HD media while reducing the file size so that it will be small enough to run from Vimeo. We will leave the Pixel Aspect at its default for size setting.
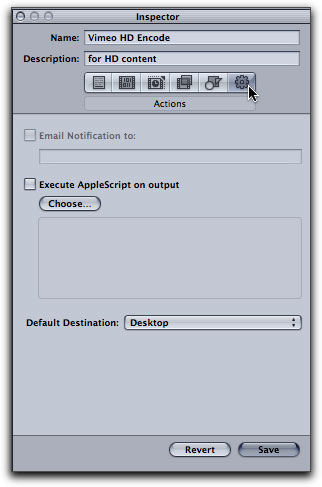
In the Action Tab, (far right) you can set your destination to either Source, where you may have your media file, or back to desktop. Another option is to set your Default Destination in the Compressor preferences to either a specific folder or desktop. I have it set to 'desktop' so I needn't bother with this step.
Click on 'Save' which will now store your Vimeo HD Encode setting within your Customs folder for current as well as future use.

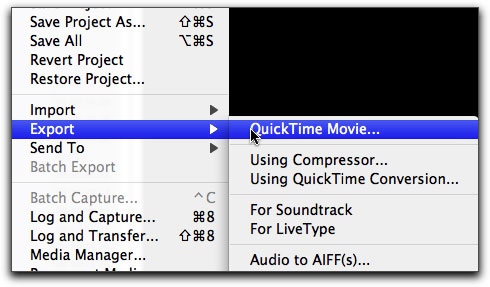
Since most films downloaded to Vimeo vary in length, we will start with a short 5 minute sequence as our demonstration example. While there are advantages and disadvantages to exporting from Final Cut Pro either as a Self-contained movie or as a Reference movie, I have always preferred exporting from Final Cut as a Self-contained movie directly to my desktop.
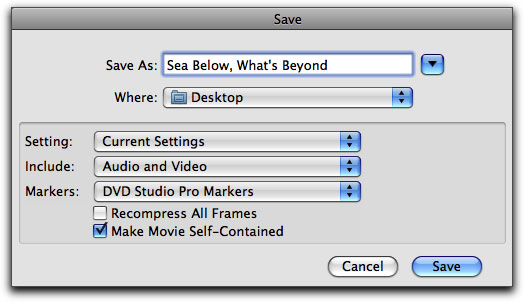
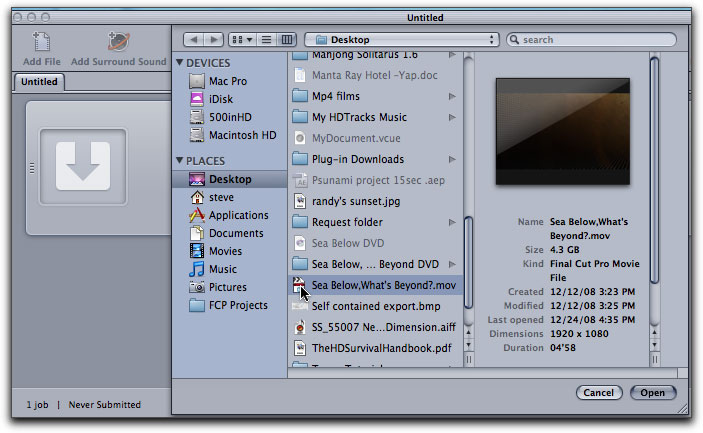
Once you have exported your sequence, you can check the size of the video file by clicking on Command/I and we can see that this specific export comes in at 4.36 gigs which we now have to compress down to under 500 Mb.

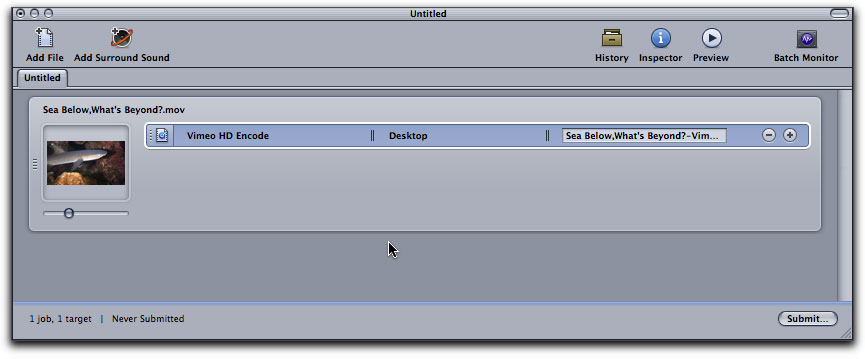
I've imported my self-contained movie into Compressor by using the 'Add File' button but you can drag it in from your desktop or from whichever folder you may have exported it to.
Since I have already created and saved my Vimeo HD Encode preset to my customs folder, I only now need to drag my new preset up to the Batch Window, drop it in and submit. The end result for my 5 minute sequence resulted in excellent quality video and a greatly reduced file size from the original 4.38 Gb to 195.70 MB. This is well below the file size limit allowed by Vimeo.
You can also create a droplet of this preset and save it to your desktop for future encodes as well. Well, there you have it, an easy way to encode HD files for upload to Vimeo.com's excellent website, a source for you to have your films viewed by public with opportunities for feedback and comments. If you prefer to share your films with only a few chosen friends, your Vimeo settings tab will allow that as well. I hope this little tutorial comes in handy for you.
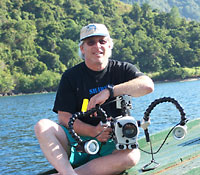 Steve Douglas is a certified Apple Pro for Final Cut Pro 6 and underwater videographer. A winner of the 1999 Pacific Coast Underwater Film Competition, 2003 IVIE competition, 2004 Los Angeles Underwater Photographic competition, and the prestigious 2005 International Beneath the Sea Film Competition, where he also won the Stan Waterman Award for Excellence in Underwater Videography and 'Diver of the Year', Steve was a safety diver on the feature film "The Deep Blue Sea", contributed footage to the Seaworld Park's Atlantis production, and productions for National Geographic and the History channels. Steve is also feature writer for Asian Diver Magazine and is one of the founding organizers of the San Diego UnderSea Film Exhibition. He is available for both private and group seminars for Final Cut Pro and leads both underwater filming expeditions and African safaris with upcoming excursions to Kenya in Aug.09, the Red Sea and Egypt for Nov.2009, Truk Lagoon and Yap in Micronesia for July, 2010. Feel free to contact him if you are interested in joining Steve on any of these exciting trips. www.worldfilmsandtravel.com
[Top]
copyright © Steve Douglas 2009
© 2000 -2009 Ken Stone. All rights reserved. Apple, the Apple logo, Final
Cut Pro, Macintosh and Power Mac
are either registered trademarks or trademarks of Apple. Other
company and product names may be trademarks of their respective
owners.
All screen captures, images, and textual references are the property and trademark of their creators/owners/publishers.