
March 18, 2009
Creating Watermarks in Final Cut Pro
By Steve Douglas
With the advent of such sites as Vimeo, YouTube and others, protecting your footage and work is paramount as some of these sites claim the right to use your footage for other agendas. Thus, watermarking serves to protect from theft, as well as to remind those watching your movies on either the web or DVDs, just whose footage it is. Having your footage watermarked also protects it from being stolen and used in broadcast or on another website in some other country. This actually happened to me several years ago when a film student somewhere in Sweden ripped a short film of mine off a website and claimed it as his own. A swift contact to the president of the film school stopped that and further litigation was unnecessary.
Heck, even your favorite broadcast television shows continue to rankle with the station's logos popping up and often staying on for the duration of the show you're watching. However, some time's it's understandable, after all, FOX doesn't want CBS to steal one of their shows and claim it as theirs. Want to distribute your work on DVD? Watermark it before someone rips it!
There are many ways to create a watermark and many applications that can be used to do the job, but I will focus strictly on creating a watermark within Final Cut Pro. Let's get started.
Within Final Cut Pro, go to the Generators folder in the Effects tab. I prefer using the Boris 3D text as it is vector based and provides a cleaner appearance, however you can pretty much use whichever text application you want.
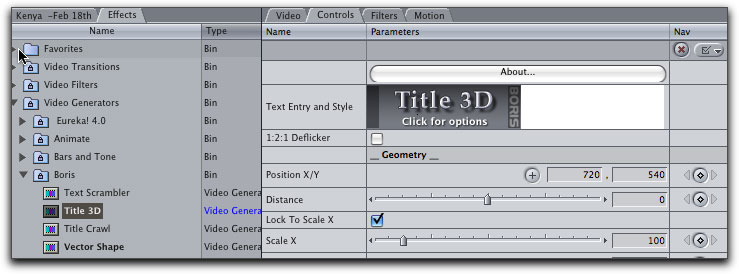
The Boris 3D generator exists in the effects browser. In the viewer, double click the box stipulating Text Entry and Style.
Before you start typing, you might want to click the reset style button at the bottom of the window. This will clear any previous styles you might have used for prior projects.
If you want a simple copyright-name or date watermark, pressing option/g will create the standard copyright symbol. For this tutorial I will type in ©sharksdelight. Now I highlight my entire text.
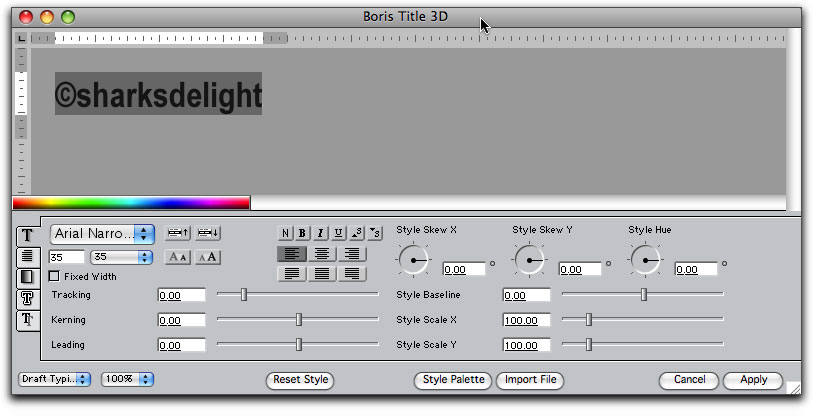
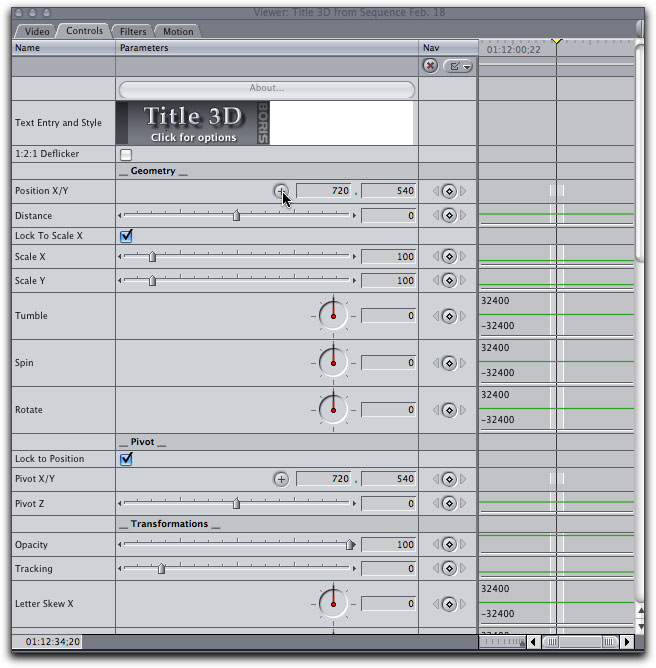
Remember to keep your text highlighted to ensure that any parameter changes are applied. Here, I have applied my desired font and suggested size.
Choose the font you want, I like the Arial fonts, and in this one I chose the Arial Narrow. I prefer to keep the font style simple and clear, but that is an artistic decision best left up to you. I do set it to 'Bold', however, as it appears to work best in terms of standing out.
Next, set the size. For starters we'll go with 35, and add a drop shadow. We add the shadow by clicking on the bottom most tab and checking the box at the top to enable it.
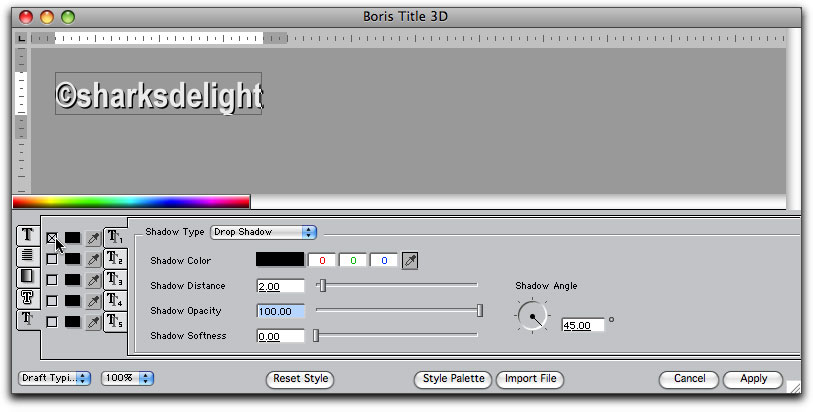
Here I have brought up the Drop Shadow tab at the bottom and clicked the topmost checkbox to apply the drop shadow and adjust my settings.
In the shadow distance field, enter a setting of 2.0 and set the shadow opacity at 100%.
Next click on the Text Fill tab, 3rd from the top, where we will now change the opacity of the text itself. Drag the style opacity slider and set it to 60%. I find the Boris sliders to be difficult to drag to specific settings, so typing them in makes it a whole lot easier.
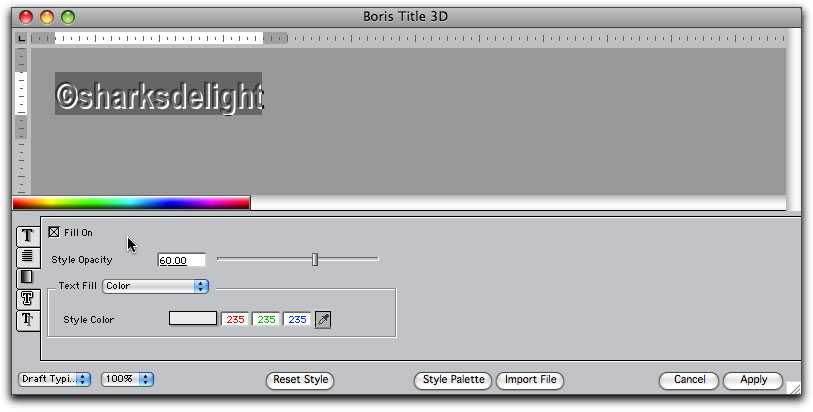
With the center tab clicked, I can now set my Style Opacity. Note that at all times, my text is still highlighted.
At this point, you might want to save your watermark style for future use. You can do this by clicking on the 'Style Palette' button, click on the 'Add Category' button and name it something you can easily recall.
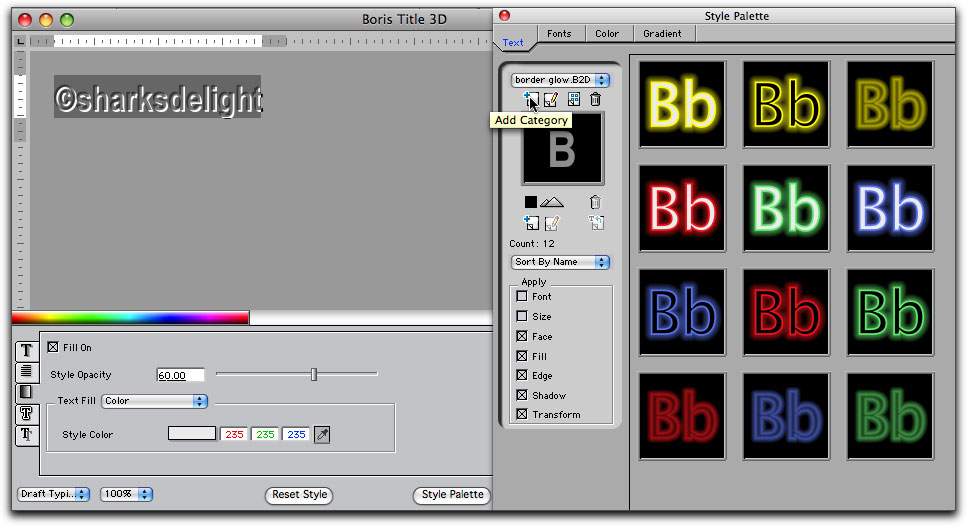
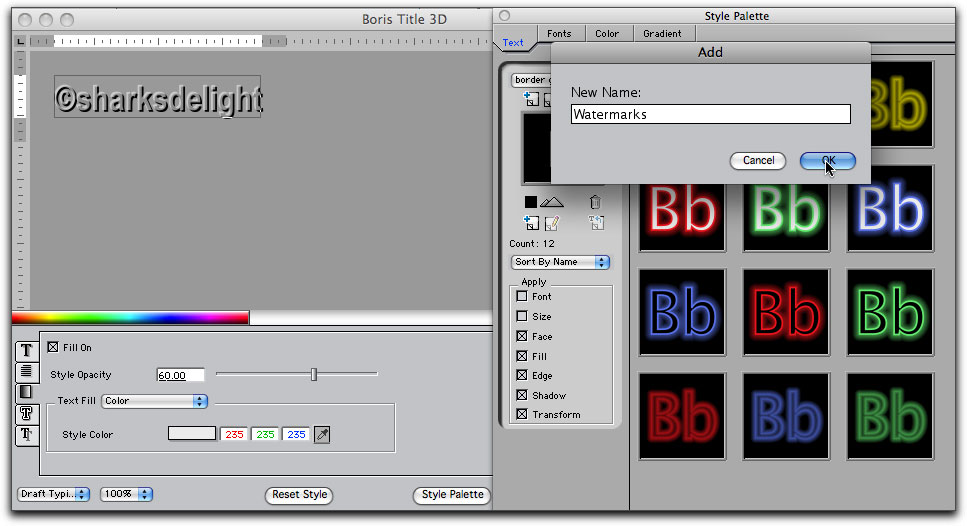
Clicking upon the 'Add Category' button will bring up a new window where an appropriate name is entered.
In this case, it is obvious, so I will name it 'Steve Douglas Watermarks'. Now click the 'Add Style' button and if you chose to rename it, you can right or control click and chose 'rename' from the drop down menu where you can type whatever you feel is an appropriate moniker.
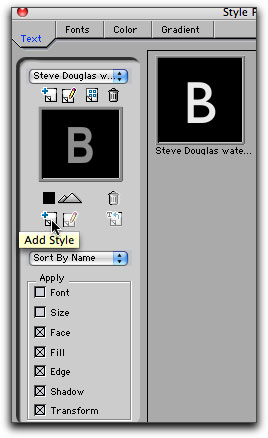
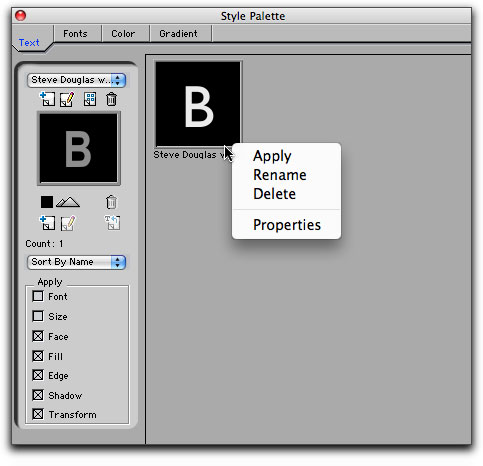
Clicking on the 'Add Style' allows you to name or re-name the specific style of watermark within the category.
This way, you can have several watermarks with diverse styles all within your 'Watermarks' category.
Now all we need to do is to click 'Apply' at the bottom of the Boris text window and your watermark will appear. If you had not initially dragged the Boris text generator over a video layer, you should do that now from Final Cut Pro's viewer window.

You can drag the duration of the text to fit the length of your clips.
Making sure that the Boris text is highlighted in the Final Cut Pro timeline, right click and go to Composite Mode/Overlay. This will allow the viewer to now see the video clearly through the text itself.
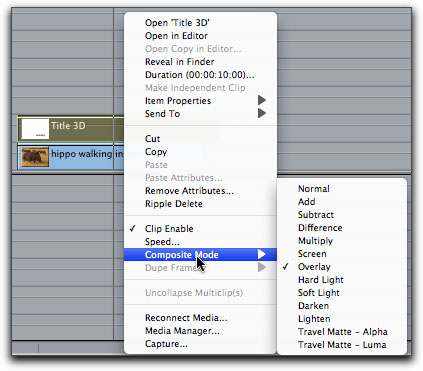
The composite mode/overlay is the secret to preserving your copyright or name recognition
but it's transparency is far less intrusive to the viewer of your footage than a solid text.

Here my watermark is looking good and allows the viewer to see through its transparency.
Because the watermark is transparent, it will take the color of whatever the pixel colors are which are behind it.
However, I certainly don't want it stuck in the middle of the frame.
At this point, I need to reposition the text, but first I make sure that my title and action safe overlays are present in the Canvas. By clicking in the X/Y position, I can then click, hold and drag my text within the frame to where I want it, making sure it does not extend past the title safe boundary lines.
Once the watermark has been applied I just need to reposition its placement within the frame.
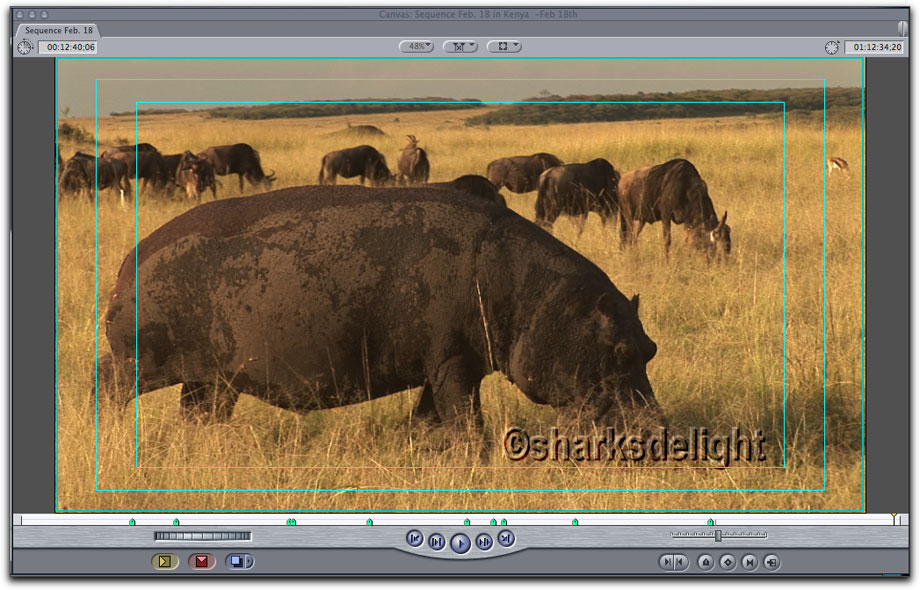
Using the title safe overlay, it is easy to reposition my watermark.
Should you need to change or adjust any of the text parameters it is a simple matter of reopening the Boris 3D text and apply any changes you feel are necessary. Another trick, once shown to me, is that if I wanted to save this text I could just drag it up to the Favorites folder. That works just fine, but if I should ever have to trash my preferences, the watermark would then be trashed along with them. However, I can simply drag the watermark into the browser where it will remain as a clip in the project even if preferences are trashed. Should you have done neither of these two steps and somehow have forgotten to save the project's most recent work, including your watermark, remember that you have created a new watermark category in the Boris Style Palette and can always go back to it and retrieve it there.
I do hope that you have found this tutorial helpful. A little protection helps prevent unwanted pregnancies, I meant theft.
 Steve Douglas is a certified Apple Pro for Final Cut Pro 6 and underwater videographer. A winner of the 1999 Pacific Coast Underwater Film Competition, 2003 IVIE competition, 2004 Los Angeles Underwater Photographic competition, and the prestigious 2005 International Beneath the Sea Film Competition, where he also won the Stan Waterman Award for Excellence in Underwater Videography and 'Diver of the Year', Steve was a safety diver on the feature film "The Deep Blue Sea", contributed footage to the Seaworld Park's Atlantis production, and productions for National Geographic and the History channels. Steve is also feature writer for Asian Diver Magazine and is one of the founding organizers of the San Diego UnderSea Film Exhibition. He is available for both private and group seminars for Final Cut Pro and leads both underwater filming expeditions and African safaris with upcoming excursions to Kenya in Aug.09, the Red Sea and Egypt for Nov.2009, Truk Lagoon and Yap in Micronesia for July, 2010. Feel free to contact him if you are interested in joining Steve on any of these exciting trips. www.worldfilmsandtravel.com
[Top]
copyright © www.kenstone.net 2009
© 2000 -2009 Ken Stone. All rights reserved. Apple, the Apple logo, Final
Cut Pro, Macintosh and Power Mac
are either registered trademarks or trademarks of Apple. Other
company and product names may be trademarks of their respective
owners.
All screen captures, images, and textual references are the property and trademark of their creators/owners/publishers.


